
Related Manuals for Chefman Toast-Air


Summary of Contents for Chefman Toast-Air
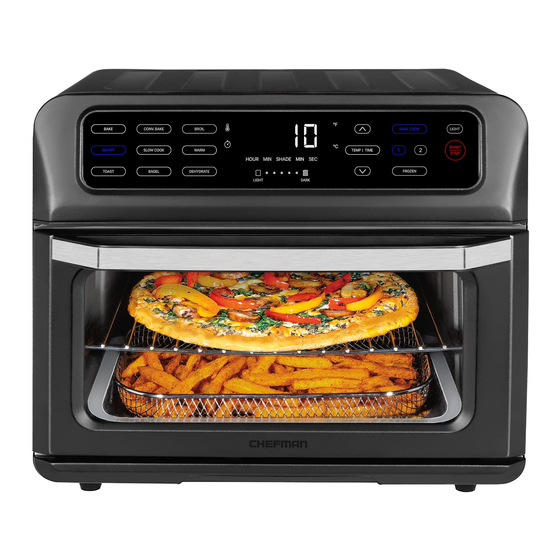
- Page 1 Toast-Air Touch ® AI R FRYER+ OVEN USER GUIDE • Safety Instructions • Features • Operating Instructions • Cooking Tips • Troubleshooting/FAQs • Cleaning and Maintenance • Notes • Terms and Conditions • Warranty Registration RJ50-SST2...
- Page 2 Whether this is your first Chefman appliance or you’re already part of our ® family, we’re happy to be in the kitchen with you. With your new Toast-Air ® Touch Air Fryer+ Oven, you can choose from nine pre-programmed, adjustable cooking functions to satisfy all your cooking needs.
-
Page 3: Table Of Contents
CONTENTS Safety Instructions Features Operating Instructions Cooking Tips Troubleshooting/FAQs Cleaning and Maintenance Notes Terms and Conditions Warranty Registration... -
Page 4: Safety Instructions
5. Unplug from outlet when not in use and before cleaning. Allow to cool before putting on or taking off parts, and before cleaning the appliance. 6. Do not operate any appliance with a damaged cord or plug or after the appliance malfunctions, or has been damaged in any manner. Contact Chefman Customer ®... - Page 5 SAFETY INSTRUCTIONS IMPORTANT SAFEGUARDS 15. A fire may occur if the oven is covered or touching flammable material, including curtains, draperies, walls, and the like, when in operation. Do not store any item on top of the appliance when in operation. 16.
- Page 6 SAFETY INSTRUCTIONS IMPORTANT SAFEGUARDS WARNING: Improper use of the grounding plug can result in electric shock. GROUNDING INSTRUCTIONS This appliance must be grounded. In the event of an electrical short circuit, grounding reduces the risk of electric shock by providing an escape wire for the electric current. To protect against electrical shock, this appliance is equipped with a cord having a 3-prong grounding-type plug for insertion into a proper grounding-type electrical outlet.
- Page 7 3. To disconnect the appliance, grasp the plug and remove it from the outlet. 4. Never use the product if the power cord shows signs of abrasion or excessive wear. Contact Chefman Customer Support for additional guidance and support. ®...
-
Page 8: Features
FEATURES Capacitive-Touch Control Panel 2. Easy-Clean Interior 3. Rack Insert Positions 4. Safety Auto-Shutoff Door 5. Cool-Touch Door Handle 6. Air-Fry Basket 7. Broil/Bake Pan 8. Flat Wire Rack 9. Pull-Out Crumb Tray (shipped inside unit) 10. Dehydrating Racks (2) - Page 9 FEATURES CONTROL PANEL A. 9 Cook Function Buttons Time +/– Buttons (Bottom) Press to choose. Press to increase time; press to reduce time. (Press and hold both buttons for 5 seconds to B. Temp Display switch between °F and °C.) Shows set temperature.
- Page 10 FEATURES COOK FUNCTION GUIDE Function Description Temp Range (˚F/˚C) Time Range Notes Uses fast-moving hot Use the air-fry basket for air to cook food to crispiest results (place basket crisp perfection. It’s on broil/bake pan to insert fantastic for cooking into oven).
- Page 11 FEATURES COOK FUNCTION GUIDE Function Description Temp Range (˚F/˚C) Time Range Notes Heats the oven at a If warming leftover cooked lower temperature. meat using the Reheat Ideal for reheating function, fill the broil/bake leftovers without pan with 1 cup of water Reheat drying them out.
-
Page 12: Operating Instructions
OPERATING INSTRUCTIONS BEFORE FIRST USE 1. Read and remove all packing materials and stickers from the inside and outside of the unit except for the rating label, which should remain on the oven. Be sure that all accessories are accounted for before throwing away any packaging. 2. - Page 13 OPERATING INSTRUCTIONS HOW TO USE THE COOK FUNCTIONS Follow the instructions below if you’d like to Air Fry, Bake, Air Bake, Air Roast, Air Broil, Reheat, or Dehydrate (see Cook Function Guide starting on p. 10 for more details on each cook function). Ensure the crumb tray is in its position below the oven door and plug in the unit.
- Page 14 OPERATING INSTRUCTIONS HOW TO USE THE TOAST AND BAGEL FUNCTIONS With five toast shades, the oven is great for toasting bread or bagels to perfection. Ensure the crumb tray is inserted in its position below the oven door and plug in the unit. 2.
-
Page 15: Cooking Tips
COOKING TIPS • If not cooking on the broil/bake pan, insert it in the bottom rack position as a drip tray for easy cleanup. • When working with delicate foods that can easily crumble, take the rack out of the oven, and assemble your food directly on the rack. -
Page 16: Troubleshooting/Faqs
If your unit displays ERR3 on the display panel, it means the door was not closed properly. Please try shutting the door again. If ERR1 or ERR2 displays, it means there is a malfunction that can't be fixed. Should this occur, please contact Chefman ®... -
Page 17: Cleaning And Maintenance
CLEANING AND MAINTENANCE The oven is easy to clean and should be cleaned frequently. Follow the directions below. Unplug the unit and allow it to cool completely before cleaning. 2. Gently wipe the exterior with a clean, damp cloth and dry thoroughly. 3. -
Page 18: Notes
NOTES... - Page 19 NOTES...
-
Page 20: Terms And Conditions
. Any changes to the Terms and ® Conditions of this Warranty must be in writing, signed by a representative of Chefman ® No other party has the right or ability to alter or change the Terms and Conditions of this Warranty. - Page 21 ® and workmanship, under normal household use, for a period of 1 year from the date of purchase when used in accordance with the directions listed in the Chefman User ® Guide. If your product does not work as it should, please contact Customer Support at support@chefman.com so that we may assist you.
- Page 22 • Access Code NOTE: Label depicted here is an example. How do I register my product? All you need to do is fill out a simple Chefman registration form. You can easily ® access the form in one of the two ways listed below: 1.
- Page 23 W ARRANTY REGISTRATION ® For product information, visit Chefman.com EXCEPT WHERE SUCH LIABILITY IS REQUIRED BY LAW, THIS WARRANTY DOES NOT COVER, AND CHEFMAN SHALL NOT BE ® LIABLE FOR, INCIDENTAL, INDIRECT, SPECIAL, OR CONSEQUENTIAL DAMAGES, INCLUDING WITHOUT LIMITATION, DAMAGE TO, OR LOSS OF USE OF THE PRODUCT, OR LOST SALES OR PROFITS OR DELAY OR FAILURE TO PERFORM THIS WARRANTY OBLIGATION.
- Page 24 ©CHEFMAN 2022 RJ50-SST2_UG_FINAL_OTP_110222...
Need help?
Do you have a question about the Toast-Air and is the answer not in the manual?
Questions and answers