Chefman TurboFry Touch User Manual
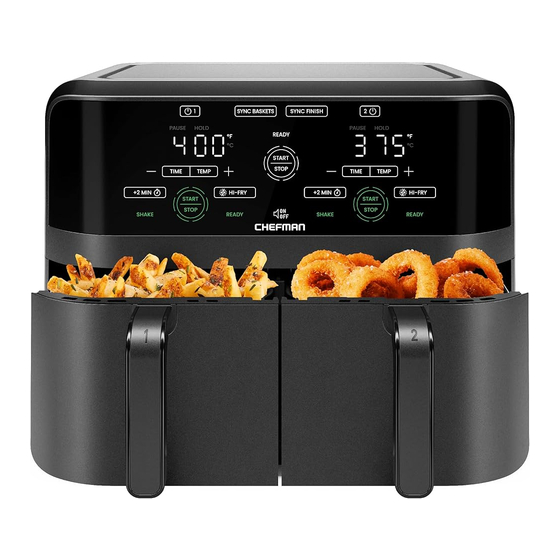
Dual air fryer
Hide thumbs
Also See for TurboFry Touch:
- User manual ,
- Manual (108 pages) ,
- Quick start manual (4 pages)
Table of Contents
Advertisement
Available languages
Available languages
Quick Links
TurboFry
Touch
®
Dual
Air Fryer
USER GUIDE
•
Safety Instructions
•
Features
•
Control Panel
•
Operating Instructions
•
Special Functions
•
Notes
•
Air Frying Chart
•
Air Fryer Cooking Tips
•
Troubleshooting
•
Cleaning and Maintenance
•
Terms and Conditions
•
Warranty Registration
RJ38-SQPF-3TDB-2-CA
Advertisement
Chapters
Table of Contents

Related Manuals for Chefman TurboFry Touch


Summary of Contents for Chefman TurboFry Touch
- Page 1 TurboFry Touch ® Dual Air Fryer USER GUIDE • Safety Instructions • Features • Control Panel • Operating Instructions • Special Functions • Notes • Air Frying Chart • Air Fryer Cooking Tips • Troubleshooting • Cleaning and Maintenance • Terms and Conditions •...
- Page 2 COOKING FORWARD™ Welcome! Whether this is your first Chefman appliance or you’re already part of our family, ® we’re happy to be cooking with you! With your new TurboFry Touch Dual Air Fryer, ® you can air fry foods to crisp perfection with little to no oil for healthier eating.
-
Page 3: Table Of Contents
CONTENTS Safety Instructions Features Control Panel Operating Instructions Special Functions Air Frying Chart Air Fryer Cooking Tips Notes Troubleshooting Cleaning and Maintenance Terms and Conditions Warranty Registration... -
Page 4: Safety Instructions
Unplug from the outlet when not in use and before cleaning. Allow to cool before putting on or taking off parts. Do not operate any appliance with a damaged cord or plug, or after the appliance malfunctions or has been damaged in any manner. Contact Chefman Customer ®... - Page 5 SAFETY INSTRUCTIONS IMPORTANT SAFEGUARDS 15. The unit will emit some heat. Allow sufficient space around the unit when in use, and do not place near other items or appliances. 16. Check that your home power supply corresponds with the intended voltage of the TurboFry ®...
- Page 6 SAFETY INSTRUCTIONS IMPORTANT SAFEGUARDS WARNING: This appliance has a polarised plug (one blade is wider than the other). This plug is intended to fit into a polarised outlet only one way. If the plug does not fit fully into the outlet, reverse the plug. If it still does not fit, contact a qualified electrician.
- Page 7 2. To insert the plug, grasp it firmly and guide it into the outlet. 3. To disconnect the appliance, grasp the plug and remove it from the outlet. 4. Before each use, inspect the power cord for cuts and/or abrasion marks. If any are found, please contact Chefman Customer Support for assistance. ®...
-
Page 8: Features
FEATURES Control Panel 2. Basket 1 3. Basket 2 4. Basket Racks 5. Basket Handles... -
Page 9: Control Panel
CONTROL PANEL SYNC BASKETS HOLD Lights +/- Buttons PAUSE Lights Program both baskets Illuminate when a basket to cook at the same is waiting to start so it Increase Illuminate when a time and temperature. will sync finish with the or decrease basket is pulled out to other basket. -
Page 10: Operating Instructions
OPERATING INSTRUCTIONS BEFORE FIRST USE For best results, follow these steps before using your air fryer for the first time. Remove all packaging materials, such as plastic bags and foam inserts. Check to ensure that all parts and accessories are accounted for. Read and remove any stickers on the unit except for the rating label on the bottom, which should remain on the unit. - Page 11 OPERATING INSTRUCTIONS PREPARE TO COOK The air fryer’s high-speed fans cook your favorite foods quickly. The rubber feet on the racks elevate the racks to allow air to circulate around foods for even cooking and crisping. The racks also allow excess fat to drip down and away from foods for healthier eating.
- Page 12 OPERATING INSTRUCTIONS 3. Lower the racks into the baskets, or just one rack if cooking in just one basket. Press down on the racks to ensure they are secure and level. There should be a small amount of space between the rack(s) and the bottom of the basket(s). (For easiest handling of the basket rack, pinch the center grip bar with your thumb and index finger.) CAUTION: Never spray the baskets or racks with cooking oil from an aerosol spray can, which includes harsh components that can cause chipping of the nonstick coating.
- Page 13 OPERATING INSTRUCTIONS 4. During cooking, the SHAKE light on the control panel will turn on, and the air fryer will beep as a reminder to shake (or flip) food, as necessary. (See Chart on p. 18 for more details on timing.) The light will turn off immediately when the basket is removed and will go off automatically after about 1 minute if the basket is not pulled out.
- Page 14 OPERATING INSTRUCTIONS Press START. If one basket’s time or temperature is manually adjusted during cooking the other basket will automatically adjust to match. Pressing the HI-FRY or +2 MIN button, however, will break the sync. During cooking, the SHAKE lights will turn on, and the air fryer will beep as a reminder to shake (or flip) food, as necessary.
- Page 15 OPERATING INSTRUCTIONS With both baskets in place, set the time and temperature for basket 1: To set the temperature, press the TEMP button until the temperature displays, and then press the plus or minus sign. To set the time, press the TIME button until the time displays, and then press the plus or minus sign.
-
Page 16: Special Functions
SPECIAL FUNCTIONS HI-FRY BUTTON The HI-FRY button illuminates partway through cooking. When pressed, it will raise the cooking temperature to 235˚C (450˚F) for 2 minutes, to give foods a little additional browning. When cooking in one of the Sync modes, pressing the HI-FRY button on one side raises the temperature only on that basket, and breaks the sync. -
Page 17: Air Frying Chart
AIR FRYING CHART The times below do not include a preheat. Quantities indicate the amount one basket of the air fryer can accommodate with ample room for air flow. Ingredient Amount Prep Time Temp Shake/Flip (min) ˚C (˚F) Vegetables Asparagus 113 g (4 oz) Tough ends Toss with... - Page 18 AIR FRYING CHART Ingredient Amount Prep Time Temp Shake/Flip (min) ˚C (˚F) Seafood Crab cakes 2 cakes, Brush lightly 13-16 190˚C 113 g (4 oz) or spray (375˚F) each with oil Salmon 2 fillets, Brush skin 11-13 (for 205˚C Gently flip once 170 g (6 oz) side lightly medium)
- Page 19 AIR FRYING CHART Ingredient Amount Prep Time Temp Shake/Flip (min) ˚C (˚F) Meat Bacon 2 slices None 10-12 205˚C No, but check (400˚F) to ensure bacon isn’t touching Chicken breast Trim excess Brush lightly 19-23 190˚C Flip once (boneless, 170-227 g fat and with oil (375˚F)
-
Page 20: Air Fryer Cooking Tips
AIR FRYER COOKING TIPS For a crisp exterior, oil foods lightly. Some foods, especially if fresh, benefit from being tossed with a little oil in a separate bowl before frying. However, high-fat foods, like a well-marbled steak, or prepared foods usually require no additional oil. Avoid wet batters. -
Page 21: Notes
NOTES... -
Page 22: Troubleshooting
Customer Support for a replacement. ® What do I do if a rack is missing a rubber foot? Though they should be fairly secure, the feet on the rack are removable. Should one get lost, please contact Chefman Customer Support for a replacement. ®... -
Page 23: Cleaning And Maintenance
CLEANING AND MAINTENANCE The nonstick coating on the baskets and racks makes the air fryer easy to clean following the steps below. Unplug the unit and let cool completely before cleaning. (For faster cooling, take hot baskets out of the unit.) To remove the cooled racks from the baskets, pinch the center grip bar on the rack, and pull the rack straight up and out of the basket. -
Page 24: Terms And Conditions
. Any changes to the Terms and ® Conditions of this Warranty must be in writing, signed by a representative of Chefman ® No other party has the right or ability to alter or change the Terms and Conditions of this Warranty. - Page 25 ® and workmanship, under normal household use, for a period of 1 year from the date of purchase when used in accordance with the directions listed in the Chefman User ® Guide. If your product does not work as it should, please contact Customer Support at support@chefman.com so that we may assist you.
- Page 26 NOTE: Label depicted here is an example. How do I register my product? All you need to do is fill out a simple Chefman® registration form. You can easily access the form in one of the two ways listed below: Visit Chefman.com/register.
- Page 27 HEREIN ARE THE EXCLUSIVE REMEDIES UNDER THIS WARRANTY, WHETHER BASED ON CONTRACT, TORT OR OTHERWISE. Chefman® is a registered trademark of RJ Brands, LLC. TurboFry® is a registered trademark of RJ Brands, LLC. Cooking Forward™ is a trademark of RJ Brands, LLC.
- Page 29 Double friteuse à air TurboFry à Touches GUIDE DE L’UTILISATEUR • Consignes de sécurité • Caractéristiques • Panneau de commande • Instructions d’utilisation • Fonctions spéciales • Remarques • Tableau de cuisson avec friteuse à air • Conseils de cuisson avec friteuse à air •...
- Page 30 COOKING FORWARD Bienvenue! Que cet appareil Chefman soit votre premier ou que vous fassiez déjà partie de notre famille, nous sommes heureux de nous sommes heureux de cuisiner avec vous! Avec votre nouvelle double friteuse à air TurboFry à touches, vous pouvez frire vos aliments à...
- Page 31 TABLE DES MATIÈRES Consignes de sécurité Caractéristiques Panneau de commande Instructions d’utilisation Fonctions spéciales Tableau de cuisson avec friteuse à air Conseils de cuisson avec friteuse à air Remarques Diagnostic Nettoyage et entretien Conditions Enregistrement de la garantie...
-
Page 32: Consignes De Sécurité
N’utilisez pas d’appareil dont la fiche ou le cordon est endommagé ou après un dysfonctionnement ou suite à des dommages, quels qu’ils soient. Communiquez avec le service à la clientèle de Chefman pour l’examen, la réparation ou le réglage. - Page 33 CONSIGNES DE SÉCURITÉ MESURES DE PROTECTION IMPORTANTES 15. L’appareil produit de la chaleur. Prévoyez suffisamment d’espace autour de l’appareil lorsqu’il est utilisé, et ne le mettez pas proche d’autres articles ou appareils ménagers. 16. Vérifiez que l’alimentation de votre maison correspond à la tension prévue de la double friteuse à air TurboFry à...
- Page 34 CONSIGNES DE SÉCURITÉ MESURES DE PROTECTION IMPORTANTES AVERTISSEMENT : cet appareil est doté d’une fiche polarisée (une broche est plus large que l’autre). Cette fiche est prévue pour une prise polarisée et ne peut être introduite que d’une seule façon. Si la fiche ne s’adapte pas complètement dans la prise, inversez-la. Si elle ne s’adapte toujours pas, faites appel à...
- Page 35 4. Avant chaque usage, inspectez le cordon d’alimentation pour toute présence de coupures ou d’abrasions. Si tel est le cas, veuillez communiquer avec le service à la clientèle de Chefman N’enroulez jamais de façon serrée le cordon sur l’appareil, car cela pourrait le contraindre là...
-
Page 36: Caractéristiques
CARACTÉRISTIQUES Panneau de commande Panier 1 Panier 2 Grilles du panier Poignée du panier... -
Page 37: Panneau De Commande
PANNEAU DE COMMANDE Synchronisation des paniers Indicateurs d’attente (HOLD) Boutons +/- Indicateurs de pause (PAUSE) (SYNC BASKETS) S’illumine lorsqu’un panier est en attente Augmente S’illumine lorsqu’un panier de démarrage pour qu’il se synchronise ou baisse la est soulevé pour vérifier ou Programmez les deux paniers pour qu’ils cuisent avec l’autre panier. -
Page 38: Instructions D'utilisation
INSTRUCTIONS D’UTILISATION AVANT L’EMPLOI INITIAL Pour obtenir les meilleurs résultats, suivez ces étapes avant d’utiliser votre friteuse à air la première fois. Retirez tous les matériaux de conditionnement comme les sacs en plastique et les éléments en mousse. Vérifiez qu’il ne manque pas de pièces ni d’accessoires. Lisez les étiquettes se trouvant sur l’appareil et enlevez-les, sauf celle de régime nominal située au-dessous. - Page 39 INSTRUCTIONS D’UTILISATION PRÉPARER LA CUISSON Le ventilateur à haute vitesse de la friteuse à air cuit rapidement vos aliments favoris. Les pieds en caoutchouc des grilles élèvent les grilles pour permettre à l’air de circuler autour des aliments pour une cuisson et un croustillant uniformes. Les grilles permettent également à l’excès de graisse de s’égoutter et de s’éloigner des aliments pour une alimentation plus saine.
- Page 40 INSTRUCTIONS D’UTILISATION Abaissez les grilles dans les paniers, ou une seule grille si vous ne cuisinez que dans un seul panier. Appuyez sur les grilles pour vous assurer qu’elles sont bien fixées et de niveau. Il doit y avoir un petit espace entre la ou les grilles et le fond du ou des paniers. (Pour une manipulation plus facile de la grille, pincez la barre de préhension centrale avec le pouce et l’index.) ATTENTION : ne vaporisez jamais les paniers ou les grilles avec de l’huile de cuisson provenant d’une bombe aérosol, qui contient des composants agressifs susceptibles d’écailler le revêtement...
- Page 41 INSTRUCTIONS D’UTILISATION Lors de la cuisson, l’indicateur Remuer (SHAKE) sur le panneau de commande s’allume, et la friteuse à air émet un bip de rappel pour remuer (ou retourner) l’aliment, selon le besoin. (Voir le tableau, p. 18, pour plus de détails sur les durées.) L’indicateur s’éteint immédiatement lors du retrait du panier et s’éteint aussi automatiquement après environ 1 seconde si le panier n’est pas retiré.
- Page 42 INSTRUCTIONS D’UTILISATION Si la durée ou la température d’un panier est ajustée manuellement pendant la cuisson, l’autre panier s’adaptera automatiquement. En revanche, si vous appuyez sur le bouton HI-FRY ou +2 MIN, la synchronisation sera interrompue. Lors de la cuisson, l’indicateur Remuer (SHAKE) sur le panneau de commande s’allume, la friteuse à...
- Page 43 INSTRUCTIONS D’UTILISATION Appuyez sur le bouton de synchronisation de finition (SYNC FINISH), puis sur Démarrer (START). La friteuse commencera à cuire le côté dont le temps de cuisson est le plus long et retardera le début de la cuisson de l’autre côté jusqu’au moment approprié afin qu’ils finissent en même temps.
-
Page 44: Fonctions Spéciales
FONCTIONS SPÉCIALES BOUTON DE FRITURE HI-FRY Le bouton de friture HI-FRY s’allume au cours de la cuisson. Lorsqu’il est enfoncé, la température de cuisson monte et cela pendant 2 minutes à 235 ˚C (450 ˚F), pour brunir un peu plus les aliments. - Page 45 TABLEAU DE CUISSON AVEC LA FRITEUSE À AIR Les temps indiqués ci-dessous ne comprennent pas de préchauffage. Les quantités indiquent la quantité qu’un panier de la friteuse peut accueillir avec un espace suffisant pour la circulation de l’air. Ingrédient Quantité Préparation Huile Durée...
-
Page 46: Tableau De Cuisson Avec Friteuse À Air
TABLEAU DE CUISSON AVEC FRITEUSE À AIR Ingrédient Quantité Préparation Huile Durée Temp ˚C Remuer/Retourner (min) (˚F) Poissons et fruits de mer 13-16 Beignets de crabe 2 beignets, Brosser 190˚C 113 g (4 oz) légèrement (375˚F) chaque ou vaporiser d’huile 11-13 Saumon 2 filets de 170 g Brosser 205˚C Retourner une fois... - Page 47 TABLEAU DE CUISSON AVEC FRITEUSE À AIR Ingrédient Quantité Préparation Huile Durée Temp ˚C Remuer/Retourner (min) (˚F) Viande Bacon 2 tranches Aucune 10-12 205 ˚C Non, vérifier que les (400 ˚F) tranches de bacon ne se touchent pas Poitrine de poulet 1 de 170-227 g Enlever l’excès Brosser...
-
Page 48: Conseils De Cuisson Avec Friteuse À Air
CONSEILS DE CUISSON AVEC FRITEUSE À AIR Pour plus de croustillant, badigeonnez légèrement les aliments avec de l’huile. Pour certains aliments, surtout s’ils sont frais, il est préférable de les remuer avec un peu d’huile dans un autre récipient avant de les mettre dans la friteuse. Cependant, pour les aliments très gras comme un bifteck très persillé... -
Page 49: Remarques
REMARQUES... -
Page 50: Diagnostic
Que dois-je faire s’il manque un pied en caoutchouc à un support? Bien qu’ils devraient être assez sécuritaires, les pieds de la grille sont amovibles. En cas de perte, communiquez avec le service à la clientèle de Chefman pour un remplacement. -
Page 51: Nettoyage Et Entretien
NETTOYAGE ET ENTRETIEN Le revêtement antiadhésif du panier de la grille et du panier facilite le nettoyage de la friteuse à air selon les étapes ci-dessous. Débranchez l’appareil et laissez-le refroidir complètement avant de le nettoyer. (Pour accélérer le refroidissement, sortez le panier chaud de l’appareil.) Pour retirer les grilles refroidies du panier, pincez la barre de préhension centrale sur la grille, et tirez-la tout droit hors du panier. -
Page 52: Conditions
Chefman . Toutes les modifications apportées aux Conditions de cette garantie doivent être faites par écrit et signées par un représentant de Chefman . Aucune autre partie n’a le droit ou la capacité de modifier ou d’altérer les conditions de cette Garantie. - Page 53 Guide de l’utilisateur de Chefman . Si votre produit ne fonctionne pas comme il est prévu, veuillez communiquer avec le support à la clientèle à support@chefman. com afin que l’on puisse vous porter assistance. CETTE GARANTIE NE COUVRE PAS •...
- Page 54 AC ONLY/ AC SEULEMENT REMARQUE : l’étiquette présentée ci-contre est un exemple. Que dois-je faire pour enregistrer mon produit? Il vous suffit de remplir un simple formulaire d’enregistrement Chefman . Vous pouvez accéder au formulaire facilement, d’une des deux manières ci-dessous : Consultez Chefman.com/register.
- Page 55 ENREGISTREMENT DE LA GARANTIE CHEFMAN Pour plus d’informations sur le produit, consultez Chefman.com. SAUF DANS LE CAS OÙ UNE TELLE RESPONSABILITÉ EST REQUISE PAR LA LOI, CETTE GARANTIE NE COUVRE PAS, ET CHEFMAN NE SERA PAS TENUE RESPONSABLE DE DOMMAGES DIRECTS OU INDIRECTS, OU SPÉCIAUX, INCLUANT ET SANS LIMITATION, DOMMAGES, OU PERTE DE JOUISSANCE DU PRODUIT, OU PERTE DE VENTES OU DE BÉNÉFICES, OU ENCORE RETARD OU...
- Page 56 ©CHEFMAN 2023 RJ38-SQPF-3TDB-2-CA_UG_FINAL_OTP_052523...
Need help?
Do you have a question about the TurboFry Touch and is the answer not in the manual?
Questions and answers
Only the Number 2 side of my air fryer. Icannot get any setting on the Number 1.