Advertisement
Table of Contents
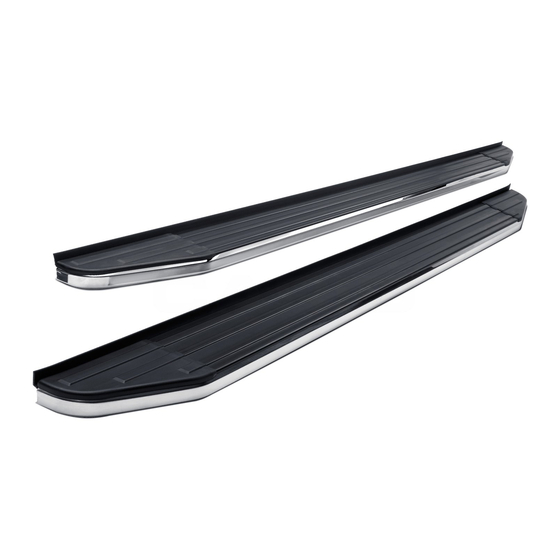
PARTS LIST:
1
Driver/Left Running Board
1
Passenger/Right Running Board
1
Driver/Left Front Mounting Bracket
1
Passenger/Right Front Mounting Bracket
1
Driver/Left Center Mounting Bracket
1
Passenger/Right Center Mounting Bracket
1
Driver/Left Rear Mounting Bracket
1
Passenger/Right Rear Mounting Bracket
3
12mm x 50mm Hex Bolts
3
12mm Lock Washers
3
12mm x 32mm OD x 3mm Flat Washers
3
10mm x 50mm Hex Bolts
Passenger/Right
Rear Mounting
Bracket
Passenger/Right
Center Mounting
Bracket
PROCEDURE:
1. REMOVE CONTENTS FROM BOX. VERIFY ALL PARTS ARE PRESENT. READ INSTRUCTIONS
CAREFULLY. USE ILLUSTRATION TO IDENTIFY BRACKETS AND TYGER FURY STEPS.
2. Starting on the Driver/Left front of the vehicle, remove the cover on the bottom of the vehicle. Select the
Driver/Left Front Mounting Bracket. Attach the Mounting Bracket to the threaded insert in the front
location with (1) 12mm Hex Bolt, (1) 12mm Lock Washer and (1) 12mm Flat Washer, (Figures 1 & 2).
Do not tighten hardware.
3. Attach the Mounting Bracket to the pinch trim with (1) 6mm Flat Washer, (1) 6mm Lock Washer and (1)
6mm Hex Nut, (Figure 3). Do not tighten hardware.
4. Move along the body panel to the center mounting location, (Figure 4). Select the Driver/Left Center
Mounting Bracket. Repeat Step 2 to install the Bracket, (Figures 3 & 4). Do not tighten hardware.
5. Continue to the rear mounting location in front of the rear tire, (Figure 5). Select the Driver/Left Rear
Mounting Bracket. Attach the Bracket to the threaded insert with (1) 10mm Hex Bolt, (1) 10mm Lock
Washer and (1) 10mm Flat Washer, (Figures 5 & 6). Do not tighten hardware. Repeat Step 3 to attach
the Bracket to the pinch trim.
6. Select the Driver/Left Viewpoint Running Board. Insert (6) T-Bolts into the channels in the bottom of the
Running Board, (3) per channel, (Figure 7). Place the Running Board onto the Mounting Brackets and
line up the T-Bolts. Attach the Running Board to the Mounting Brackets with (6) 6mm Flat Washers, (6)
6mm Lock Washers and (6) 6mm Hex Nuts, (Figure 8). Do not tighten hardware.
7. Level and adjust the Running Board and tighten all hardware.
8. Move to the Passenger/Right side. Repeat Steps 1,2 & 5 to attach the Passenger/Right Front and Rear
Mounting Brackets.
12
24
18
18
Passenger/Right Front
Mounting Bracket
Passenger/Right
Running Board
2021-22 GRAND CHEROKEE "L"
1
10mm x 40mm Hex Bolt
3
10mm Lock Washers
3
10mm x 30mm OD x 2.5mm Flat Washers
1
10mm x 27mm OD x 3mm Flat Washer
1
10mm Hex Nut
1
10mm Threaded Insert
1
10mm Insert Tool
6
6mm x 30mm Hex Bolts
6mm x 20mm T-Bolts
6mm x 20mm OD x 2mm Flat Washers
6mm Lock Washers
6mm Hex Nuts
Driver/Left Front
Mounting Bracket
Page 1 of 4
STX100 RUNNING BOARDS
Driver/Left Rear
Mounting
Bracket
Driver/Left
Center Mounting
Bracket
Front
REV1 6/14/22 (CC)
Advertisement
Table of Contents

Related Manuals for Steelcraft STX100


Summary of Contents for Steelcraft STX100
- Page 1 STX100 RUNNING BOARDS 2021-22 GRAND CHEROKEE “L” PARTS LIST: Driver/Left Running Board 10mm x 40mm Hex Bolt Passenger/Right Running Board 10mm Lock Washers Driver/Left Front Mounting Bracket 10mm x 30mm OD x 2.5mm Flat Washers Passenger/Right Front Mounting Bracket 10mm x 27mm OD x 3mm Flat Washer...
- Page 2 STX100 RUNNING BOARDS 2021-22 GRAND CHEROKEE “L” 9. Locate the center mounting location, (Figure 9). Select the Passenger/Right Center Mounting Bracket. Hold the Bracket and line up to the hole in the pinch trim to the lower slot in the top of the Bracket. Mark where the top slot is located on the floor panel.
- Page 3 STX100 RUNNING BOARDS 2021-22 GRAND CHEROKEE “L” Driver Side Installation Pictured 12mm threaded insert 10mm threaded insert Rear Front (Fig 4) Driver/Left center mounting location (Fig 5) Driver/Left rear mounting location. The threaded insert is smaller than the front and center locations...
- Page 4 STX100 RUNNING BOARDS 2021-22 GRAND CHEROKEE “L” Passenger Side Installation Pictured (Fig 9) Locate the Passenger/Right center mounting location. Line up the top of the Passenger/Right Center Mounting Bracket to the hole in the pinch trim. Mark the top slot for drilling.
Need help?
Do you have a question about the STX100 and is the answer not in the manual?
Questions and answers