Table of Contents
Advertisement
Audio Video Control Receiver
TX-SV373
Audio Video Karaoke Control
Receiver
TX-SE350
Instruction Manual
STANDBY/ON
STANDBY
POWER
ALL CHANNEL HIGH CURRENT DISCRETE OUTPUT STAGE
ON
OFF
A
SPEAKERS
B
SURROUND MODE
PHONES
MUL
TI CH INPUT
DVD
VIDEO
1
VIDEO
2
STANDBY/ON
STANDBY
KEY CONTOL
VACAL
POWER
CANCEL
ALL CHANNEL HIGH CURRENT DISCRETE OUTPUT STAGE
ON
OFF
A
SPEAKERS
B
SURROUND MODE
1
MIC LEVEL
2
ECHO LEVEL
KARAOKE
MIN
MAX
MIN
MAX
MIN
MAX
MUL
TI CH INPUT
DVD
VIDEO
1
VIDEO
2
PHONES
1
MIC
2
Thank you for purchasing the Onkyo Audio Video
Control Receiver.
Please read this manual thoroughly before making
connections and turning on the power.
Following the instructions in this manual will enable
you to obtain optimum performance and listening
enjoyment from your new Audio Video Control
Receiver.
Please retain this manual for future reference.
MASTER VOLUME
PRESET
TUNING
SCAN
GROUP
CENTER MODE
DELAY TIME
MEMORY FM MUTE / MODE
CLEAR
BASS
TREBLE
C D
TAPE(
MONITOR
)
FM
AM
PHONO
TX-SV373
AUDIO VIDEO CONTROL RECEIVER
MASTER VOLUME
PRESET
TUNING
SCAN
GROUP
CENTER MODE
DELAY TIME
MEMORY FM MUTE / MODE
CLEAR
BASS
TREBLE
TAPE(
MONITOR
)
FM
AM
PHONO
C D
TX-SE350
A/V KARAOKE CONTROL RECEIVER
Contents
Before using
Important Safeguards........................ 2
Precautions ....................................... 3
Features............................................. 4
Supplied accessories......................... 4
Before operating this unit ................. 5
Preparation
Audio equipment connections .......... 6
Video equipment connections .......... 7
Connecting Other Devices................ 8
Connecting speakers....................... 10
Positioning speakers ....................... 11
Connecting the power..................... 11
Connecting antennas....................... 12
Operation
Stereo mode ................................. 16
Tuning in a radio station................. 18
Using preset radio stations.............. 19
Recording a source ......................... 22
Using TAPE (MONITOR) Button..... 23
Using the Remote Controller.......... 24
A few important notes
Control positions and names .......... 26
Troubleshooting guide.................... 27
Specifications ................................. 28
Advertisement
Table of Contents

Related Manuals for Onkyo TX-SE350


Summary of Contents for Onkyo TX-SE350
-
Page 1: Table Of Contents
VIDEO VIDEO TAPE( MONITOR PHONES Thank you for purchasing the Onkyo Audio Video Control Receiver. Please read this manual thoroughly before making connections and turning on the power. Following the instructions in this manual will enable you to obtain optimum performance and listening enjoyment from your new Audio Video Control Receiver. -
Page 2: Important Safeguards
19. Outdoor Antenna Grounding – If an outside antenna is con- S3125A nected to the receiver, be sure the antenna system is grounded so as to provide some protection against voltage surges and built up static charges. Article 810 of the National Electrical... -
Page 3: Precautions
3. AC Fuse The fuse is located inside the chassis and is not user-serviceable. If power does not come on, contact your Onkyo authorized service station. 4. Care From time to time you should wipe the front and rear panels and the cabinet with a soft cloth. -
Page 4: Features
(REMOTE INTERACTIVE) REMOTE CONTROL to operate the major functions of vir- tually any Onkyo component — logical button layout puts all the basic functions right at your fingertips — easy to use. (TX-SE350 only) KARAOKE CAPABILITY with 2 microphone inputs, each... -
Page 5: Before Operating This Unit
Before operating this unit 9kHz 10kHz FREQUENCY STEP ANTENNA SURROUND FRONT SURROUND CENTER CENTER SPEAKERS SPEAKER WOOFER WOOFER MULT I CHANNEL I NPUT PRE OUT MODEL NO. TX-SV262 I NPUT I NPUT OUTPUT I NPUT FRONT SPEAKERS MONITOR OUTPUT VIDEO-1 VIDEO-2 OUTPUT INPUT... -
Page 6: Audio Equipment Connections
Please refer to the instruction manual for each component when you make any connections. This receiver is designed for use with turntables using moving magnet cartridges. Insert the plugs and connectors securely. Remember that improper connection could result in noise, poor performance, or damage to the equipment. -
Page 7: Video Equipment Connections
This unit can be used only with a monitor TV equipped with a video input. If the receiver interferes with the TV reception, place the unit as far from the TV as possible. We do not recommend the use of a common TV/FM antenna (see the antenna section). -
Page 8: Connecting Other Devices
Connecting other devices Audio connection cable L (Left) R (Right) Video connection cable V (Video) Monaural audio cable (mono) DVD player or a decoder with Multi channel outputs AUDIO OUT VIDEO OUT MULTI CHANNEL FRONT OUT ANTENNA FRONT MULT I CHANNEL I NPUT MONITOR I NPUT I NPUT... -
Page 9: Connections For Remote Control
AC 230V 50Hz SWITCHED 100W MAX. tape decks, compact disc players, and DVD players that have Onkyo connectors. Connect a remote control cable to the black connector with the mark on the rear panel. remote control cable equipped with a 3.5mm (1/8 in.)-... -
Page 10: Connecting Speakers
Connecting speakers Follow the diagram below to connect each speaker as illustrated, observing the correct connections for R, L, + and –. Do not use unnecessarily long or extremely thin speaker cables. If the DC resistance of the speaker cables is too high, the damping factor will decrease, adversely affecting the sound quality. -
Page 11: Positioning Speakers
ON button or the POWER button on the remote controller switches the TX-SV373/TX-SE350 between standby status (the STANDBY indicator is lit) and power-on status (the display is lit). Press the POWER switch on the TX-SV373/TX-SE350 to set it to the OFF position, turning off the unit. -
Page 12: Connecting Antennas
Outdoor FM/TV antenna Slit C Directional linkage type splitter To TX-SV373/TX-SE350 To TV (or VCR) Antenna cables 1. Press down the lever. 2. Insert the wire into the hole. 3. Release the lever to replace it. AM loop antenna Assemble the loop antenna as shown in the illustration. (Refer to the next page for details on connecting the AM loop antenna.) -
Page 13: Connecting The Included Antennas
Connecting antennas ANTENNA ANTENNA Connecting the included antennas Connecting the T-shaped FM antenna: ANTENNA The T-shaped FM antenna is for indoor use only. Extend the antenna and move it in various directions until the clearest signal is received. Fix it with push pins or similar implements in the posi- tion that will cause the least amount of distortion. -
Page 14: Listening To Your Favorite Source
Also check to make sure the audio muting is off. 4. Adjust the volume to an appropriate level using the MASTER VOLUME control knob on the receiver or the VOLUME π(up) /†(down) buttons on the remote controller. Speaker selector... -
Page 15: Sleep Function
The sleep timer can turn off the power to the system after a speci- fied time period. To set up this function, use the remote controller supplied with your receiver. 1. Start playing the source to which you would like to listen (CD, tape, or radio broadcast). -
Page 16: To Enjoy Surround Mode Or Stereo Mode
To enjoy Surround mode or Stereo mode Surround system Since the TX-SV373/SE350 is equipped with a front amplifier, center amplifier, and a surround amplifier, all Dolby Pro Logic Surround effects can be produced. When using video cassette tapes, DVD video or video discs that have the DOLBY STEREO or DOLBY SUR- ROUND trademark, you can enjoy the acoustic atmosphere of a movie theater in your own home. -
Page 17: Enjoying Dolby Pro Logic Surround Sound
To enjoy Surround mode or Stereo mode SURROUND MODE CENTER MODE POWER VIDEO-1 VIDEO-2 When the button is pressed, the OUND MODE CENTER MODE DELAY TIME mode will change as shown below. NORMAL CH SEL CH SEL CH SEL TEST TEST TONE TONE... -
Page 18: Tuning In A Radio Station
Tuning in a radio station TUNING Up/Down buttons Use these buttons to tune the frequencies up and down. PRESET station buttons Use these buttons to store and recall the preset stations. Input Selector (FM/AM)buttons Use these buttons to select the FM/AM band. MEMORY button Press this button to store the station. -
Page 19: Using Preset Radio Stations
Using preset radio stations EAKERS A B MUTING FM MUTE TUNED FM STEREO PE MONITOR VIDEO MEMORY FM MUTE / MODE CLEAR EAKERS A B MUTING FM MUTE TUNED FM STEREO PE MONITOR VIDEO SCAN GROUP MUTING FM MUTE TUNED FM STEREO AKERS A B PRESET... -
Page 20: Karaoke Function (Tx-Se350 Only)
Connect one or two dynamic-type microphones to these jacks. KEY CON (Key Control) buttons VOCAL CANCEL button (TX-SE350 only) VOCAL CANCEL button OFF: The Vocal Cancel function is turned off and the entire sound is played. V. CANCEL: Vocal parts are muted. -
Page 21: Karaoke Function (Tx-Se350 Only)
MIC LEVEL MASTER VOLUME Karaoke operation All you need to enjoy karaoke with the TX-SE350 is a dynamic microphone. The karaoke function can also cancel the vocals on your favorite songs. The amount of cancellation depends on the source material. Vocal cancellation is not possible with mono sources, and also cannot be used when the MULTI-CH INPUT but- ton is pressed. -
Page 22: Recording A Source
Set the proper recording level using the controls on the tape deck. CD player Adjusting any controls (bass, treble etc.) on the receiver during recording will not affect the recorded tone. If you are using the monitor function, refer to page 23. -
Page 23: Using Tape (Monitor) Button
Using TAPE (MONITOR) Button TI CH INPUT VIDEO VIDEO TAPE( MONITOR DOLBY PRO LOGIC SPEAKERS A MUTING FM MUTE HALL DOLBY DIGITAL TAPE MONITOR VIDEO STEREO DOLBY PRO LOGIC SPEAKERS A MUTING FM MUTE Not lit HALL DOLBY DIGITAL VIDEO STEREO VIDEO TI CH INPUT... -
Page 24: Using The Remote Controller
Using the Remote Controller * The TX-SV373 has been shipped with a remote controller, RC-385S, and the TX-SE350 has been shipped with a remote controller, RC-387S. Buttons used to control the receiver: The remote controller has buttons for general operation and frequently-used functions. For more information, refer to the pages listed in the brackets [ ]. -
Page 25: Playing A Cd Player
Buttons used to control other devices: You can use the remote controller to control other Onkyo devices that have Point the emitter of the remote controller toward the reception window, and operate the buttons as described below. Refer to page 9 for more information on connection. -
Page 26: Control Positions And Names
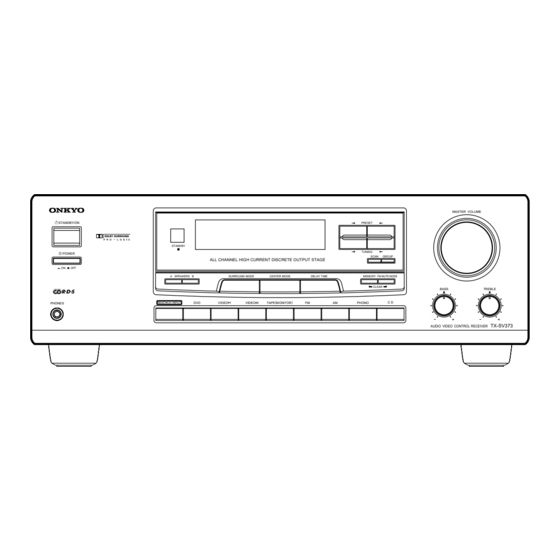
20. Multi channel input button [14] 21. Headphone jack [15] 22. Key control buttons [20, 21] (TX-SE350 only) 23. Vocal cancel button [20, 21] (TX-SE350 only) 24. Echo level control knob [20, 21] (TX-SE350 only) STANDBY ALL CHANNEL HIGH CURRENT DISCRETE OUTPUT STAGE SPEAKERS... -
Page 27: Troubleshooting Guide
SPEAKERS B is set to ON. Remedy Connect power cord. Turn the power switch off and then on again. Contact your Onkyo Service Center. Press the TAPE button. Switch to off by the remote controller. Check connections, speaker leads, etc. -
Page 28: Amplifier Section
Tel: 201-825-7950 Fax: 201-825-8150 E-mail: onkyo@onkyousa.com ONKYO EUROPE ELECTRONICS GmbH Industriestrasse 20, 82110 Germering, GERMANY Tel: 089 84 93 20 Fax: 089 84 93 226 E-mail: info@onkyo.de ONKYO EUROPE FRANCE BRANCH Domaine Technologique de Saclay 4, Rue René Razel, SACLAY-91892...
Need help?
Do you have a question about the TX-SE350 and is the answer not in the manual?
Questions and answers