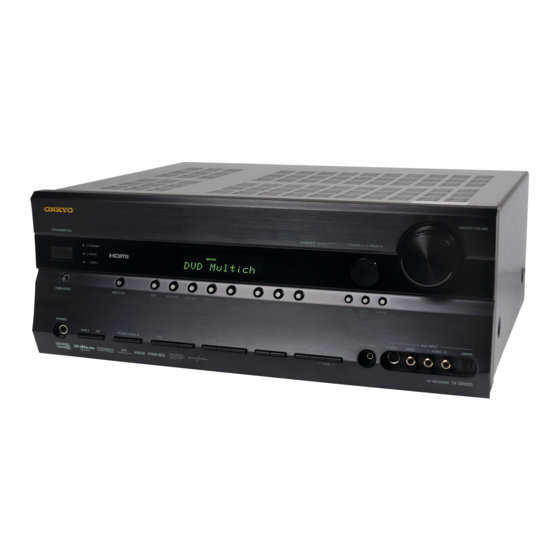
Onkyo TX-SR605 User Manual
Av receiver/av amplifier
Hide thumbs
Also See for TX-SR605:
- Quick setup (2 pages) ,
- Instruction manual (232 pages) ,
- Service manual (76 pages)
Table of Contents
Advertisement
AV Receiver
TX-SR605
AV Amplifier
TX-SA605
TX-SA8560
Instruction Manual
Thank you for purchasing an Onkyo AV Receiver/
AV Amplifier. Please read this manual thoroughly
before making connections and plugging in the unit.
Following the instructions in this manual will enable
you to obtain optimum performance and listening
enjoyment from your new AV Receiver/
AV Amplifier.
Please retain this manual for future reference.
Contents
Introduction......................................2
Connections...................................18
First Time Setup ............................41
Basic Operations ...........................54
Advanced Operations....................69
Advanced Setup.............................70
Zone 2 .............................................87
Controlling Other Components ....90
Specifications ................................93
Troubleshooting.............................94
E
n
Advertisement
Table of Contents

Related Manuals for Onkyo TX-SR605


Summary of Contents for Onkyo TX-SR605
-
Page 1: Table Of Contents
AV Amplifier TX-SA605 TX-SA8560 Instruction Manual Thank you for purchasing an Onkyo AV Receiver/ AV Amplifier. Please read this manual thoroughly before making connections and plugging in the unit. Following the instructions in this manual will enable you to obtain optimum performance and listening enjoyment from your new AV Receiver/ AV Amplifier. -
Page 2: Introduction Important Safety Instructions
WARNING: TO REDUCE THE RISK OF FIRE OR ELECTRIC SHOCK, DO NOT EXPOSE THIS APPARATUS TO RAIN OR MOISTURE. CAUTION: TO REDUCE THE RISK OF ELECTRIC SHOCK, DO NOT REMOVE COVER (OR BACK). NO USER-SERVICEABLE PARTS INSIDE. REFER SERVICING QUALIFIED PERSONNEL. -
Page 3: Precautions
5. Never Touch this Unit with Wet Hands—Never handle this unit or its power cord while your hands are wet or damp. If water or any other liquid gets inside this unit, have it checked by your Onkyo dealer. 6. Handling Notes •... -
Page 4: Declaration Of Conformity
We, ONKYO EUROPE ELECTRONICS GmbH LIEGNITZERSTRASSE 6, 82194 GROEBENZELL, GERMANY declare in own responsibility, that the ONKYO product described in this instruction manual is in compliance with the corresponding technical standards such as EN60065, EN55013, EN55020 and EN61000-3-2, -3-3. GROEBENZELL, GERMANY... -
Page 5: Connections
DTS, Inc. “96/24” is a trademark of DTS, Inc. Neural Surround name and related logos are trademarks owned by Neural Audio Corporation. “CinemaFILTER” is a trademark of Onkyo Corporation. HDMI, the HDMI logo and High Definition Multimedia Inter- face are trademarks or registered trademarks of HDMI Licens- ing, LLC. - Page 6 Setting the Display Brightness ... 56 Muting the AV receiver/AV amplifier ... 56 Using the Sleep Timer... 56 Using Headphones... 56 Listening to the Radio (TX-SR605 only) ...57 Using the Tuner... 57 Presetting AM/FM Stations ... 58 Using RDS (European models only) ... 59 Using the Listening Modes ...61...
-
Page 7: Front & Rear Panels
Other models The page numbers in parentheses show where you can find the main explanation for each item. STANDBY/ON button (40) This button is used to set the AV receiver/AV ampli- fier to Standby or On. STANDBY indicator (40) This indicator lights up when the AV receiver/AV amplifier is in Standby mode, and it flashes while a signal is being received from the remote controller. - Page 8 TUNING [ ] buttons are used to tune the tuner, and the PRESET [ to select radio presets (see page 58) (TX-SR605 only). When the onscreen setup menus are used, they work as arrow buttons and are used to select and set items.
-
Page 9: Display
Listening mode & format indicators These indicators show the currently selected listen- ing mode and the format of digital input signals. Tuning indicators (TX-SR605 only) FM STEREO (57): This indicator lights up when the AV receiver is tuned to a stereo FM station. -
Page 10: Rear Panel
Front & Rear Panels—Continued Rear Panel TX-SR605 North American model bp br TX-SR605 other than North American model bl bm bp br bs TX-SA605/8560 bl bm bp br bs ck cl ck cl ck cl (Only some models) - Page 11 HDMI outputs, such as DVD players. The HDMI output is for connecting a TV or projec- tor with an HDMI input. AM ANTENNA (TX-SR605 only) (22) These push terminals are for connecting an AM antenna. FM ANTENNA (TX-SR605 only) (22) This jack is for connecting an FM antenna.
-
Page 12: Remote Controller
Keep this in mind when installing. • If another remote controller of the same type is used in the same room, or the AV receiver/AV amplifier is installed close to equipment that uses infrared rays, the remote controller may not work reliably. -
Page 13: Using The Remote Controller
Modes are selected by using the six REMOTE MODE buttons. ■ RECEIVER/TAPE Mode In RECEIVER/TAPE mode, you can control the AV receiver/AV amplifier and an Onkyo cassette recorder connected via ■ DVD and CD/MD/CDR/DOCK Modes... - Page 14 Used with the Late Night function. To select the Tuner (AM/FM: TX-SR605 only) as the input source, press: Number, D TUN, and ENT buttons (TX-SR605 only) (57) Used to select AM and FM radio stations directly. CH +/– button (58) Used to select radio presets (TX-SR605).
-
Page 15: Dvd Mode
Remote Controller—Continued DVD Mode By default, the remote controller is set to control an Onkyo DVD player. To select your DVD player as the input source, press: STANDBY/ON button Sets the DVD player to Standby or On. Number buttons Used to enter title, chapter, and track numbers and times for locating specific points. -
Page 16: Cd/Md/Cdr/Dock Mode
Remote Controller—Continued CD/MD/CDR/DOCK Mode By default, the remote controller is set to control an Onkyo CD player. To select the input source, press: * If you’re using an MD, CDR, or RI Dock, you must change the input display (see page 51). -
Page 17: About Home Theater
With DVDs you can enjoy DTS and Dolby Digital. With analog and digital TV you can enjoy Dolby Pro Logic IIx or Onkyo’s own DSP surround listening modes. -
Page 18: Connecting The Av Receiver/Av Amplifier
(RCA) Multichannel analog audio cable (RCA) Note: The AV receiver/AV amplifier does not support SCART plugs. AV Connection Color Coding RCA-type AV connections are usually color-coded: red, white, and yellow. Use red plugs to connect right- channel audio inputs and outputs (typically labeled “R”). -
Page 19: Connecting Your Speakers
5. Surround left speaker speaker Connecting a Powered Subwoofer Using a suitable cable, connect the AV receiver/AV amplifier’s PRE OUT SUBWOOFER to an input on your powered subwoofer, as shown. If your subwoofer is unpowered and you’re using an external amplifier, con- nect the PRE OUT SUBWOOFER to an input on the amp. -
Page 20: Speaker Connection Precautions
Doing so may dam- age the AV receiver/AV amplifier. • Don’t connect more than one cable to each speaker terminal. Doing so may damage the AV receiver/AV amplifier. • Don’t connect one speaker to several terminals. Connecting the Speaker Cables Strip about 5/8"... -
Page 21: Bi-Amping The Front Speakers
• When bi-amping is used, the AV receiver/AV ampli- fier is able to drive up to 5.1 speakers in the main room. -
Page 22: Connecting Antenna (Tx-Sr605 Only)
Connecting the AV Receiver/AV Amplifier—Continued Connecting Antenna (TX-SR605 only) This section explains how to connect the supplied indoor FM antenna and AM loop antenna, and how to connect commercially available outdoor FM and AM antennas. The AV receiver won’t pick up any radio signals without any antenna connected, so you must connect the antenna to use the tuner. -
Page 23: Connecting An Outdoor Fm Antenna
Connecting the AV Receiver/AV Amplifier—Continued Connecting an Outdoor FM Antenna If you cannot achieve good reception with the supplied indoor FM antenna, try a commercially available out- door FM antenna instead. Notes: • Outdoor FM antennas work best outside, but usable results can sometimes be obtained when installed in an attic or loft. -
Page 24: Connecting Both Audio & Video
Connecting Both Audio & Video By connecting both the audio and video outputs of your DVD player and other AV components to the AV receiver/AV amplifier, you can select both the audio and video simultaneously simply by selecting the appropriate input source on the AV receiver/AV amplifier. - Page 25 AV receiver/AV amplifier as shown, with com- posite video and S-Video sources being upcon- verted for the component video output. Use this setting if you connect the AV receiver/AV ampli- fier’s COMPONENT VIDEO OUT to your TV. Composite video is upconverted to S-Video and S-Video is downconverted to composite video.
-
Page 26: Connecting Your Tv Or Projector
Connection must be assigned (see page 50) If your TV has no audio outputs, connect an audio output from your VCR or cable or satellite receiver Hint! to the AV receiver/AV amplifier and use its tuner to listen to TV programs through the AV receiver/AV amplifier (see pages 29 and 31). -
Page 27: Connecting A Dvd Player
Step 1: Video Connection Choose a video connection that matches your DVD player ( , You must connect the AV receiver/AV amplifier to your TV via the same type of connection. Step 2: Audio Connection Choose an audio connection that matches your DVD player ( , •... - Page 28 AV receiver/AV amplifier’s multichannel DVD input. Use a multichannel analog audio cable, or several normal audio cables, to connect the AV receiver/AV amplifier’s DVD IN FRONT L/R, CENTER, SURR L/R, SURR BACK L/R, and SUBWOOFER jacks to the 7.1-channel analog audio output on your DVD player.
-
Page 29: Connecting A Vcr Or Dvd Recorder For Playback
Step 1: Video Connection Choose a video connection that matches your VCR or DVD recorder ( , You must connect the AV receiver/AV amplifier to your TV via the same type of connection. Step 2: Audio Connection Choose an audio connection that matches your VCR or DVD recorder ( , •... -
Page 30: Connecting A Vcr Or Dvd Recorder For Recording
Notes: • The AV receiver/AV amplifier must be turned on for recording. Recording is not possible while it’s in Standby mode. • If you want to record directly from your TV or playback VCR to the recording VCR without going through the AV receiver/AV amplifier, connect the TV/VCR’s audio and video outputs directly to the recording VCR’s audio and... -
Page 31: Connecting A Satellite, Cable, Set-Top Box, Or Other Video Source
Connecting the AV Receiver/AV Amplifier—Continued Connecting a Satellite, Cable, Set-top box, or Other Video Source With this hookup, you can use your satellite or cable receiver to listen to your favorite TV programs Hint! via the AV receiver/AV amplifier, useful if your TV has no audio outputs. -
Page 32: Connecting A Game Console
Step 1: Video Connection Choose a video connection that matches the game console ( , If you use connection , you must connect the AV receiver/AV amplifier to your TV with the same type of connec- tion. Step 2: Audio Connection Choose an audio connection that matches the DVD player ( , •... -
Page 33: Connecting A Camcorder Or Other Device
Connecting the AV Receiver/AV Amplifier—Continued Connecting a Camcorder or Other Device Step 1: Video Connection Choose a video connection that matches the camcorder ( Step 2: Audio Connection Choose an audio connection that matches the camcorder ( Connection AV receiver/AV amplifier... -
Page 34: Connecting Components With Hdmi
About Copyright Protection The AV receiver/AV amplifier supports HDCP (High-bandwidth Digital Content Protection) tem for digital video signals. Other devices connected to the AV receiver/AV amplifier via HDMI must also support HDCP. Commercially available HDMI cables (supplied with some components) should be used to connect the AV receiver/AV amplifier’s HDMI OUT to the HDMI input on your TV or projector. -
Page 35: Audio Signals
TV screen (on the TV, select the input of the HDMI component connected to the AV receiver/AV amplifier). If the TV power is off or the TV is set to another input source, this may result in no sound from the AV receiver/AV amplifier or the sound may be cut off. -
Page 36: Connecting A Cd Player Or Turntable
Connecting the AV Receiver/AV Amplifier—Continued Connecting a CD Player or Turntable ■ CD Player or Turntable (MM) with Built-in Phono Preamp Step 1: Choose a connection that matches your CD player ( , phono preamp. COAXIAL IN 2 (CBL/SAT) Connect one or... -
Page 37: Connecting An Ri Dock
• Connect the Remote Interactive Dock with an • Set the Remote Interactive Dock’s RI MODE switch to HDD or HDD/DOCK. • Set the AV receiver/AV amplifier’s input display to DOCK (see page 51). • Refer to the Remote Interactive Dock’s instruction manual. -
Page 38: Connecting A Cassette, Cdr, Minidisc, Or Dat Recorder
Connecting the AV Receiver/AV Amplifier—Continued Connecting a Cassette, CDR, MiniDisc, or DAT Recorder Step 1: Choose a connection that matches the recorder ( , COAXIAL IN 2 (CBL/SAT) OPTICAL IN 1 (GAME/TV) Connect one or the other • With connection , you can play and record and listen in Zone 2. -
Page 39: Connecting Onkyo Components
Connecting the AV Receiver/AV Amplifier—Continued Connecting Onkyo Components Step 1: Make sure that each Onkyo component is connected to the AV receiver/AV amplifier with an analog audio cable (connection in the hookup examples) (see pages 26 to 38). Step 2: Make the connection. -
Page 40: Turning On The Av Receiver/Av Amplifier
• Turning on the AV receiver/AV amplifier may cause a momentary power surge that might interfere with other elec- trical equipment on the same circuit. If this is a problem, plug the AV receiver/AV amplifier into a different branch circuit. -
Page 41: First Time Setup
First Time Setup This section explains the settings that you need to make before using the AV receiver/AV amplifier for the very first time. Automatic Speaker Setup (Audyssey 2EQ) With the supplied speaker setup microphone, the Audyssey 2EQ function can measure the number of... - Page 42 First Time Setup—Continued Put the speaker setup micro- phone at measurement point (page 41), and connect it to the SETUP MIC jack. Please place microphone at center of listening area at ear height. Push Enter : Next Notes: • Make sure the microphone is hori- zontal.
- Page 43 First Time Setup—Continued The following screen appears. Auto Speaker Setup Please place microphone at left end of listening area at ear height. Push Enter : Next Move the speaker setup micro- phone to measurement point (page 41), then press [ENTER]. Audyssey 2EQ performs more mea- surements.
-
Page 44: Error Messages
This message appears if saving fails. Try saving again. If this message appears after 2 or 3 attempts, the AV receiver/AV amplifier is probably mal- functioning. Contact your Onkyo dealer. Retry: Return to step 2 and try again. Cancel: Cancel the automatic speaker setup. -
Page 45: Using A Powered Subwoofer
First Time Setup—Continued Reviewing the Results Use the Up and Down [ buttons to select the settings that you want to review, and then press [ENTER]. Auto Speaker Setup Save Review SP Config Review SP Distance Review SP Level Cancel The options are: Review SP Config: Review the speaker configuration... -
Page 46: Main Menu
First Time Setup—Continued About the Onscreen Setup Menus The onscreen setup menus are displayed on the connected TV and provide a convenient way to change the AV receiver/ AV amplifier’s settings. Submenus p. 47 p. 50 1. Input/Output Assign 1. Monitor Out 2. -
Page 47: Hdmi Monitor
HDMI Note: This procedure can also be performed on the AV HDMI receiver/AV amplifier by using its [SETUP] button, arrow buttons, and [ENTER] button. Press the [RECEIVER] button fol- lowed by the [SETUP] button. The main menu appears onscreen. -
Page 48: Video Input Setup
DVD player to HDMI IN 1, you must assign HDMI IN 1 to the DVD input selector. If you’ve connected your TV to the AV receiver/AV amplifier with an HDMI cable, you can set the AV... -
Page 49: Component Video Setup
VCR/DVR CBL/SAT GAME/TV If you’ve connected your TV to the AV receiver/AV amplifier with a component video cable, you can set the AV receiver/AV amplifier so that composite video and S- Video sources are upconverted* and output by the COM- PONENT VIDEO OUT. -
Page 50: Digital Input Setup
IN 1 or IN 2 in the “HDMI Input Setup” (see page 48) can be set to HDMI here. • There are no assignments for TUNER (TX-SR605 only). • AUX is used only for digital input from the front panel terminals. Examples: If you connect your DVD player to the OPTICAL IN 1 jack, set “DVD”... -
Page 51: Changing The Input Display
CD recorder, or RI Dock to the TAPE IN/OUT or GAME/TV IN jacks, for to work properly, you must change this setting. This setting can only be changed on the AV receiver/AV amplifier. 1, 2 1, 2 iPod photo: If you’re using an iPod photo with the DS-A1 Remote Interactive Dock, connect the DS-A1 to the GAME/TV IN jacks. -
Page 52: Tv Format Setup (Not North American Models)
Press the [SETUP] button. The Setup menu closes. Note: This procedure can also be performed on the AV receiver/AV amplifier by using its [SETUP] button, arrow buttons, and [ENTER] button. TV Format Setup (not North American models) You must specify the TV system used in your area. -
Page 53: Am Frequency Step Setup (On Some Models)
9 kHz: Select if 9 kHz steps are used in your area. Press the [SETUP] button. The Setup menu closes. Note: • This procedure can also be performed on the AV receiver/AV amplifier by using its [SETUP] button, arrow buttons, and [ENTER] button. 9 kHz... -
Page 54: Basic Operations
Start playback on the source component. When you select DVD or another video component, on your TV, you’ll need to select the video input that’s connected to the AV receiver/AV amplifier’s COMPONENT VIDEO OUT, HDMI OUT or MONITOR OUT. On some DVD players, you may need to turn on the digital audio output. -
Page 55: Using The Multichannel Dvd Input
Note: This procedure can also be performed on the AV receiver/AV amplifier by using its [DISPLAY] button. The following information can typically be displayed for input sources. Input source & volume... -
Page 56: Setting The Display Brightness
Alternatively, you can use the AV receiver’s [DIMMER] button (not European models). Muting the AV receiver/AV amplifier You can temporarily mute the output of the AV receiver/ AV amplifier. Press the [RECEIVER] button, and then press the [MUTING] but- ton. -
Page 57: Listening To The Radio (Tx-Sr605 Only)
Listening to the Radio (TX-SR605 only) Using the Tuner With the built-in tuner you can enjoy AM and FM radio stations. You can store your favorite stations as presets for quick selection. Listening to the Radio Use the [TUNER] input selector button to select either AM or FM. -
Page 58: Presetting Am/Fm Stations
Listening to the Radio (TX-SR605 only)—Continued Presetting AM/FM Stations 2, 4 You can store a combination of up to 40 of your favorite AM/FM radio stations as presets. Tune into the AM/FM station that you want to store as a preset. -
Page 59: Using Rds (European Models Only)
Listening to the Radio (TX-SR605 only)—Continued Using RDS (European models only) RDS only works with European models and only in areas where RDS broadcasts are available. When tuned into an RDS station, the RDS indicator appears. RDS indicator ■ What is RDS? RDS stands for Radio Data System and is a method of transmitting data in FM radio signals. -
Page 60: Displaying Radio Text (Rt)
Listening to the Radio (TX-SR605 only)—Continued Displaying Radio Text (RT) RT/PTY/TP When tuned to an RDS station that’s broadcasting text information, the text can be displayed. Press the [RT/PTY/TP] button once. The RT information scrolls across the display. Notes: • The message “Waiting” may appear while the AV receiver waits for the RT information. -
Page 61: Using The Listening Modes
■ [PURE AUDIO] button (not North American models) This button selects the Pure Audio listening mode. When this mode is selected, the AV receiver/AV amplifier’s display is turned off and only video sig- nals input through HDMI IN can be output. Pressing this button again will select the previous listening mode. -
Page 62: Listening Modes Available For Each Source Format
Using the Listening Modes—Continued Listening Modes Available for Each Source Format Analog and PCM Sources Source format 32-96 kHz Media Listening mode Pure Audio (not North American models) Direct Stereo Multichannel Dolby D Dolby Digital Plus DTS, DTS 96/24 DTS Discrete/Matrix DTS-HD High Resolution Audio DTS-HD Master Audio... - Page 63 ✔ ✔ *1. During input of a 96 kHz TrueHD signal, the only sound balance or sound quality adjustment that can be made is Tone control. The AV receiver/ AV amplifier does not respond to a 192 kHz TrueHD signal.
- Page 64 Using the Listening Modes—Continued DTS and DTS 96/24 Sources Source format Media Listening mode Pure Audio (not North American models) Direct Stereo Multichannel Dolby D Dolby Digital Plus DTS, DTS 96/24 DTS Discrete/Matrix DTS-HD High Resolution Audio DTS-HD Master Audio TrueHD PLII Movie/PLIIx Movie PLII Music/PLIIx Music...
- Page 65 Using the Listening Modes—Continued DTS-HD High Resolution Audio and DTS-HD Master Audio Sources DTS-HD High Resolution Audio Source format Multichannel except *2 Media Listening mode Pure Audio (not North ✔ American models) ✔ Direct ✔ Stereo Multichannel Dolby D Dolby Digital Plus DTS, DTS 96/24 DTS Discrete/Matrix DTS-HD High Resolution...
-
Page 66: About The Listening Modes
Dolby format offers up to 7.1 discrete channels of digital audio with 48/96 kHz, up to 5.1-chan- nels with 192 kHz sampling rate. For the signals supported by the AV receiver/AV ampli- fier, see page 63. 5.1-channel source + PLIIx Music These modes use the Pro Logic IIx Music mode to expand 5.1-channel sources for 6.1/7.1-channel play-... - Page 67 DTS format offers up to 7.1 discrete chan- nels of digital audio with 48/96 kHz, up to 5.1-channels with 192 kHz sampling rate. For the signals supported by the AV receiver/AV ampli- fier, see page 65. Neural Surround...
-
Page 68: Recording
OUT jack. See pages 24 to 39 for hookup information. Use the input selector buttons to select the source that you want to record. You can watch the source while record- ing. The AV receiver/AV amplifier’s VOLUME control has no effect on recording. On your recorder, start record- ing. -
Page 69: Advanced Operations
AV receiver/AV amplifier is set to Standby. Notes: • You cannot use this function while the AV receiver/ AV amplifier is muted. • Speakers that are set to No or None in the Speaker Configuration cannot be adjusted. -
Page 70: Advanced Setup
Refer to your speaker’s manuals to determine the optimum crossover frequencies. 2, 3 1, 12 Press the [RECEIVER] button fol- lowed by the [SETUP] button. The main menu appears onscreen. Use the Up and Down [ buttons to select “2. Speaker Setup,”... - Page 71 Press the [SETUP] button. The setup menu closes. Note: This procedure can also be performed on the AV receiver/AV amplifier by using its [SETUP] button, arrow buttons, and [ENTER] button. ] buttons to select a low- ] buttons to select: (default).
-
Page 72: Speaker Distance
Surr Back L distances can be set between 5 and 25 ft. (1.5 and 7.5 m). • This procedure can also be performed on the AV receiver/AV amplifier by using its [SETUP] button, arrow buttons, and [ENTER] button. 2–3. Speaker Distance... -
Page 73: Speaker Level Calibration
Note: The speakers cannot be calibrated while the output of the AV receiver/AV amplifier is muted or while a pair of headphones is connected. 2, 3 1, 6 Press the [RECEIVER] button fol- lowed by the [SETUP] button. -
Page 74: Equalizer Setting
Here you can adjust the EQ of individual speakers. To set the volume of individual speakers see page 73. 2, 3 1, 8 Press the [RECEIVER] button fol- lowed by the [SETUP] button. The main menu appears onscreen. Use the Up and Down [ buttons to select “2. -
Page 75: Multichannel Dvd Input Settings
• Depending on the input source or listening mode, the Equalizer settings may not produce the desired effect. • This procedure can also be performed on the AV receiver/AV amplifier by using its [SETUP] button, arrow buttons, and [ENTER] button. Multichannel DVD Input Settings... -
Page 76: Audio Adjust Functions
[SETUP] button. The setup menu closes. Note: This procedure can also be performed on the AV receiver/AV amplifier by using its [SETUP] button, arrow buttons, and [ENTER] button. The Audio Adjust functions are explained below. Tone Control Settings You can adjust the bass and treble for the front speakers, except when the Direct or Pure Audio (not North Amer- ican models) listening mode is selected. - Page 77 Advanced Setup—Continued PLIIx/Neo:6 Music Mode Settings These settings provide for playing any 2-channel digital source such as Dolby Digital, or 2-channel analog/PCM source in the PLIIx Music listening mode. ■ Panorama With this function, you can broaden the width of the front stereo image when using the Pro Logic II Music or Pro Logic IIx Music listening mode.
-
Page 78: Assigning Listening Modes To Input Sources
Dolby Digital input signals. You can select other listening modes dur- ing playback, but the mode specified here will be resumed once the AV receiver/AV amplifier has been set to Standby. Press the [RECEIVER] button fol- lowed by the [SETUP] button. -
Page 79: Source Setup
When you’ve finished, press the [SETUP] button. The setup menu closes. Note: This procedure can also be performed on the AV receiver/AV amplifier by using its [SETUP] button, arrow buttons, and [ENTER] button. Source Setup 2, 4 1, 6 IntelliVolume You can set the input level for each input source. -
Page 80: Correcting Sound And Picture Sync
With this setting, you can correct this by delaying the audio signals. You can set it from 0 to 100 milliseconds (msec) in 10 millisecond steps. Press the [RECEIVER] button fol- lowed by the [SETUP] button. The main menu appears onscreen. -
Page 81: Volume Setup/Osd Setup
+12 dB. When you’ve finished, press the [SETUP] button. The setup menu closes. Last Note: This procedure can also be performed on the AV receiver/AV amplifier by using its [SETUP] button, arrow buttons, and [ENTER] button. ] buttons to set them. -
Page 82: Osd Setup
Bottom Auto Note: This procedure can also be performed on the AV receiver/AV amplifier by using its [SETUP] button, arrow buttons, and [ENTER] button. Use the Up and Down [ buttons to select the settings, and use the Left and Right [ ] buttons to set them. -
Page 83: Changing The Av Receiver/Av Amplifier's Id
AV receiver/AV amplifier’s remote con- trol ID. You may need to change this if the remote controller’s control codes overlap with those of another Onkyo component located in the same room. If you change the AV receiver/AV amplifier’s remote control ID, be sure... -
Page 84: Hdmi Audio Out
• Refer to the connected component’s instruction man- ual for details. ■ TV Control Set to Enable when you want to control the AV receiver/ AV amplifier from an RIHD-compatible TV that is con- nected to HDMI. Disable: TV Control disabled. -
Page 85: Lock Setup
“Analog” indicated on the screen (see page 50). Normally, the AV receiver/AV amplifier detects the sig- nal format automatically. However, if you experience either of the following issues when playing PCM or DTS... -
Page 86: Changing The Remote Controller's Id
Advanced Setup—Continued Changing the Remote Controller’s ID If several Onkyo components are used in the same room, the remote controller’s control codes may overlap with those of another component. To differentiate the remote controller’s control codes, you can change its ID to another number. -
Page 87: Zone
With this connection method, you can use 7.1 surround sound in the main room and play a different AV source in Zone 2. The volume for Zone 2 is set on the receiver/ integrated amp. • Use an RCA audio cable to connect the AV receiver/ AV amplifier’s ZONE 2 LINE OUT L/R jacks to an... -
Page 88: Zone 2
Zone 2 turns on and ZONE 2 indicator lights up. To select AM or FM press the [TUNER] input selector button repeat- edly (TX-SR605 only). To select the same source as that of the main room, press the [ZONE 2] button repeatedly until “Z2 Sel: Source”... - Page 89 [ZONE 2] button, and then use the [LEVEL–] and [LEVEL+] buttons. LEVEL –/+ AV receiver/ On the AV receiver/AV amplifier, AV amplifier use the ZONE 2 LEVEL [ buttons. If your Zone 2 speakers are connected to an amp in Zone 2, use its volume control to adjust the volume.
-
Page 90: Controlling Other Components
Controlling Other Components You can use the AV receiver/AV amplifier’s remote con- troller (RC-682M) to control your other AV components, including those made by other manufacturers. This sec- tion explains how to enter the necessary remote control code for the component that you want to control (e.g., DVD player, TV, or VCR). -
Page 91: Remote Control Codes For Onkyo Components Connected Via
AV receiver/AV amplifier, and operate the component. If you want to control an Onkyo component by pointing the remote controller directly at it, or you want to control an Onkyo component that’s not connected via... - Page 92 Pause, Play, Stop. ], [ Rewind and Fast forward. ■ Controlling a Satellite or Cable Receiver Press [SAT] first [STANDBY/ON] Sets the satellite/cable receiver to Standby or On. Number buttons Enter numbers. [CLR] Cancels functions. [CH +/–] Selects satellite/cable chan- nels.
-
Page 93: Specifications
1 Vp-p/75 (Composite) Component Video Frequency Response 5 Hz - 50 MHz - 3 dB Tuner Section (TX-SR605 only) FM Tuning Frequency Range North American: 87.5 MHz - 107.9 MHz Others: 87.5 MHz - 108.0 MHz AM Tuning Frequency Range... -
Page 94: Troubleshooting
If you have any trouble using the AV receiver/AV ampli- fier, look for a solution in this section. If you can’t resolve the issue yourself, contact your Onkyo dealer. If you can’t resolve the issue yourself, try resetting the AV receiver/AV amplifier before contacting your Onkyo dealer. - Page 95 About DTS signals • When DTS program material ends and the DTS bit- stream stops, the AV receiver/AV amplifier remains in DTS listening mode and the DTS indicator remains on. This is to prevent noise when you use the pause, fast forward, or fast reverse function on your player.
- Page 96 • Make sure to set the same ID on both the AV receiver/ AV amplifier and remote controller (pages 83 and 86). Can’t control other components • If it’s an Onkyo component, make sure that the cable and analog audio cable are connected properly. Connecting only an cable won’t work (page 39).
- Page 97 Onkyo is not responsible for damages (such as CD rental fees) due to unsuccessful recordings caused by the unit’s malfunction. Before you record important data, make sure that the material will be recorded cor- rectly.
- Page 98 MEMO...
- Page 99 MEMO...
- Page 100 Unit 1 & 12, 9/F, Ever Gain PlazaTower 1, 88, Container Port Road, Kwai Chung, N.T., Hong Kong Tel: 852-2429-3118 Fax: 852-2428-9039 http://www.ch.onkyo.com/ SN 29344489 (C) Copyright 2007 ONKYO CORPORATION Japan. All rights reserved. HOMEPAGE http://www.onkyo.com/ Y0703-1 * 2 9 3 4 4 4 8 9 *...
Need help?
Do you have a question about the TX-SR605 and is the answer not in the manual?
Questions and answers