Table of Contents
Advertisement
Quick Links
Advertisement
Table of Contents

Related Manuals for Miller Classic Clearlight


Summary of Contents for Miller Classic Clearlight
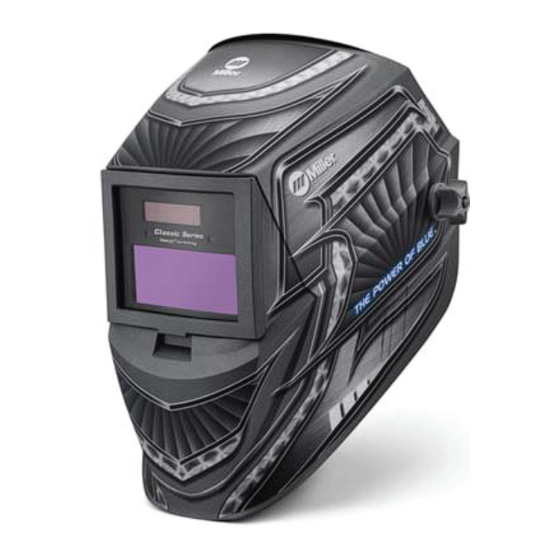
- Page 1 OM-288583D 2021-04 Classic Clearlight Auto-Darkening Helmets OWNER’S MANUAL...
-
Page 2: Table Of Contents
TABLE OF CONTENTS SECTION 1 – SAFETY PRECAUTIONS – READ BEFORE USING......1 Symbol Usage ............. 1 Arc Welding Hazards . - Page 3 TABLE OF CONTENTS 11-1 Troubleshooting ............31 SECTION 12 –...
-
Page 4: Section 1 - Safety Precautions - Read Before Using
SECTION 1 – SAFETY PRECAUTIONS – READ BEFORE USING Protect yourself and others from injury—read, follow, and save these important safety precautions and operating instructions. 1-1. Symbol Usage DANGER! – Indicates a hazardous situation which, if not avoided, will result in death or serious injury. - Page 5 � Before welding, adjust the auto-darkening lens sensitivity setting to meet the application. � Stop welding immediately if the auto-darkening lens does not darken when the arc is struck. NOISE can damage hearing. Noise from some processes or equipment can damage hearing. �...
-
Page 6: California Proposition 65 Warnings
� Do not weld in locations near degreasing, cleaning, or spraying operations. The heat and rays of the arc can react with vapors to form highly toxic and irritating gases. � Do not weld on coated metals, such as galvanized, lead, or cadmium plated steel, unless the coating is removed from the weld area, the area is well ventilated, and while wearing an air- supplied respirator. -
Page 7: Principal Safety Standards
1-5. Principal Safety Standards Safety in Welding, Cutting, and Allied Processes, American Welding Society standard ANSI Standard Z49.1. Website: http://www.aws.org. Safe Practice For Occupational And Educational Eye And Face Protection, ANSI Standard Z87.1, from American National Standards Institute. Website: www.ansi.org. Safety in Welding, Cutting, and Allied Processes, CSA Standard W117.2 from Canadian Stand- ards Association. -
Page 8: Section 2 - Consignes De Sécurité - Lire Avant Utilisation
SECTION 2 – CONSIGNES DE SÉCURITÉ - LIRE AVANT UTILISATION Pour écarter les risques de blessure pour vous-même et pour autrui — lire, appliquer et ranger en lieu sûr ces consignes relatives aux précautions de sécurité et au mode opératoire. 2-1. - Page 9 � Avoir recours à des écrans protecteurs ou à des rideaux pour protéger les autres contre les rayonnements les éblouissements et les étincelles ; prévenir toute personne sur les lieux de ne pas regarder l’arc. � Porter un équipement de protection pour le corps fait d’un matériau résistant et ignifuge (cuir, coton robuste, laine).
-
Page 10: Proposition Californienne 65 Avertissements
LES FUMÉES ET LES GAZ peuvent être dangereux. Le soudage produit des vapeurs et des gaz. Respirer ces vapeurs et ces gaz peut être dangereux pour votre santé. � Écarter la tête des fumées. Ne pas inhaler ces fumées. � À l’intérieur, ventiler la zone et/ou utiliser une ventilation forcée au niveau de l’arc pour l’éva- cuation des fumées et des gaz de soudage. -
Page 11: Principales Normes De Sécurité
Classe de N° de classe Taille d'électrode Courant d'arc protection Procédé de protection in. (mm) en ampères suggérée minimum (Comfort)* Léger Moins de 500 Coupage arc-air (CAC-A) Lourd 500–1000 Moins de 20 20–40 40–60 Coupage à l'arc 60–80 plasma 80–300 300–400 400–800 Moins de 20... -
Page 12: Section 3 - Definitions
SECTION 3 – DEFINITIONS 3-1. Additional Safety Symbol Definitions Warning! Watch Out! There are possible haz- ards as shown by the symbols. Accidental ingestion prevention. Keep battery away from children. Battery is harmful if swallowed. 3-2. Miscellaneous Symbols And Definitions Positive Negative Power On/... -
Page 13: Section 4 - Specifications
SECTION 4 – SPECIFICATIONS � Please register your product at www.MillerWelds.com/Support/Registration Classic Clear- Standard Fixed- Fixed-Shade 2 x Specifica- VSi Clearlight light Variable Shade No. 10 4 No. 10 Flip-Up tion Helmet Shade Helmet Helmet Helmet Viewing 3.75 x 1.5 in. (95 x 3.75 x 1.57 in. - Page 14 Classic Clear- Standard Fixed- Fixed-Shade 2 x Specifica- VSi Clearlight light Variable Shade No. 10 4 No. 10 Flip-Up tion Helmet Shade Helmet Helmet Helmet 14°F to 131°F (-10°C to +55°C) Operating Tempera- � When stored in extremely cold temperatures, warm helmet to ambient tem- ture perature before welding.
-
Page 15: Section 5 - Operating Instructions
SECTION 5 – OPERATING INSTRUCTIONS 5-1. Variable Shade Helmet Controls 1 Mode Button (See Section 5-6) 2 Grind Mode / Low Battery Light (See Section 5-4) 3 Variable Shade Control (See Section 5-8) 4 Lens Delay Control (See Section 5-9) 5 Sensitivity Control (See Section 5-10) 6 Variable Shade And... -
Page 16: Fixed Shade Helmet Controls
5-3. Fixed Shade Helmet Controls 2-1. Helmet Controls Continued Fixed Shade No. 10 The fixed shade mo Fixed Shade No. 10 Helmets buttons or controls. T on (darkens) autom The fixed shade models have welding begins and no buttons or controls. The welding stops. -
Page 17: Grind/Low Battery Light
5-4. Grind/Low Battery Light 2-2. Reset Button And Low Battery Indicator The auto-darkening lens turns Variable Shade Helmets (darkens) automatically when welding begins and turns 1 Grind / Low Battery Light Variable Shade Lens Assembly off when welding stops. Reset Button The Grind / Low Battery light blinks every three seconds Press Reset button to check if the... -
Page 18: Mode Control For Variable Shade Helmets
5-6. Mode Control For Variable Shade Helmets 1 Mode Control Button � Press Mode button to turn lens on and display current settings in each mode. Lens also turns on when exposed to welding arc. Press Mode button to turn lens on and to select the mode appropriate for the work activity. -
Page 19: Mode Control For Vsi Helmets
5-7. Mode Control For VSi Helmets Mode Control Button Slide Mode Control switch to select the mode appropriate for the work activity. Slide switch away from the de- 1 Mode Control Button sired mode (Weld or X-Mode). When the switch is moved, “On” is Slide Mode Control switch to revealed next to the active mode. -
Page 20: Variable Shade Control
5-8. Variable Shade Control 1 Variable Shade Adjust- Variable Shade Helmets ment Buttons (Knob On Variable Shade Control VSi Helmet) Lens shade can be adjusted from No. 2 Mode Control Button 8 12 on Variable Shade helmet, and from No. 8 13 on VSi helmet. -
Page 21: Lens Delay Control
Lens Delay Control The lens delay control is used to 5-9. Lens Delay Control adjust the time for the lens to switch to the clear state after welding. The delay is particularly useful in eliminating bright after-rays pres- ent in higher amperage applica- tions where the molten puddle re- 1 Lens Delay... -
Page 22: Sensitivity Control
follows: Adjust hel conditions 5-10. Sensitivity Control Turn sens setting. Press On Helmet le then clear Face the h use, expo light condi Variable Shade Helmets VSi Helmets Gradually clockwise then turn terclockwi ting where ready for may be n plications and off. -
Page 23: Typical Variable Shade Lens Adjustment Procedure
5-11. Typical Variable Shade Lens Adjustment Procedure � In the Grind mode the lens is a fixed shade No. 3. No lens adjustments are possible. Adjusting Lens Assembly � Press Mode button to turn lens On. LEDs indicate current lens settings. �... -
Page 24: Section 6 - Adjusting Headgear
SECTION 6 – ADJUSTING HEADGEAR 6-1. Adjusting Headgear tension knobs and press inward to free from � There are four headgear adjustments: adjustment slots. Move forward or back to headgear top, tightness, angle, and desired position and retighten. (Both sides distance. -
Page 25: Section 7 - Replacing Lens Covers
SECTION 7 – REPLACING LENS COVERS 7-1. Replacing Outside Lens Cover On Variable Shade And Standard Fixed Shade Helmets Never use the auto- darkening lens with- out the inside and outside lens covers properly installed. Welding spatter will damage auto- darkening lens and void the warranty. -
Page 26: Helmets
7-2. Replacing Inside Lens Cover On Variable Shade And Standard Fixed Shade Helmets Never use the auto- darkening lens with- out the inside and outside lens covers properly installed. Welding spatter will damage auto- darkening lens and void the warranty. �... -
Page 27: Replacing Lens Covers On Vsi Helmet
7-3. Replacing Lens Covers On VSi Helmet Never use the auto- darkening lens with- out the inside and outside lens covers properly installed. Welding spatter will damage auto- darkening lens and void the warranty. Outside Lens Cover 1 Lens Holder 2 Release Points 3 Outside Lens Cover Remove lens holder by press-... -
Page 28: Replacing Grinding Shield On Vsi Helmet
7-4. Replacing Grinding Shield On VSi Helmet Never use the auto- darkening lens with- out the inside and outside lens covers properly installed. Welding spatter will damage auto- darkening lens and void the warranty. 1 Grinding Shield 2 Retaining Clip Rotate both retaining clips to the Open position. -
Page 29: Replacing Lens Covers And Grinding Shield On Fixed Shade Flip-Up
7-5. Replacing Lens Covers And Grinding Shield On Fixed Shade Flip-Up Helmets Never use the auto-darkening lens Lift flip-up frame and slide lens and covers without the inside and outside lens together out of the open side of the frame. covers properly installed. -
Page 30: Section 8 - Replacing The Battery
SECTION 8 – REPLACING THE BATTERY 8-1. Replacing The Battery To replace the battery, begin by removing the auto-darken- ing lens assembly (see Sec- tion 7-2). 1 Battery Tray After removing the lens as- sembly, slide the battery hold- ing tray out and remove the old battery. -
Page 31: Replacing The Battery On Vsi Helmet
Insert a coin into the slot on the bat- tery cover. Rotate cover counter- clockwise to remove battery. 1 Battery Cover Install Panasonic CR2450 lithium battery or equivalent (Miller Part No. Insert a coin into the slot on 217043). the battery cover. Rotate cov- er counterclockwise to re- Be sure Positive (+) side of the move battery. -
Page 32: Section 9 - Installing Optional Magnifying Lens
SECTION 9 – INSTALLING OPTIONAL MAGNIFYING LENS 9-1. Installing Optional Magnifying Lens Outside Len Optional Ma Remove lens grasping the ou pulling the frame 1 Outside Lens Cover met. Frame Remove the au 2 Optional Magnifying Lens assembly by ge met lip above t Remove lens cover frame by pushing assem... -
Page 33: Section 10 - Maintenance And Storage
SECTION 10 – MAINTENANCE AND STORAGE � Do not use solvents or abrasive cleaning detergents to clean the helmet. Do not immerse the lens assembly in water. � Keep helmet dry; do not expose helmet to rain or snow. Keep helmet away from fire and oth- er sources of heat. -
Page 34: Section 11 - Troubleshooting
SECTION 11 – TROUBLESHOOTING 11-1. Troubleshooting Trouble Remedy Auto lens does not turn Check battery and verify it is in good condition and installed on when Mode Control properly. button is pressed. Check battery surfaces and contacts, and clean if necessary. Check battery for proper contact and gently adjust contact points if necessary. - Page 35 SECTION 12 – PARTS LIST Figure 12-1. Classic Variable Shade Auto-Darkening Welding Helmets OM-288583 Page 32...
- Page 36 —Label, Warning Helmet En/Sp/Fr 231410 Lens Cover, Inside (4.25 − 1.75 in.) (5 Per Pkg.) 287806 Auto-Darkening Lens Assy. (Variable Shade) (Clearlight) 288934 Tray, Battery Classic ClearLight. 217043 Battery, Non-Rechargeable CR2450 231412 Gasket, Front Lens 231411 Lens, Front Cover (4.5 x 3.6875 in) (5 Per Pkg.)
- Page 37 ♦ Optional Figure 12-2. VSi Auto-Darkening Welding Helmet OM-288583 Page 34...
- Page 38 770249 Headband, Fabric 079975 Replacement O-rings For Kit 770 248 (5 Per Pkg.) ♦216336 Cushion, Comfort (Foam Rubber) ♦770250 Bag, Helmet (Miller Logo) ♦222003 Adapters, Hard Hat (Not Shown) ♦260940 Adapters, Slotted Hard Hat (Not Shown) ♦212235 Lens, 0.75 Magnification ♦212236...
- Page 39 Figure 12-3. Fixed Shade No. 10 Flip-Up Welding Helmet OM-288583 Page 36...
- Page 40 Replacement O-rings For Kit 770 248 (5 Per Pkg.) 770249 Headband, Fabric ♦216336 Cushion, Comfort (Foam Rubber) ♦770250 Bag, Helmet (Miller Logo) ♦222003 Adapters, Universal Hard Hat (Not Shown) ♦260940 Adapters, Slotted Hard Hat (Not Shown) ♦212235 Lens, 0.75 Magnification ♦212236...
- Page 41 Miller. THIS WARRANTY IS EXPRESSLY IN LIEU OF ALL OTHER WARRANTIES, EXPRESS OR IMPLIED, INCLUDING THE WARRANTIES OF MERCHANT- ABILITY AND FITNESS.
- Page 43 For product information, Owner’s Manual translations, and more, visit www.MillerWelds.com ORIGINAL INSTRUCTIONS © Miller Electric Mfg. LLC 2021-04...
Need help?
Do you have a question about the Classic Clearlight and is the answer not in the manual?
Questions and answers