Advertisement
Quick Links
Technical Service Bulletin
SUBJECT:
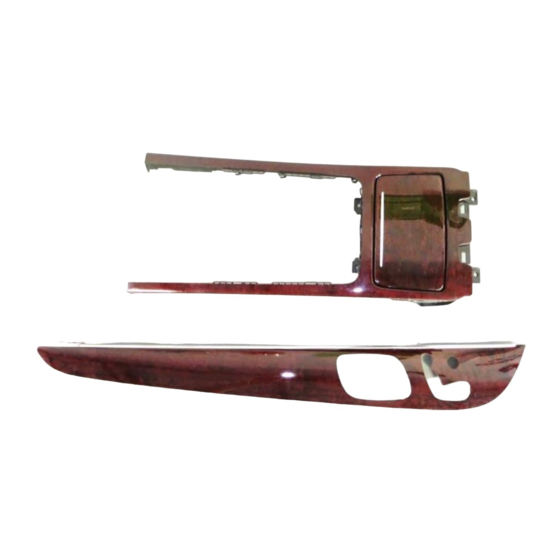
Description: If any of the Equus wood trim panels exhibit scratches, blemishes, circular "water
marks" or uneven surface finish, do not replace the wood trim panel; instead follow the repair
procedure below.
NOTICE
The following TSB does not apply to deep scratches or gouges. This procedure is
suitable for an experienced auto body technician.
Applicable Vehicles: 2011-2013MY Equus (VI)
Circulate To: General Manager, Service Manager, Parts Manager, Warranty Manager, Service
Advisors, Technicians, Body Shop Manager, Fleet Repair
GROUP
BODY INTERIOR
DATE
FEBRUARY 2015
WOOD TRIM REPAIR
NUMBER
15-BD-002
MODEL(S)
EQUUS (VI)
Advertisement

Related Manuals for Hyundai 82302-3N700-W2R


Summary of Contents for Hyundai 82302-3N700-W2R
- Page 1 GROUP NUMBER BODY INTERIOR 15-BD-002 DATE MODEL(S) Technical Service Bulletin FEBRUARY 2015 EQUUS (VI) WOOD TRIM REPAIR SUBJECT: Description: If any of the Equus wood trim panels exhibit scratches, blemishes, circular “water marks” or uneven surface finish, do not replace the wood trim panel; instead follow the repair procedure below.
- Page 2 WOOD TRIM REPAIR SUBJECT: Parts Information: NOTICE Products can be found in local auto parts stores. Part Description Content 3M Headlight Lens Restoration Kit 02516 or Equivalent NOTICE This kit contains all items listed below EXCEPT for painter’s tape and applicator pads. 3M Ultrafine Machine Polish 39061 or Equivalent 3M 3 inch Random Orbital Sander 28353 or Equivalent...
- Page 3 WOOD TRIM REPAIR SUBJECT: Warranty Information: Model Op. Code Operation Op. Time Causal Part # 82302F00 DOOR WOOD TRIM REPAIR (1) 82302-3N700-W2R 82302-3N700-W2V 82302F01 DOOR WOOD 2.0 M/H 82302-3N700-W3V TRIM REPAIR (2) 82302-3N700-W5R 82302F02 DOOR WOOD 3.0 M/H 82302-3N700-W5V TRIM REPAIR (3)
- Page 4 WOOD TRIM REPAIR SUBJECT: Inspection: Inspect the wood trim under fluorescent light to identify any type of blemishes that may be present. See examples below of wood trim with scratches, water marks, and blemishes. TSB #: 15-BD-002 Page 4 of 18 SUBJECT:...
- Page 5 WOOD TRIM REPAIR SUBJECT: Disassembly Procedure: I. Door Wood Trim Disassembly Remove the screw on the hinge side of the door panel. Separate the plastic door trim by pulling it away from the door frame. Disconnect the speaker connector and remove the door trim.
- Page 6 WOOD TRIM REPAIR SUBJECT: Carefully pry the rubber armrest liner out. Remove the screw beneath it using a Philips head screwdriver. Pry the door handle liner out and remove the screw using a Phillips head Screwdriver. NOTICE Use care to avoid damaging the door trim.
- Page 7 WOOD TRIM REPAIR SUBJECT: Disconnect all door connectors and press the white clip to remove the door handle cables. Remove the door panel and place on a soft surface. Remove the door handle mechanism and the seat switch module by unscrewing the screws shown to the right.
- Page 8 WOOD TRIM REPAIR SUBJECT: II. Crash Pad Trim Disassembly Using a plastic trim removal tool, carefully pry the center fascia away from the dash on both sides. Pull the center fascia from both sides to unclip it from the dash. NOTICE The center fascia does not need to be fully removed.
- Page 9 WOOD TRIM REPAIR SUBJECT: III. Center Console Wood Trim Disassembly Pull straight up on the shift knob to remove it. NOTICE A significant amount of force may be needed to remove the shift knob. Lift up on the shift gate trim cover to remove it from the floor console.
- Page 10 WOOD TRIM REPAIR SUBJECT: Remove the 2 screws securing the center console sliding tray using a Philips head screwdriver. Follow steps 1 and 2 from the Crash Pad Wood Trim disassembly procedure described above, and unclip the center fascia from the dash. While lifting the center fascia, unclip the center console sliding tray.
- Page 11 WOOD TRIM REPAIR SUBJECT: Disconnect the center console sliding tray connector and set the sliding tray aside. Using a Philips head screwdriver, remove the 2 screws securing the cup holder. Using a trim removal tool, remove the center console tray cover. TSB #: 15-BD-002 Page 11 of 18 SUBJECT:...
- Page 12 WOOD TRIM REPAIR SUBJECT: Remove the 2 bolts securing the center console tray. Loosen the center console tray using a trim removal tool. NOTICE The center console tray does not need to be fully removed. Lift the center console tray to separate it from the center console.
- Page 13 WOOD TRIM REPAIR SUBJECT: Using a Philips head screwdriver, remove the 2 screws securing the wood trim. Carefully lift along the edges of the wood trim to release the retaining clips. Remove the center console wood trim. NOTICE Use care to avoid scratching the wood trim during removal.
- Page 14 WOOD TRIM REPAIR SUBJECT: Service Procedure. I. Initial Scratch Removal Procedure NOTICE This procedure describes the process to repair the crash panel wood trim. Follow a similar process for the door and center console wood trim panels. Attach a 1000 grit 3M Trizact disc to a random orbital sander and connect to shop air.
- Page 15 WOOD TRIM REPAIR SUBJECT: NOTICE Follow these general guidelines while sanding the panel: Do not sand the panel dry. If the surface dries up, dampen the panel before continuing. Replace the disc with a new one if it becomes loaded with sanding residue or it is no longer sanding effectively.
- Page 16 WOOD TRIM REPAIR SUBJECT: II. Sanding Scratch Refinement Procedure Attach a 3000 grit Trizact disc to the same random orbital sander. Following the same procedure above, wet sand the panel to refine the surface and prepare for polishing. Wipe with a clean portion of microfiber cloth.
- Page 17 WOOD TRIM REPAIR SUBJECT: Apply 3M Rubbing Compound to the surface of the panel. Buff the panel in a back and forth motion. CAUTION Hold on to the panel tightly while buffing/polishing. Buff the panel until the cloudiness is gone and the finish begins to clear up.
- Page 18 WOOD TRIM REPAIR SUBJECT: Dispense 3M Ultrafine Machine Polish onto the panel and polish to a high gloss. Wipe the residue off with a new microfiber cloth. NOTICE Do not use a contaminated microfiber cloth to remove the polish. Wood trim shown after polishing is completed.
Need help?
Do you have a question about the 82302-3N700-W2R and is the answer not in the manual?
Questions and answers