Advertisement
Quick Links
Vehicle Model:
Model Year
Part No.
Language
Rev. Date
Find your vehicle model below then scan the QR code, click or enter the website
address in your web-browser to obtain installation instructions.
www.hyundaiaccessories.com/admin_media_uploads/installationSheets/tu221_au100.pdf
2022~ Santa Cruz
www.hyundaiaccessories.com/admin_media_uploads/installationSheets/cr221_au100.pdf
Genuine Accessories
Multiple
2022~
CWF21 AU100
English
7/13/2022
2022~ Tucson
Revision Date
07/13/2022
Accessory:
Crossbars
Difficulty:
( B )
Note:
Difficulty stated above reflects the minimum level of
expertise required to install the accessory:
(A) Customer
(B) Dealer Technician
(C) Master Technician or Specialist
Page 1 of 1
Advertisement

Subscribe to Our Youtube Channel
Related Manuals for Hyundai CWF21 AU100


Summary of Contents for Hyundai CWF21 AU100
- Page 1 Vehicle Model: Multiple Accessory: Crossbars Model Year 2022~ Difficulty: ( B ) Part No. CWF21 AU100 Note: Difficulty stated above reflects the minimum level of expertise required to install the accessory: Language English (A) Customer Rev. Date 7/13/2022 (B) Dealer Technician...
- Page 2 Vehicle Model: Tucson Accessory: Crossbars Model Year 2022~ Difficulty: ( A ) Copy OEM Logo Here (→) Part No. CWF21 AU100 Note: Difficulty stated above reflects the minimum level of expertise required to install the accessory: Language English (A) Customer Rev.
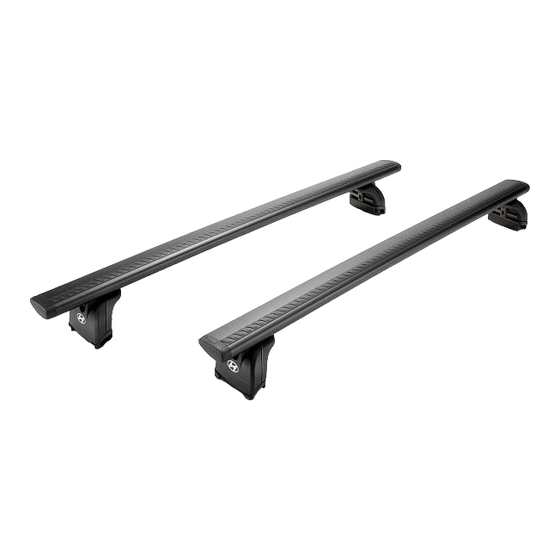
- Page 3 Genuine Accessories Kit Overview 43 1/8" (109.54 cm) - Fully Extended 45 5/8" (115.89 cm) - Fully Extended Description No. Qty Rear Crossbar Front Crossbar Wrench Quick Reference Guide Service Part Overview Service Part Number Description Service Part Number Description CWF21 AU050 Top Cover Strip CWF21 AU020...
- Page 4 Genuine Accessories Step Ladder and Clean Cloth A. Clean the side roof rails in the areas shown. Do NOT scratch or damage the vehicle. Wrench, Coin or Flat-Head Screwdriver BOLT A. Unlock all four (4) plastic cylinders by turning them counterclockwise as shown. B.
- Page 5 Genuine Accessories Step Ladder and Tape Measure A. Locate the front crossbar. B. Verify the rounded profile of the crossbar faces forward for proper orientation as shown. C. Carefully place the front crossbar onto the roof side rails. Ensure the crossbar brackets wrap around the roof rails as shown. D.
- Page 6 Genuine Accessories Coin or Flat-Head Screwdriver A. Carefully align and reinstall all four (4) foot covers. Turn the plastic cylinders clockwise as shown to lock the foot covers in place. NOTE: Ensure the foot covers are properly seated and locked. Do NOT scratch or damage the vehicle.
- Page 7 Genuine Accessories Visual Check Item to be Checked Result Ensure all four (4) bolts are torqued properly. All four (4) bolts are properly torqued. Ensure all four (4) foot covers are fully seated and locked in position. All four (4) foot covers are properly seated and locked. Ensure the crossbars are in a locked position and do not jiggle or rattle.
- Page 8 Accessory: Crossbars Model Year 2022~ Difficulty: ( A ) Copy OEM Logo Here (→) Part No. CWF21 AU100 Note: Difficulty stated above reflects the minimum level of expertise required to install the accessory: Language English (A) Customer Rev. Date 6/14/2021...
- Page 9 Genuine Accessories Kit Overview 43 1/8" (109.54 cm) ‐ Fully Extended 45 5/8" (115.89 cm) ‐ Fully Extended Description No. Qty Rear Crossbar Front Crossbar Wrench Quick Reference Guide Service Part Overview Service Part Number Description Service Part Number Description CWF21 AU050 Top Cover Strip CWF21 AU020 Attachment Hardware Set CWF21 AU060 Lower Cover Strip Set CWF21 AU030...
- Page 10 Genuine Accessories Step Ladder and Clean Cloth A. Clean the side roof rails in the areas shown. Do NOT scratch or damage the vehicle. Wrench, Coin or Flat-Head Screwdriver BOLT A. Unlock all four (4) plastic cylinders by turning them counterclockwise as shown. B.
- Page 11 Genuine Accessories Step Ladder and Tape Measure A. Locate the front crossbar. B. Verify the rounded profile of the crossbar faces forward for proper orientation as shown. C. Carefully place the front crossbar onto the roof side rails. Ensure the crossbar brackets wrap around the roof rails as shown. D.
- Page 12 Genuine Accessories Coin or Flat-Head Screwdriver A. Carefully align and reinstall all four (4) foot covers. Turn the plastic cylinders clockwise as shown to lock the foot covers in place. NOTE: Ensure the foot covers are properly seated and locked. Do NOT scratch or damage the vehicle.
- Page 13 Genuine Accessories Visual Check Item to be Checked Result Ensure all four (4) bolts are torqued properly. All four (4) bolts are properly torqued. Ensure all four (4) foot covers are fully seated and locked in position. All four (4) foot covers are properly seated and locked. Ensure the crossbars are in a locked position and do not jiggle or rattle.
Need help?
Do you have a question about the CWF21 AU100 and is the answer not in the manual?
Questions and answers