Table of Contents
Advertisement
Quick Links
Installation and Operation Manual
Manual P/N 5900285 – Revision A1 – February 2023
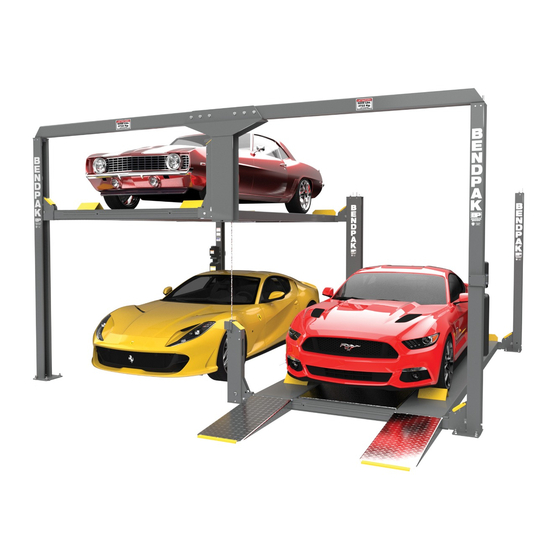
Models:
• PL-12000DP
• PL-12000DPS
Designed and engineered by BendPak Inc. in Southern California, USA. Made in China.
⚠
DANGER
Double-Wide Parking Lift
IMPORTANT SAFETY INSTRUCTIONS, SAVE THESE
INSTRUCTIONS!
installing, operating, servicing, or maintaining this product. Failure to
follow the instructions and safety precautions in this Manual can result in
serious injury or death. Make sure all other operators also read this
Manual. Keep the Manual near the product for future reference. By
proceeding with installation and operation, you agree that you
fully understand the contents of this Manual and assume full
responsibility for product use .
Read the entire contents
1645 Lemonwood Dr.
Santa Paula, CA 93060 USA
Toll Free: (800) 253-2363
Tel: (805) 933-9970
bendpak.com
of this Manual
before
Advertisement
Table of Contents

Related Manuals for BendPak PL-12000DP


Summary of Contents for BendPak PL-12000DP
- Page 1 Installation and Operation Manual Manual P/N 5900285 – Revision A1 – February 2023 Models: • PL-12000DP • PL-12000DPS Designed and engineered by BendPak Inc. in Southern California, USA. Made in China. ⚠ IMPORTANT SAFETY INSTRUCTIONS, SAVE THESE of this Manual before...
- Page 2 Copyright. Copyright © 2023 by BendPak Inc. All rights reserved. You may make copies of this document if you agree that: you will give full attribution to BendPak Inc., you will not make changes to the content, you do not gain any rights to this content, and you will not use the copies for commercial purposes.
- Page 3 Unit Information. Enter the Model Number, Serial Number, and the Date of Manufacture from the Label on your unit. This information is required for part or warranty issues. Model: Serial: Date of Manufacture: PL-12000DP Series Parking Lift P/N 5900285 — Rev. A1 — February 2023...
-
Page 4: Table Of Contents
Technical support and service is available from your dealer, on the Web at bendpak.com/support, by email at support@bendpak.com, or by phone at (800) 253-2363, extension 196. You may also contact BendPak for parts replacement information (please have the model and serial number of your unit available) at (800) 253-2363, extension 191. -
Page 5: Shipping Information
900 chemicals identified by the State of California to cause cancer, birth defects or reproductive harm. ALWAYS use this product in accordance with BendPak BendPak’s instructions. For more information go to www.P65Warnings.ca.gov. - Page 6 23. Always make sure Lift is secured on Safety Locks before working on or near a Vehicle. 24. Make a thorough inspection of the product at least once a year. Replace any damaged or severely worn parts, decals, or warning labels. Replace worn or damaged parts with BendPak or BendPak approved parts and assemblies only.
- Page 7 Check for damaged, worn, or missing parts. Do not use it if you find any of these issues. Instead, take it out of service, then contact an authorized repair facility, your dealer, or BendPak at (877) 432-6627 or support@BendPak.com. ⚠...
-
Page 8: Components
Components PL-12000DP Series Parking Lift P/N 5900285 — Rev. A1 — February 2023... -
Page 9: Specifications
Specifications PL-12000DP Series Parking Lift P/N 5900285 — Rev. A1 — February 2023... - Page 10 Each Platform consists of one Powerside and one Offside Runway and the two optional Aluminum Decks between them. Total Width is defined as the dimensions outside-to-outside of the Baseplates. Special voltages available upon request. Specifications subject to change without notice PL-12000DP Series Parking Lift P/N 5900285 — Rev. A1 — February 2023...
-
Page 11: Installation Checklist
Installation Checklist Following are the steps required to install a PL-12000DP Parking Lift. Perform them in the order shown. NOTICE The PL-12000DP Series Parking Lift has separate Platforms. For installation, BendPak recommends installing one Platform at a time, then repeating the same process on the adjacent Platform. -
Page 12: Installation
• Torque wrench Open-end wrench set, SAE and metric • • Socket and ratchet set, SAE and metric Compressed air • • General assorted tools Hex-key wrench set PL-12000DP Series Parking Lift P/N 5900285 — Rev. A1 — February 2023... - Page 13 7-in. min. Clearance + Height of the particular Vehicle on the Platform + height of the Safety Locks. higher Each location height needs to be than the sum of these values to allow safe clearance and to prevent vehicle damage. PL-12000DP Series Parking Lift P/N 5900285 — Rev. A1 — February 2023...
- Page 14 Installing the Lift on a surface with more than 3 degrees of slope could lead to injury or even death. Only install PL-12000DP Series Lifts on a level floor, defined as no more than 3/8 in. difference over the installation area. If the floor is not level, consider making the floor level or using a different location.
- Page 15 ⚠ CAUTION BendPak Lifts are supplied with installation instructions and concrete anchors that meet the criteria set by the current version of the American National Standard “Automotive Lifts – Safety Requirements for Construction, Testing, and Validation”, ANSI/ALI ALCTV. You are responsible for any special regional structural and/or seismic anchoring requirements specified by any other agencies and/or codes such as the Uniform Building Code (UBC) and/or International Building Code (IBC).
- Page 16 3. Create the Rear Chalk Line parallel to the Front Chalk Line. Make the Rear Chalk Line longer than the Total Width setting for your Lift model; the Front and Rear Chalk Lines must also be parallel to each other. PL-12000DP Series Parking Lift P/N 5900285 — Rev. A1 — February 2023...
- Page 17 Forklift or Shop Crane (not an engine hoist) and at least 3 capable assistants. The following illustration shows the correct orientation for the 3 Front Posts, while placed on the ground before assembly. PL-12000DP Series Parking Lift P/N 5900285 — Rev. A1 — February 2023...
- Page 18 Move all vehicles and bystanders away to leave an open work area. Only allow trained personnel to move the Posts and use appropriate lifting devices, such as a Forklift or Shop Crane. PL-12000DP Series Parking Lift P/N 5900285 — Rev. A1 — February 2023...
- Page 19 Verify the Crosstube Slots in the Posts are facing to the inside of the Lift. Installing the Front Crosstubes and Raising the Posts Important It is possible to install the Crosstubes incorrectly. Check carefully. The following illustration shows the two Front Crosstubes. PL-12000DP Series Parking Lift P/N 5900285 — Rev. A1 — February 2023...
- Page 20 Raise FRONT Crosstubes in their required locations, as shown in the drawing (below). FRONT just before raising The following drawing shows orientation of Posts and Crosstubes; PL-12000DP Series Parking Lift P/N 5900285 — Rev. A1 — February 2023...
- Page 21 Make sure the correct Crosstubes for the Platform have been selected Rear If not 2. The Slide Blocks should already be attached to the Crosstubes. , attach as shown below PL-12000DP Series Parking Lift P/N 5900285 — Rev. A1 — February 2023...
- Page 22 4. Use a Forklift or Shop Crane to carefully lower the Crosstubes into place down by the Baseplates. REAR assembly. REAR The following illustration shows the correct orientation for the Crosstubes on the Lift with WINDOWS facing toward Inside the lift. PL-12000DP Series Parking Lift P/N 5900285 — Rev. A1 — February 2023...
- Page 23 3. Attach each end of the Top Tube to the Tall Powerside Post and Tall Post. 4. Secure the Short Post to the Top Tube using the supplied M12 hardware. PL-12000DP Series Parking Lift P/N 5900285 — Rev. A1 — February 2023...
- Page 24 About the Safety Ladders There are three different lengths of Safety Ladders used on the PL-12000DP, their locations identified by each respective number (1,2, and 3) on the Lift are illustrated below. ⚠ Make sure to install the Safety Ladders correctly. If they are not, the Safety Locks...
- Page 25 Ladder runs through BOTH Slots. If the Ladder misses a Slot WARNING the Slide Blocks were not installed correctly, your Safety Locks will engage nor function correctly. PL-12000DP Series Parking Lift P/N 5900285 — Rev. A1 — February 2023...
- Page 26 , thread a Stop Nut on the Threaded Stud at the top; turning it down ½ in. from the top of the Stud. See following Graphic (Short Powerside Post installation next). Front View. Not all components shown. PL-12000DP Series Parking Lift P/N 5900285 — Rev. A1 — February 2023...
- Page 27 Safety Lock. Thus, producing a level platform. NOTICE Requires at least four sawhorses to aid in completing the installation. The following illustration shows the Front and Rear Crosstubes resting on sawhorses. PL-12000DP Series Parking Lift P/N 5900285 — Rev. A1 — February 2023...
- Page 28 3. To disengage the Slack Safeties after raising the Front Crosstube, press the Sheave and/or the weldment (they are connected and will move together) back towards the Ladder and the back of the Post. Crosstube components removed for clarity. Not all components shown. PL-12000DP Series Parking Lift P/N 5900285 — Rev. A1 — February 2023...
- Page 29 To secure the Ladders at the top plate, push the Bolt through the Spacer, Ladder, Stop Block, and then through the inside of the Post. 4. Take the second Washer and the Nut and install them on the end of the Bolt; secure the Nut. PL-12000DP Series Parking Lift P/N 5900285 — Rev. A1 — February 2023...
- Page 30 Finding the ~1.5-in. wide hole in the side of the Powerside Runway at the Power Post for the Flex Tube (which holds the Air, Return, and Hydraulic Hoses). The following illustration shows the correct orientation for the Powerside and Offside Runway. PL-12000DP Series Parking Lift P/N 5900285 — Rev. A1 — February 2023...
- Page 31 5. Using a Forklift or Shop Crane, pick up the Offside Runway and position it in the wide setting. Carefully lower the Powerside Runway onto the Crosstubes resting on the sawhorses. Make sure the Utility Rail is facing to the inside of the Lift PL-12000DP Series Parking Lift P/N 5900285 — Rev. A1 — February 2023...
- Page 32 The two Lifting Cables that share a Double Cable Sheave (Lifting Cables A and C, then Lifting Cables B and D) are routed around the same time in order to reinstall the Double Cable Sheaves. PL-12000DP Series Parking Lift P/N 5900285 — Rev. A1 — February 2023...
- Page 33 Threaded end. Match the Cable letter with the provided length letters are information. The following graphic details the cable routing and identifications for both Platforms (not all components shown). PL-12000DP Series Parking Lift P/N 5900285 — Rev. A1 — February 2023...
- Page 34 Lifting Cables for the PL-12000DP Platform 1 Cable Length Part Number Cable A1 153.50 in. / 3,900 mm. 5595712 Cable B1 217.00 in. / 5,515 mm. 5595714 Cable C1 316.00 in. / 8,031 mm. 5595627 Cable D1 379.50 in. / 9,637 mm.
- Page 35 Post, it must run under and up where the Gusset Sheave will be installed, and up to not routed exactly along these where the Slack Safety Sheave already is. If Cables are pathways , the runway operation and Slack Safeties will function correctly. PL-12000DP Series Parking Lift P/N 5900285 — Rev. A1 — February 2023...
- Page 36 Make sure Lifting Cable A rides in the bottom Sheave, and Cable C is in the top Sheave. The following drawing shows how to route the Lifting Cables around the Double Cable Sheaves. PL-12000DP Series Parking Lift P/N 5900285 — Rev. A1 — February 2023...
- Page 37 Lines by cutting lengths from the long roll of Tubing supplied with the Lift. • Elbow Compression Fittings. Each Return Line uses an Elbow Compression Fitting on the Hydraulic Cylinder and then another Elbow Compression Fitting on the Power Unit. PL-12000DP Series Parking Lift P/N 5900285 — Rev. A1 — February 2023...
- Page 38 The Air Line Elbow Connectors on the Crosstube Gussets come installed from the factory. PL-12000DP Series Parking Lift P/N 5900285 — Rev. A1 — February 2023...
- Page 39 Platform long enough so it will not pull tight when the Platform is raised. 2. Cut seven pieces of Tubing to the measured lengths from the roll of Tubing. PL-12000DP Series Parking Lift P/N 5900285 — Rev. A1 — February 2023...
- Page 40 4. Leave the Power Unit end of the Air Line hanging out of the Flex Tube opening for now. The Flex Tube, and the Air Line will be connected to a Tee Fitting and the Pushbutton Air Valve later in the procedure. PL-12000DP Series Parking Lift P/N 5900285 — Rev. A1 — February 2023...
- Page 41 Hydraulic Hoses and Fittings on the Lift, making your new Lift inoperable. Your Lift is shipped with clean components; however, BendPak strongly recommends taking secondary precautions and cleaning all Hydraulic Hoses and Fittings prior to making connections. It is better and less costly to take these extra steps now to avoid taking the Lift out of service later to fix issues that could have been prevented at the time of installation.
- Page 42 JIC to ORB Hydraulic Elbow Fitting. 5550008. The JIC end connects to the Hydraulic Hose and the ORB end connects to the Power Unit. Not connected at this point. PL-12000DP Series Parking Lift P/N 5900285 — Rev. A1 — February 2023...
- Page 43 4. Attach the NPT end of the Elbow Fitting to the Port and tighten it, while allowing the correct position to align with the soon to be installed hydraulic hose JIC end. Use Thread Sealant on NPT Threads only PL-12000DP Series Parking Lift P/N 5900285 — Rev. A1 — February 2023...
- Page 44 • (2X) COMP to NPT Elbow Fittings. 5550089. The COMP end connects the Return Line and the NPT end connects to the Power Unit and the Hydraulic Cylinder. PL-12000DP Series Parking Lift P/N 5900285 — Rev. A1 — February 2023...
- Page 45 Compression Elbow Fitting (5550089) into the Port where the Shipping Plug was. Note: Install all Elbow Fittings so that they are correctly tightened and positioned (clocked) to allow adjoining hose fittings to properly align. PL-12000DP Series Parking Lift P/N 5900285 — Rev. A1 — February 2023...
- Page 46 ⚠ CAUTION The Power Unit is heavy. BendPak recommends one person holds the Power Unit, while another person bolts it into place. The following drawing shows how to attach the Power Unit to the Power Post.
- Page 47 2. Fill the Hydraulic Fluid Reservoir on the Power Unit with the appropriate amount of Hydraulic Fluid. 3. When the Reservoir is full (approximately 1-in. from top), replace the Reservoir Cap. Do not connect the Power Unit to a power source at this point PL-12000DP Series Parking Lift P/N 5900285 — Rev. A1 — February 2023...
- Page 48 Always promptly clean any Hydraulic Fluid spills. If a leak is the source of the spill, lockout the Lift to prevent use until the Hydraulic System is repaired. PL-12000DP Series Parking Lift P/N 5900285 — Rev. A1 — February 2023...
- Page 49 Back Plate and the retaining Nut. This configuration is common, but not required. BendPak recommends orienting the Flex Tube so that the exiting lines will be adjacent to the Power Unit and the Pushbutton Air Valve’s connections.
- Page 50 Tube should create a gentle radius that does not pinch or collapse the Flex Tube. 11. Install the Flex Tube’s cut end into the Connector on the Flex Tube Angle Bracket. Refer to the figure below: PL-12000DP Series Parking Lift P/N 5900285 — Rev. A1 — February 2023...
- Page 51 Do not attach the Return Line to the Pushbutton Air Valve by mistake . Double check to make sure the Air Line is attached to the Pushbutton Air Valve. PL-12000DP Series Parking Lift P/N 5900285 — Rev. A1 — February 2023...
- Page 52 Install a Thermal Disconnect Switch. Ensures the equipment shuts down in the event of an overload or an overheated motor. Refer to Install a Thermal Disconnect Switch for more PL-12000DP Series Parking Lift P/N 5900285 — Rev. A1 — February 2023...
- Page 53 Protect each circuit with an appropriate time-del ay fuse or circuit breaker for the power unit supplied. • The following figure shows the configuration for the Power Unit. P1/P2 represents the Hydraulic Power Out; T1/T2 or CV1/CV2 commonly represents the Hydraulic Return. PL-12000DP Series Parking Lift P/N 5900285 — Rev. A1 — February 2023...
- Page 54 Do not run the Lift without an adequate supply of Hydraulic Fluid; otherwise, damage may occur to the Power Unit. All wiring in accordance with national, state, and local electrical codes. PL-12000DP Series Parking Lift P/N 5900285 — Rev. A1 — February 2023...
- Page 55 High electrical current that exceeds the motor’s full load amps (FLA) rating may result in permanent damage to the motor. BendPak strongly recommends exceeding the rated duty cycle of the Lift’s motor. PL-12000DP Series Parking Lift P/N 5900285 — Rev. A1 — February 2023...
- Page 56 Vehicle damage, personal injury, or even death. ⚠ CAUTION BendPak Lifts are supplied with installation instructions and concrete anchors that meet the criteria set by the current version of the American National Standard “Automotive Lifts – Safety Requirements for Construction, Testing, and Validation”, ANSI/ALI ALCTV.
- Page 57 Sleeve does not grip as strongly, which means less holding strength. If the hole is too wide, the Expansion Sleeve does not press against the Concrete with as much force, again resulting in less holding strength. BendPak recommends using a vacuum to clean the hole. Or compressed air; to make sure to thoroughly clean each hole ream the hole.
- Page 58 Do not shim a Post more than ½ in. with the provided Shims. A maximum of 2 in. is possible by ordering optional Shim Plates. Contact BendPak at (800) 253-2363, extension 191 to order. Please have the model and serial number of your Lift available.
- Page 59 Overhead view. Some components not shown. 3. Repeat Steps 1 and 2 for the remaining three Tire Stops. Make sure to chock the Vehicle’s Rear Tires when positioning in place on the Runways. PL-12000DP Series Parking Lift P/N 5900285 — Rev. A1 — February 2023...
- Page 60 Gusset Covers Each Gusset includes a cover to protect the Safety Release Mechanism and Sheave. 1. To install, simply snap each Gusset Cover into place as shown above. PL-12000DP Series Parking Lift P/N 5900285 — Rev. A1 — February 2023...
- Page 61 Aluminum Deck is not suitable for jacking Applying Anti-Slip Tape Anti-Slip Tape (5930195) is provided to service both runways on PL-12000DP/DPS four-post lifts that were produced without the non-skid, sandy grit runways. The supplied Anti-Slip Tape is used to increase the friction (grip) between the runway’s metal parking surface, and Vehicles and/or Personnel upon the runways.
- Page 62 Handle the tape by its edges. Minimize contact between adhesive and your hands. IMPORTANT! BendPak recommends two people work together to install. One person removes the backing and applies the Tape to the Runway, second holds the Tape in place over the guidelines marked on the Runway.
- Page 63 Operational Test BendPak recommends performing an Operational Test of your Lift with a typical Vehicle before starting normal usage (a Vehicle is not required, but is recommended). ⚠ WARNING NEVER To reduce the risk of property damage, personal injury, or loss of life, park any vehicle on the Lift’s runways without first placing two suitable wheel chocks...
- Page 64 Make sure a copy of the Installation and Operation Manual is left with the Lift. • If it has not been done already, perform an operational test of the Lift. Refer to Performing an Operational Test. PL-12000DP Series Parking Lift P/N 5900285 — Rev. A1 — February 2023...
-
Page 65: Operation
This section describes how to operate your Lift. BendPak recommends reading Lifting It Right from the Automotive Lift Institute prior to putting your Lift into normal operation. It is a guide to the considerations required for the safe operation of automotive Lifts. - Page 66 6. If not using the Lift any further, turn the ON/OFF Switch to OFF. 7. Make sure it is safe to drive the Vehicle off the Lift. 8. Drive the Vehicle off of the Platform. PL-12000DP Series Parking Lift P/N 5900285 — Rev. A1 — February 2023...
-
Page 67: Maintenance
⚠ WARNING Do not operate the Lift if there are maintenance issues; instead, take the Lift out of service, then contact the dealer, visit bendpak.com/support, email support@bendpak.com, or call (800) 253-2363. PL-12000DP Series Parking Lift P/N 5900285 — Rev. A1 — February 2023... - Page 68 With an awl, probe between wires and strands and lift any wires that appear loose. Evidence of internal broken wires may require a more extensive rope examination. PL-12000DP Series Parking Lift P/N 5900285 — Rev. A1 — February 2023...
-
Page 69: Troubleshooting
If the Lift is new, a break-in period may be needed; run the Lift several times each day. If the noises persist, contact BendPak Support. If issues continue with the Lift, take it out of service, then contact the dealer, go to bendpak.com/support, email... - Page 70 • To find an appropriate facility, visit the website earth911.com. PL-12000DP Series Parking Lift P/N 5900285 — Rev. A1 — February 2023...
-
Page 71: Wiring Diagrams
⚠ WARNING Failure to connect the Motor frame to equipment Ground by using the grounding cord, green screw, or green wire provided, may result in serious electric shock. PL-12000DP Series Parking Lift P/N 5900285 — Rev. A1 — February 2023... -
Page 72: Labels
LABELS PL-12000DP Series Parking Lift P/N 5900285 — Rev. A1 — February 2023... - Page 73 PL-12000DP Series Parking Lift P/N 5900285 — Rev. A1 — February 2023...
- Page 74 PL-12000DP Series Parking Lift P/N 5900285 — Rev. A1 — February 2023...
-
Page 75: Parts Drawings
Parts Drawings PL-12000DP Series Parking Lift P/N 5900285 — Rev. A1 — February 2023... - Page 76 PL-12000DP Series Parking Lift P/N 5900285 — Rev. A1 — February 2023...
- Page 77 PL-12000DP Series Parking Lift P/N 5900285 — Rev. A1 — February 2023...
- Page 78 PL-12000DP Series Parking Lift P/N 5900285 — Rev. A1 — February 2023...
- Page 79 PL-12000DP Series Parking Lift P/N 5900285 — Rev. A1 — February 2023...
- Page 80 PL-12000DP Series Parking Lift P/N 5900285 — Rev. A1 — February 2023...
- Page 81 PL-12000DP Series Parking Lift P/N 5900285 — Rev. A1 — February 2023...
- Page 82 PL-12000DP Series Parking Lift P/N 5900285 — Rev. A1 — February 2023...
- Page 83 PL-12000DP Series Parking Lift P/N 5900285 — Rev. A1 — February 2023...
- Page 84 PL-12000DP Series Parking Lift P/N 5900285 — Rev. A1 — February 2023...
- Page 85 PL-12000DP Series Parking Lift P/N 5900285 — Rev. A1 — February 2023...
- Page 86 PL-12000DP Series Parking Lift P/N 5900285 — Rev. A1 — February 2023...
- Page 87 PL-12000DP Series Parking Lift P/N 5900285 — Rev. A1 — February 2023...
- Page 88 PL-12000DP Series Parking Lift P/N 5900285 — Rev. A1 — February 2023...
- Page 89 PL-12000DP Series Parking Lift P/N 5900285 — Rev. A1 — February 2023...
- Page 90 PL-12000DP Series Parking Lift P/N 5900285 — Rev. A1 — February 2023...
- Page 91 PL-12000DP Series Parking Lift P/N 5900285 — Rev. A1 — February 2023...
- Page 92 PL-12000DP Series Parking Lift P/N 5900285 — Rev. A1 — February 2023...
-
Page 93: Maintenance Logs
Maintenance Log PL-12000DP Series Parking Lift P/N 5900285 — Rev. A1 — February 2023... - Page 94 Maintenance Log PL-12000DP Series Parking Lift P/N 5900285 — Rev. A1 — February 2023...
- Page 95 The ALI Store is your trusted source for workplace safety! Visit today and get the training and materials needed to work safely: www.autolift.org/ali-store/. PL-12000DP Series Parking Lift P/N 5900285 — Rev. A1 — February 2023...
- Page 96 1645 Lemonwood Drive Santa Paula, CA, 93060 USA © 2023 BendPak Inc. All rights reserved. bendpak.com...
Need help?
Do you have a question about the PL-12000DP and is the answer not in the manual?
Questions and answers