
Related Manuals for Esatto EBTDWW


Summary of Contents for Esatto EBTDWW
- Page 1 Model/s Version EBTDWW V1.2 0223 EBTDWS Everything you need for your Benchtop Dishwasher is in this User Manual...
-
Page 2: Esatto.house
1300 11 4357 and operation requirements of your appliance to ensure the most optimum performance. Again, thank you for choosing an Esatto appliance and we look forward to being of service to you. Kind Regards, The Residentia Team... -
Page 3: Table Of Contents
Contents Page 04 Page 06 Safety Information Product Overview Page 07 Page 09 Quick Start Guide Installation Instructions Page 14 Page 16 Operation Preparing & Instructions Loading Dishes Page 22 Page 24 Maintenance Troubleshooting & Cleaning Tips Page 26... -
Page 4: Safety Information
User Manual Safety Information When using your dishwasher, follow the precautions listed below: SAFETY INFORMATION DISPOSAL • Installation and repair can only be carried out • For disposing of package and the appliance by a qualified technician please go to a recycling center. Therefore cut •... - Page 5 Safety Information When using your dishwasher, follow the precautions listed below: EARTHING INSTRUCTIONS • This appliance must be earthed. In the event • Some dishwasher detergents are strongly of a malfunction or breakdown, earthing alkaline. They can be extremely dangerous will reduce the risk of an electric shock by if swallowed.
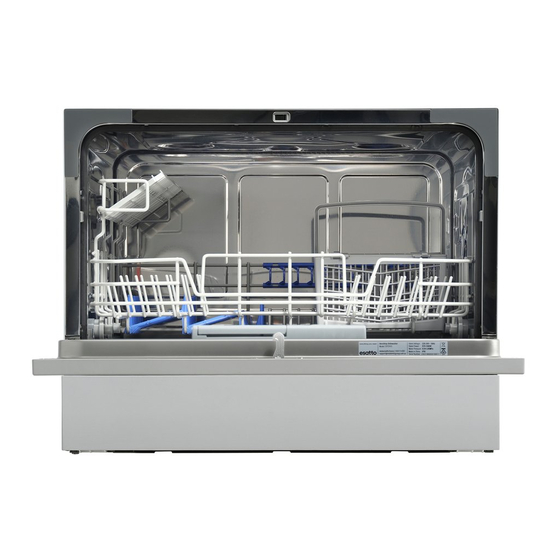
- Page 6 User Manual PRODUCT OVERVIEW PRODUCT OVERVIEW Product Overview IMPORTANT: IMPORTANT: To get the best performance from your dishwasher, read all operating instructions To get the best performance from your dishwasher, r before using it for the first time. before using it for the first time. Spray Arm Spray arm Filter Assembly...
- Page 7 QUICK USER GUIDE QUICK USER GUIDE QUICK USER GUIDE QUICK USER GUIDE Quick Start Guide QUICK USER GUIDE For more details on operation, please read the relevant content in this manual. Please read the corresponding content on the instruction manual for detailed...
- Page 8 User Manual This page is intentionally blank But if you want to draw something, make notes or even write a recipe... it’s all yours!
- Page 9 INSTALLATION INSTRUCTION Installation Instructions WARNING Electrical Shock Hazard hose to Power Connection, Water Supply & Draining Disconnect electrical power before installing dishwasher. Failure to do so could result in death or electrical shock. INSTALLATION INSTRUCTION Attention WARNING : The installation of the pipes and electrical equipments should be done by professionals.
- Page 10 User Manual Connection Of Drain Hoses Installation Instructions Insert the drain hose into a drain pipe with a minimum diameter of 4 cm, or let it run Water Supply & Draining into the sink, making sure to avoid bending or crimping it. The height of drain pipe must be less than 600mm.
-
Page 11: Installation Instructions
Installation Instructions Water Supply & Draining INSTALLATION INSTRUCTION Connection Of Drain Hoses Water Outlet WARNING Insert the drain hose into a drain pipe with a Connect the water drain hose. The drain hose Electrical Shock Hazard minimum diameter of 4 cm, or let it run into the must be correctly fitted to avoid water leaks. - Page 12 面板类型1 User Manual Operation Instructions Button Interface USING YOUR DISHWASHER Control Panel ➀ ➄ ➅ ➄ ➂ ➁ ➆ ➇ ➃ Operation (Button) Power Press this button to turn on your dishwasher, the screen lights up. Delay Press the button to set the delay time. Operation (Buttons) Press this button to select the appropriate washing program, the Program...
- Page 13 Operation Instructions Display Interface Display Rinse Aid If the “ ” indicator is lit, the dishwasher is low on rinse aid ➄ Warning and requires a refill. Indicators Water Faucet If the “ ” indicator is lit, it means the water faucet closed.
- Page 14 User Manual INSTALLATION INSTR Operation Instructions WARNING Electrical Sho Programming the Dishwasher Disconnect elec installing dishw Failure to do so electrical shock WASH CYCLE TABLE: Attention Note : The table below shows which programs are best for the levels of food residue on them and how much detergent is needed.
- Page 15 Operation Instructions Programming the Dishwasher STARTING A CYCLE WASH: FORGET TO ADD A DISH?: INSTALLATION INSTRUCTION ➀ Draw out the lower and upper basket, load the dishes A forgotten dish can be added any time before the detergent dispenser opens.
- Page 16 User Manual Preparing & Loading Dishes LOADING THE BASKETS LOADING THE BASKETS Loading the Baskets According to AUS/NZ S 2007.1 ACCORDING TO AS/NZS 2007.1: ACCORDING TO AS/NZS 2007.1: LOADING THE BASKETS 1.Basket: ACCORDING TO AS/NZS 2007.1: 1.Basket: Item Number Item Number 1.Basket: Item...
-
Page 17: Preparing & Loading Dishes
Preparing & Loading Dishes For Washing the Following Cutlery / Dishes RECOMMENDED: RECOMMENDED LOADING METHOD: Scrape off any large amounts of leftover food. Soften • Items such as cups, glasses, pots/pans, etc. are faced remnants of burnt food in pans. It is not necessary to rinse downwards. - Page 18 User Manual Preparing & Loading Dishes Loading the Baskets According to AUS/NZ S 2007.1 Loading the basket ced face up, in order All tableware can't be placed face up, in order rea and washing to improve the cleaning area and washing mended to place the performance, it is recommended to place the he basket...
- Page 19 Preparing & Loading Dishes Rinse-Aid & Detergent INSTALLATION INSTRUCTION WARNING Electrical Shock Hazard FUNCTION OF RINSE-AID AND DETERGENT: Disconnect electrical power before The rinse aid is released during the final rinse to prevent water from forming installing dishwasher. droplets on your dishes, which can leave spots and streaks. It also improves Failure to do so could result in death or drying by allowing water to roll off the dishes.
- Page 20 User Manual Rinse-Aid indicator Filling The Rinse Aid Reservoir Preparing & Loading Dishes The Rinse Aid Reservoir Filling the Rinse-Aid Reservoir 翻盖1 Rinse-Aid indicator nse-Aid indicator Rinse-Aid Indicator To open the dispenser, turn the cap Carefully pour in Filling The Rinse Aid Reservoir INSTALLATION INSTRUCTIO to the "open"...
- Page 21 Push latch to open esatto.house Filling The Detergent Dispenser The Detergent Dispenser Preparing & Loading Dishes Filling the Detergent Dispenser Push latch to open ush latch to open Press the release catch on the detergent Add detergent into th dispenser to open the cover.
- Page 22 User Manual Maintenance & Cleaning External & General Care THE DOOR AND THE DOOR SEAL: REMOVE THE PLUG: INSTALLATION INSTRUCTION Clean the door seals regularly with a soft damp cloth Before cleaning or performing maintenance, always to remove food deposits. When the dishwasher is remove the plug from the socket.
- Page 23 Open Open esatto.house the coarse filter and rotate it Lift fine filter up from main filter. ockwise to unlock the filter. Maintenance & Cleaning he filter upwards and out of Fine filter shwasher. Internal Care Main filter Main filter Open...
- Page 24 User Manual Troubleshooting Tips Reviewing the following pages may save you from calling for service Problem Possible Cause Solution Fuse has blown, or the circuit breaker Dishwasher does Replace fuse or reset circuit breaker. Remove tripped. not start any other appliances sharing the same circuit with the dishwasher.
- Page 25 Troubleshooting Tips Reviewing the following pages may save you from calling for service Problem Possible Cause Solution The dishes were not loaded into the The dishes do not appear See section titled “Preparing & Loading Dishes”, basket correctly. clean after washing located on pg 14) Program was not powerful enough.
- Page 26 User Manual Error Codes If there is a malfunction, the dishwasher will display error codes to identify these: Code Meaning Possible Cause Longer inlet time. The ‘Quick 30'’ light Faucet is not opened, water intake is flickers quickly restricted, or water pressure is too low. The ‘Quick 30' + Not reaching required Malfunction of the heating element.
- Page 27 Depth (D2) 812mm (with the door opened 90°) Manufacturer Esatto Manufacturer Esatto Manufacturer Esatto Type / Description EBTDWW, EBTDWS Type / Description EBTDWW,EBTDWS Type / Description EBTDWW,EBTDWS Standard Place Settings Standard place settings Standard place settings Energy Efficiency Class Energy efficiency class...
- Page 28 User Manual Warranty WARRANTY TERMS AND CONDITIONS IN THIS WARRANTY DISHWASHERS ‘acceptable quality’ as referred to in clause 10 of this warranty has the same meaning referred to in This document sets out the terms and conditions of the the ACL; product warranties for Residentia Group Appliances.
- Page 29 Warranty You will bear the cost of transportation, travel and For Appliances and services provided by Residentia delivery of the Appliance to and from Residentia Group Group in Australia, the Appliances come with a or its ASR. If you reside outside of the service area, you...
- Page 30 – that you can refer to at any time. Simply visit the below website, or ask your retailer h) damage caused by power outages or surges for help: www.esatto.house/nz/registration i) damage caused by pests (eg. rats, cockroaches etc.) 7. That if the product is a freestanding microwave oven or...
-
Page 31: Purchase Details
Attach your receipt to this page Purchase Details For future reference, please record the following information which can be found on the rating plate and the date of purchase which can be found on your sales invoice. STORE DETAILS... - Page 32 everything you need A RESIDENTIA GROUP INITIATIVE...
Need help?
Do you have a question about the EBTDWW and is the answer not in the manual?
Questions and answers