
Subscribe to Our Youtube Channel
Related Manuals for Esatto EDW7S


Summary of Contents for Esatto EDW7S
- Page 1 Product: Model Code/s: 60cm EDW7S Freestanding EDW7W Dishwasher User Manual Exactly what you need Online: Version: esatto.house V5 0721...
- Page 2 User Manual Appliances Exactly what you need...
- Page 3 Contents Welcome Important Safety Instructions Your Dishwasher Control Panel Technical Installation Information Instructions Preparing Your Operating Your Dishwasher Dishwasher Maintenance Troubleshooting and Cleaning Error Codes Attach Your Receipt Purchase Details Warranty...
- Page 4 — Head Office 165 Barkly Avenue At Esatto, we are customer obsessed and our Support Teams are there to ensure you get Burnley Victoria the most out of your appliance. Should you want to learn more about your dishwasher Australia 3121 such as the various washing programs or importantly taking care of the appliance, our —...
-
Page 5: Important Safety Instructions
Important Safety Instructions GENERAL SAFETY INSTRUCTIONS WARNING! When using your dishwasher, always follow the precautions listed below. Failure to do so can cause injury or damages. You may then not be covered by warranty for this damage. Only plug this appliance directly into an AC power supply which is properly earthed and had the correct voltage. - Page 6 User Manual Important Safety Instructions (Cont.) GENERAL SAFETY INSTRUCTIONS CONTINUED • During installation, the power supply must not be excessively or dangerously bent or flattened. • Do not tamper with controls. • The appliance needs to be connected to the main water valve using new hose sets. Old sets should not be reused.
-
Page 7: Your Dishwasher
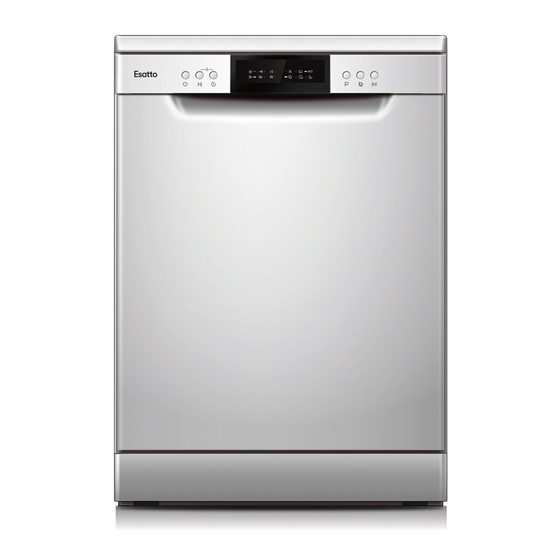
Your Dishwasher THE MAIN COMPONENTS Note: The images may differ slightly to your model and are for general reference only. Figure 1- Front view Figure 2- Back view... -
Page 8: The Control Panel
User Manual Control Panel THE CONTROL PANEL Figure 3- Control panel 1. On/Off button: switches the dishwasher On and Off. 2. Half-load Function button: this activates the Half-load function. Use this when you have less than 7 place settings of dishes, saving both energy and water consumption. This can only be used with the Intensive, ECO and 90 Min wash programs. -
Page 9: Technical Information
Technical Information Height: 845mm Width: 598mm Depth: 600mm (with door closed), 1175mm (with door open) Water Pressure: 0.04-1.0MPa=0.4-10 bar Power Supply: AC 220-240V/50Hz Power Consumption: 1760-2100W Capacity: 14 Place Settings... -
Page 10: Installation Instructions
User Manual Installation Instructions WARNING! Electrical shock hazard Disconnect electrical power before installing the dishwasher. Failure to do so could result in death or electrical shock. Important! The installation of the dishwasher, plumbing and electrical outlets should be completed by licenced tradespeople. -
Page 11: Water Supply And Drain Connection
Installation Instructions (Continued) WATER SUPPLY AND DRAIN CONNECTION Cold Water Connection Important! Your dishwasher should only be connected to the cold water outlet. It has an in-built heating element to heat up the water to the required temperatures depending on the selected wash program. - Page 12 User Manual Installation Instructions (Continued) WATER SUPPLY AND DRAIN CONNECTION CONTINUED Important! New waste traps typically have the dishwasher spigot sealed off with plastic and requires the plumber or licensed installer to drill out the center of the spigot to allow water to flow. It’s important to ensure this spigot is drilled out before calling our Service team to respond to a dishwasher failure, as there will be a fee payable should we attend and find this non-warranty installation fault.
-
Page 13: Preparing Your Dishwasher
Preparing Your Dishwasher RINSE AID Rinse aid is released during the dishwasher’s final rinse to prevent water from forming droplets on your dishes, which can leave spots and streaks. It also improves drying by allowing water to roll off the dishes. -
Page 14: Adjusting The Rinse-Aid Dispenser
User Manual Preparing Your Dishwasher (Continued) FILLING THE RINSE AID DISPENSER CONTINUED Step 3 Re-insert the Rinse-aid cap and screw in a clockwise direction to lock it in place. Refer to Figure 11. Figure 11- Re-fitting the cap onto the Rinse-aid dispenser. ADJUSTING THE RINSE-AID DISPENSER You can increase or decrease the amount of Rinse-aid being dispensed by your dishwasher for each cycle, using the adjustment dial. - Page 15 Preparing Your Dishwasher (Continued) FILLING THE DISHWASHER DETERGENT DISPENSER Step 1 Press the release catch on the detergent dispenser, to open the cover. Refer to Figure 13. Figure 13- Release catch to open the detergent dispenser cover. Step 2 Add the detergent (powder or tablet) into the larger cavity (labelled A in figure 14 below) which is used for the main wash cycle.
-
Page 16: Using The Baskets
User Manual Preparing Your Dishwasher (Continued) USING THE BASKETS Your dishwasher is supplied with an upper and lower basket, along with a removable plastic cutlery basket which is designed to sit in the lower basket. Adjusting the upper basket height The height positioning of your upper basket can easily be adjusted between two settings, allowing you to accommodate taller dishes in either the upper or lower basket. - Page 17 Preparing Your Dishwasher (Continued) USING THE BASKETS CONTINUED Step 4 Push in the upper basket. Figure 19- Sliding in the upper basket after adjusting its height position. FOLDING BACK THE GLASS RACKS To make room for taller items in the upper basket, you can raise the glass rack upwards, allowing you to lean the tall glasses against it (i.e.
-
Page 18: Recommendations For Loading
User Manual Preparing Your Dishwasher (Continued) PREPARING AND LOADING DISHES INTO YOUR BASKET RACKS Caution! Some items are not safe for use in dishwashers and can be damaged or become discoloured when washed within a dishwasher. Always check the care information on your utensils and crockery to ensure they are dishwasher safe. - Page 19 Preparing Your Dishwasher (Continued) Loading the upper basket rack The upper basket rack is designed to hold more delicate and lighter dishware such as glass, coffee/tea cups, saucers, small plates and small bowls. Position the dishes so that they will not get moved by the spray of the water.
-
Page 20: Operating Your Dishwasher
User Manual Operating Your Dishwasher TURNING YOUR DISHWASHER ON AND STARTING A WASH CYCLE Step 1 Load your dishwasher according to the guidelines in the Preparing Your Dishwasher section of this manual. Step 2 Load the dishwasher detergent dispenser (refer to section Preparing Your Dishwasher in this manual). - Page 21 Operating Your Dishwasher (Continued) YOUR DISHWASHERS’ WASH PROGRAMS Your Esatto dishwasher has the following wash programs. Please refer to the table below to determine which program is most suitable for each load. Program Process of Suggested deter- Running Energy...
-
Page 22: Changing The Program
User Manual Operating Your Dishwasher (Continued) CHANGING THE PROGRAM Once the dishwasher has started a wash cycle program, you can change the selected program within the first minute or so, otherwise the detergent may have been already released. When you start a new program, the dishwasher will drain any residual water, hence you will need to re-fill the detergent dispenser in the event that it’s already dispensed it. -
Page 23: Maintenance And Cleaning
Maintenance and Cleaning Some simple maintenance and cleaning steps must be followed to ensure that your dishwasher continues to operate at its optimum and without issue. Failure to follow these basic maintenance and cleaning steps may void your Manufacturer’s warranty or result in a service fee in the event of a technician attending site under warranty. - Page 24 User Manual Maintenance and Cleaning (Continued) INTERNAL CARE CONTINUED Step 2 With the filter assembly removed from the dishwasher, the fine filter can be pulled off the bottom of the filter assembly (refer to figure 25 below). This fine filter is covered by a fine mesh. Rinse this under running water from your tap and wipe any residual food residue off the filter.
- Page 25 Maintenance and Cleaning (Continued) WARNING! Do not over tighten the filters. Put the filters back in the correct sequence and securely lock in place, otherwise coarse debris could get into the system and cause a blockage or damage internally.
-
Page 26: Frost Protection
User Manual Maintenance and Cleaning (Continued) INTERNAL CARE CONTINUED Cleaning the interior cabinet Over time, grime can accumulate on the interior walls of the appliance. A quick wipe down will do wonders for removing any dishwasher odour which can develop over time. Step 1 Remove both the upper and lower basket racks and run them under hot water within the kitchen sink. - Page 27 Maintenance and Cleaning (Continued) GENERAL CARE ADVICE After every wash After every wash cycle, turn off the water supply to the dishwasher and leave the door slightly ajar to that moisture and odours are not trapped inside. Remove the plug Before undertaking any cleaning or maintenance steps, always remove the dishwasher’s plug from it’s...
-
Page 28: General Troubleshooting Steps
User Manual Troubleshooting GENERAL TROUBLESHOOTING STEPS Having an issue with your dishwasher? Before contacting our service team, please refer to the troubleshooting table below. Most issues can easily be rectified with some basic troubleshooting. Problem Possible Causes Actions to try My dishwasher Fuse blown, or the circuit Replace fuse or reset circuit breaker. - Page 29 Troubleshooting (Continued) Rattling noise in Items of crockery are loose Interrupt the program and rearrange the items of in the dishwasher. crockery. the dishwasher Knocking noise in This may be caused by This has no influence on the dishwasher function. If on-site installation or the in doubt, contact a qualified plumber.
-
Page 30: Error Codes
User Manual Error Codes If there is a malfunction the dishwasher will display error codes to identify the fault. Code Indicator Meanings Possible Causes The Rapid E1- Water entering the dish- Ensure that the water supply hose is un-kinked and program LED washer has exceeded the that the water supply tap is fully open. - Page 31 This page is intentionally left blank...
- Page 32 User Manual Attach your receipt to this page...
-
Page 33: Product Details
Purchase Details For future reference, please record the following information which can be found on the rating plate and the date of purchase which can be found on your sales invoice. STORE DETAILS STORE NAME ADDRESS TELEPHONE PURCHASE DATE PRODUCT DETAILS MODEL NO. -
Page 34: Warranty Information
User Manual Warranty Information AUSTRALIAN WARRANTY TERMS & CONDITIONS 1. IN THIS WARRANTY DISHWASHERS (a) ‘acceptable quality’ as referred to in clause 10 of this warranty has the same meaning referred to in the ACL; This document sets out the terms and conditions of the (b) ‘ACL’... - Page 35 Telephone contact (d) the Appliance was serviced or repaired by anyone other – Please call 1300 ESATTO (1300 372 886) than Residentia Group, an authorised repairer or ASR. Online portal (e) the maintenance guidelines within the product’s user –...
- Page 36 This page User Manual is intentionally left blank Appliances Exactly what you need A RESIDENTIA GROUP INITIATIVE...
Need help?
Do you have a question about the EDW7S and is the answer not in the manual?
Questions and answers