Advertisement
Quick Links
sauder.com
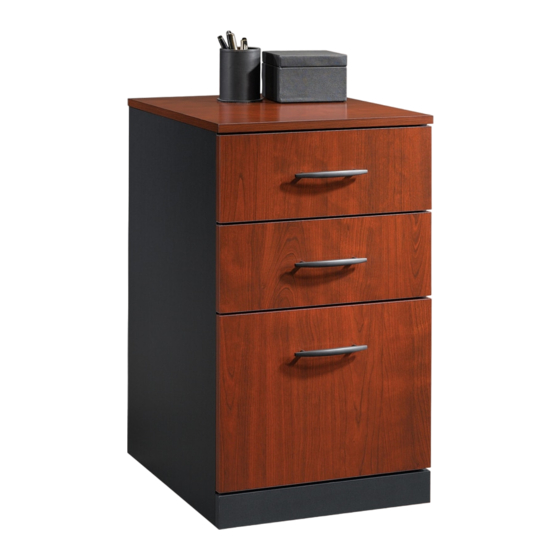
3-Drawer Pedestal
Via Collection | 401443
Need help? Visit Sauder.com to view video assembly tips or chat with a live rep.
Prefer the phone? Call 1-800-523-3987.
Share your journey!
Get all organized
and stuff .
NOTE: THIS INSTRUCTION
BOOKLET CONTAINS IMPORTANT
SAFETY INFORMATION.
PLEASE READ AND KEEP FOR
FUTURE REFERENCE.
English pg 1-20
Français pg 21-24
Español pg 25-28
Lot # 363349
06/26/14
Purchased: __________________
Be sure to give us a ring before
making any returns. 1-800-523-3987
Advertisement

Related Manuals for Sauder Via 401443


Summary of Contents for Sauder Via 401443
- Page 1 Via Collection | 401443 NOTE: THIS INSTRUCTION BOOKLET CONTAINS IMPORTANT SAFETY INFORMATION. Need help? Visit Sauder.com to view video assembly tips or chat with a live rep. PLEASE READ AND KEEP FOR FUTURE REFERENCE. Prefer the phone? Call 1-800-523-3987. English pg 1-20 Français pg 21-24...
- Page 2 Part Identifi cation No. 2 Phillips Screwdriver Tip Shown Actual Size Hardware Identifi cation Assembly Steps 5-20 Hammer Not actual size Français 21-24 Español 25-28 Tape Measure Safety 29-30 Warranty Skip the power trip. This time. Page 2 401443 www.sauder.com/services...
- Page 3 D707 SMALL DRAWER BOTTOM (2) BOTTOM (1) RIGHT DRAWER SIDE (1) D708 DRAWER BOTTOM (1) BACK (1) LEFT DRAWER SIDE (1) DRAWER FRONT (1) D107 SMALL RIGHT DRAWER SIDE (2) D109 D107 D707 D108 D109 D107 D707 D108 D708 www.sauder.com/services 401443 Page 3...
- Page 4 FASTENER - 12 (EXTENSION SET SHOWN SEPARATED) EXTENSION RAIL - 2 EXTENSION SLIDE - 2 FILE ROD - 2 PULL - 3 SUPPORT PIN - 4 METAL BRACKET - 3 TOUCH-UP PEN - 1 SLIDE CAM - 6 Page 4 401443 www.sauder.com/services...
- Page 5 29G SAFETY STOP - 3 INTERLOCK TRACK - 1 BLACK 9/16" LARGE HEAD SCREW - 22 BLACK 7/8" MACHINE SCREW - 6 PP GOLD 5/16" FLAT HEAD SCREW - 24 30S BLACK 1-9/16" FLAT HEAD SCREW - 12 www.sauder.com/services 401443 Page 5...
- Page 6 Assemble your unit on a carpeted fl oor or on the empty å carton to avoid scratching your unit or the fl oor. To begin assembly, push a SAUDER TWIST-LOCK® å FASTENER (S) into the large holes in the ENDS (A2 and B).
- Page 7 Step Step 2 Insert three SAFETY STOPS (29G) into the holes shown å in the RIGHT END (A2). This pin must insert into the location holes in the RIGHT END (A2). www.sauder.com/services 401443 Page 7...
- Page 8 The interlock system is a safety feature that prevents more than one drawer from opening at the same time. Do not Be sure the use excessive force to open the drawers. interlock track snaps into each cabinet actuator. Tape Measure Groove Page 8 401443 www.sauder.com/services...
- Page 9 If this happens, GOLD 5/16" FLAT HEAD SCREW open two drawers at the same time to override the (4 used in this step) interlock system. Remove the drawers to re-adjust the INTERLOCK TRACK assembly. www.sauder.com/services 401443 Page 9...
- Page 10 If this happens, open two GOLD 5/16" FLAT HEAD SCREW drawers at the same time to override the (8 used in this step) interlock system. Remove the drawers to re-adjust the INTERLOCK TRACK assembly. Roller end Roller end Page 10 401443 www.sauder.com/services...
- Page 11 Step 6 Fasten the BACK (E) and BOTTOM (D) to the LEFT å ® How to use the SAUDER TWIST-LOCK FASTENER END (B). Tighten four TWIST-LOCK® FASTENERS. 1. Insert the dowel end of the FASTENER into the hole of the adjoining part.
- Page 12 å TWIST-LOCK® FASTENERS. Roller end i t h o ® f a c S u r - L O I S T E R S T E N F A S These edges should be even. Page 12 401443 www.sauder.com/services...
- Page 13 Fasten the BASE (P) to the ENDS (A2 and B) and å BOTTOM (D). Use three BLACK 9/16" LARGE HEAD SCREWS (NN) through the METAL BRACKETS and into the BASE. BLACK 9/16" LARGE HEAD SCREW (6 used in this step) Unfi nished edge www.sauder.com/services 401443 Page 13...
- Page 14 BLACK 9/16" LARGE HEAD SCREWS (NN). Don't worry. It isn't Rome. This can be built in a day. BLACK 9/16" LARGE HEAD SCREW (16 used in this step) The tabs on the NON-SWIVEL CASTERS (Q) must insert into these holes. Page 14 401443 www.sauder.com/services...
- Page 15 D88). Use four BLACK 1-9/16" FLAT HEAD SCREWS (30S). NOTE: Be sure the DRAWER BOTTOM (D708) inserts into the å groove of the DRAWER BACK (D78). Repeat this step for the small drawers using parts K, D107, D108, å D109, and D707. www.sauder.com/services 401443 Page 15...
- Page 16 GOLD 5/16" FLAT HEAD SCREW NOTE: Use holes #1 and #3 in each DRAWER SLIDE. å (6 used in this step) Screw head - turn CAM to line up holes in the SLIDES with holes in DRAWER SIDES Open end Page 16 401443 www.sauder.com/services...
- Page 17 Screw head - turn CAM to line up holes in the SLIDES with holes in DRAWER SIDES Slot These tabs must insert into the slots. GOLD 5/16" FLAT HEAD SCREW (6 used in this step) Post www.sauder.com/services 401443 Page 17...
- Page 18 FILE RODS (EE), then press this FILE GLIDE over the LEFT DRAWER SIDE (D88). Insert the FILE RODS into the holes of your choice in the FILE GLIDES, depending on your fi le sizes. BLACK 7/8" MACHINE SCREW (6 used in this step) Page 18 401443 www.sauder.com/services...
- Page 19 For long-term care and maintenance of your unit, you å may touch up the edges with the TOUCH-UP PEN (JJ). 30 lbs. 10 lbs. each in the small drawers 30 lbs. www.sauder.com/services 401443 Page 19...
- Page 20 #3. The higher the screw in the oblong hole, the higher your drawer front will be. The lower the screw, the lower the drawer front. Page 20 401443 www.sauder.com/services...
- Page 21 QUANTITÉ d’ a chat de cet élément et conserver le livret pour future référence. EXTRÉMITÉ DROITE ..........1 35GA ÉLÉMENT DROITE ...........2 Pour contacter Sauder EXTRÉMITÉ GAUCHE ..........1 35GB ÉLÉMENT GAUCHE ..........2 en ce qui concerne cet DESSUS................1 35GC TIROIR DROIT..............2 élément, faire référence...
- Page 22 Pour commencer l'assemblage, enfoncer une FIXATION TWIST-LOCK® et B). Utiliser quatre VIS TÊTE PLATE 8 mm DORÉES (PP). SAUDER (S) dans les gros trous de l'EXTRÉMITÉ DROITE (A2) et l'EXTRÉMITÉ GAUCHE (B). REMARQUE : Pour chaque GLISSIÈRE D'EXTENSION, faire tourner une VIS dans le trou indiqué...
- Page 23 DE PETIT TIROIR (D108). REMARQUE : L'extrémité à roulette du TIROIR GAUCHE doit se trouver vers l’ a rrière du tiroir. REMARQUE : Utiliser les trous nº 1 et nº 3 dans chacun COULISSE DE TIROIR. www.sauder.com/services 401443 Page 23...
- Page 24 Enfi ler une autre ARMATURE POUR DOSSIERS (6B) sur l'autre pour meubles ou d’un chiff on humide. Essuyer. extrémité des GUIDES POUR DOSSIERS (EE) et appuyer cette ARMATURE POUR DOSSIERS sur le CÔTÉ GAUCHE DE TIROIR (D88). Page 24 401443 www.sauder.com/services...
- Page 25 EXTREMO DERECHO ..........1 35GA GABINETE DERECHO ..........2 et conserver le livret pour future référence. 35GB GABINETE IZQUIERDO ..........2 EXTREMO IZQUIERDO ..........1 Pour contacter Sauder 35GC CAJÓN DERECHO .............2 PANEL SUPERIOR ............1 en ce qui concerne cet 35GD CAJÓN IZQUIERDO ..........2 FONDO .................1 élément, faire référence...
- Page 26 Para comenzar el ensamblaje, empuje un SUJETADOR cuatro TORNILLOS DORADOS DE CABEZA PERDIDA de 8 mm (PP). TWIST-LOCK® SAUDER (S) dentro de los agujeros grandes del EXTREMO DERECHO (A2) y del EXTREMO IZQUIERDO (B). NOTA: Para cada RIEL DE EXTENSIÓN, atornille un TORNILLO dentro del agujero indicado en el diagrama ampliado.
- Page 27 CAJONES IZQUIERDOS (35GD) sobre los LADOS IZQUIERDOS DE CAJÓN PEQUEÑO (D108). NOTA: El extremo con rodillo del CAJÓN IZQUIERDO debe estar ubicado en la parte posterior del cajón. NOTA: Utilice los agujeros No. 1 y No. 3 de cada CORREDERA DE CAJÓN. www.sauder.com/services 401443 Page 27...
- Page 28 Deslice otro CORRIMIENTO DE ARCHIVERO (6B) sobre el otro muebles preferido o un paño húmedo. Seque con un paño. extremo de las VARILLAS DE ARCHIVERO (EE) y presione este CORRIMIENTO DE ARCHIVERO sobre el LADO IZQUIERDO DE CAJÓN (D88). Page 28 401443 www.sauder.com/services...
- Page 29 Les téléviseurs peuvent être très un téléviseur. téléviseur. lourds. De plus, le poids et l’emplacement du tube image ont tendance à rendre les téléviseurs instables et enclins à tomber vers l’ a vant. www.sauder.com/services 401443 Page 29...
- Page 30 Además, soportar un televisor. diseñadas para soportar un televisor. el peso y la ubicación del tubo de imagen tienden a causar la inestabilidad de televisores y son propensos a inclinarse hacia adelante. Page 30 401443 www.sauder.com/services...
- Page 31 GARANTIE LIMITÉE DE 5 ANS 1. Sauder Woodworking Co. (Sauder®) off re une couverture de garantie limitée à l’ a cheteur 4. La présente garantie ne s’ a pplique qu’ a ux défauts garantis qui se produisent pour initial du présent produit pendant une période de cinq ans à...
- Page 32 Dear Valued Customer: So, how did it go? Thanks so much for choosing Sauder® furniture. I hope the Set a world record for speed? purchase and assembly process was a positive experience Feeling good about yourself? and you feel good about the furniture you just built. If you Nice.
Need help?
Do you have a question about the Via 401443 and is the answer not in the manual?
Questions and answers