Chauvet Professional MAVERICK FORCE 2 PROFILE User Manual
Hide thumbs
Also See for MAVERICK FORCE 2 PROFILE:
- Quick reference manual (72 pages) ,
- User manual (34 pages) ,
- Quick reference manual (17 pages)
Table of Contents
Advertisement
Quick Links
Advertisement
Table of Contents

Related Manuals for Chauvet Professional MAVERICK FORCE 2 PROFILE


Summary of Contents for Chauvet Professional MAVERICK FORCE 2 PROFILE
- Page 1 User Manual Model ID: MAVERICKFORCE2PROFILE...
- Page 2 Edition Notes The Maverick Force 2 Profile User Manual includes a description, safety precautions, installation, programming, operation and maintenance instructions for the Maverick Force 2 Profile as of the release date of this edition. Trademarks Chauvet, Chauvet Professional, the Chauvet logo, Maverick, and Maverick Force are registered trademarks or trademarks of Chauvet &...
-
Page 3: Table Of Contents
Control Panel Description ................ Battery Powered Display ................. Home Screen..................Control Panel Lock ................Passcode ....................Technician Mode ................. Menu Map.................... Configuration (DMX, Art-Net™, sACN) ..........Control Mode ................... Control Personalities................Starting Address ..................Maverick Force 2 Profile User Manual Rev. 4... - Page 4 Manual Test ..................... System Information................Offset Mode (Zero Adjust) ..............Web Server..................Gobo Wheels..................Gobo Dimensions ..................Gobo Replacement.................. 5. Maintenance................Product Maintenance................6. Technical Specifications ............Contact Us ..................Warranty & Returns ................Maverick Force 2 Profile User Manual Rev. 4...
-
Page 5: Before You Begin
This equipment should be installed and operated with a minimum distance of 20cm between the radiator and the user. This transmitter must not be co-located or operating in conjunction with any other antenna or transmitter. Maverick Force 2 Profile User Manual Rev. 4... -
Page 6: Safety Notes
LEDs, contributing to shorter lifespans if always used at full intensity. The average LED lifespan is 40,000 to 50,000 hours. To extend LED lifespan, maintain proper ventilation around the product, and limit the overall intensity. Maverick Force 2 Profile User Manual Rev. 4... -
Page 7: Introduction
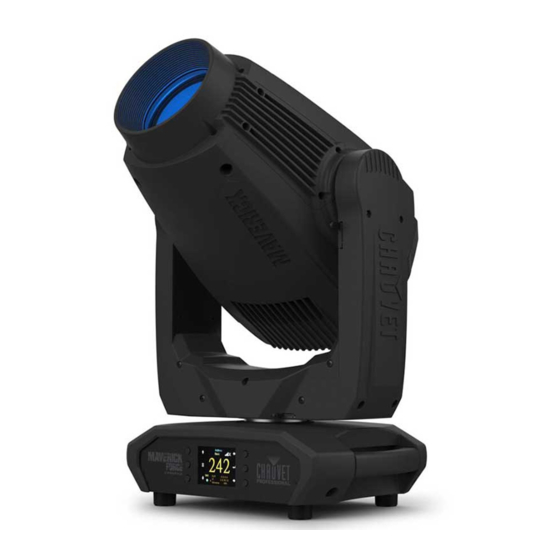
2. Introduction Description The Maverick Force 2 Profile is a lightweight, tour-grade moving head with a big presence. The powerful product features an output of over 20,000 lumens and an artillery of speedy effects housed in a deceptively compact frame, under 60lbs. The Maverick Force 2 Profile features CMY + CTO color-mixing, a color wheel with a CTB and CRI option, and an extensive zoom range of 7 to over 50 degrees that maintains a flat field of focus even when fully wide. -
Page 8: Product Dimensions
17.79 in 452 mm 21.72 in 552 mm 13.9 in 26.38 in 353 mm 670 mm 4.51 in 114 mm 15.51 in 394 mm 10.71 in 272 mm 10.0 in 254 mm Maverick Force 2 Profile User Manual Rev. 4... -
Page 9: Setup
3. Setup AC Power The Maverick Force 2 Profile has an auto-ranging power supply and it can work with an input voltage range of 100 to 240 VAC, 50/60 Hz. To determine the product’s power requirements (circuit breaker, power outlet, and wiring), use the current value listed on the label affixed to the product’s back panel, or refer to the product’s specifications chart. -
Page 10: Mounting
When rigging the product onto a truss, use a mounting clamp of appropriate weight capacity. Procedure The Maverick Force 2 Profile comes with 2 omega brackets to which the user can directly attach mounting clamps (sold separately). Make sure the clamps are capable of supporting the weight of this product. Use at least two mounting points per product. -
Page 11: Signal Connections
DMX controller, download the DMX Primer from the Chauvet website: www.chauvetprofessional.com. DMX Linking It is possible to link the Maverick Force 2 Profile to a DMX controller using a 3 or 5-pin DMX connection or a WDMX connection. For more information about DMX, read the DMX primer at: https:// www.chauvetprofessional.com/wp-content/uploads/2016/06/DMX_Primer.pdf. -
Page 12: Operation
4. Operation Touchscreen Control Panel The Maverick Force 2 Profile has a touchscreen display as well as 6 control buttons. Navigate the menu structure by pressing the buttons, touching the images of the buttons on the sides of the display, or touching the desired menu option on the display directly. -
Page 13: Menu Map
Operation Menu Map Refer to the Maverick Force 2 Profile product page on www.chauvetprofessional.com for the latest menu map. Main Level Programming Levels Description Address 001–480 Sets the starting address Manual Manually set IP address IP Mode DHCP Network sets IP address... - Page 14 Recorded preset menu Preset Select PRESET B options PRESET C Allows recorded preset menu options to be transferred to Preset Sync other Maverick Force 2 Profile fixtures in the DMX daisy chain Maverick Force 2 Profile User Manual Rev. 4...
- Page 15 Blade1- 2 Fine Blade2- 1 Blade2- 1 Fine Blade2- 2 Blade2- 2 Fine Blade3- 1 Blade3- 1 Fine Blade3- 2 Blade3- 2 Fine Blade4- 1 Blade4- 1 Fine Blade4- 2 Blade4- 2 Fine Maverick Force 2 Profile User Manual Rev. 4...
- Page 16 _ _ _ _ _ Error! Frequency Pan Fine Tilt Tilt Fine P/T Speed Channel Shows all current values _ _ _ Information from input signals, 000–255 Dimmer Dimmer Fine Shutter Virtual Shaking Cyan Magenta Maverick Force 2 Profile User Manual Rev. 4...
- Page 17 Blade4- 1 Fine Blade4- 2 Blade4- 2 Fine Blade Rotate Blade. Rota Fine Focus Focus Fine Focus Auto Zoom Zoom Fine Prism Prism Rotate Iris Frost CMY Macro CMY Macro Speed Special Function Maverick Force 2 Profile User Manual Rev. 4...
-
Page 18: Configuration (Dmx, Art-Net™, Sacn)
Use control configurations to operate the product with a DMX, Art-Net™, or sACN controller. Control Mode The Maverick Force 2 Profile works with wired DMX, WDMX, Art-Net™, and sACN control signals. To select which protocol to use: 1. Go to the Settings main level. -
Page 19: Control Channel Assignments And Values
042 048 CRI 049 059 CTB 060 187 Color wheel indexing 188 219 Color scroll, fast to slow 220 223 Stop 224 255 Reverse color scroll, slow to fast Maverick Force 2 Profile User Manual Rev. 4... - Page 20 064 145 Gobo rotation, fast to slow Gobo 2 Rotate 146 149 Stop 150 231 Reverse gobo rotation, slow to fast 232 255 Bounce effect, short to long Maverick Force 2 Profile User Manual Rev. 4...
- Page 21 064 127 Auto change, slow to fast Iris 128 191 Slow open, fast close (slow to fast) 192 255 Slow close, fast open (slow to fast) Frost 000 255 0–100% Maverick Force 2 Profile User Manual Rev. 4...
- Page 22 226 230 Iris smooth mode 231 235 XY swap on 236 240 XY swap off 241 245 Minimum zoom focus on 246 250 Minimum zoom focus off 251 255 No function Maverick Force 2 Profile User Manual Rev. 4...
-
Page 23: Configuration (Settings)
3. Select from 270 (270°), 180 (180°), or 90 (90°). Blackout on Movement To set the Maverick Force 2 Profile to black out on pan or tilt movement, color wheel movement, or gobo wheel movement: 1. Go to the Settings main level. -
Page 24: Wdmx Reset
Operation WDMX Reset To reset the WDMX connection and allow the Maverick Force 2 Profile to connect to a WDMX transmitter: 1. Go to the Settings main level. 2. Select the WDMX Reset option. 3. Select from NO (do not reset), or YES (reset the WDMX connection). -
Page 25: Preset Selection
1. Connect the Maverick Force 2 Profile products to receive the Presets by a DMX daisy chain. 2. Make the Maverick Force 2 Profile with the Presets to transfer the first in the DMX daisy chain. 3. Power on all of the products. -
Page 26: Test Mode
Operation Test Mode Auto Test To have the Maverick Force 2 Profile automatically test all functions one after the other: 1. Go to the Test main level. 2. Select the Auto Test option. Manual Test To manually test an individual function of the Maverick Force 2 Profile: 1. -
Page 27: Web Server
Operation Web Server The Maverick Force 2 Profile Web Server can be accessed by any computer on the same network as the product. It allows network access to system information, settings such as control setup, manual testing of all functions, firmware updates, and the ability to change the Web Server password. -
Page 28: Gobo Wheels
Chess Shower Glass Granny Sue Ballistic Glass Color Weave Four Eyes Indigo Square Breakup Gobo Dimensions Gobo Wheel 1 Gobo Wheel 2 25.5 mm 25.5 mm 20 mm 18.5 mm IMAGE IMAGE Maverick Force 2 Profile User Manual Rev. 4... -
Page 29: Gobo Replacement
8. Push the gobo holder inwards. DO NOT force the gobo holder into the gobo wheel slot. If correctly installed, the gobo holder should easily slide into the gobo wheel slot. Diagram Locate Pull Back Remove Gobo Holder Gobo Retaining Ring Maverick Force 2 Profile User Manual Rev. 4... -
Page 30: Maintenance
7. Gently polish the transparent surfaces until they are free of haze and lint. Always dry the transparent surfaces carefully after cleaning them. Do not spin the cooling fans with compressed air. Damage may result. Maverick Force 2 Profile User Manual Rev. 4... -
Page 31: Technical Specifications
Channel Range Amphenol XLR Net RJ45 in/out 33 or 50 Ordering Product Name Item Name Item Code UPC Number Maverick Force 2 Profile MAVERICKFORCE2PROFILE 08011698 781462220464 UL 1573 CSA C22.2 No. 166 E113093 Maverick Force 2 Profile User Manual Rev. 4... -
Page 32: Contact Us
For warranty terms and conditions and return information, please visit our website. For customers in the United States and Mexico: www.chauvetlighting.com/warranty-registration. For customers in the United Kingdom, Republic of Ireland, Belgium, the Netherlands, Luxembourg, France, and Germany: www.chauvetlighting.eu/warranty-registration. Maverick Force 2 Profile User Manual Rev. 4...
Need help?
Do you have a question about the MAVERICK FORCE 2 PROFILE and is the answer not in the manual?
Questions and answers