Advertisement
Quick Links
sauder.com
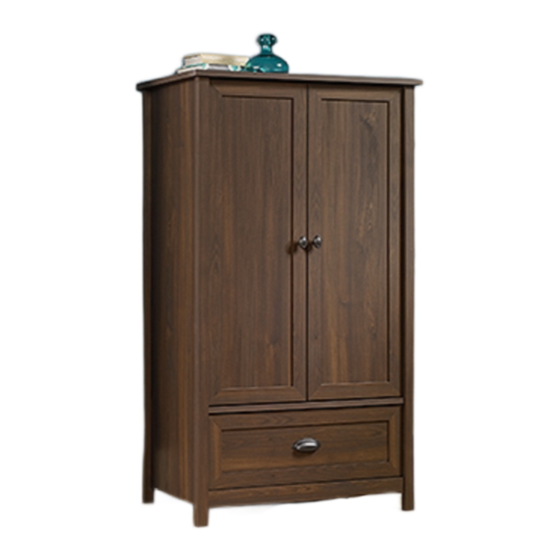
Armoire
County Line Collection | Model 415995
Need help? Visit Sauder.com to view video assembly tips or chat with a live rep.
Prefer the phone? Call 1-800-523-3987.
Share your journey!
You could use a new
hide-and-seek spot.
NOTE: THIS INSTRUCTION
BOOKLET CONTAINS IMPORTANT
SAFETY INFORMATION.
PLEASE READ AND KEEP FOR
FUTURE REFERENCE.
English pg 1-22
Français pg 23-25
Español pg 26-28
Lot # 375987
07/22/15
Purchased: __________________
Be sure to give us a ring before
making any returns. 1-800-523-3987
Advertisement

Related Manuals for Sauder County Line 415995


Summary of Contents for Sauder County Line 415995
- Page 1 County Line Collection | Model 415995 NOTE: THIS INSTRUCTION BOOKLET CONTAINS IMPORTANT SAFETY INFORMATION. Need help? Visit Sauder.com to view video assembly tips or chat with a live rep. PLEASE READ AND KEEP FOR FUTURE REFERENCE. Prefer the phone? Call 1-800-523-3987.
- Page 2 Assembly Tools Required Part Identifi cation No. 2 Phillips Screwdriver Tip Shown Actual Size Hardware Identifi cation Assembly Steps 5-22 Hammer Not actual size Français 23-25 Español 26-28 Skip the power trip. Safety 29-30 This time. Warranty Page 2 415995 www.sauder.com/services...
- Page 3 DRAWER BACK (1) D986 DRAWER BOTTOM (1) SHELF (1) BACK (1) DOOR (2) ADJUSTABLE SHELF (2) RIGHT FRONT LEG (1) LEFT FRONT LEG (1) BACK LEG (2) BOTTOM SKIRT (1) DRAWER FRONT (1) DRAWER BRACE (1) D986 www.sauder.com/services 415995 Page 3...
- Page 4 BLACK 9/16" LARGE HEAD SCREW - 5 BLACK 1/2" FLAT HEAD SCREW - 8 30S BLACK 1-9/16" FLAT HEAD SCREW - 5 BLACK 2-1/4" FLAT HEAD SCREW - 9 SILVER 1/4" MACHINE SCREW - 2 GOLD 1" MACHINE SCREW - 2 Page 4 415995 www.sauder.com/services...
- Page 5 Assemble your unit on a carpeted fl oor or on the empty å carton to avoid scratching your unit or the fl oor. To begin assembly, push a SAUDER TWIST-LOCK® å FASTENER (10F) into the large holes in the ENDS (A2 and B2).
- Page 6 Push nine HIDDEN CAMS (1F) into the ENDS (A2 and B2) å and DRAWER BRACE (M65). (9 used) Arrow Arrow Arrow (9 used) Hole The arrow in the HIDDEN CAM must point toward the hole in the edge of the board. Page 6 415995 www.sauder.com/services...
- Page 7 Tighten eight HIDDEN CAMS. NOTE: Be sure the WOOD DOWELS in the ENDS insert into the å holes in the FRONT LEGS. These surfaces must be even. These surfaces must be even. The LEG should overhang this edge. www.sauder.com/services 415995 Page 7...
- Page 8 Fasten the BACK LEGS (K) to the ENDS (A2 and B2). Use å eight BLACK 2-1/4" FLAT HEAD SCREWS (26S). Remember: Righty tighty. Lefty loosey. These surfaces must be even. The LEG should overhang this edge. BLACK 2-1/4" FLAT HEAD SCREW (8 used in this step) Page 8 415995 www.sauder.com/services...
- Page 9 Fasten the UNIVERSAL CABINET RAILS* (40DA) to å the ENDS (A2 and B2). Use four GOLD 5/16" FLAT HEAD SCREWS (3S). *patent pending glide system å GOLD 5/16" FLAT HEAD SCREW (4 used in this step) Glide end Glide end www.sauder.com/services 415995 Page 9...
- Page 10 TWIST-LOCK® FASTENERS. Do not stand the unit upright without the BACK fastened. The unit may collapse. ® How to use the SAUDER TWIST-LOCK FASTENER 1. Insert the dowel end of the FASTENER into the hole of the adjoining part.
- Page 11 Fasten the SHELF (E) to the LEFT END (B2). Tighten å two TWIST-LOCK® FASTENERS. Finished edge S u r f a c i t h I S T - L O ® F A S T E N E R www.sauder.com/services 415995 Page 11...
- Page 12 Notched edge S u r f a c i t h I S T - L O ® F A S T E N E R Slide the BOTTOM SKIRT (L) Groove onto the notched edge. Page 12 415995 www.sauder.com/services...
- Page 13 Rome. This can be built Push two DOOR STOPS (4I) into the holes in the TOP (C). å in a day. i t h o f a c S u r D E N H I D www.sauder.com/services 415995 Page 13...
- Page 14 Fasten the BACK (F) to your unit using the NAILS (1N). å NOTE: Be sure to tap NAILS into the holes that line up å over the SHELF (E). NAIL (44 used in this step) These holes must line up over the SHELF (E). Page 14 415995 www.sauder.com/services...
- Page 15 Step 11 Fasten two HINGES (14H) to each DOOR (G). Use eight å BLACK 1/2" FLAT HEAD SCREWS (11S). BLACK 1/2" FLAT HEAD SCREW (8 used in this step) www.sauder.com/services 415995 Page 15...
- Page 16 Fasten a KNOB (69K) to the DOOR (G). Use a GOLD 1" å MACHINE SCREW (50S). Mounting screw Repeat this step for the other DOOR (G). å See the next step for DOOR adjustments. å Hinge GOLD 1" MACHINE SCREW (2 used for the KNOBS) Page 16 415995 www.sauder.com/services...
- Page 17 To adjust the DOORS in or out (depth), loosen the mounting å screw one turn and move the DOORS in or out, as needed. Tighten the mounting screw after making adjustments. Mounting screw (depth) Adjusting screw (horizontal) (vertical adjustment) www.sauder.com/services 415995 Page 17...
- Page 18 (4 used in this step) Groove With the palm of your hand, tap the DRAWER BOTTOM down into the groove. D986 fi n i s h r f a Be sure the DRAWER BOTTOM inserts into the DRAWER FRONT groove. Page 18 415995 www.sauder.com/services...
- Page 19 Surface with HIDDEN CAM Start each screw a few turns before completely tightening any of them. BLACK 1-9/16" FLAT HEAD SCREW (5 used in this step) Be sure the DRAWER BOTTOM inserts into the DRAWER BACK groove. www.sauder.com/services 415995 Page 19...
- Page 20 Fasten the PULL (98K) to the DRAWER FRONT (M). å Use two WASHERS (10I) and two SILVER 1/4" MACHINE SCREWS (61S). Glide end SILVER 1/4" MACHINE SCREW (2 used for the PULLS) Glide end GOLD 5/16" FLAT HEAD SCREW (4 used in this step) Page 20 415995 www.sauder.com/services...
- Page 21 This is a permanent label. Do not remove. Cette étiquette est permanente. Ne pas l’enlever. Esta es una etiqueta permanente. No remover. 10/16 395783 Place the glide on the SLIDE behind the glide on the RAIL. (8 used) D986 www.sauder.com/services 415995 Page 21...
- Page 22 (1 used into a stud in your wall) BLACK 9/16" LARGE HEAD SCREW (1 used into the top of your unit) 10 lbs. 25 lbs. 25 lbs. 10 lbs. 25 lbs. (6 used) To cover HIDDEN CAMS Page 22 415995 www.sauder.com/services...
- Page 23 EXTRÉMITÉ DROITE ..........1 10F FIXATION TWIST-LOCK® ........12 pour future référence. EXTRÉMITÉ GAUCHE...........1 15F CHEVILLE EN BOIS ...........2 Pour contacter Sauder en ce qui concerne cet DESSUS ................1 CONSOLE DE SÉCURITÉ ........1 élément, faire référence DESSOUS ..............1 CONSOLE DE DEVANT DE TIROIR ....1...
- Page 24 Enfi ler la MOULURE DE DESSOUS* (L) sur le chant cranté du DESSOUS (D). Pour commencer l'assemblage, enfoncer une FIXATION TWIST-LOCK® SAUDER (10F) dans les gros trous des EXTRÉMITÉS (A2 et B2). * Brevet État Unis n° 5,499,886 Répéter cette étape pour le DESSOUS (D) et la TABLETTE (E).
- Page 25 1 et nº 2. REMARQUE : Les coulisses ne sont pas sensées tourner. Fixer la POIGNÉE (98K) au DEVANT DE TIROIR (M). Utiliser deux RONDELLES (10I) et deux VIS À MÉTAUX 6 mm ARGENTÉES (61S). www.sauder.com/services 415995 Page 25...
- Page 26 EXTREMO DERECHO..........1 MÉNSULA DE SEGURIDAD .........1 et conserver le livret EXTREMO IZQUIERDO ........1 MÉNSULA DE CARA DE CAJÓN .....1 pour future référence. Pour contacter Sauder PANEL SUPERIOR............1 14H BISAGRA ................4 en ce qui concerne cet FONDO ................1 TOPE DE PUERTA ............2 élément, faire référence...
- Page 27 Para comenzar el ensamblaje, empuje un SUJETADOR PASO 8 TWIST-LOCK® SAUDER (10F) dentro de los agujeros grandes de los EXTREMOS (A2 y B2). Fije el FONDO (D) al EXTREMO IZQUIERDO (B2). Apriete dos SUJETADORES TWIST-LOCK®.
- Page 28 No. 1 y No. 2. NOTA: Los corrimientos no están concebidos para rotar. Fije el TIRADOR (98K) a la CARA DE CAJÓN (M). Utilice dos ARANDELAS (10I) y dos TORNILLOS PLATEADOS PARA METAL de 6 mm (61S). Page 28 415995 www.sauder.com/services...
- Page 29 • Ne pas pousser le mobilier, surtout sur la être très lourd. moquette. Se faire aider par une autre personne pour soulever l’élément et le mettre en place • Cette unité doit être placée contre un mur.. www.sauder.com/services 415995 Page 29...
- Page 30 • No empuje la unidad, especialmente sobre ser muy pesado. un piso alfombrado. Pide la ayuda de otra persona para levantar la unidad y colocarla en lugar. • Esta unidad debe ser colocada contra una pared. Page 30 415995 www.sauder.com/services...
- Page 31 à compter de la date d'achat la première fois et qui sont signalés à Sauder dans les limites de couverture de la contre tout défaut de matériaux ou de fabrication des composantes de mobilier Sauder.
- Page 32 Dear Valued Customer: So, how did it go? Thanks so much for choosing Sauder® furniture. I hope the Set a world record for speed? purchase and assembly process was a positive experience Feeling good about yourself? and you feel good about the furniture you just built. If you Nice.
Need help?
Do you have a question about the County Line 415995 and is the answer not in the manual?
Questions and answers