Advertisement
Quick Links
sauder.com
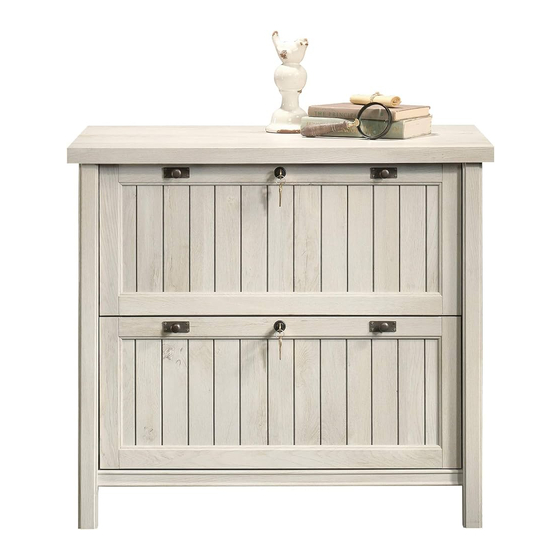
Lateral File
Costa Collection | Model 420040
Need help? Visit Sauder.com to view video assembly tips or chat with a live rep.
Prefer the phone? Call 1-800-523-3987.
Share your journey!
Congratulations. You
are now an adult.
NOTE: THIS INSTRUCTION
BOOKLET CONTAINS IMPORTANT
SAFETY INFORMATION.
PLEASE READ AND KEEP FOR
FUTURE REFERENCE.
English pg 1-28
Français pg 29-32
Español pg 33-36
Lot # 394137
08/30/16
Purchased: __________________
Be sure to give us a ring before
making any returns. 1-800-523-3987
Advertisement

Subscribe to Our Youtube Channel
Related Manuals for Sauder Lateral File


Summary of Contents for Sauder Lateral File
- Page 1 Costa Collection | Model 420040 NOTE: THIS INSTRUCTION BOOKLET CONTAINS IMPORTANT SAFETY INFORMATION. Need help? Visit Sauder.com to view video assembly tips or chat with a live rep. PLEASE READ AND KEEP FOR FUTURE REFERENCE. Prefer the phone? Call 1-800-523-3987.
- Page 2 RIGHT REAR LEG (1) SHELF (1) TOP (1) D225 DRAWER SIDE (4) UPPER DRAWER FRONT (1) D508 DRAWER FRONT/BACK (4) LOWER DRAWER FRONT (1) BOTTOM MOLDING (1) DRAWER BRACE (2) BOTTOM (1) LEFT FRONT LEG (1) Page 2 420040 www.sauder.com/services...
- Page 3 Use this part identifi cation to help identify similar parts. D225 D508 D225 D508 D225 D508 D225 D508 Hardware Identifi cation EXTENSION RAIL - 4 EXTENSION SLIDE - 4 FILE BAR - 4 FILE ROD - 4 (EXTENSION SET SHOWN SEPARATED) www.sauder.com/services 420040 Page 3...
- Page 4 BLACK 1-1/8" MACHINE SCREW - 4 30S BLACK 1-9/16" FLAT HEAD SCREW - 20 BLACK 9/16" FLAT HEAD SCREW - 4 SILVER 1/2" FLAT HEAD SCREW - 4 113S BLACK 1-15/16" FLAT HEAD SCREW - 4 Page 4 420040 www.sauder.com/services...
- Page 5 Assemble your unit on a carpeted fl oor or on the empty å carton to avoid scratching your unit or the fl oor. STOP To begin assembly, push a SAUDER TWIST-LOCK® å FASTENER (12F) into the large holes in the If you purchased ENDS (A and B).
- Page 6 Push twelve HIDDEN CAMS (1F) into the long edges of the å ENDS (A and B). Arrow (12 used) Arrow Arrow Hole The arrow in the HIDDEN CAM must point toward the hole in the edge of the board. Page 6 420040 www.sauder.com/services...
- Page 7 Turn twelve CAM SCREWS (8F) into the LEGS (H, I, J and P). å Fill the holes 1/4 to 1/2 full with GLUE. Caution Inspect the parts thoroughly before assembling. Disassembly of glued parts is extremely diffi cult. www.sauder.com/services 420040 Page 7...
- Page 8 Fill the hole in the LEFT END (B) 1/4 to 1/2 full with GLUE (54M). å Fasten the LEFT END (B) to the LEFT REAR LEG (I). Tighten å three HIDDEN CAMS. S u r f a c H I D D E N i t h Page 8 420040 www.sauder.com/services...
- Page 9 SCREWS and onto the ENDS. should be even. Shoulder LEFT END ASSEMBLY Apply pressure with your hands as you guide the MOLDINGS over the SCREWS and onto the ENDS. Shoulder These edges should be even. www.sauder.com/services 420040 Page 9...
- Page 10 Fill the hole in the LEFT END (B) 1/4 to 1/2 full with GLUE (54M). å Fasten the LEFT END (B) to the LEFT FRONT LEG (P). å Tighten three HIDDEN CAMS. S u r f a c H I D D E N i t h Page 10 420040 www.sauder.com/services...
- Page 11 Lay the RIGHT END (A) fl at on the fl oor. å Insert two SAFETY STOPS (29G) into the holes shown in å the RIGHT END (A). This pin must insert into the location holes in the RIGHT END (A). www.sauder.com/services 420040 Page 11...
- Page 12 The interlock system is a safety feature that prevents more than one drawer from opening at the same time. Do not Be sure the use excessive force to open the drawers. interlock track snaps into each SAFETY STOP. Tape Measure Page 12 420040 www.sauder.com/services...
- Page 13 RAILS. If the gap is larger than 1/16", the drawers could lock up and not open. If this happens, open two drawers at the same time to override the interlock system. Remove the drawers to re-adjust the INTERLOCK TRACK assembly. www.sauder.com/services 420040 Page 13...
- Page 14 GLUE (54M). Then, insert the WOOD DOWELS (15F) into the holes. Wipe away the excess GLUE. Fill the holes 1/4 to 1/2 full with GLUE. Caution Inspect the parts thoroughly before assembling. Disassembly of glued parts is extremely diffi cult. Page 14 420040 www.sauder.com/services...
- Page 15 Meet Part (K). This component has been engineered to be lighter, stronger, faster… well ok. Not technically faster. But defi nitely makes for a sturdier Lateral File that’ s easier to assemble and friendlier to the environment. www.sauder.com/services 420040 Page 15...
- Page 16 Step 12 Fasten the BACKS (G) to the TOP (K). Tighten four å TWIST-LOCK® FASTENERS. Now might be a good time to refresh your drink. Page 16 420040 www.sauder.com/services...
- Page 17 Tighten four TWIST-LOCK® FASTENERS. This groove must be here. S u r f a c i t h I S T - L O F A S T E N ® E R S These holes must be here. www.sauder.com/services 420040 Page 17...
- Page 18 å These edges must be even. Notched edge Slide the BOTTOM MOLDING (E) onto the notched edge. 113S BLACK 1-15/16" FLAT HEAD SCREW The groove will be (4 used in this step) closer to this edge. Page 18 420040 www.sauder.com/services...
- Page 19 NOTE: Be sure the WOOD DOWELS in the LEGS insert into the holes in å the TOP. Fill the holes 1/4 to 1/2 full with GLUE. Caution Inspect the parts thoroughly before assembling. Disassembly of glued parts is extremely diffi cult. www.sauder.com/services 420040 Page 19...
- Page 20 BRACE (N) to a DRAWER BACK (D508). Use fi ve BLACK 1-9/16" FLAT HEAD SCREWS (30S). Repeat this step for the other drawer. å BLACK 1-9/16" FLAT HEAD SCREW (10 used in this step) D225 D508 D225 Groove Page 20 420040 www.sauder.com/services...
- Page 21 Be sure the DRAWER BOTTOM inserts into the DRAWER FRONT/BACK groove. D508 D225 Be sure the DRAWER BOTTOM inserts into the DRAWER FRONT/ BACK groove. BLACK 1-9/16" FLAT HEAD SCREW D225 (10 used in this step) www.sauder.com/services 420040 Page 21...
- Page 22 Repeat this step for the other drawer using the LOWER å DRAWER FRONT (M). BLACK 9/16" LARGE HEAD SCREW (8 used for the FILE BRACKETS) (4 used) D508 D508 This hole must be here. BLACK 7/8" LARGE HEAD SCREW (8 used for the DRAWER FRONTS) Page 22 420040 www.sauder.com/services...
- Page 23 Fasten an EXTENSION SLIDE (R) to a left DRAWER SIDE (D225). å Use two GOLD 5/16" FLAT HEAD SCREWS (3S) through holes #2 and #4. Repeat this step for the other drawer. å GOLD 5/16" FLAT HEAD SCREW (4 used in this step) Open end D225 www.sauder.com/services 420040 Page 23...
- Page 24 #2 and #4. Repeat this step for the other drawer. å Open end Slot D225 These tabs must insert into the slots. GOLD 5/16" FLAT HEAD SCREW (4 used in this step) Post D225 Seated Page 24 420040 www.sauder.com/services...
- Page 25 FILE RODS (9B), then press this FILE GLIDE over the left DRAWER SIDE (D225). Repeat this step for the other drawer. å Use this hole for the FILE ROD. D225 D225 Use this hole for the FILE ROD. www.sauder.com/services 420040 Page 25...
- Page 26 Push a LOCK COVER (10J) over the key extension of the å LOCK (16J) until it is even with the front surface. Repeat this step for the other drawer. å Key extension SILVER 1/2" FLAT HEAD SCREW (4 used in this step) Page 26 420040 www.sauder.com/services...
- Page 27 Fasten two KNOB SETS (136K) to the UPPER DRAWER å FRONT (L). Use two BLACK 1-1/8" MACHINE SCREWS (21S). Repeat this step for the other drawer. å BLACK 1-1/8" MACHINE SCREW (4 used in this step) 136K www.sauder.com/services 420040 Page 27...
- Page 28 This completes assembly. Clean with your favorite furniture å polish or a damp cloth. Wipe dry. And to celebrate, why not share your success story? 50 lbs. 40 lbs. 40 lbs. Page 28 420040 www.sauder.com/services...
- Page 29 élément et conserver le livret pour future référence. EXTRÉMITÉ DROITE ..........1 ARMATURE POUR DOSSIERS ....4 Pour contacter Sauder EXTRÉMITÉ GAUCHE ..........1 EXCENTRIQUE ESCAMOTABLE .....12 en ce qui concerne cet FOND DE TIROIR ............2 VIS D'EXCENTRIQUE ........12 élément, faire référence...
- Page 30 Pour commencer l'assemblage, enfoncer une FIXATION TWIST-LOCK® Remplir le trou dans l'EXTRÉMITÉ DROITE (A) de 1/4 à 1/2 pleins de SAUDER (12F) dans les gros trous des EXTRÉMITÉS (A et B). Répéter cette étape pour la TABLETTE (D), le DESSOUS (F) et les ARRIÈRES (G).
- Page 31 PIEDS dans les trous dans le DESSUS. Retourner le tiroir sur le DEVANT/ARRIÈRE DE TIROIR (D508). Utilisation de la FIXATION TWIST-LOCK® SAUDER Enfi ler le FOND DE TIROIR (B39) dans les rainures des CÔTÉS DE TIROIR (D225) et de l'ARRIÈRE DE TIROIR (D508).
- Page 32 GUIDE POUR DOSSIERS (19B) située sur le CÔTÉ DE TIROIR (D225) droit. Enfi ler une autre ARMATURE POUR DOSSIERS (19B) sur l'autre extrémité des GUIDES POUR DOSSIERS (9B) et appuyer cette ARMATURE POUR DOSSIERS sur le CÔTÉ DE TIROIR (D225) gauche. Répéter cette étape pour l'autre tiroir. Page 32 420040 www.sauder.com/services...
- Page 33 EXCÉNTRICO ESCONDIDO .......12 et conserver le livret pour future référence. EXTREMO IZQUIERDO ........1 BIELA DE EXCÉNTRICO ........12 Pour contacter Sauder FONDO DE CAJÓN ..........2 SUJETADOR TWIST-LOCK®...... 16 en ce qui concerne cet MOLDURA DE EXTREMO .......2 PASADOR DE MADERA........8 élément, faire référence...
- Page 34 Para comenzar el ensamblaje, empuje un SUJETADOR TWIST-LOCK® Llene los agujeros del EXTREMO DERECHO (A) hasta 1/4 a 1/2 con SAUDER (12F) dentro de los agujeros grandes de los EXTREMOS (A y B). PEGAMENTO (54M). Repita este paso para el ESTANTE (D), el FONDO (F) y los DORSOS (G).
- Page 35 NOTA: Asegúrese de insertar los PASADORES DE MADERA sujetados a Repita este paso para el otro cajón. las PATAS dentro de los agujeros del PANEL SUPERIOR. Cómo utilizar el SUJETADOR TWIST-LOCK® SAUDER PASO 17 1. Inserte el extremo con cabilla del SUJETADOR en el agujero de la parte Vuelva un cajón sobre la CARA/DORSO DE CAJÓN (D508).
- Page 36 Deslice otro CORRIMIENTO DE ARCHIVERO (19B) sobre el otro extremo de las VARILLAS DE ARCHIVERO (9B) y presione este CORRIMIENTO DE ARCHIVERO sobre el LADO izquierdo DE CAJÓN (D225). Repita este paso para el otro cajón. Page 36 420040 www.sauder.com/services...
- Page 37 Les téléviseurs peuvent être très un téléviseur. téléviseur. lourds. De plus, le poids et l’emplacement du tube image ont tendance à rendre les téléviseurs instables et enclins à tomber vers l’ a vant. www.sauder.com/services 420040 Page 37...
- Page 38 PRECAUCIÓN Por favor use el mobiliario correcta y seguramente. El mal uso puede causar riesgos de seguridad o daño a las unidades o artículos domésticos. Cuidadosamente lea la tabla a continuación. Esté alerto de: Puede ocurrir: Evitar el problema: • Cajones sobrecargados. •...
- Page 39 GARANTIE LIMITÉE DE 5 ANS 1. Sauder Woodworking Co. (Sauder®) off re une couverture de garantie limitée à l’ a cheteur 4. La présente garantie ne s’ a pplique qu’ a ux défauts garantis qui se produisent pour initial du présent produit pendant une période de cinq ans à...
- Page 40 Dear Valued Customer: So, how did it go? Thanks so much for choosing Sauder® furniture. I hope the Set a world record for speed? purchase and assembly process was a positive experience Feeling good about yourself? and you feel good about the furniture you just built. If you Nice.
Need help?
Do you have a question about the Lateral File and is the answer not in the manual?
Questions and answers
how to remove drawers once installed.