Advertisement
Quick Links
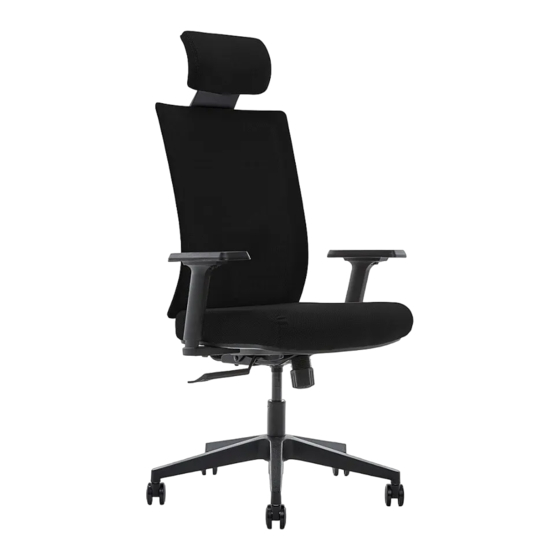
M# 51489
EXECUTIVE MESH CHAIR
FAUTEUIL DE DIRECTION EN MAILLE
SILLA DE MALLA EJECUTIVA
Use and Care Instructions
Instructions d'utilisation et d'entretien
Uso y cuidado instrucciones
IMPORTANT, RETAIN FOR FUTURE REFERENCE: READ CAREFULLY.
IMPORTANT, À CONSERVER POUR DE FUTURS BESOINS DE RÉFÉRENCE : À LIRE SOIGNEUSEMENT
IMPORTANTE: CONSERVE PARA FUTURA REFERENCIA. LEA CUIDADOSAMENTE
Advertisement

Related Manuals for LAZBOY 51489


Summary of Contents for LAZBOY 51489
- Page 1 M# 51489 EXECUTIVE MESH CHAIR FAUTEUIL DE DIRECTION EN MAILLE SILLA DE MALLA EJECUTIVA Use and Care Instructions Instructions d'utilisation et d'entretien Uso y cuidado instrucciones IMPORTANT, RETAIN FOR FUTURE REFERENCE: READ CAREFULLY. IMPORTANT, À CONSERVER POUR DE FUTURS BESOINS DE RÉFÉRENCE : À LIRE SOIGNEUSEMENT...
- Page 2 Attention: 1. Do not stand on the seat cushion. 2. For indoor use only. 3. Please do not expose to direct sunlight. 4. Please do not place this product near sources of excessive heat. 5. Please avoid use of sharp objects on or near this product. 6.
- Page 3 STOP ARRÊTEZ DETENER Do not return to the store. Please contact our customer service team before returning to store. Allow us to solve your issue. For assistance with assembly or installation, parts and customer service, call: 1-800-379-9773 (English only), Monday – Friday 6:00 AM – 5:00 PM Pacific Time, USA (from US) 1-866-789-1060 (English and French), Monday –...
- Page 4 PARTS/PIÈCES/PARTES Casters X5 Base X1 Gas Lift X1 Seat Plate X1 Roulettes X5 Base X1 Vérin à gaz X1 Plaque de siège X1 Ruedas X5 Base X1 Elevador neumático X1 Mecanismo del asiento X1 Left Arm X1 Right Arm X1 Seat Cushion X1 Back Cushion X1 Accoudoir de gauche X1...
- Page 5 Place the star base (B) upside down and insert 5 casters (A) into the holes on the star base (B). Placez la base en étoile (B) à l’envers et enfoncez les 5 roulettes (A) dans la base (B). Ponga la base en forma de estrella (B) con las patas hacia arriba e inserte las 5 ruedas (A) en los hoyos situados en la base (B).
- Page 6 Tighten the brackets of arms (E1 & E2) onto the bottom of the seat cushion (F) (with front of arms facing the front of seat cushion) by using 44 mm small screws (J). Note: Tighten the screws completely. Serrez les supports des accoudoirs (E1 et E2) au bas du coussin de siège (F) (avec le devant des accoudoirs face au devant du coussin de siège) en utilisant les petites vis de 44 mm (J).
- Page 7 Attach seat plate (D) to the bottom of the seat cushion (with the front of the seat plate facing the front of seat cushion). Attach by using 25 mm big screws (K) for the holes of the seat plate (D) and tighten screws. Note: Tighten the screws completely.
- Page 8 Insert back cushion (G) into the rear hole of the seat plate (D) as shown. Then secure with 19 mm big screws (L). Securely tighten the screws with enclosed allen key (N). Insérez le coussin de dossier (G) dans le trou arrière de la plaque du siège (D), comme illustré. Ensuite, xez le tout au moyen de grosses vis de 19 mm (L).
- Page 9 Attach the headrest (H) to the back cushion (G) by using 13 mm small screws (M) as shown. Press the headrest insert (I) into the hole once all screws have been tightened. Fixez l’appuie-tête (H) au dossier (G) au moyen de petites vis de 13 mm (M), comme illustré. Une fois toutes les vis serrées, enfoncez l’insertion de l’appuie-tête (I) dans le trou.
- Page 10 Position the assembled chair upright with the seat plate facing down. Insert the gas lift (C) into the center hole of the seat plate (D). Mettez le fauteuil assemblé en position verticale, la plaque du siège vers le bas. Insérez le vérin pneumatique (C) dans le trou situé...
-
Page 11: Function Instruction
Operating instructions Mode d’emploi Instrucciones de uso Function Instruction - 1 To Adjust Seat Height: While seated, lean forward and reach under the right side of the chair to nd the handle. Lift the handle and raise your body up slightly to allow the chair to rise to the desired height. - Page 12 Function Instruction - 2 To Operate Tilt Lockout: While seated, reach under the right side of the chair to nd the height adjustment handle. Pull the handle all the way out (away from the gas lift) to allow the chair to tilt backwards. Push the handle in towards the gas lift to lock the chair angle while the desired position is reached.
- Page 13 Function Instruction - 3 To Adjust Tension On The Tilt: Reach under the front center of the chair, grasp the round knob (R) and turn it counter- clockwise to stiffen the tilt mechanism for a heavier user. Turn the knob (R) clockwise to loosen the tilt mechanism for a lighter user.
- Page 14 Function Instruction - 4 To Adjust Arm Height: Press the buttons under the armpads to move them up or down freely then release the buttons once the desired height is reached. Fonction - 4 Pour régler la hauteur des accoudoirs : Appuyez sur les boutons sous les garnitures de bras de se déplacer vers le haut et vers le bas librement puis relâcher les boutons dès que la hauteur désirée soit atteinte.
- Page 15 Function Instruction - 6 To Adjust Lumbar Support Height: Lumbar support height adjust independently for the short and tall. Fonction - 6 Pour ajuster la hauteur du soutien lombaire : La hauteur du soutien lombaire s'ajuste de façon indépendante en tirant sur la poignée. Instrucciones de Funcionamiento - 6 Para ajustar la altura del soporte lumbar: La altura del soporte lumbar se ajusta independientemente...
- Page 16 Limited Warranty True Innovations seating products are warranted against defects in material and workmanship while owned by the “Original Purchaser”. The term “Original Purchaser” is de ned as that party or entity which purchases True Innovations furniture from an authorized True Innovations retailer as shown by the original sales receipt.
-
Page 17: Garantie Limitée
Garantie limitée Les fauteuils de True Innovations sont garantis contre tout défaut de matériaux et de fabrication à « l’acheteur initial ». Le terme « acheteur initial » se dé nit comme la personne ou entité qui achète le meuble True Innovations d’un détaillant True Innovations autorisé, tel qu’attesté... - Page 18 Garantía Limitada Los productos de True Innovations seating están garantizados contra defectos de material y mano de obra mientras está en posesión de su “Comprador Original”. El término “Comprador Original” se de ne como el individuo o entidad que compra el mueble de True Innovations de un distribuidor autorizado así...