
Related Manuals for 3M SCALEGARD SGLP-RO


Summary of Contents for 3M SCALEGARD SGLP-RO
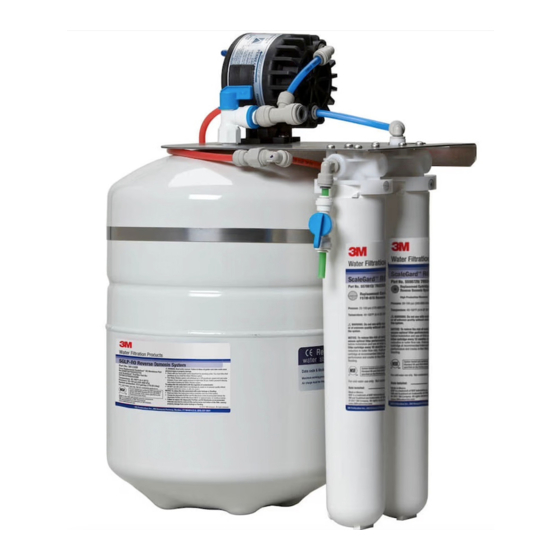
- Page 1 Water Filtration Products Installation and Operating Instructions for SCALEGARD LP REVERSE OSMOSIS FILTRATION SYSTEM SGLP-RO Installer: Please leave this manual with owner/operator.
- Page 2 Product, model number and alleged defect. Limitation of Liability: 3M Purification Inc. will not be liable for any loss or damage arising from this 3M Purification Inc. product, whether direct, indirect, special, incidental, or consequential, regardless of the legal theory asserted, including warranty, contract, negligence or strict liability.
-
Page 3: Important Installation Instructions
Turbidity ......<5 NTU * NOTE: For waters over 10 grain hard, a 3M water softener is recommended for pretreatment. Consult 3M technical services for correct sizing. -
Page 4: Plumbing Connections
PLUMBING CONNECTIONS Note: The ScaleGard LP Reverse Osmosis Water Filtration System requires a minimum 50 psi inlet water pressure. If inlet water pressure is less than 50 psi, a water booster pump may be required. Refer to Figure 1 for proper tubing connections. All connections are made with “Push-In”... -
Page 5: How To Use 'Push-In' Connectors
HOW TO USE ‘PUSH-IN’ CONNECTORS This product is outfitted with user friendly ‘Push In’ connectors. Proper use of the connectors is shown in the diagrams.I t is most important that the tubing selected for use with these connectors be of high quality, e xact size and roundness, and with no surface nicks or scratches. - Page 6 CARTRIDGE & RO MEMBRANE CHANGE INSTRUCTIONS (continued) Flush Instructions 1. Close tank valve. 2. Open Water Sample Valve and divert to drain for 5 minutes. 3. Close Water Sample Valve and open tank valve. Note: Be sure to install the cartridge into the proper head by matching the icon on the cartridge label with the icon on the head.
- Page 7 CHECK TANK PRESSURE WHEN: Yearly TOOLS: Piece of 3/8” tubing OR Bucket Bicycle or tire pressure gauge Bicycle tire pump 1. Drain water from the storage tank. a. Shut off the inlet water valve or water booster system if applicable. b.
-
Page 8: Replacement Parts
Product Dimensions (Figure 4) 9 5/16" 12 1/4" (23.7 cm) (31 cm) 17 3/4" (45 cm) 1 1/2" (3.8 cm) MINIMUM DISTANCE REQUIRED FOR CTG REMOVAL Replacement Parts Part Number Description 54-3030 Stainless steel bracket complete with filter heads and RO shut-off valve 56-161351 Tank 60-23296... -
Page 9: Troubleshooting Guide
Troubleshooting Guide Repair Existing Booster Pump / Contact Dealer System (If Applicable) Low Feed Water Pressure Add Water Booster Pump Only if Beverage Booster System is not installed Feed Water Pressure, Temperature, RO Module Flow Replace RO Module RO Membrane Fouled Rate and Reject Flow Rate should be checked before replacing Module... - Page 11 3M Purification Inc. 400 Research Parkway Meriden, CT 06450 USA Toll Free: 866.990.9785 3M is a trademark of 3M Company. Worldwide: 203.237.5541 INSTR4232 0912B Fax: 203.238.8701 © 2012 3M Company. All rights reserved. www.3Mfoodservice.com Please Recycle. Printed in U.S.A. www.3Mpurification.com...
Need help?
Do you have a question about the SCALEGARD SGLP-RO and is the answer not in the manual?
Questions and answers