Subscribe to Our Youtube Channel
Summary of Contents for MB QUART MB QUART MBQR-SUB-2
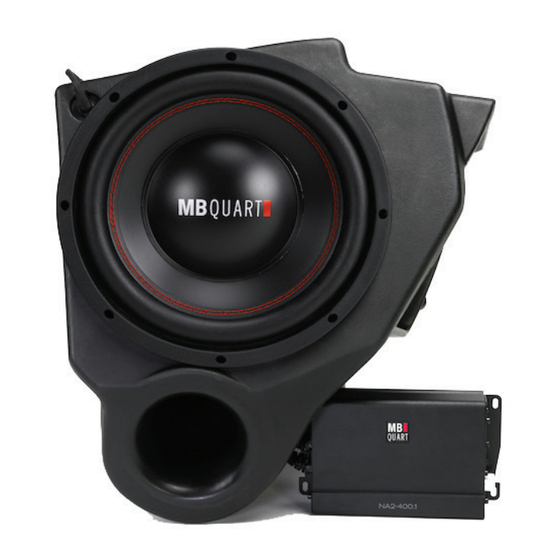
- Page 1 Installation Manual MBQR-SUB-2 10” Subwoofer / 400 Watt RZR-Tuned Audio Package for Polaris Vehicles ® ®...
- Page 2 Thanks for choosing MB QUART! The RZR-Tuned MBQR-SUB-2 Subwoofer Kit has been meticulously engineered for your vehicle. The process of installation is simple and straightforward. Installation following these detailed instructions can be completed in about 2 hours. INSTALLATION OVERVIEW VIDEO products feature a “how to”...
- Page 3 About 2 hours are required to complete this installation assuming you already have an existing Stage 2 TOOLS AND SUPPLIES NEEDED share the pictures of your installation on MB Quart social media channels to help others. SAFETY PRECAUTIONS Safely prepare your machine for the installation before proceeding.
- Page 4 If your 2017 or newer RZR model is equipped with the Ride Command system, the does not include a source unit because you will retain the Ride Command system as the source unit. MB Quart provides VEHICLES WITHOUT RIDE COMMAND ®...
- Page 5 DASH AREA DISASSEMBLY 2013-2018 (Non-Turbo S) RZR Figure 5-1 STEP 1 – REMOVE CENTER HOOD Twist the tabs at the upper left and right corners. Pull up to remove. This is where you will access the bus bar machine has the bus bar harness installed. If your bus bar harness has not been installed, you can purchase from your dealer or Polaris online.
- Page 6 DASH AREA DISASSEMBLY 2013-2018 (Non-Turbo S) RZR - Continued STEP 5 – REMOVE DASH FASCIA CENTER HARDWARE Torx screws will come out allowing access to the second (upper) set further back in the dash. Next, pull the Figure 5-6 Figure 5-7 STEP 6 –...
-
Page 7: Step 1 - Remove Center Hood
DASH AREA DISASSEMBLY 2018.5 Turbo S & 2019+ RZR (RIDE COMMAND) this manual. STEP 1 – REMOVE CENTER HOOD Figure 7-1 Remove the center of the hood area as shown in Figure 7-1. Twist the recessed tabs at the upper left and right toward the rear of the vehicle. -
Page 8: T40 Torx Screw
Figure 7-4a Figure 7-4b STEP 5 – REMOVE LOWER POCKET AND PASSENGER SIDE CUBBY MB Quart source unit installs. Next, remove (2) plastic push clips in the passenger side cubby as shown in Figure 7-5a Figure 7-5b STEP 6 – REMOVE CENTER SWITCH HARDWARE... - Page 9 DASH AREA DISASSEMBLY 2018.5 Turbo S & 2019+ RZR - Continued STEP 7 – PREPARE FINAL ELECTRONICS FOR DASH REMOVAL disconnect wires from back of switches as shown in Figure 7-7b. Take note of plug color and switch location for reassembly purposes. Figure 7-7a Figure 7-7b STEP 8–...
-
Page 10: Figure
SUBWOOFER ENCLOSURE MOUNTING (ALL MODELS) Prepare to mount the subwoofer into the glove box and grab bar location. 2018.5 Turbo S and 2019 and newer RZR models, use only the rear mounting plate and four 1/2” bolts as shown in Figure 8-1. All other RZR models use both mounting plates and all eight 1/2”... - Page 11 AMPLIFIER WIRING - either please refer to the electrical connections outlined Figure 9-1 in the NA2-400.1 installation manual available at MBQuart.com. power and ground wiring at the RZR bus bar location as described on page 3. a 30 ampere fuse placed close to the point of turn-on output (typically a blue wire).
- Page 12 INITIAL TESTING STEP 1 – RECONNECT THE BATTERY Figure 10-1 reconnect the negative terminal of the negative battery cable as indicated in Figure 10-1. STEP 2 – TURN ON IGNITION Turn the ignition key to the ACC position and push the STEP 3 –...
- Page 13 FINE TUNING hundreds of installations, we have determined the settings shown on page are ideal for MBQR-SUB-2 subwoofer system. NOTE audio sound. The ideal gain setting should allow full volume from the source unit without audible distortion. The illustrations below describe the various controls. Refer to Settings Two Channel Amplifier NA2-400.2RC...
- Page 14 VEHICLE REASSEMBLY reassembling all the panels. 2013-2018 RZR Models 2018.5 Turbo S and 2019+ RZR Models ® ©2020 Maxxsonics USA, Inc.
- Page 15 FINAL INSPECTION that you know your RZR and your audio equipment are secure. *NOTE – It is critical to the safe operation of your vehicle that the nuts holding the steering column in 2013- 2018 models be re-tightened to 40-foot pounds of torque.
- Page 16 COMPLETE WIRING LAYOUT This is a complete wiring harness layout diagram of a RZR whole audio system package possible. Kit (part#MBQR-SUB-2) Shown To view all the RZR-Tuned Audio System Options, visit MBQuart.com ©2020 Maxxsonics USA, Inc.
- Page 17 NOTES or any other wiring or installation-related details that will be helpful if you need to add on to the system or troubleshoot any unforeseen issues.
- Page 18 FCC Notice provide reasonable protection against harmful interference in a mobile installation. This equipment generates, uses and can radiate radio frequency energy and, if not installed and used in accordance with the instructions, may cause harmful interference to radio communications. However, there is no guarantee that interference will not occur in a particular installation.


Need help?
Do you have a question about the MB QUART MBQR-SUB-2 and is the answer not in the manual?
Questions and answers