
Related Manuals for BabySafe Booster cushion unit


Summary of Contents for BabySafe Booster cushion unit
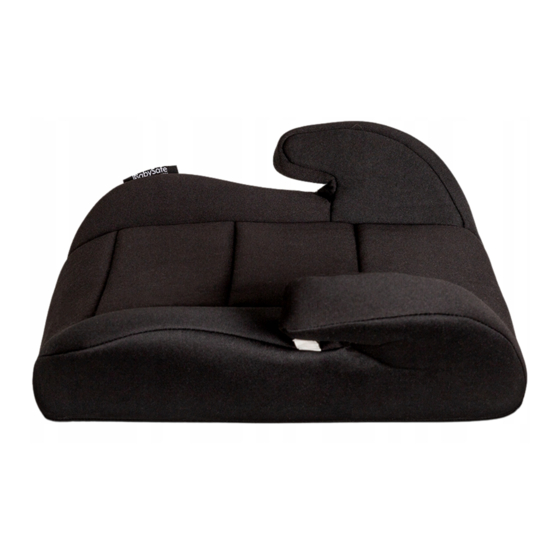
- Page 1 Fotelik samochodowy Booster cushion unit i-size INSTRUKCJA OBSŁUGI • USER MANUAL WZROST DZIECKA: 125-150 cm SUIT FOR: 125-150 cm...
-
Page 3: Instrukcja Obsługi
Fotelik samochodowy i-size INSTRUKCJA OBSŁUGI WZROST DZIECKA: 125-150 cm... - Page 5 Badania dowodzą, że wciąż wiele fotelików nie jest właściwie montowana w samochodach dlatego prosimy, abyście poświecili czas na dokładne prze- czytanie niniejszej instrukcji. Nasz fotelik zagwarantuje maksimum bezpie- czeństwa, tylko jeśli będzie używany zgodnie z zaleceniami. Życzymy bezpiecznych i przyjemnych podróży. BabySafe – Przyjaciel dziecka i rodziny.
- Page 6 Uwaga! Ważne! Aby zapewnić dziecku jak największe bezpieczeństwo, prosimy o dokładne zapoznanie się z niniejszą instrukcją obsługi: 1. Sztywne elementy i plastikowe części ulepszonego urządzenia przytrzymu- jącego dla dzieci muszą być tak rozmieszczone i zainstalowane, aby pod- czas codziennego użytkowania pojazdu nie mogły zostać przytrzaśnięte przez ruchome siedzenie lub drzwi pojazdu.
- Page 7 Ważne Fotelik samochodowy jest udoskonalonym systemem przytrzymującym dla dzieci. Jest homologowany zgodnie z normą ONZ nr 129/03. Do użytku w kon- kretnych pojazdach wskazanych w odpowiedniej liście pojazdów. W razie wątpliwości skonsultuj się z producentem ulepszonego systemu przy- trzymującego dla dzieci lub ze sprzedawcą. Dla dzieci o wzroście od 125 cm do 150 cm.
- Page 8 Ważne Montaż wyłącznie przodem do kierunku jazdy Dla dzieci o wzroście od 125 cm do 150 cm. Montaż: system ISOFIX + pasy bezpieczeństwa pojazdu, lub wyłącznie pasy bezpie- czeństwa pojazdu. Montaż przodem do kierunku jazdy Instalacja fotelika w pojeździe Dozwolony wyłącznie montaż Dozwolone fotele w samochodzie, przodem do kierunku jazdy.
- Page 9 Kluczowe elementy Klamra prowadząca przebieg pasa bezpieczeństwa pojazdu Przycisk zwalniający mocowanie ISOFIX Ramię mocowania ISOFIX...
- Page 10 Montaż za pomocą 3-puntowych pasów bezpieczeństwa pojazdu 1. Umieść dziecko w foteliku. 2. Klamra prowadząca pas w odcinku barkowym musi być wyregulowana tak, aby pas znajdował się na tym samym poziomie co ramiona dziec- ka ( rys. obok zaznaczono zieloną li- nią).
- Page 11 Montaż za pomocą systemu ISOFIX oraz 3-punktowych pasów bezpieczeństwa 1. Wyciągnij mocowania ISOFIX do pożądanej długości zgodnie z rysunkiem obok 2. Pchnij fotelik w kierunku oparcia fo- tela samochodowego. Gdy usłyszysz („klik”) to oznacza ze fotelik został wpięty w mocowanie klik 3.
- Page 12 Wskazówki dotyczące zapięcia pasów bezpieczeństwa Klamra prowadząca pas w odcinku barkowym musi być wyregulowana tak, aby pas znajdo- wał się na tym samym poziomie co ramiona dziecka (rys. obok zaznaczono zieloną linią). Pas w klamrze musi być ciasno. Upewnij się, że pasy opiera się na miednicy dziecka Upewnij się, że pas bezpieczeństwa przeszedł...
- Page 13 Zdejmowanie tapicerki Zdejmij tapicerkę ze skorupy fotelika zgodnie z kierunkiem oznaczonym na rysunku. Tapicerka jest obowiązkowym elementem budowy fotelika. Nigdy nie używaj fotelika bez tapicerki. Zakładanie tapicerki Użyj powyższej instrukcji w odwrotnej kolejności.
- Page 14 Konserwacja foteli Czyszczenie Nie używaj żadnych agresywnych środków czyszczących; mogą one uszkodzić mate- riał dziecięcego fotelika samochodowego. Czyścić ręcznie wodą i łagodnym mydłem. Po wypadku Po wypadku fotelik samochodowy i pasy bezpieczeństwa samochodu powinny zostać wymienione. Chociaż mogą wyglądać na nieuszkodzone, w razie kolejnego wypadku fotelik samochodowy i pasy bezpieczeństwa mogą...
- Page 15 Booster cushion unit i-size USER MANUAL SUIT FOR: 125-150 cm...
- Page 17 Dear Parents: Thank you very much for purchasing our product. The function s and design of this car seat off er safety and comfort when your child is in this child restraint. In order to use safely, please adjust the child restraint till it is suitable for your child.
- Page 18 Warning! In order to provide your child with greatest security, please read this instruc- tion manual carefully: 1. The rigid items and plastic parts of an Enhanced Child Restraint System shall be so located and installed that they are not liable, during everyday use of the vehicle, to become trapped by a movable seat or in a door of the vehicle.
- Page 19 Notice This is a specific vehicle booster cushion Enhanced Child Restraint System. It is approved according to UN Regulation No . 129 ,for use in the specific vehicle indicated in the applicable vehicle list . If in doubt , consult either the Enhanced Child Restraint System manufacturer or the retailer.
- Page 20 Important Forward facing installation only. Forward facing installation Positioning in car Only forward facing installation allowed Allowed positions in car, only with a 3-point-belt, are indicated green, the advice position is on the rear seat Second-hand car seats We advice that child seats should not be bought or sold second-hand. Many sec- ond-hand car seats have been found to be dangerous.
- Page 21 Crucial parts Seat belt hook FIT release button FIX connectors...
- Page 22 Installation in the vehicle with 3 point belt 1. Place the child in the seat 2. Shoulder strap guide hook must be adjusted so that the shoulder straps are at the same level as your child’s shoulders (Show as in the green area) , and pull tightly.
- Page 23 Installation in the vehicle with FIT connectors and 3 point belt 1. Extend the FIT connector to a suitable po- sition in the direction shown in the figure. 2. Push the booster seat towards the anchorages in your car seat. Make sure you hear a clear sound „click”, it means it is locked.
- Page 24 Precautions for wearing seat belts Shoulder strap guide hook must be adjusted so that the shoulder straps are at the same level as your child’s shoulders ( Show as in the green area ) , and pull tightly. Please make sure the belt is on the child’s pelvis. Please make sure that the seat belt has passed through the shoulder belt guide hook and waist belt guide groove at the same time.
- Page 25 Removing the cover Separate the cloth cover from the base accor- ding to the direction of the arrow. The cover is a safety feature. Never use the child car seat without it. Refitting the cover Refit the cover, using the previous instructions in reversed order.
- Page 26 Seat maintenance Cleaning the seat Do not use any aggressive cleaning products; these may harm the construction mate- rial of the child car seat . Clean by hand with water and mild soap. After an accident After an accident, the child car seat and your car seat belts should be replaced. Al- though they may look undamaged, if you have another accident , the child car seat and your car seat belts may not be able to protect your child as well as they should .
- Page 28 BabySafe S.A. Regnów 50 96-232 Regnów Polska Tel.: +48 46 814 73 36 e-mail: biuro@babysafe.eu www.babysafe.eu...
Need help?
Do you have a question about the Booster cushion unit and is the answer not in the manual?
Questions and answers