
Subscribe to Our Youtube Channel
Related Manuals for BabySafe Chart


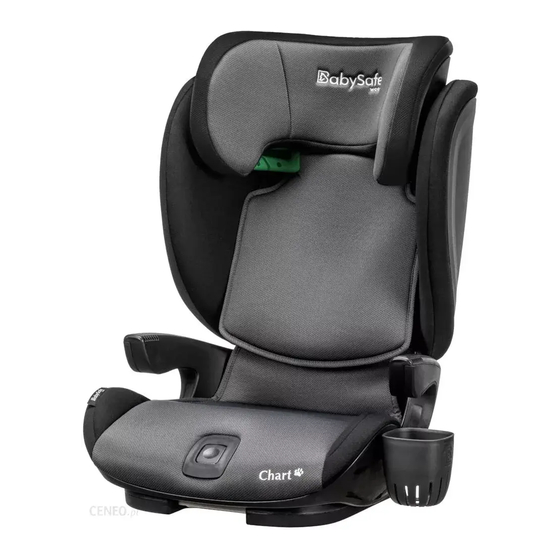
Summary of Contents for BabySafe Chart
- Page 1 INSTRUKCJA OBSŁUGI • USER MANUAL DLA DZIECI O WZROŚCIE 100 cm - 150 cm • FOR CHILD’S HEIGHT 100 cm - 150 cm...
- Page 3 INSTRUKCJA OBSŁUGI DLA DZIECI O WZROŚCIE 100 cm - 150 cm...
-
Page 5: Table Of Contents
SPIS TREŚCI Przedmowa ........................Podstawowe informacje ..................Ważne informacje ...................... Główne elementy montażowe ............... Jak używać systemu ISOFIX ................Regulacja wysokości pasa barkowego ............ Regulacja szerokości oparcia ................Regulacja kąta nachylenia oparcia ............. Jak zainstalować fotelik w samochodzie ..........Umieszczanie dziecka w foteliku .............. -
Page 6: Przedmowa
EKG ONZ nr 16 lub innym. • Fotelik Chart jest zatwierdzony dla wzrostu dziecka 100 cm -150 cm oraz mon- tażu przodem do kierunku jazdy. • Fotelik Chart może nie zmieścić się we wszystkich pojazdach, jeżeli jest stoso- wany w zakresie wysokości dziecka od 135 cm do 150 cm, ze względu na niższy... -
Page 7: Podstawowe Informacje
EKG ONZ nr 16 lub innym. • Fotelik Chart jest zatwierdzony dla wzrostu dziecka 100 cm -150 cm oraz mon- tażu przodem do kierunku jazdy. • Fotelik Chart może nie zmieścić się we wszystkich pojazdach, jeżeli jest stoso- wany w zakresie wysokości dziecka od 135 cm do 150 cm, ze względu na niższy... - Page 8 Niezabezpieczony bagaż może w razie wypadku spowodować poważne obra- żenia u dzieci i dorosłych. • Nigdy nie używać fotelika bez tapicerki. Tapicerka jest elementem zabezpie- czającym i może być zastępowana tylko oryginalną tapicerką BabySafe. • Nie należy używać żadnych agresywnych środków czyszczących, mogą one uszkodzić materiał konstrukcyjny fotelika.
-
Page 9: Ważne Informacje
WAŻNE INFORMACJE Montaż tylko przodem do kierunku jazdy. NIE MONTOWAĆ fotelika na fotelu przednim z poduszką powietrzną. Opcjonalne miejsca Montaż przodem montażu do kierunku jazdy Można TYLKO montować Kolor zielony wskazuje przodem do kierunku jazdy opcjonalne miejsca montażu z wymaganym systemem 3-punktowych pasów. -
Page 10: Główne Elementy Montażowe
GŁÓWNE ELEMENTY MONTAŻOWE Zagłówek Prowadnica pasa barkowego Ochrona boczna SIP Podstawa Przycisk regulacji kąta pochylenia Uchwyt wysuwania mocowania ISOFIX Kubek na napoje Regulacja wysokości zagłówka Tył siedziska Dźwignia regulacji szerokości oparcia Miejsce montażu uchwytu kubka Złączki ISOFIX Przycisk zwalniający Przycisk podwójnej blokady ISOFIX... -
Page 11: Jak Używać Systemu Isofix
JAK UŻYWAĆ SYSTEMU ISOFIX Pociągnąć za uchwyt wysuwania systemu ISOFIX - mechanizm ISOFIX działa automatycznie. Rozciągnąć go do maksymalnej długości, popchnąć mechanizm ISOFIX do tyłu, aby zamocować go w fotelu samochodowym. REGULACJA WYSOKOŚCI PASA BARKOWEGO Chwycić za dźwignię regulacji wysokości zagłówka i przesunąć go w gó- rę/w dół, wtedy można odpowiednio zmienić... -
Page 12: Regulacja Szerokości Oparcia
REGULACJA SZEROKOŚCI OPARCIA Pociągnąć za dźwignię regulacji szerokości oparcia, aby ją odblokować. Na- stępnie można dostosować szerokość oparcia do dziecka. REGULACJA KĄTA NACHYLENIA OPARCIA Nacisnąć przycisk regulacji kąta pochylenia, następnie ustawić oparcie w żą- danym położeniu. Przed zapięciem dziecka pasem należy ustawić fotelik pod odpowiednim kątem (dostępne są... -
Page 13: Jak Zainstalować Fotelik W Samochodzie
JAK ZAINSTALOWAĆ FOTELIK W SAMOCHODZIE 1. Pociągnąć za uchwyt wysuwania 2. Zatrzasnąć złącza ISOFIX w punk- mocowania ISOFIX. System ISOFIX tach mocowania ISOFIX w siedze- rozciąga się do maksymalnej długo- niu pojazdu. Upewnić się, że wszyst- ści. Upewnić się, że złączka ISOFIX kie wskaźniki ISOFIX są... -
Page 14: Umieszczanie Dziecka W Foteliku
UMIESZCZANIE DZIECKA W FOTELIKU 1. Pociągnąć uchwyt regulacji zagłówka do góry na odpowiednią wysokość, upewniając się, że pas barkowy jest na równi z ramieniem dziecka. 2. Nacisnąć przycisk regulacji kąta pochylenia, a następnie przesunąć fotelik do przodu lub do tyłu, aby ustawić odpowiedni kąt oparcia fotelika. Przed posadzeniem i zapięciem dziecka należy upewnić... -
Page 15: Demontaż Fotelika
DEMONTAŻ FOTELIKA 1. Odpiąć klamrę pasa samochodowego - można wysunąć pas z prowadnicy pasa barkowego. 2. Nacisnąć przycisk podwójnej blokady ISOFIX i pociągnąć przycisk odblo- kowujący ISOFIX, aby rozłączyć system ISOFIX. Przed wyjęciem fotelika z samochodu, należy upewnić się, że mechanizm ISOFIX jest wsunięty do fotelika. -
Page 16: Zdejmowanie Tapicerki
ZDEJMOWANIE TAPICERKI Krok 1: Wyciągnąć zatrzask z podstawy, a następnie zdjąć tapicerkę. Krok 2: Rozsunąć oparcie, zdjąć tapicerkę ze „skrzydełek” poprzez wysunięcie tkaniny ze szczeliny i odpiąć pasek na rzep. Powtórzyć czynności z dru- giej strony. Krok 3: Odpiąć gumki z haczyków, zdjąć pokrowiec z prowadnicy barkowej, a następnie zdjąć... -
Page 17: Zakładanie Tapicerki
ZAKŁADANIE TAPICERKI Krok 1: Założyć tapicerkę na zagłówek. 1. Założyć tapicerkę na zagłówek i upewnić się, że tkanina jest wciśnięta w pla- stikowe elementy. 2. Założyć tapicerkę wokół prowadnicy barkowej. 3. Zaczepić gumki tapicerki na dolnych haczykach. Krok 2: Założyć tapicerkę na skrzydełka 1. -
Page 18: Konserwacja Fotelika
KONSERWACJA FOTELIKA Ostrzeżenie: potencjalnie niewłaściwe użycie • W celu prawidłowego użytkowania poduszki powietrznej w połączeniu z fote- likiem, należy zapoznać się z instrukcją obsługi pojazdu. • Przed jazdą upewnić się, że wskaźniki są zielone. • Upewnić się, że plecy fotelika dotykają oparcia siedzenia pojazdu, a złącza ISO- FIX są... - Page 19 USER MANUAL FOR CHILD’S HEIGHT 100 cm -150 cm...
- Page 21 CONTENT Introduction ........................Vital Information ......................Important Points ......................Key Installing Components ................How to Use ISOFIX ..................... Adjust the Height of Shoulder Belt .............. Back width adjustment ..................Adjust the Angle of the Seat ................How to Install the Car Seat ................
-
Page 22: Introduction
• Chart is approved for stature height 100 cm -150 cm, in the forward-facing direction. • When used for stature heights between 135 cm and 150 cm, Chart might not fi t in all vehicles, due to a low position of the vehicle roof at the side. -
Page 23: Vital Information
• Chart is approved for stature height 100 cm - 150 cm, in the forward-facing direction. • When used for stature heights between 135 cm and 150 cm, Chart might not fi t in all vehicles due to a low position of the vehicle roof at the side. - Page 24 • If doubt, consult either the car seat manufacturer or the retailer. Product Group Installation Type 3-point Belt/ISOFIX BabySafe Chart 100 cm - 135 cm Universal + 3-point Belt 3-point Belt/ISOFIX BabySafe Chart 135 cm - 150 cm...
-
Page 25: Important Points
Green Colors indicate the optional installation places. 3-point harness system required. Better to be installed on back seats. Second-handed Safety Car Seats BabySafe suggest customers do not use or buy any kind of second-handed child car seat in case of danger. -
Page 26: Key Installing Components
KEY INSTALLING COMPONENTS Headrest Shoulder Belt Guider SIP Bumper Base Angle Adjusting Button ISOFIX Release Handle Cup holder Headrest Height Adjusting Handle Back of Seat Backrest width adjustment lever Cup Holder Installing Slot ISOFIX Connectors ISOFIX Unlocking Device ISOFIX Dual Locking Button... -
Page 27: How To Use Isofix
HOW TO USE ISOFIX Pull the ISOFIX Pulling Handle, ISOFIX will automatically Stretch to the max. length, push the ISOFIX backward will put it inside of the car seat. ADJUST THE HEIGHT OF SHOULDER BELT Grab the headrest adjusting handle and move up and down then you can change the height accordingly. -
Page 28: Back Width Adjustment
BACK WIDTH ADJUSTMENT Pull the backrest width lever to unlock it. Then you can adjust the width of the backrest to suit your child. ADJUST THE ANGLE OF THE SEAT Push the Angle Adjusting Button downward, meanwhile move the back of the seat to different angles. -
Page 29: How To Install The Car Seat
HOW TO INSTALL THE CAR SEAT 1. Pull the ISOFIX Pulling Han- 2. Click the ISOFIX connectors to dle ISOFIX will stretch to max. the ISOFIX anchorage points length. Make sure ISOFIX is in the vehicle seat.Make sure on”open” status. that All lSOFIX indicators are GREEN Notice:... -
Page 30: Place The Child
PLACE THE CHILD 1. Pull the Headrest Adjusting Handle upward to proper height, making sure the Shoulder Belt is level with your child’s shoulder; 2. Press the Angle Adjusting Button, then move the child car seat forward or backward to proper seat back angle. Do make sure the child car seat was set to right reclining scale before you buckle up and fix the child;... -
Page 31: Removing The Seat
REMOVING THE SEAT 1. Push the buckle of the car, you will be able to slide the belt out of the shoul- der belt guider; 2. Press the ISOFIX Dual Locking Button and pull the ISOFIX Unlocking Device to separate the ISOFIX from the ISOFIX Connector. Before removing the child seat out of the car,please make sure ISOFIX is slide into the child car seat. -
Page 32: Removing The Cover
REMOVING THE COVER Step ONE of removing: pull out the snap-fastener of the base cover and then pull down the base cover; Step TWO of removing: pull out the cover of SIP Bumper from the rim of the seat and tear apart the macro tape. One side after the other; Step THREE of removing: get the rope out of the hook, pull the cover of the Shoulder Guide out and then pull the whole headrest cover out. -
Page 33: Refitting The Seat Cover
REFITTING THE SEAT COVER Step ONE: Put on Headrest Cover 1. Put the head rest cover on the headrest and make sure the cover is crammed into the plastic parts; 2. Cram the cover around the Shoulder Guide into the Guide; 3. -
Page 34: Maintenance Of The Seat / Cleaning
MAINTENANCE OF THE SEAT Warning: potential misuse • For the correct usage of the airbag in combination with the seat, read the vehicle handbook. • Make sure the indicators are green before you drive. • Make sure the back of the seat is touching the backrest of the vehicle seat and the ISOFIX connectors are pushed inside the seat as far as possible. - Page 36 BabySafe S.A. Mszczonowska 36 96-200 Rawa Mazowiecka POLAND Tel.: +48 46 814 73 13 Fax: +48 46 814 73 00 E-mail: biuro@babysafe.eu www.babysafe.eu...
Need help?
Do you have a question about the Chart and is the answer not in the manual?
Questions and answers