Advertisement
Quick Links
Ashtech Z-Xtreme RTK / TDS Ranger - Survey Pro CE
Version 3.2.1 - Sales Support Document
RTK Demo – TDS Localization Method
The RTK Base will occupy an unknown control point, with assumed coordinates of
N-5000m, E-5000m and Elevation-500m. Perform a TDS GET to obtain the autonomous
WGS84 Latitude, Longitude and Ellipsoid Height for the RTK Base station. Perform
Single-Point Localization at the RTK Base Station. The resulting Scale Factor will equal
1.00000000 and the Rotation Angle will equal 0° 00' 00".
You can demonstrate the capability of the RTK system from this single local control
point. You will be able RTK survey at relatively close distances to the RTK Base station.
The further the distance from the RTK Base station, (Single Point Localization) the
greater the distortions.
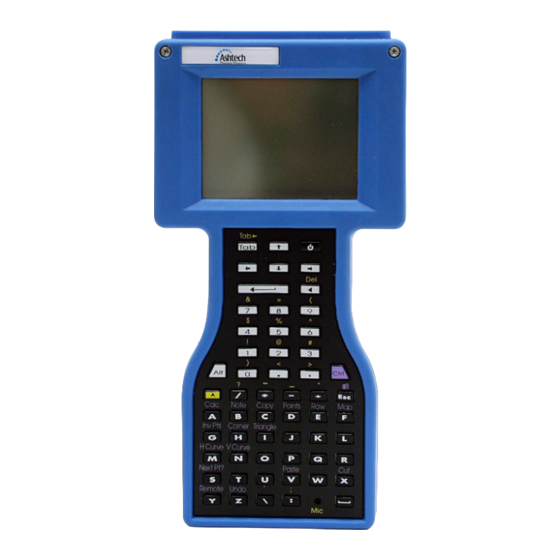
On the TDS Ranger, start the TDS Survey Pro CE software by double-tapping on the
Survey Pro icon, or from the Start | Programs | Survey Pro menu...
The TDS Survey Pro CE logo / splash screen will be displayed...
Figure 1
After a few seconds, the Logo / Splash screen will close automatically.
To manually close the Logo / Splash screen, simply tap anywhere on the screen.
Thales Navigation: ZXSS-TDS v3.2.1 Localization
1
Advertisement

Subscribe to Our Youtube Channel
Related Manuals for ashtech Z-Xtreme RTK


Summary of Contents for ashtech Z-Xtreme RTK
- Page 1 Ashtech Z-Xtreme RTK / TDS Ranger - Survey Pro CE Version 3.2.1 - Sales Support Document RTK Demo – TDS Localization Method The RTK Base will occupy an unknown control point, with assumed coordinates of N-5000m, E-5000m and Elevation-500m. Perform a TDS GET to obtain the autonomous WGS84 Latitude, Longitude and Ellipsoid Height for the RTK Base station.
- Page 2 The next screen… Figure 2 The Welcome to Survey Pro dialog menu… Select the “Create a New Job” menu… Tap the New… button. The next screen… Figure 3 Input a name for the New Job: RTK-Demo1 Next, Tap the Next > button… Thales Navigation: ZXSS-TDS v3.2.1 Localization...
- Page 3 The next screen… Figure 4 Select the Options as shown above: Next, Tap the Next button… The next screen… Figure 5 Enter the Coordinates as shown above: Next, Tap the Finish button… Thales Navigation: ZXSS-TDS v3.2.1 Localization...
- Page 4 The next screen… Figure 6 From the Survey Pro CE main menu, Tap on [ 2 ] JOB - [ A ] Settings menu… The next screen… Figure 7 Settings In the menu, Tap on the Center / Pull-Down Menu… This is the Primary Settings Pull-Down menu for the Survey Pro CE software.
- Page 5 The next screen… Figure 8 Select the Options as shown above: Next, Tap on the Receiver settings… button, The next screen… Figure 9 Select the Options as shown above: Next, Tap on the Base Radio Tab… Thales Navigation: ZXSS-TDS v3.2.1 Localization...
- Page 6 The next screen… Figure 10 Select the Options as shown above: Next, Tap on the General Tab… The next screen… Figure 11 Select the Options as shown above: When finished verifying the GPS Receiver Settings – Tap OK … Thales Navigation: ZXSS-TDS v3.2.1 Localization...
- Page 7 Settings This will return you to the Menu… Next, Tap on the Center Pull-Down menu, Select Measure Mode… The next screen… Figure 12 Select the Options as shown above: Next, Tap on the Center Pull-Down Menu – Select Projection… The next screen… Figure 13 Select the Options as shown above: Thales Navigation: ZXSS-TDS v3.2.1 Localization...
- Page 8 After you have selected the desired Projection Modes for the Demo, Tap OK… This will return you to the Survey Pro CE Main menu… At this stage of the demo, the TDS Ranger needs to be connected to the Base RTK receiver.
- Page 9 Next, Tap on the Sky View tab… The next screen… Figure 15 Next Tap on the Close button.. This will return you to Survey Pro CE Main menu… [ 3 ] Survey - [ B ] Base Setup Next, Tap on the menu The next screen…...
- Page 10 Tap on the Setup… button, The next screen… Figure 17 Tap on the Down Arrow and Select – Choose from list… The next screen… Figure 18 Tap / Select Point 1, RTK Base, N-5000, E-5000, Elev. 500 Next, Tap the OK button… Thales Navigation: ZXSS-TDS v3.2.1 Localization...
- Page 11 The next screen… Figure 19 Tap on the Setup HR button.. The next screen… Figure 20 Select the Options as shown above: The Antenna Type: Geodetic IV -GP: (P/N 701975-01). The –GP = No Ground plane. In this example, The RTK Base GPS Antenna is mounted to a wooden tripod/Tribrach. The HI Flag = Slant measure mark.
- Page 12 The next screen… Figure 21 This returns to the Base Setup menu… Tap on the Next > button… The next screen… Figure 22 In this menu, perform the TDS GET (GET Position From Rx.) But, first input Average Position 60 Epochs before GET, then Tap “GET Position From Rx.”...
- Page 13 The next screen… Figure 23 Status Screen during 60-second from GET Autonomous Position… When the 60-seconds is completed, the window automatically closes. The next screen… Figure 24 Resulting WGS84 Position for the RTK Base. Tap on the Set button… Thales Navigation: ZXSS-TDS v3.2.1 Localization...
- Page 14 The next screen… Figure 25 Tap on the Reset button… This will start a new a data file in the GPS receiver’s internal PC Card memory, for Post-Processing applications, (Code & Carrier Data). The next screen… Figure 26 Tap the OK button This is the “Trigger”...
- Page 15 The next screen… Figure 27 Tap on the OK button… This screen informs the User, the current Localization will be discarded, (if the User Taps OK), the RTK Rover must then re-occupy the Horizontal and Vertical control points, then SOLVE & ACCEPT for the new Localization. The next screen…...
- Page 16 The next screen… Figure 29 Next, Tap on [ 3 ] Survey - [ D ] Control Points The next screen… Figure 30 In this menu, select the point number for the RTK Base Point, Calculate a Single Point Localization… Thales Navigation: ZXSS-TDS v3.2.1 Localization...
- Page 17 Control Points menu + Point: Tap on the Down Arrow for the Pull-Down menu… Select “Choose from List” option, select Point 1, the RTK Base point, Next, Tap on the Utilities | Projection menu button, The next screens… Figure 31 Next, Tap on the Localization Setup…...
- Page 18 The next screen… Figure 33 You have just performed a single Point Localization, holding the N-5000, E-5000, 500 Elevation coordinates, with the autonomous WGS84 position from the TDS GET: Latitude 39° 03’ 45.25178” N Longitude 77° 28’ 50.87388” W Base Height 75.084m Next, to accept the Localization, Tap on the Accept button…...
- Page 19 The next screen… Figure 34 Note the results of the Single Point Localization, the Scale Factor = 1.000000 The Rotation Angle = 0° 00’ 00”. The data collector cannot compute the RMS residuals on the control points, there’s not enough control points to compute these residuals.
- Page 20 Next, select [ 3 ] Survey - [ C ] Rover Setup… Figure 35 The next screen… Figure 36 Thales Navigation: ZXSS-TDS v3.2.1 Localization...
- Page 21 Note the Position of the RTK Base, this is the resulting WGS84 position from the TDS GET function. This is the position SET into the RTK Base receiver, this is position the PDL base radio is transmitting. DO NOT tap on Set Rover yet… Configure the RTK Rover GPS Antenna, Measure To and RTK Rover’s HI.
- Page 22 The menu will close and return you to the Rover Setup menu… Figure 38 After the RTK Rover Antenna Parameters are determined – Tap Set Rover… The next screen… Figure 39 This will start a new a data file in the GPS receiver’s internal PC Card memory, for Post-Processing applications, (Code &...
- Page 23 The next screen… Figure 40 Tap the OK button… This is the “Trigger” that switches the receiver from STATIC MODE into RTK ROVER MODE. The receiver is now configured as a RTK Rover, the internal PDL - RXO Rover Radio should now begin to Receive corrections from the RTK Base Next, select [ 3 ] Survey - [ A ] GPS Status…...
- Page 24 GPS Status – Receiver display menu… The next screen… Figure 42 GPS Status – Data Link display menu… The next screen… Figure 43 GPS Status – Sky View display menu… Thales Navigation: ZXSS-TDS v3.2.1 Localization...
- Page 25 The next screen… Figure 44 GPS Status – SNR Plot display menu… The next screen… Figure 45 GPS Status – SV List display menu… Thales Navigation: ZXSS-TDS v3.2.1 Localization...
- Page 26 The next screen … Figure 46 GPS Status – Position display menu… Note: if the Localization HAS been Solved & Accepted, the Position display will show Northing, Easting and Elevation coordinates, relative to the RTK Base station. If the Localization has NOT been Solved & Accepted, the Position display will show the differentially corrected Latitude, Longitude and Ellipsoid –...
- Page 27 The RTK system both Base and Rover are operational, the Localization is Solved and Accepted. You are now ready to Check a Control point, perform Data Collection, or perform Stakeout. Continue with the RTK demonstration… To check Control Points, select [ 3 ] Survey – [ D ] Control Points… To collect Topographic Data Points, From the Survey Pro CE Main menu, Select, [ 3 ] Survey - [ D ] Data Collection…...
- Page 28 The next screen… Figure 49 Note the Status Bar, in the top portion of the Data Collection menu, the Status Bar will constantly display Fix / Float status, Radio reception, Number of SV’s and HRMS. The Point number will sequentially increase, input a Description as needed, when your ready to “take-the-shot”, tap Point…...
- Page 29 Tap the OK button to “take-the-shot”… Hold the RTK Rover’s range pole steady, if there’s a lot of motion while “taking-the- shot”, the RTK Rover receiver may not allow you to store the point, until the pole motion ceases. Alternatively, the Data Collection – Settings can be changed from Static, to Dynamic Always.
- Page 30 The Survey Pro CE software will allow the user to Append the Description after the point has been stored. This featured can be turned off if desired. Tap OK, or hit Enter on the Ranger keyboard to accept the Descriptor. If desired, Tap on the Attributes…...
- Page 31 Select, [ 4 ] Stakeout - [ A ] Stake Points… The next screen … Figure 53 The next screen… Figure 54 Tap on the Down Arrow, then select Choose from List… Thales Navigation: ZXSS-TDS v3.2.1 Localization...
- Page 32 Select the Design Point for Stake-Out.. The next screen … Figure 55 In this example, Point 2 was selected for Stake-Out.. After selecting Point 2, tap OK… The next screen … Figure 56 Thales Navigation: ZXSS-TDS v3.2.1 Localization...
- Page 33 To begin the Stake-Out routines, Tap Solve… The next screen … Figure 57 The selected Point 2’s Design Coordinates are displayed… Next, tap the Stake button… The next screen … Figure 58 Live Screen displays: Azimuth, Distance, Cut –or- Fill To the Design Point. Thales Navigation: ZXSS-TDS v3.2.1 Localization...
- Page 34 Note, the Status Bar, in the top portion of the GPS Staking menu, the Status Bar will constantly display Fix / Float status, Radio reception, Number of SV’s and HRMS. In this screen capture, the Ref: 0° 00’ 00” (Geodetic North) is being used. If the Compass vile is mounted on the RTK Rover Pole, use this to orientate direction to the Design point.
- Page 35 The Design point is the Square Target / The RTK Rover Pole is the Round target. Put the Round target in the Square… When the point has been successfully located, Tap the Done button, the “AZ-built” position can be stored. Follow the on-screen prompts to Store the Point.
- Page 36 Tap on the Drop-Down Arrow, choose Select All Points Figure 61 Select Sequential or, Non-Sequential… Thales Navigation: ZXSS-TDS v3.2.1 Localization...
- Page 37 Figure 62 Tap on Export … Thales Navigation: ZXSS-TDS v3.2.1 Localization...
- Page 38 Save As menu… Figure 63 Input a Filename: RTK-Demo-Out.CR5… To Transfer the Exported Coordinates from the TDS Ranger: Select [ 1 ] File – [ F ] Transfer… Figure 64 Thales Navigation: ZXSS-TDS v3.2.1 Localization...
- Page 39 Transfer menu… Figure 65 Specify connecting to Windows PC Specify Communications settings… Thales Navigation: ZXSS-TDS v3.2.1 Localization...
- Page 40 Start the TDS Survey Link software on the PC, Start | Programs | TDS Survey Works | Survey Link… From the Pull-Down menu Select Transfer | Send / Receive… Select the Receiver Tab… Figure 66 Last Updated by RDL: 9/10/02 Thales Navigation: ZXSS-TDS v3.2.1 Localization...
Need help?
Do you have a question about the Z-Xtreme RTK and is the answer not in the manual?
Questions and answers