Table of Contents
Advertisement
Advertisement
Table of Contents

Related Manuals for ashtech MobileMapper 10


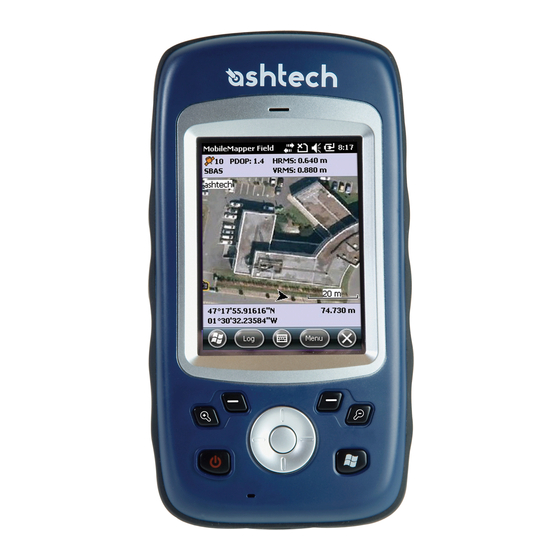
Summary of Contents for ashtech MobileMapper 10
- Page 1 MobileMapper 10 Getting Started Guide...
-
Page 2: Table Of Contents
Table of Contents First-Time Use ..................1 Unpacking ..................1 Inserting the Battery Into the Receiver..........1 Turning the Receiver On..............2 Using the AC Adapter to Charge the Battery ........3 Adjusting Backlight Level and Idle Time ........... 4 Power Management................. - Page 3 Cropping a Picture..............15 Auto-correcting a Picture ............16 Deleting a Picture ..............16 Changing Picture Settings ............16 Making a Video................16 Setting the Duration of a Video Film..........16 Starting a Video ................ 17 Ending a Video................17 Playing Back a Video ..............
-
Page 4: First-Time Use
First-Time Use Unpacking Open the receiver box and unpack the following items: • Receiver • Battery • Universal AC adapter • USB cable • Back strap • Lanyard • Stylus Inserting the Follow the instructions below: Battery Into the • Turn over the receiver. Receiver •... -
Page 5: Turning The Receiver On
Skip the next section and go to Adjusting Backlight Level and Idle Time on page 4. If it less, Ashtech recommends you first charge the battery as explained in Using the AC Adapter to Charge the Battery on page 3. -
Page 6: Using The Ac Adapter To Charge The Battery
Using the AC Follow the instructions below. Adapter to Charge • Prepare the AC adapter: the Battery – Remove the protective cover [1] by pushing the button then sliding the cover forward. – Choose the plug that fits your country’s AC outlet standard (see [2]) and slide it into the AC adapter [3}. -
Page 7: Adjusting Backlight Level And Idle Time
sure the battery charge status is at least 50% before taking your receiver for a field job. • When you are done with the charging of the battery, disconnect the USB cable from the receiver, put the AC adapter safe away and proceed to the next step. Adjusting Backlight Level: The screen backlight may be adjusted to match the ambient light for optimized visibility. -
Page 8: Setting Time & Date
• Press the Windows key and tap successively on Settings, System and Power. • Tap on the Advanced tab. This tab allows you to ask for the receiver to switch automatically to Suspend mode if it stays idle for the period of time you choose. You may choose a different setting depending on whether the receiver is powered from the internal battery or from an external power source. -
Page 9: How To Hold The Receiver
• In the task bar at the bottom of the screen, tap on the padlock icon (see screen below). As a result, the touch screen and keypad are made inactive. • To unlock the touch screen and keypad, just drag the on- screen slide button either to the left or right. -
Page 10: Switching The Receiver Manually To Suspend Mode
you should drag the stylus over the screen to scroll through the whole data displayed. To return to 1:1 zoom, just tap on the title bar again to re- open the quick toolbar, and then tap on the zoom function again. -
Page 11: Receiver Description
Receiver Description Front View Power Key Use the Power key [1] to turn on or off the receiver. To turn on the receiver, press the Power key [1] until you can feel a vibration in your hand, meaning the receiver has started a power-on procedure. -
Page 12: Microphone
[14] GPS antenna is automatically disconnected from the receiver input. The antenna input connector is protected by a rubber flap. Although a waterproof coaxial connector is used, Ashtech [15] [16] recommends you keep the flap close when no external antenna is used. -
Page 13: Battery Compartment
Battery Compartment The receiver makes use of a rechargeable Li-Ion battery pack. Loosen the quarter-turn screws [15] [16] using a coin to access the battery compartment [17]. The two screws use opposite directions of rotation for opening and closing the trap door. -
Page 14: Gnss Toolbox
GNSS Toolbox GNSS Toolbox is used to control and monitor important functions in your receiver. These are listed and detailed below. • GNSS Settings: Constellations and frequencies used in the receiver. • GNSS Status: Views GNSS reception monitoring screens. • Reset: Resets the receiver. •... -
Page 15: Reset
Using the Reset function is recommended when only the GNSS Toolbox (and not other field software) is running on the platform. About This function provides the software version of GNSS Toolbox, followed by the Ashtech legal line. -
Page 16: Advanced Features
Advanced Features Power Modes The receiver has three power modes: • Shutdown: The receiver is off. • On: The receiver is fully powered • Suspend: In this mode, the screen content and backlight are turned off to save power. Satellite reception is maintained and the use context is saved. -
Page 17: Battery Charging Scenarios
With only about 5% of remaining power (red area), a new message will pop up: “Main Battery Very Low”. Tap Dismiss in the task bar to continue using the receiver. Ashtech however recommends that you turn off the receiver and replace the battery. -
Page 18: Using The Camera
Using the Camera Taking a Picture • Press the Windows key and tap Pictures & Videos. This opens the “My Pictures” folder in which you can see the list of existing images and videos. The first item in the list is the Camera, the tool you will now be using to take pictures. -
Page 19: Auto-Correcting A Picture
• Tap Menu and Edit. • Tap Menu again and select Crop. • As instructed, drag a rectangle on the picture representing what the final image should be like, then tap inside the rectangle to complete the crop operation. If you’re not happy with the result, you can always come back to the initial image by selecting Menu and Revert to Saved. -
Page 20: Starting A Video
• Tap on the Video tab. • Tap within the Time limit for videos. field and select one of the options below: – No limit: Choose this option to be able to film a video over an unlimited period of time. –... -
Page 21: Renaming A Video
Renaming a Video • With the “My Pictures” folder open, select the desired video file using the Scroll button. • Tap Menu, Tools and then Properties. • Rename the file and tap OK. Deleting a Video • With the “My Pictures” folder open, tap and hold the desired video file. -
Page 22: Platform Specifications
Platform Specifications GNSS 20 channels Characteristics • GPS L1 C/A • SBAS: WAAS/EGNOS/MSAS • External antenna: L1 GPS • NMEA Output: GGA, GSA, GSV, RMC Accuracy All specified values are HRMS, handheld accuracy performance achieved in good conditions (open sky) with Specifications PDOP <... -
Page 23: Physical Characteristics
Physical • Receiver size: 169 x 88 x 25 mm Characteristics • Receiver weight (batteries included): 380 g • Receiver weight, alone: 310 g User Interface Keyboard: • Alphanumeric virtual keyboard • 4-way navigation scroll button; OK, Zoom In/Out keys + context-sensitive keys •... - Page 24 Ashtech follows a policy of continuous product improvement; specifications and descriptions are thus subject to change without notice. Please contact Ashtech for the latest product information. ©2010 Ashtech. All rights reserved. The Ashtech logo is a trademark of Ashtech LLC.
- Page 25 Manual Requirements according 15.19 / RSS-210 NOTICE: This device complies with Part 15 of the FCC Rules [and with RSS-210 of Industry Canada]. Operation is subject to the following two conditions: (1) this device may not cause harmful interference, and this device must accept any interference received, including interference that may cause undesired operation.
- Page 26 NOTICE: This device complies with Industry Canada licence-exempt RSS standard(s). Operation is subject to the following two conditions: (1) this device may not cause interference, and (2) this device must accept any interference, including interference that may cause undesired operation of the device. [Le présent appareil est conforme aux CNR d'Industrie Canada applicables aux appareils radio exempts de licence.
Need help?
Do you have a question about the MobileMapper 10 and is the answer not in the manual?
Questions and answers