Advertisement
Available languages
Available languages
Quick Links
Baby Trend, Inc.
13048 Valley Blvd.
Fontana CA 92335
1-800-328-7363
(8:00 a.m. ~ 4:30 p.m. PST)
www.babytrend.com
RK02XXXA_2L_100722
Read all instructions BEFORE assembly and USE of product.
KEEP INSTRUCTIONS FOR FUTURE USE.
Lea todas las instrucciones ANTES de armar y USAR el
producto. CONSERVE LAS INSTRUCCIONES PARA USO FUTURO.
Instruction Manual
Manual de Instrucciones
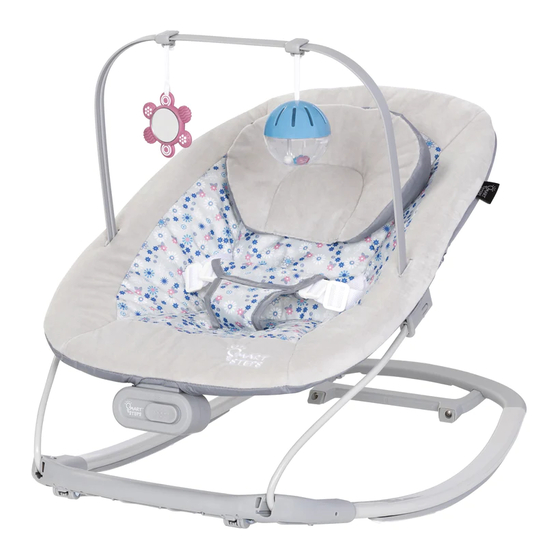
My First Rocker 2 Bouncer
RK02XXXA
Advertisement

Related Manuals for BABYTREND Smart STEPS My First Rocker 2


Summary of Contents for BABYTREND Smart STEPS My First Rocker 2
- Page 1 Lea todas las instrucciones ANTES de armar y USAR el producto. CONSERVE LAS INSTRUCCIONES PARA USO FUTURO. Instruction Manual RK02XXXA Manual de Instrucciones Baby Trend, Inc. 1-800-328-7363 (8:00 a.m. ~ 4:30 p.m. PST) 13048 Valley Blvd. My First Rocker 2 Bouncer Fontana CA 92335 www.babytrend.com RK02XXXA_2L_100722...
-
Page 2: Warranty
Customer Service Department can be contacted at 1 (800) 328-7363 Monday through Friday between 8:00 a.m. and 4:30 p.m. (PST). Return Authorizations are required prior to returning product(s) to Baby Trend®. Please visit http://babytrend.com/pages/ limited-warranty for complete warranty details. GARANTIA NO DEVUELVA SU PRODUCTO A LA TIENDA. -
Page 3: Fall Hazard
WARNING WARNING WARNING! • Toy bar is NOT designed to be used as a carry handle. Not intended for infant sleep and • NEVER use on any elevated surface. should never be used for this purpose. FALL HAZARD: • NEVER leave baby unattended. Babies have suffered skull •... - Page 4 PARTS ASSEMBLY IMPORTANT! Check that you have all the parts for this model before assembling the Bouncer/Rocker. To ensure safe operation of your Bouncer/Rocker , please follow these instructions carefully. Please keep these instructions for future reference. IMPORTANT! Before assembly and each use, inspect this product for damaged hardware, loose joints, missing parts or sharp edges.
- Page 5 ASSEMBLY ASSEMBLY Bouncer/Rocker frame assembly With the toy bar connectors facing up, insert the arch ends into the padded support tube Top frame holes (Fig. 1a). NOTE: Start with the 2 backrest bars to create the Ensure that they click into top arch (1).
- Page 6 ASSEMBLY ASSEMBLY vibration unit Attach the vibration unit Inserting the padding entry Bottom Attachment parts Rear frame view of fabric covering Gather the parts and locate Flip the Bouncer/Rocker frame the holes of the padded upside down and slip the cover support tube.
- Page 7 ASSEMBLY ASSEMBLY Complete the padding cover Base frame attachment Base frame by gently stretching the top back covering over the backrest Base Frame Orientation frame (Fig. 3c). Diagram NOTE: Keep buckle straps NOTE: refer to the diagram as over the tubes at all times. a guide for the following base connections.
- Page 8 ASSEMBLY ASSEMBLY Base frame wire connection Connect the frames Locate the and base frame, right and left base frame Flip-out the 2 stationary feet wires (Fig. 4c). NOTE: use the 2 feet to assist in NOTE: Base frame wires must assembing the Bouncer/Rocker be curved inward toward base frame sections (Fig.
- Page 9 ASSEMBLY SAFETY Secure the Bouncer/Rocker Frame SEAT RESTRAINT Push the wire into the connection firmly (Fig. 5d). Harness release The connectors and base frame Fig. 5d wires are secure only when they If buckled, unbuckle the straps on each side of the seat restraint click into position (Fig.
- Page 10 SAFETY ASSEMBLY Child placement Accessory Carefully place the child in the Bouncer/Rocker seat Head Pillow and buckle the waist straps into the crotch buckles To attach the pillow, thread the hook and loop fastener through the (Fig. 6b). loop at the top front of the fabric. Buckle may be tucked under NOTE: product may be used with or without the head pillow.
- Page 11 ASSEMBLY FUNCTIONS Toy Bar Rocker to Bouncer Function Toys to bar connection Collapse the 2 stationary feet Use the hook and Rocker: fold the 2 feet to Hook and loop straps to dangle / convert and use the Rocker loop interchange the toys.
- Page 12 FUNCTIONS FUNCTIONS Battery Installation The vibration unit requires three size AAA batteries (not included). It is recommended that Vibration Function you use alkaline batteries for longer battery life. CAUTION: To prevent possible battery leakage, be Batteries sure to follow the guidelines outlined below. Remove the battery cover •...
-
Page 13: Maintenance
ADDITIONAL MAINTENANCE FCC Statement CARE AND CLEANING This device complies with Part 15 of the FCC rules. Operation is subject to the following two Remove the seat pad and headrest conditions: from the frame. 1 this device may not cause harmful interference, and 2 this device must accept any interference received, including interference that may cause undesired NOTE: requires reversing STEP 3. - Page 14 ADVERTENCIA ADVERTENCIA ADVERTENCIA ¡ADVERTENCIA! • NUNCA use a barra de juguetes para levantar o No está diseñado para trasladar el producto. que duerman los bebés y nunca debe usarse para • NUNCA coloque la hamaca/mecedora en supercies este propósito. elevadas. PELIGRO DE CAÍDA: Los bebés •...
- Page 15 PIEZAS ENSAMBLAR Verifique que tenga todas las piezas para este modelo antes de montar el asiento. ¡IMPORTANTE! Para asegurar el hamaca/ funcionamiento seguro de su mecedora , siga estas instrucciones cuidadosamente. Por favor, conserve estas instrucciones para referencia futura. ¡IMPORTANTE! Antes del montaje y de cada uso, inspeccione (2) Tubos del respaldo...
- Page 16 ENSAMBLAR ENSAMBLAR Conjunto de bastidor hamaca/mecedora Con los conectores de la barra de juguete hacia arriba, inserte los extremos del Marco superior arcoen el tubo de soporte acolchado agujeros (Fig. 1a). NOTA: Comience con las 2 barras de respaldo para crear el arco superior (1).
- Page 17 ENSAMBLAR ENSAMBLAR unidad de vibración Conecte la unidad de vibración Inserción del acolchado entrada Fondo Piezas de conexión Vista del bastidor trasero de tela cobertura Piezas de conexión Reúna las Voltea el marco de la hamaca/ piezas y localice los agujeros del mecedora boca abajo y desliza acolchado tubo de apoyo.
- Page 18 ENSAMBLAR ENSAMBLAR Completa la cubierta Construcción de la base de acolchado estirando Marco base suavemente la parte superior Orientación del marco base y atrás cubriendo el respaldo marco Diagrama (Fig. 3c). NOTA: consulte el diagrama NOTA: Mantenga las correas como una guía para la de la hebilla sobre los tubos siguiente base conexiones.
- Page 19 ENSAMBLAR ENSAMBLAR Conexión de cable de la base Conectar los marcos Localice el marco y el marco base, marco base derecho e Despliega los 2 pies estacionarios izquierdo alambres (Fig. 4c). NOTE: use los 2 pies para ayudar en montaje de la hamaca/mecedora secciones NOTA: Los cables del marco de marco (Fig.
- Page 20 ENSAMBLAR ENSAMBLAR SAFETY Asegure el marco de la hamaca/mecedora SUJECIÓN DE ASIENTOS Empuje el cable hacia la conexión firmemente Liberación del arnés (Fig. 5d). Fig. 5d Si está abrochado, desabroche las correas a cada lado del sistema de retención del asiento (Fig. 6a). Los conectores y el bastidor base los cables son seguros solo cuando haga clic en la posición...
- Page 21 SEGURIDAD ENSAMBLAR Colocación de niños Accesorio Coloque cuidadosamente al niño en el asiento de la Almohada para la cabeza hamaca/mecedora y abroche las correas de la cintura en las Para sujetar la almohada, enhebra el gancho y el cierre del lazo a hebillas de la entrepierna través de la lazo en la parte superior delantera de la tela.
- Page 22 ENSAMBLAR ENSAMBLAR FUNCIONES Barra de juguetes Función de Mecedora a Hamaca Conexión de juguetes a barra Colapsar los 2 pies estacionarios Usa las correas de gancho y Mecedora: dobla los 2 pies para Gancho y lazo para sujetar o convertir y usar la mecedora lazo intercambiar los juguetes.
- Page 23 FUNCIONES FUNCIONES Instalación de las Baterias Función de Vibración La unidad de vibración requiere tres pilas tamaño AAA (no están incluidas). Se recomienda Las Pilas que use pilas alcalinas para que duren más. Use un destornillador Phillips PRECAUCIÓN: para retirar la cubierta de las Para prevenir una posible pilas (Fig.
-
Page 24: Mantenimiento
ADICIONAL MANTENIMIENTO Declaración de la FCC CUIDADO Y LIMPIEZA Retire la almohadilla del asiento y el Este dispositivo cumple con las normas de la Parte 15 de la Comisión Federal de Comunicaciones reposacabezas del marco. (FCC). El funcionamiento está sujeto a las siguientes dos condiciones: 1 este dispositivo no puede producir interferencias perjudiciales y NOTA: requiere invertir el PASO 3.
Need help?
Do you have a question about the Smart STEPS My First Rocker 2 and is the answer not in the manual?
Questions and answers