Table of Contents
Advertisement
Quick Links
Advertisement
Table of Contents

Related Manuals for AEG BSE772380M


Summary of Contents for AEG BSE772380M
- Page 1 EN User Manual | Steam oven BSE772380M aeg.com\register...
-
Page 2: Table Of Contents
FOR PERFECT RESULTS Thank you for choosing this AEG product. We have created it to give you impeccable performance for many years, with innovative technologies that help make life simpler – features you might not find on ordinary appliances. Please spend a few minutes reading to get the very best from it. -
Page 3: Safety Information
SAFETY INFORMATION Before the installation and use of the appliance, carefully read the supplied instructions. The manufacturer is not responsible for any injuries or damage that are the result of incorrect installation or usage. Always keep the instructions in a safe and accessible location for future reference. - Page 4 similar accommodation where such use does not exceed (average) domestic usage levels. • Only a qualified person must install this appliance and replace the cable. • Do not use the appliance before installing it in the built-in structure. • Disconnect the appliance from the power supply before carrying out any maintenance.
-
Page 5: Safety Instructions
2. SAFETY INSTRUCTIONS 2.1 Installation Ventilation opening mini‐ 560x20 mm mum size. Opening placed WARNING! on the bottom rear side Only a qualified person must install this Mounting screws 4x25 mm appliance. 2.2 Electrical connection • Remove all the packaging. •... - Page 6 The isolation device must have a contact – be careful when you remove or install opening width of minimum 3 mm. the accessories. • Fully close the appliance door before you • Discoloration of the enamel or stainless connect the mains plug to the mains steel has no effect on the performance of socket.
- Page 7 • Before carrying out the pyrolytic cleaning – Be careful when you open the and initial preheating remove from the appliance door when the function is oven cavity: activated. Steam can release. – any excess food residues, oil or – Open the appliance door with care grease spills / deposits.
-
Page 8: Product Description
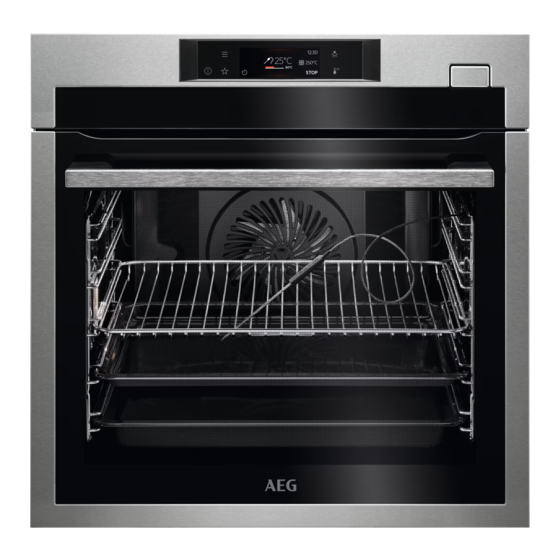
3. PRODUCT DESCRIPTION 3.1 General overview Control panel Display Water drawer Socket for the food sensor Heating element Lamp Descaling pipe outlet Shelf support, removable Shelf positions 3.2 Accessories Wire shelf For cookware, cake tins, roasts. Baking tray For cakes and biscuits. Grill- / Roasting pan To bake and roast or as a pan to collect fat. -
Page 9: Control Panel
Trivet For roasting and grilling. Use the trivet only with the Grill- / Roasting pan. Food sensor To measure the temperature inside food. Telescopic runners For inserting and removing trays and wireshelf more easily. 4. CONTROL PANEL 4.1 Control panel overview ON / OFF Press and hold to turn the appliance on and off. -
Page 10: Before First Use
Fast Heat Up To turn on and off the function: Fast Heat Up. Press Move Press and hold Touch the surface with fingertip. Slide fingertip over the surface. Touch the surface for 3 seconds. 4.2 Display Display with key functions set. Time of day START/STOP 12:30... - Page 11 5.1 Initial Cleaning Step 1 Step 2 Step 3 Remove all accessories and remov‐ Clean the appliance and the acces‐ Place the accessories and the re‐ able shelf supports from the appli‐ sories only with a microfibre cloth, movable shelf supports in the appli‐ ance.
-
Page 12: Daily Use
Water hardness Test paper Calcium depos‐ Calcium de‐ Water classifi‐ it (mmol/l) posit (mg/l) cation Level 0 - 7 0 - 1.3 0 - 50 soft 8 - 14 1.4 - 2.5 51 - 100 moderately hard 15 - 21 2.6 - 3.8 101 - 150 hard... - Page 13 Step 5 Press: Step 6 Press the cover of the water drawer to open it. Step 7 Fill the water drawer with cold water to the maximum level (around 950 ml) until the signal sounds or the display shows the message. Do not fill the water drawer over its maximum capacity. There is a risk of water leakage, overflow and furniture damage.
- Page 14 6.4 Heating functions STANDARD Heating function Application To grill thin pieces of food and to toast bread. Grill To roast large meat joints or poultry with bones on one shelf position. To make gratins and to brown. Turbo Grilling To bake on up to three shelf positions at the same time and to dry food. Set the tem‐ perature 20 - 40 °C lower than for Conventional Cooking.
- Page 15 Heating function Application To preheat plates for serving. Plate Warming To defrost food (vegetables and fruit). The defrosting time depends on the amount and size of the frozen food. Defrost For dishes such as lasagna or potato gratin. To make gratins and to brown. Au Gratin To prepare tender, succulent roasts.
-
Page 16: Clock Functions
7. CLOCK FUNCTIONS 7.1 Clock functions description Clock function Application Cooking time To set the length of cooking. Maximum is 23 h 59 min. End action To set what happens when the timer ends counting. Delayed start To postpone the start and / or end of cooking. Time extension To extend cooking time. -
Page 17: Using The Accessories
How to delay start of cooking Step 1 Set the heating function and the temperature. Step 2 Press: Step 3 Set the cooking time. Step 4 Press: Step 5 Press: Delayed start. Step 6 Choose the value. Step 7 Press: . - Page 18 Wire shelf: Push the shelf between the guide bars of the shelf support. Baking tray / Deep pan: Push the tray between the guide bars of the shelf support. 8.2 Using Trivet and Grill- / Roasting WARNING! Be careful when you remove the accessories from a hot oven.
- Page 19 Step 1 Put the trivet into the deep pan so that the supports of the wire shelf point down. Step 2 Put the deep pan into the oven on the necessary shelf position. 8.3 Food Sensor Food Sensor - measures the temperature inside the food. You can use it with every heating function.
-
Page 20: Additional Functions
Step 4 Plug Food Sensor into the socket at the front of the oven. The display shows the current temperature of: Food Sensor. Step 5 - press to set the core temperature of the sensor. Step 6 - press to set the preferred option: •... -
Page 21: Hints And Tips
- press to reset the setting. - press to cancel the setting. 9.2 Function lock This function prevents an accidental change of the heating function. Step 1 Turn on the appliance. Step 2 Set a heating function. Step 3 - press at the same time to turn on the function. To turn off the function repeat step 3. - Page 22 (°C) (min) Sweet rolls, 16 baking tray or dripping pan 25 - 35 pieces Swiss Roll baking tray or dripping pan 15 - 25 Whole fish, 0.2 kg baking tray or dripping pan 15 - 25 Cookies, 16 pieces baking tray or dripping pan 20 - 30 Macaroons, 24 baking tray or dripping pan...
- Page 23 °C Fatless sponge cake Conventional Cooking 45 - 60 Apple pie, 2 tins Ø20 cm True Fan Cooking 55 - 65 Apple pie, 2 tins Ø20 cm Conventional Cooking 55 - 65 Short bread True Fan Cooking 25 - 35 Short bread Conventional Cooking 25 - 35...
-
Page 24: Care And Cleaning
11. CARE AND CLEANING WARNING! Refer to Safety chapters. 11.1 Notes on cleaning Clean the front of the appliance only with a microfibre cloth with warm water and a mild de‐ tergent. Use a cleaning solution to clean metal surfaces. Clean stains with a mild detergent. - Page 25 CAUTION! If there are other appliances installed in the same cabinet, do not use them at the same time as this function. It can cause damage to the oven. Before the Pyrolytic Cleaning: Turn off the oven and wait until Remove all accessories.
- Page 26 11.5 How to use: Descaling Before you start: Turn off the oven and wait until it is Remove all accessories. Make sure that the water drawer is cold. empty. Duration of the first part: around 100 min Step 1 Place the deep pan on the first shelf position. Step 2 Pour 250 ml of the descaling agent in the water drawer.
- Page 27 Step 1 Place the deep pan on the first shelf position. Step 2 Fill the water drawer with water to the maximum level until the signal sounds or the display shows the message. Step 3 Select: Menu / Cleaning / Rinsing. Duration: around 30 min Step 4 Turn on the function and follow the instruction on the display.
- Page 28 Step 3 Close the oven door to the first opening position (approximately 70° angle). Hold the door at both sides and pull it away from the oven at an upwards angle. Put the door with the outer side down on a soft cloth on a stable surface.
-
Page 29: Troubleshooting
Step 3 Replace the lamp with a suitable 300 °C heat-resistant lamp. Step 4 Attach the metal ring to the glass cover and install it. Side lamp Step 1 Remove the left shelf support to get ac‐ cess to the lamp. Step 2 Use a narrow, blunt object (e.g. - Page 30 Components Description Remedy The lamp is burnt out. Replace the lamp, for details refer to "Care and Clean‐ ing" chapter, How to replace: Lamp. Power cut always stops cleaning. Repeat cleaning if it's interrupted by power failure. 12.2 How to manage: Error codes When the software error occurs, the display shows error message.
-
Page 31: Energy Efficiency
13. ENERGY EFFICIENCY 13.1 Product Information and Product Information Sheet Supplier's name Model identification BSE772380M 944188704 Energy Efficiency Index 61.2 Energy efficiency class Energy consumption with a standard load, conventional mode 1.09 kWh/cycle Energy consumption with a standard load, fan-forced mode 0.52 kWh/cycle... -
Page 32: Menu Structure
Moist Fan Baking turn on the lamp again but this action will Function designed to save energy during reduce the expected energy savings. cooking. When you use this function the lamp automatically turns off after 30 sec. You may 14. MENU STRUCTURE 14.1 Menu Menu item Application... -
Page 33: S Easy
Submenu Application Digital clock style Changes the format of the displayed time indication. 14.4 Submenu for: Setup Submenu Description Language Sets the appliance language. Display brightness Sets the display brightness. Key tones Turns the tone of the touch fields on and off. It is not possible to mute the tone for: Buzzer volume Sets the volume of key tones and signals. -
Page 34: Environmental Concerns
Start cooking - press to turn on the - select the heating - set the tempera‐ - press to start cook‐ - press to confirm. appliance. function. ture. ing. Get to know how to cook quickly Use the automatic programmes to prepare a dish quickly with the default settings: Assisted Cook‐... - Page 36 867371433-B-062023...