AEG BSE782380M User Manual
Hide thumbs
Also See for BSE782380M:
- User manual (48 pages) ,
- User manual (36 pages) ,
- User manual (28 pages)
Table of Contents
Advertisement
Quick Links
Advertisement
Table of Contents

Related Manuals for AEG BSE782380M


Summary of Contents for AEG BSE782380M
- Page 1 EN User Manual | Steam oven BSE782380M...
-
Page 2: Table Of Contents
Access your full user manual at aeg.com/manuals Get usage advice, brochures, trouble shooter, service and repair information at aeg.com/support For more recipes, hints, troubleshooting download My AEG Kitchen app. Subject to change without notice. CONTENTS 1. SAFETY INFORMATION................2 2. - Page 3 the use of the appliance in a safe way and understand the hazards involved. Children of less than 8 years of age and persons with very extensive and complex disabilities shall be kept away from the appliance unless continuously supervised. •...
-
Page 4: Safety Instructions
• WARNING: Ensure that the appliance is switched off before replacing the lamp to avoid the possibility of electric shock. • WARNING: The appliance and its accessible parts become hot during use. Care should be taken to avoid touching heating elements or the surface of the appliance cavity. •... - Page 5 2.3 Use Mounting screws 4x25 mm WARNING! 2.2 Electrical connection Risk of injury, burns and electric shock or explosion. WARNING! • Do not change the specification of this Risk of fire and electric shock. appliance. • Make sure that the ventilation openings •...
- Page 6 • Always cook with the appliance door – Open the appliance door with care closed. after the steam cooking operation. • If the appliance is installed behind a 2.6 Internal lighting furniture panel (e.g. a door) make sure the door is never closed when the appliance operates.
-
Page 7: Product Description
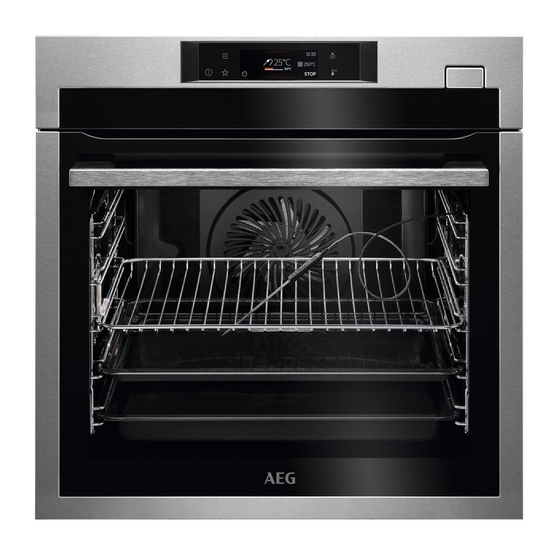
3. PRODUCT DESCRIPTION 3.1 General overview Control panel Display Water drawer Socket for the food sensor Heating element Lamp Descaling pipe outlet Shelf support, removable Shelf positions 3.2 Accessories Wire shelf For cookware, cake tins, roasts. Baking tray For cakes and biscuits. Grill- / Roasting pan To bake and roast or as a pan to collect fat. -
Page 8: Control Panel
Trivet For roasting and grilling. Use the trivet only with the Grill- / Roasting pan. Food sensor To measure the temperature inside food. Telescopic runners For inserting and removing trays and wireshelf more easily. Steam set One unperforated and one perforated food container. - Page 9 ON / OFF Press and hold to turn the appliance on and off. Menu Lists the appliance functions. Favourites Lists the favourite settings. Display Shows the current settings of the appliance. Lamp switch To turn the lamp on and off. Fast Heat Up To turn on and off the function: Fast Heat Up.
-
Page 10: Before First Use
5. BEFORE FIRST USE WARNING! Refer to Safety chapters. 5.1 Initial Cleaning Step 1 Step 2 Step 3 Remove all accessories and remov‐ Clean the appliance and the acces‐ Place the accessories and the re‐ able shelf supports from the appli‐ sories only with a microfibre cloth, movable shelf supports in the appli‐... -
Page 11: Daily Use
Put the test paper into Shake the test paper to re‐ After 1 min, check water Set the water hardness lev‐ water for about 1 sec. Do move the excess of water. hardness with the table el: Menu / Settings / Setup / not put the test paper un‐... - Page 12 Step 1 Turn on the oven. Select the symbol of the heating function and press it to enter the submenu. Step 2 Press . Set the steam heating function. Step 3 Press: . The display shows the temperature settings. Step 4 Set the temperature.
- Page 13 6.3 How to set: Assisted Cooking Every dish in this submenu has a recommended function and temperature. You can adjust the time and the temperature. For some of the dishes you can also cook with: • Weight Automatic • Food Sensor The degree to which a dish is cooked: •...
- Page 14 Heating function Application To bake cakes with crispy bottom and to preserve food. Bottom Heat SPECIALS Heating function Application To preserve vegetables (e.g., pickles). Preserving To dry sliced fruit, vegetables and mushrooms. Dehydrating To preheat plates for serving. Plate Warming To defrost food (vegetables and fruit).
-
Page 15: Clock Functions
Heating function Application Food reheating with steam prevents surface drying. Heat is distributed in a gentle and even way, which allows to recover taste and aroma of food as just prepared. This function can be used to reheat food directly on a plate. You can reheat more than one Steam Regenerating plate at the same time, using different shelf positions. - Page 16 Clock function Application Time extension To extend cooking time. Reminder To set a countdown. Maximum is 23 h 59 min. This function has no effect on the operation of the appliance. Uptimer Monitors how long the function operates. Uptimer - you can turn it on and off. 7.2 How to set: Clock functions How to set the clock Step 1...
-
Page 17: Using The Accessories
How to delay start of cooking Step 7 Press: . Repeat the action until the display shows the main screen. How to extend cooking time When 10% of cooking time is left and the food seems not to be ready, you can extend cooking time. You can also change the heating function. - Page 18 Baking tray / Deep pan: Push the tray between the guide bars of the shelf support. 8.2 Using Trivet and Grill- / Roasting WARNING! Be careful when you remove the accessories from a hot oven. There is a risk of burns. You can use the trivet to roast larger pieces of meat or poultry on one shelf position.
- Page 19 8.3 Food Sensor Food Sensor - measures the temperature inside the food. You can use it with every heating function. There are two temperatures to be set: The oven temperature: minimum 120 °C. The core temperature. For the best cooking results: Ingredients should be at room tem‐...
-
Page 20: Additional Functions
Step 6 - press to set the preferred option: • Sound alarm - when food reaches the core temperature, the signal sounds. • Sound alarm and stop cooking - when food reaches the core temperature, the signal sounds and the oven stops. Step 7 Select the option and repeatedly press: to go to main screen. -
Page 21: Hints And Tips
9.3 Automatic switch-off The Automatic switch-off does not work with the functions: Light, Food sensor, End time, For safety reasons the appliance turns off Slow Cooking. after some time, if a heating function works and you do not change any settings. 9.4 Cooling fan When the appliance operates, the cooling fan turns on automatically to keep the surfaces of... - Page 22 (°C) (min) Short crust biscuits, baking tray or dripping pan 15 - 25 20 pieces Tartlets, 8 pieces baking tray or dripping pan 15 - 25 10.3 Moist Fan Baking - recommended accessories Use the dark and non-reflective tins and containers. They have better heat absorption than the light colour and reflective dishes.
- Page 23 °C Small cakes, 20 per tray, preheat True Fan Cooking 20 - 30 the empty oven Small cakes, 20 per tray, preheat Conventional Cooking 20 - 30 the empty oven Multilevel baking - biscuits °C Short bread True Fan Cooking 25 - 45 2 / 4 Small cakes, 20 per tray, pre‐...
-
Page 24: Care And Cleaning
Container (Gastronorm) Broccoli, preheat 1 x 2/3 perforated max. 10 - 11 Put the baking tray the empty oven on the first shelf position. Peas, frozen 2 x 2/3 perforated 2 x 1.5 2 and 4 Until the tem‐ Put the baking tray perature in on the first shelf the coldest... - Page 25 Step 2 Carefully pull the shelf supports up and out of the front catch. Step 3 Pull the front end of the shelf support away from the side wall. Step 4 Pull the supports out of the rear catch. Install the shelf supports in the opposite sequence. 11.3 How to use: Steam Cleaning Before you start: Turn off the oven and wait until...
- Page 26 11.5 How to use: Descaling Before you start: Turn off the oven and wait until it is Remove all accessories. Make sure that the water drawer is cold. empty. Duration of the first part: around 100 min Step 1 Place the deep pan on the first shelf position. Step 2 Pour 250 ml of the descaling agent in the water drawer.
- Page 27 Step 1 Place the deep pan on the first shelf position. Step 2 Fill the water drawer with water to the maximum level until the signal sounds or the display shows the message. Step 3 Select: Menu / Cleaning / Rinsing. Duration: around 30 min Step 4 Turn on the function and follow the instruction on the display.
- Page 28 CAUTION! Carefully handle the glass, especially around the edges of the front panel. The glass can break. Step 1 Fully open the door. Step 2 Lift and press the clamping levers (A) on the two door hinges. Step 3 Close the oven door to the first opening position (approximately 70° angle). Hold the door at both sides and pull it away from the oven at an upwards angle.
-
Page 29: Troubleshooting
Before you replace the lamp: Step 1 Step 2 Step 3 Turn off the oven. Wait until the Disconnect the oven from the Put a cloth on the bottom of the cav‐ oven is cold. mains. ity. Top lamp Step 1 Turn the glass cover to remove it. - Page 30 The appliance does not turn on or does not heat up Possible cause Remedy The clock is not set. Set the clock, for details refer to Clock functions chap‐ ter, How to set: Clock functions. The door is not closed correctly. Fully close the door.
-
Page 31: Energy Efficiency
13. ENERGY EFFICIENCY 13.1 Product Information and Product Information Sheet according to EU and UK Ecodesign and Energy Labelling Regulations Supplier's name Model identification BSE782380M 944188705 Energy Efficiency Index 61.9 Energy efficiency class Energy consumption with a standard load, conventional mode 1.09 kWh/cycle... -
Page 32: Menu Structure
When the cooking duration is longer than 30 Cooking with the lamp off min, reduce the appliance temperature to Turn off the lamp during cooking. Turn it on minimum 3 - 10 min before the end of only when you need it. cooking. -
Page 33: S Easy
14.3 Submenu for: Options Submenu Application Light Turns the lamp on and off. Child Lock Prevents accidental activation of the appliance. When the option is on, the text Child Lock appears in the display when you turn on the appliance. To enable the appliance use, choose the code letters in the alphabetical order. - Page 34 Familiarize yourself with the basic icons on the control panel and the display: ON / OFF Menu Favourites Timer Food sensor Start using the appliance Quick start Turn on the appli‐ Step 1 Step 2 Step 3 ance and start cook‐ ing with the default Press and hold: - select the...
-
Page 35: Environmental Concerns
Clean the appliance with Steam cleaning Steam Cleaning For light cleaning. Steam Cleaning Plus For thorough cleaning. Descaling For cleaning the steam generation circuit from residual limestone. Rinsing For rinsing and cleaning the steam generation circuit after frequent use of the steam functions. - Page 36 867371431-B-122023...
Need help?
Do you have a question about the BSE782380M and is the answer not in the manual?
Questions and answers