Table of Contents
Advertisement
Quick Links
Advertisement
Table of Contents

Related Manuals for Trotec AIRGOCLEAN ONE


Summary of Contents for Trotec AIRGOCLEAN ONE
- Page 1 ® AIRGOCLEAN ORIGINAL INSTRUCTIONS AIR CLEANER...
-
Page 2: Table Of Contents
Safety .................. 2 Information about the device.......... 4 ® AirgoClean Transport and storage............ 6 Assembly and start-up............ 6 https://hub.trotec.com/?id=44900 Operation ................ 7 Safety Errors and faults.............. 18 Read this manual carefully before starting or using the Maintenance ................ 19 device. Always store the manual in the immediate vicinity Disposal ................ 23... - Page 3 (e.g. pollutants) from the air. • Only use filters and accessory recommended by Trotec for • Any use other than the intended use is regarded as a the AirgoClean One.
-
Page 4: Information About The Device
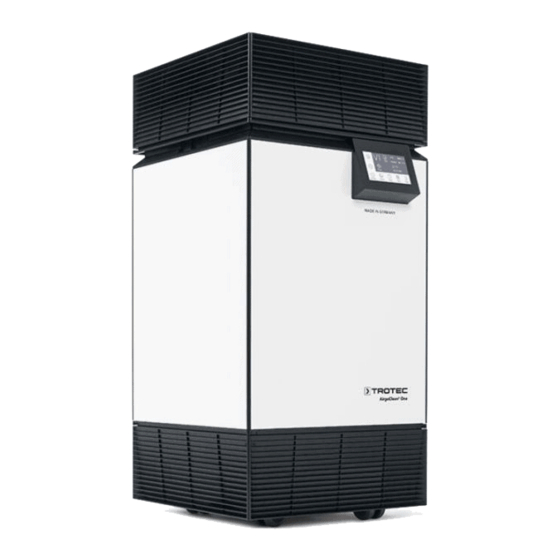
The device comes with a control panel and a remote control. hands of children. The device can also be controlled via Bluetooth from a mobile phone or tablet via the Trotec Control App. Warning Risk of suffocation! Do not leave the packaging lying around. Children may use it as a dangerous toy. - Page 5 Device depiction Designation Top section with air outlet Handle strip Control panel Air inlet with cover Mains plug with mains switch Wheels Box with air quality sensors Remote control Standard configuration Designation Prefilter with filter class ePM 10 85 % (F7) and coarse dust fleece HEPA filter H14 complying with EN 1822 Silencer...
-
Page 6: Transport And Storage
Start-up Transport and storage Prefilter, HEPA filter and silencer are already built into the Note device. If you store or transport the device improperly, the Note device may be damaged. Remove any packaging material from the prefilter, Note the information regarding transport and storage of HEPA filter and silencer. -
Page 7: Operation
Furthermore, you can control the air cleaner via Bluetooth using 2. Insert a type CR 2025 battery into the battery compartment our Trotec Control app with a smartphone or tablet. and slide the battery compartment back into the remote Remote control control. - Page 8 3. Press the respective button for the desired language to Basic settings select it. Info ð You can select the languages German, English, French, Some inputs must be activated by pressing the Save or Spanish or Italian. Back button. When using the Back button, the settings are only saved if the Save button is not available.
- Page 9 3. Press the Top Filter button. Filter menu ð The display changes to the Top Filter menu. You have to reset the respective filters after a filter change. When changing the standard configuration, it is also required to adjust the filter types. To do so, please proceed as follows: Top filter 1.
- Page 10 ð The selected filter is indicated on the Filter setup Info screen. The condition of the filters is monitored for all three filter compartments. The condition monitoring does not simply work hypothetically, based on time for instance, HEPA Top filter Reset but it records the actual filter status based on the fan 99 %...
- Page 11 Please proceed as follows to set the automatic mode: Air quality particle count per minute (fine dust value) ü The device is switched on. Particulate matter is considered to be a serious contributor to 1. Press the Auto Air Q button in the main view. respiratory problems, the increase in asthma attacks as well as ð...
- Page 12 ð The selected button is highlighted in grey. 1. Press the Sleep button in the main view. ð The selected button is highlighted in grey. 60 °C Comfort 25. Jul. 2022, 11:50 Days Standby good 20 °C 30 % 25°C poor Air Q Hours 36 ppm...
- Page 13 Setting the timer Setting a weekplan You can activate the automatic switch-on and switch-off Please proceed as follows to set a weekplan: function for a specific time period. 1. Select the symbol (More) in the main view. ð The display changes to the Menu. The number of hours can be set to 1 min to 24 h in increments of 1 h and 1 min.
- Page 14 ð The display changes to the Switching time menu again. 5. Press the desired day of the week to activate it. ð The selected button is highlighted in grey. Weekday Monday Monday Friday Fan level Level 3 Tuesday Saturday Time 0:01 Wednesday Sunday...
- Page 15 3. Press the Display brightness button. 5. Press the Create PIN button to create a new PIN or press the Cancel button to cancel the entry. 6. On the next screen, enter a 5-digit PIN, then press the Display brightness Create button. ð...
- Page 16 ð The display changes to the menu for entering the PIN. 5. Activate Bluetooth on your mobile device. 6. Then press the Pairing button on the AirgoClean ONE to 2. Enter your 5-digit PIN, then press the OK button. ð The locking function is deactivated and the display can locate your mobile device.
- Page 17 ð The display changes to the Settings menu. Device Information 1. Select the symbol (More) in the main view. ð The display changes to the Menu. General 2. Press the symbol (forward/back). Lower display brightness after 30 sec of non-use ð The menu with the Display brightness, Lock settings, Bluetooth settings and Device information buttons Resume operation after Power outage appears.
-
Page 18: Errors And Faults
The device has been checked for proper functioning several chapter. times during production. If malfunctions occur nonetheless, • If the warning does not disappear, set the AirgoClean One check the device according to the following list. to fan level zero and wait for 3 minutes. During this time, The device does not start: the filter monitoring sensors are calibrated. -
Page 19: Maintenance
Note Maintenance All service activities other than those specified in the maintenance table may only be performed by a specialist company authorized by Trotec. Maintenance intervals Maintenance and care interval before every as needed at least every at least every... - Page 20 Tasks which require the device to be opened must filter depends on the ambient conditions and the only be carried out by authorised specialist application period of the device. companies or by Trotec. Note Cleaning the housing The HEPA filter, the silencer and, if necessary, the Clean the housing with a soft, damp and lint-free cloth.
- Page 21 Proceed as follows to replace the HEPA filter: 4. Dispose of the HEPA filter according to the national 1. Press the buttons of the handle strip (2). regulations. ð The top section comes off. 5. Take the new HEPA filter out of the plastic cover. 2.
- Page 22 3. The filter fleece is attached to the prefilter (9) with a Velcro Replacing the prefilter fastener. Pull the filter fleece off from the prefilter and Note clean the prefilter and filter fleece (9) with a lint-free cloth The lifetime of the prefilter is a maximum of 1 year. or carefully tap out the fleece.
-
Page 23: Disposal
230 m 28 W also find out about other return options that apply for many Fan level 4 420 m 355 m 60 W EU countries on the website https://hub.trotec.com/?id=45090. Fan level 5 550 m 475 m 106 W Otherwise, please contact an official recycling centre for Fan level 6 = boost 650 m... - Page 24 Spare parts drawing and list Info The position numbers of the spare parts differ from Bottom those describing the positions of the components mentioned in these instructions. Spare part Spare part Board (particle sensor) Cover for sensor housing Board (sensor) Lock for prefilter Wheel Positioning piece for prefilter Screw...
- Page 25 Cover lock Info The position numbers of the spare parts differ from those describing the positions of the components mentioned in these instructions. Spare part Spare part Washer Torsion spring Axle Hold-down device air cleaner AirgoClean® One...
- Page 26 Cover Info The position numbers of the spare parts differ from those describing the positions of the components mentioned in these instructions. Spare part Spare part Ventilation panel Screw Cover lock Cover insulation Cover air cleaner AirgoClean® One...
- Page 27 Filter housing Info The position numbers of the spare parts differ from those describing the positions of the components mentioned in these instructions. Spare part Spare part Screw Rubber buffer Screw Metal clamp for filter Filter case air cleaner AirgoClean® One...
- Page 28 Housing Info The position numbers of the spare parts differ from those describing the positions of the components mentioned in these instructions. Spare part Spare part Screw Display frame Board (control) Design panel A Display Design panel B Design frame Design panel C Corner profile air cleaner AirgoClean®...
- Page 29 Info The position numbers of the spare parts differ from those describing the positions of the components mentioned in these instructions. Spare part Spare part Screw Fan (230 V or 110 V) Sealing cord Board (distributor) Mains supply with fusing (230 V or 110 V) Screw Fan casing Screw...
-
Page 30: Declaration Of Conformity
Declaration of conformity We – Trotec GmbH – declare in sole responsibility that the product designated below was developed, constructed and produced in compliance with the requirements of the EU Radio Equipment Directive in the version 2014/53/EU. AirgoClean® One Product model / Product:... - Page 31 Trotec GmbH Grebbener Str. 7 D-52525 Heinsberg +49 2452 962-400 +49 2452 962-200 info@trotec.com www.trotec.com...
Need help?
Do you have a question about the AIRGOCLEAN ONE and is the answer not in the manual?
Questions and answers