Table of Contents
Advertisement
Quick Links
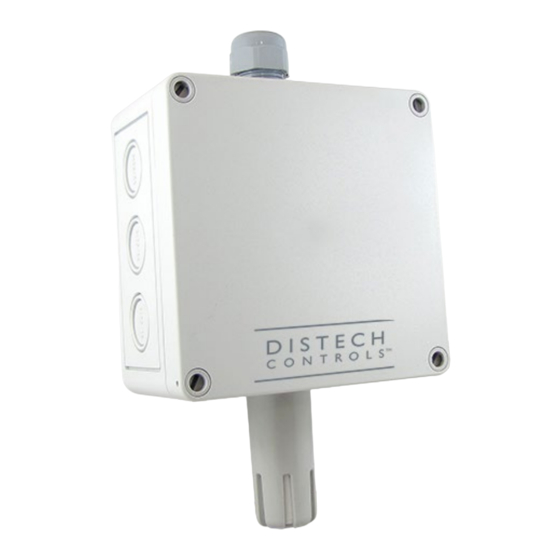
HS-THX
Analog Horticulture Sensor -Temperature, Humidity
Product Description
This document describes the hardware installation procedures for the HS-THX Analog Horticulture Sensor.
The horticulture sensor series uses a precision thermistor to monitor temperature and a thermoset polymer based capacitance sensor to measure humidity
levels. Features include a LCD for configuration and monitoring, various output signal types, optional relays for alarm indication and field replaceable
sensors.
General Installation Requirements
For proper installation and subsequent operation of each device, pay special attention to the following recommendations:
-
Upon unpacking the product, inspect the contents of the carton for shipping damages. Do not install damaged device.
-
Avoid areas where corroding, deteriorating or explosive vapors, fumes or gases may be present.
-
Ensure that all equipment is installed according to local, regional, and national regulations.
Personal injury or loss of life may occur if you do not follow a procedure as specified.
Equipment damage or loss of data may occur if you do not follow a procedure as specified.
Take reasonable precautions to prevent electrostatic discharges to the controller when installing, servicing or operating
the controller. Discharge accumulated static electricity by touching one's hand to a well-grounded object before working
with the controller.
Figure 1: HS-THX Analog Horticulture Sensor
I n s t a l l a t i o n G u i d e
Advertisement
Table of Contents

Summary of Contents for Distech Controls HS-THX
- Page 1 Figure 1: HS-THX Analog Horticulture Sensor Product Description This document describes the hardware installation procedures for the HS-THX Analog Horticulture Sensor. The horticulture sensor series uses a precision thermistor to monitor temperature and a thermoset polymer based capacitance sensor to measure humidity levels.
- Page 2 Mounting Instructions Remove the cover by using a standard or flat screwdriver to loosen the four screws as shown in Figure 2. Complete removal of the screw from the cover is not required as the screws are captive type. The horticulture sensor can be mounted directly onto any wall or flat surface, or may be suspended from the ceiling using the device cable harness which is secured to the enclosure with a compression style fitting.
- Page 3 Make wiring connections as per the "Wiring" illustrations. Once the wiring and device setup are complete, re-install the cover and secure with the four screws as shown in Figure 5. Figure 5: Closing the enclosure. Wiring Deactivate the 24 Vac/dc power supply until all connections are made to the device to prevent electrical shock or equipment damage. Follow proper electrostatic discharge (ESD) handling procedures when installing the device or equipment damage may occur.
- Page 4 Operation - Start-up - Analog After applying power to the device, it will enter the start-up mode and the LCD will indicate the software version number and the output signal type for two seconds each. Then the device will start normal operation. Operation - Normal During normal operation, the installed sensor measurements are read and displayed on the LCD.
- Page 5 Only if Relay 1 installed 4. Alarm 1 Alarm1 assignment defaults to Temp High Alarm. Use <UP> or <DOWN> to change to Temp Low, RH High or RH Low as required. If the product has the optional relays, then Alarm1 controls Relay1 and Alarm2 controls Relay2. <MENU>...
- Page 6 10. Alarm 2 Hysteresis The Alarm2 hysteresis depends on the Alarm2 assignment set previously as shown in the table. Use <UP> or <DOWN> to change the setting within the limits. Note that a high alarm resets when the measurement goes below (setpoint - hysteresis) and a low alarm resets when the measurement goes above (setpoint + hysteresis).
- Page 7 ©, Distech Controls 2020 All rights reserved. While all efforts have been made to verify the accuracy of information in this manual, Distech Controls is not responsible for damages or claims arising from the use of this manual. Persons using this manual are assumed to be trained HVAC specialist / installers and are responsible for using the correct wiring procedures and maintaining safe working conditions with fail-safe environments.


Need help?
Do you have a question about the HS-THX and is the answer not in the manual?
Questions and answers