
Related Manuals for Sony BETACAM SX DNV-5


Summary of Contents for Sony BETACAM SX DNV-5
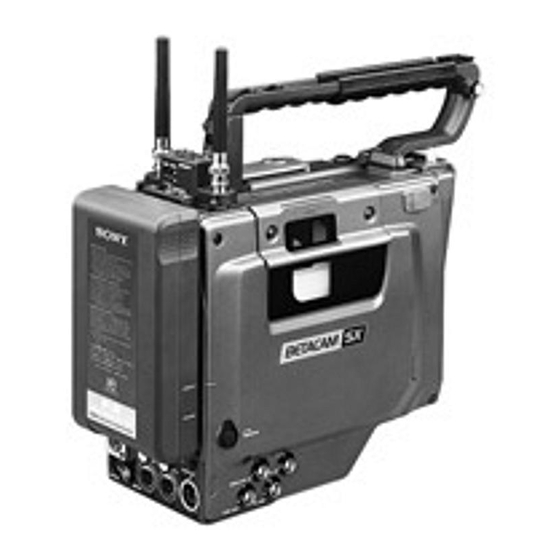
- Page 1 RECORDER UNIT DNV-5 MAINTENANCE MANUAL Part 1 1st Edition (Revised 1) Serial No. 10001 and Higher...
- Page 2 ! WARNING This manual is intended for qualified service personnel only. To reduce the risk of electric shock, fire or injury, do not perform any servicing other than that contained in the operating instructions unless you are qualified to do so. Refer all servicing to qualified service personnel.
-
Page 3: Table Of Contents
Table of Contents Manual Structure Purpose of this manual ....................3 Contents ........................3 Relative manual ......................3 1. Service Overview 1-1. Operating Conditions .................. 1-1 1-2. Supplied Accessories .................. 1-1 1-3. Location of Main Parts and Function of Printed Circuit Boards ....1-2 1-3-1. - Page 4 2. Error Code 2-1. Error Code ....................2-1 2-1-1. Warning Indicators ..............2-1 2-1-2. Error Codes ................2-1 3. Maintenance Mode 3-1. DIAG Memu ....................3-1 4. Block Diagram and Outline of Circuit 5. Periodic Maintenance and Inspection 5-1. Cleaning ...................... 5-1 5-1-1.
-
Page 5: Manual Structure
..Maintenance Manual Part 2 (Not supplied with this unit.) This manual describes the information items (adjustments, board layouts, sche- matic diagrams, detailed parts list, etc.) that premise the service based on parts. If this manual is required, please contact to Sony’s service organization. DNV-5... -
Page 7: Service Overview
Section 1 Service Overview 1-1. Operating Conditions Operating temperature : 0 to 40 dC Humidity : 25 to 85 % (Relative humidity) : _20 to 60 dC Storage temperature Use under special environment (Measure for cold area) The unit is guaranteed its operation under the temperature of 0 to 40 dC. When the unit is used under 0 dC, cover-cloth against the cold is recommended to use. -
Page 8: Location Of Main Parts And Function Of Printed Circuit Boards
1-3. Location of Main Parts and Function of Printed Circuit Boards 1-3-1. Location and Function of Printed Circuit Boards 1-3. Location of Main Parts and Function of Printed Circuit Boards 1-3-1. Location and Function of Printed Circuit Boards SW-873 KY-293 LP-102 MDC-5 KY-293... - Page 9 1-3. Location of Main Parts and Function of Printed Circuit Boards 1-3-1. Location and Function of Printed Circuit Boards System Configuration Board Name Circuit Function VIDEO/AUDIO CT-187 Camera Adaptor Control, 6P-remote Control, Setting Menu DVP-1 RF, Digital Audio Processor, Timing Clock Generator, System Controller for VTR Block DVP-2 Digital Bit Reduction Decoder, Digital Encoder, Digital Decoder...
-
Page 10: Location Of Main Mechanical Parts
1-3. Location of Main Parts and Function of Printed Circuit Boards 1-3-2. Location of Main Mechanical Parts 1-3-2. Location of Main Mechanical Parts Mechanical deck DNV-5... - Page 11 1-3. Location of Main Parts and Function of Printed Circuit Boards 1-3-2. Location of Main Mechanical Parts 1 : Tension regulator arm 2 : S5 tape guide 3 : Tension regulator guide (S4 tape guide) 4 : S3 tape guide 5 : Full erase head 6 : Tape cleaner 7 : CTL head...
-
Page 12: Location And Function Of Sensors
1-3. Location of Main Parts and Function of Printed Circuit Boards 1-3-3. Location and Function of Sensors 1-3-3. Location and Function of Sensors Mechanical deck DNV-5... - Page 13 1-3. Location of Main Parts and Function of Printed Circuit Boards 1-3-3. Location and Function of Sensors 1 : Cassette-in sensor This sensor detects the existence of a cassette. 2 : REC inhibit sensor This sensor detects the REC inhibiting plug of the cassette tape. 3 : Tape end sensor This sensor detects the end of the tape that runs in the forward direction.
-
Page 14: Matching Connectors
AUDIO IN CH-1/CH-2 XLR 3-pin, male 1-508-084-00 (for SY) XLR 3-pin, female 1-508-083-00 (for J) AUDIO OUT Audio cable SONY CCXA-53 or equivalent (XLR 5-pin _ XLR 3-pin , 2m) GENLOCK IN 1-560-069-11 TC IN TC OUT TEST OUT VBS OUT... -
Page 15: Signal Input And Output
1-5. Signal Input and Output 1-5. Signal Input and Output INPUT OUTPUT 1.0 V p-p, 75 Z, unbalanced VIDEO 1.0 V p-p, 1 kZ TEST OUT 1.0 V p-p, 75 Z 1.0 V p-p, 75 Z GENLOCK IN TC OUT 1.0 V p-p, 75 Z, unbalanced TC IN 0.5 V to 18 V p-p, 10 kZ... - Page 16 1-5. Signal Input and Output LIGHT:2-pin, female AUDIO OUT:XLR 5-pin, male <External View> <External View> Pin No. Signal Pin No. Signal LIGHT +12 V (30 W MAX) CH1 (X) CH1 (Y) CH2 (X) CH2 (Y) 1-10 DNV-5...
- Page 17 1-5. Signal Input and Output CAMERA:50-pin, female <External View> 33 50 34 18 Pin No. I/O Signal Specification Camera/VA-5 Direction Zi = 1 kZ ±5 % VBS = 1 Vp-p ±3 dB (SYNC negative) GENLOCK VIDEO IN Zo = Low Impedance GENLOCK VIDEO(GND) *+9 V OUT...
- Page 18 1-5. Signal Input and Output Pin No. I/O Signal Specification Camera/VA-5 Direction REC TALLY Zi = 20 kZ REC Reset +1.0 _0.5 10 to 100ms 2.5 ±0.5 V Warning Alarm 0 ±0.3 V VTR Connected Disconnected A/B: 50 ±10 % duty, frequency 1±0.2 Hz or 4 ±0.8 Hz Before end** BATT IND Zi = 300 Z...
- Page 19 1-5. Signal Input and Output Pin No. I/O Signal Specification Camera/VA-5 Direction Zi = 100 kZ ±5 % REW:4.5 ±0.5 V *REW CONTROL NORMAL: 0 ±0.5 V Zo <10 kZ COLOR Zi > 100 kZ FRAMING 5.0 ±1.0 V beginning V SYNC NTSC :1st Field (every 4 fields) V.SYNC/3H PULSE :1st Field (every 8 fields)
-
Page 20: Removal/Installation Of Cabinet
1-6. Removal/Installation of Cabinet 1-6. Removal/Installation of Cabinet . Be sure to turn off the power, then pull out the power cord and/or battery before performing the follow- ing procedure. If not, damage to internal circuit may result. . The standard tightening torques of main screws used in this unit are as follows: : 9 x 10 M1.4 (+) screw N.m (0.9 kgf.cm) - Page 21 1-6. Removal/Installation of Cabinet Handle Connector Box Loosen the three screws fully and remove the handle. (Stoppers are provided for these screws.) Removal Front Lid 1. Remove the front lid, outside panel, and inside panel. Loosen the two screws fully and remove the front lid. 2.
-
Page 22: Removal/Installation Of Cassette Compartment
1-7. Removal/Installation of Cassette Compartment 1-7. Removal/Installation of Cassette Compartment . Be sure to turn off the power, then pull out the power cord and/or battery before performing the following procedure. If not, damage to internal circuit may result. . The cassette compartment can be removed even if it comes up or goes down. -
Page 23: Pulling Out And Inserting The Plug-In Boards
1-7. Removal/Installation of Cassette Compartment 1-8. Pulling Out and Inserting the Plug-in Boards 1-8. Pulling Out and Inserting the Plug- 3. Move the cam plate (A) on the right side of the cassette in Boards compartment in the direction of the arrow with fingers as far as it will go. -
Page 24: Switch/Slit Land Settings On The Boards
1-9. Switch/Slit Land Settings on the Boards 1-9-1. AXM-14 Board 1-9. Switch/Slit Land Settings on the Boards For the factory-use switch and slit land, do not change the switch and slit land settings. 1-9-1. AXM-14 Board SL301 SL300 AXM-14 B Side Slit Lands Ref. -
Page 25: Board
1-9. Switch/Slit Land Settings on the Boards 1-9-2. CNB-1 Board 1-9-2. CNB-1 Board SL101 CNB-1 A Side Slit Land Ref. No. Description Factory setting SL1 Destination select OPEN : For except Japan OPEN (for except Japan) SHORT : For Japan SHORT (for Japan) Set SL1 according to the destination during board replacement. - Page 26 1-9. Switch/Slit Land Settings on the Boards 1-9-3. DVP-1 Board 1-9-3. DVP-1 Board SL1 SL3 DVP-1 A Side DVP-1 B Side Switches Ref. No Name Description Factory setting S1-1 Destination Select OFF : NTSC OFF (for NTSC) ON : PAL ON (for PAL) S1-2 Model Select...
- Page 27 1-9. Switch/Slit Land Settings on the Boards 1-9-4. DVP-2 Board 1-9-4. DVP-2 Board S401 SL601 SL602 DVP-2 A Side Switches Ref. No. Name Description Factory setting S401-1 Factory use OPEN S401-2 Not used OPEN Slit Lands Ref. No. Description Factory setting SL601 Factory use OPEN...
- Page 28 1-9. Switch/Slit Land Settings on the Boards 1-9-5. TC-80 Board 1-9-5. TC-80 Board SL402 SL401 SL102 SL202 SL302 SL103 SL203 SL301 SL205 SL105 SL206 S102 SL106 S104 S204 S601 SL704 SL607 SL703 SL506 SL608 SL702 SL706 SL905 SL507 SL707 SL508 S501 TC-80 B Side Switches...
- Page 29 1-9. Switch/Slit Land Settings on the Boards 1-9-5. TC-80 Board Slit Lands Headroom Level Select (Factory setting:20 dB) Audio Channel Ref. No. Headroom (dB) SL102 OPEN SHORT OPEN SL103 OPEN OPEN SHORT AGC CH1 SL105 OPEN OPEN SHORT SL106 OPEN SHORT OPEN SL202...
- Page 30 1-9. Switch/Slit Land Settings on the Boards 1-9-6. MDC-5 Board 1-9-6. MDC-5 Board S300 S111 SL103 S110 S108 S109 SL102 SL100 SL300 MDC-5 A Side MDC-5 B Side Switches Ref. No. Description Factory setting S108 Adjustment Mode Select S109 Adjustment Start S110-1 Adjustment Mode ON/OFF S110-2...
- Page 31 1-9. Switch/Slit Land Settings on the Boards 1-9-7. MDC-5 Board 1-9-7. CT-187 Board CT-187 A Side Switches Ref. No. Name Description Factory setting S1-1 VF TC Character ON : Displays a time code on the viewfinder usually. Select OFF : Controls whether to display a time code on the viewfinder by MPU on the CT-187 board usually.
- Page 32 1-9. Switch/Slit Land Settings on the Boards 1-9-8. IF-634 Board 1-9-8. IF-634 Board S700 IF-634 A Side Switches Ref. No. Name Description Factory setting S700-1 VF Select OFF : Color VF ON : Black and white VF S700-2 Factory use S700-3 to 8 Not used 1-26...
- Page 33 1-10. Ejecting the Cassette Tape Manually 1-10. Ejecting the Cassette Tape Manually If the above operation cannot be executed, Be sure to turn off the power, then pull out the power cord perform the following procedure. and/or battery before performing the following procedure. If not, damage to internal circuit may result.
-
Page 34: Inserting The Cassette Tape When The Outside Panel Is Removed
1-11. Inserting the Cassette Tape when the Outside Panel is Removed 1-12. Cleaning when the Heads are Clogged 1-12-1. Cleaning by Cleaning Tape 1-11. Inserting the Cassette Tape when 1-12. Cleaning when the Heads are the Outside Panel is Removed Clogged 1. -
Page 35: Cleaning By Cleaning Cloth
1-12. Cleaning When the Heads are Clogged 1-12-2. Cleaning by Cleaning Cloth 1-12-2. Cleaning by Cleaning Cloth Cleaning the Video Heads 1. Remove the front lid and outside panel. . Turn off the power before cleaning. (Refer to section 1-6.) . -
Page 36: 50-Pin Connector
1-13. 50-pin Connector 1-14. Backup Battery 1-15. Removal/Installation of Flexible Card Wires 1-13. 50-pin Connector 1-14. Backup Battery The position of the 50-pin connector on the VTR is The lithium battery for data backup operation is mounted previously calibrated at the factory with a special tool. If on the TC-80 board. -
Page 37: Fixtures
1-16. Fixtures 1-16-1. Extension Boards 1-16. Fixtures Using the EX-541 and EX-542 boards 1-16-1. Extension Boards 1. Remove the DVP-1 and IF-634 boards. 2. Remove the eight screws, then remove the shield cover on the MDC-5 board. Extension boards are optionally available to check and 3. -
Page 38: Fixtures
1-16. Fixtures 1-16-2. Fixtures 1-16-2. Fixtures Fig No. Part No. Description For use A-8312-292-A TP Tool Video tracking adjustment A-8312-804-A Extension Board Assembly Plug-in board check/adjustment (EX-501/541/542, Stays) J-6035-070-A IC External Tool (ICT-2101) Extraction of IC (PLCC type) J-6080-840-A Inspection Mirror Video tracking adjustment J-6152-450-A Wire Clearance Check Gauge... - Page 39 1-16. Fixtures 1-16-2. Fixtures 1-33 DNV-5...
-
Page 41: Error Code
Section 2 Error Code 2-1. Error Code OVER EMPH OVER DIAG PB VITC NDF EXT-LK HOLD Error code TAPE BATT ∞ Warning indicators SERVO HUMID SLACK PEAK dB LCD displays 2-1-1. Warning Indicators The warning indicator on the LCD screen lights if any fault occurs during the power-on sequence or normal operation. -
Page 43: Maintenance Mode
SECTION 3 MAINTENANCE MODE 3-1. DIAG Menu The DIAG menu is used for the maintenance menu setting and troubleshooting of the DNV-5. . Use the DIAG menu in the state in which the tape transport stopped. . Do not execute the DIAG menu when remote control RM-P9 is connected. The self-diagnosis function and remote control function are not normally activated when the self-diagnosis is executed. -
Page 44: Diag Memu
3-1. DIAG Memu 0:HOURS METER 1:DRUM RUNNING 2:TAPE RUNNING 3:OPERATION 4:THREADING 5:DRUM RUN-2 1:TIME SET 6:TAPE RUN-2 2:DATE SET 7:OPERATION-2 3:BAT BEF END 8:THREADING-2 4:BAT END 5:VITC LINE 6:VTR MODE SELECT 1:VTR MODE SELECT-1 V/AU OUT AU OUT(F/R) AU OUT CH AU REC CH3/4 2:VTR MODE SELECT-2 AU REC EMPH... - Page 45 3-1. DIAG Memu LCD Display (factory setting) Description DIAG 0 HOURS METER The contents below are displayed. (For more details, refer to 6-3-1, “Hours Meter”.) XXXX 1. DRUM RUNNING ... Total drum rotating hours 2. TAPE RUNNING ... Total tape running hours 3.
- Page 46 3-1. DIAG Memu LCD Display (factory setting) Description DIAG 6-1 VTR MODE SEL-1 1. V/AU OUT : Sets the video and audio output. 61 0000 0 : Outputs the PB/EE signal. 1 : Outputs the EE signal. 1 2 3 4 2.
- Page 47 3-1. DIAG Memu LCD Display (factory setting) Description DIAG 6-3 VTR MODE SEL-3 1. TC OUT : Sets the time code output. 63 00000 0 : Outputs PB/TCG. 1 : Outputs TCG. 1 2 3 4 5 2. EXT-LK UBIT : Sets the LTC UB set value when the time code is locked externally. 0 : Internally set value 1 : External LTC value 3.
- Page 48 3-1. DIAG Memu LCD Display (factory setting) Description DIAG 6-6 VTR MODE SEL-6 1. LTC UBIT : Sets the data recorded in the user bits of LTC. 66 00000 0 : Fixed data (Conventional-type user bits) 1 : Time of internal timer (in real time) 2 : Shot data 1 2 3 4 5 2.
- Page 49 3-1. DIAG Memu LCD Display (factory setting) Description DIAG 7 WATCH REVISION Sets the corrected value of an internal timer (the number of frames a day). DIAG 8 LCD/LAMP CHECK Sets the LCD and LED light check. All the lamps are turned on or off every time the SHIFT button is pressed. DIAG 9 9X XXXX STATE CODE...
- Page 50 3-1. DIAG Memu LCD Display (factory setting) Description DIAG D-1 PG EQ ADJ DATA-1 Displays the equalizer adjustment data (A-CH). 1. A-CH FREQ d1XXXXXX 2. A-CH PHASE 3. A-CH GAIN DIAG D-2 PG EQ ADJ DATA-2 Displays the equalizer adjustment data (A-CH). 1.
- Page 51 3-1. DIAG Memu LCD Display (factory setting) Description DIAG D-7 PG EQ ADJ DATA-7 Displays the equalizer adjustment data (D-CH). 1. D-CH FREQ d7XXXXXX 2. D-CH PHASE 3. D-CH GAIN DIAG D-8 PG EQ ADJ DATA-8 Displays the equalizer adjustment data (D-CH). 1.
-
Page 53: Block Diagram And Outline Of Circuit
Section 4 Block Diagram and Outline of Circuit Outline of Circuit (1) Video input system and digital signal system (DVP-1 (1/2) board, DVP-2 board, IF-634 board, and drum assembly) . Signal processing during recording . Signal processing during playback The Y/R-Y/B-Y signals supplied from the camera are The four-channel parallel PB data supplied from the A/D converted. - Page 54 (2) Audio system (AXM-14 board (1/2), CNB-1 (3) System control (DVP-1 board (2/2), TC-80 board (1/2), TC-80 board (1/2), and RX-26 board (2/2), KY-293 board, HN-224 board (1/2), board) and AXM-14 board (2/2)) The audio system of the Betacam SX recorder has the Among the captioned circuit boards of the system control configuration of the four input channels with the two block, the DVP-1 board controls its peripheral boards and...
- Page 55 (4) Servo control block (MDC-5 board and HN-224 (5) Power supply system (CNB-1 board (2/2), board (2/2)) RE-118 board, and RE-119 board) . MDC-5 board . CNB-1 board (2/2) The MDC-5 board has the two MPUs. MPU1 controls The input DC 12 V from the battery pack or DC IN the mode control and capstan servo system while connector is input to the CNB-1 board (2/2) where the communicating with the system control CPU in serial...
- Page 56 Block Diagram CAMERA 5.75MHz CONVERTER REC A PB C REC B PB D BUFFER VITC CAMERA 1.5MHz CONVERTER GENERATOR ENCODER REC C PB A ENCODER DRIVER REC D PB B 6.75MHz CAMERA 1.5MHz CONVERTER CAMERA CAMERA SYNC SYNC GENERATOR PB A GENLOCK IN IO-117(1/3) CONVERTER...
- Page 57 DRUM MDR-1 ASSY UNREG +12V TO CAMERA REC A TO CAMERA CT-185 REC B REC C BATTERY PACK REC D BATT(+) BATT IN PB C BATT(-) BATT REM PB D LIGHT CONT PB A DC OUT DC IN PB B BATT OUT UNSW +12V DRUM...
-
Page 59: Periodic Maintenance And Inspection
Section 5 Periodic Maintenance and Inspection 5-1. Cleaning To make the most of the functions, deliver the full performances of this unit and to lengthen the life of the unit and tape, clean the parts often. 5-1-1. General Information for Cleaning 1. - Page 60 5-1. Cleaning 2. Notes on Cleaning Do not touch the rotating drum. If you touch the drum with hand or screwdriver, it is danger to get hurt by the rapidly spinnig drum. . Make sure that the rotating drum completely stops before cleaning or replacement of parts.
-
Page 61: Cleaning Of Tape Running Surface Of Upper Drum And Video Heads
5-1. Cleaning 5-1-2. Cleaning of Tape Running Surface of Upper Drum and Video Heads Note The upper drum and video heads are the parts that can damage easily. Take a great care not to damage the upper drum and rotary heads during cleaning. Tools Required . -
Page 62: Cleaning Of Tape Running Surface Of Lower Drum And Lead Surface
5-1. Cleaning 5-1-3. Cleaning of Tape Running Surface of Lower Drum and Lead Surface Notes Take care not to damage the lower drum (specially lead surface) during cleaning. Take care to clean the edge portion above the lower drum because it is near the video heads. Tools Required . -
Page 63: Stationary Heads Cleaning
5-1. Cleaning 5-1-4. Stationary Heads Cleaning Note Take care not to damage the surfaces of the stationary heads during cleaning. Tools Required . Cleaning cloth : 3-184-527-01 . Cleaning fluid : 9-919-573-01 Procedures 1. Clean the tape running surfaces of the FE, CTL and TC heads in the vertical direction using a clean- ing cloth moistened with cleaning fluid. -
Page 64: Cleaning Of Tape Running System And Tape Cleaner
5-1. Cleaning 5-1-5. Cleaning of Tape Running System and Tape Cleaner Tape cleaner has a sharp edge. Never touch the edge by bare hands. Take care during cleaning. Tools Required . Cleaning cloth : 3-184-527-01 . Cleaning fluid : 9-919-573-01 Procedures 1. -
Page 65: Periodic Check
5-2. Periodic Check 5-2. Periodic Check To make the most of the functions, deliver the full performances of the unit, and to lengthen the life of the unit and tape, a periodic check is recommended. 5-2-1. Hours Meter This unit can display an hours meter on the LCD display, and reset the your requested hours meter. It is recommendable to carry out the periodic check using this hours meter as a reference. -
Page 66: Periodic Check List
5-2. Periodic Check 5-2-2. Periodic Check List Replacement time shown in the following list is not the guarantee term parts. Use this list as guidelines for the maintenance and inspection. The replacement time of the parts varies depending on the operation environment and conditions of the unit. -
Page 67: Cares After Using At Special Environment
4. Clean the connectors on the connector panel. 5. Carry out the common operation check (recording or playback) and check that the unit has not an abnormal sound or operation. If the unit has an abnormal condition, please contact your Sony dealer. DNV-5... - Page 69 The material contained in this manual consists of information that is the property of Sony Corporation and is intended solely for use by the purchasers of the equipment described in this manual. Sony Corporation expressly prohibits the duplication of any portion of this manual or the use thereof for any...
- Page 70 Printed in Japan Sony Corporation DNV-5 (SY) E 1996.12 08 Broadcast Products Company ©1996 3-191-540-02 Published by Broadcast Products Company...
Need help?
Do you have a question about the BETACAM SX DNV-5 and is the answer not in the manual?
Questions and answers