Table of Contents
Advertisement
Quick Links
SparkFun Qwiic Shield for Teensy Hookup Guide
Introduction
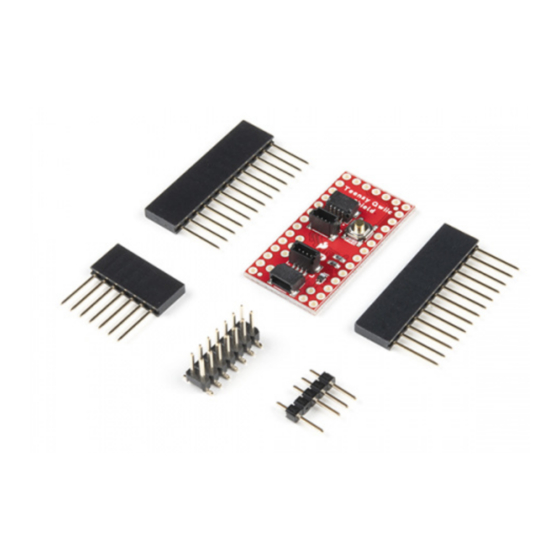
The SparkFun Qwiic Shield for Teensy and SparkFun Qwiic Shield for Teensy Extended provide an easy-to-
assemble way to add the SparkFun Qwiic ecosystem to Teensy development boards. Both of these shields
2
connect the I C bus (GND, 3.3V, SDA, and SCL) on your Teensy to four SparkFun Qwiic connectors. The Qwiic
ecosystem allows for easy daisy chaining so, as long as your devices are on different addresses, you can connect
as many Qwiic devices as you'd like.
SparkFun Qwiic Shield for Teensy
DEV-17119
Advertisement
Table of Contents

Subscribe to Our Youtube Channel
Related Manuals for sparkfun Qwiic Shield for Teensy


Summary of Contents for sparkfun Qwiic Shield for Teensy
- Page 1 SparkFun Qwiic ecosystem to Teensy development boards. Both of these shields connect the I C bus (GND, 3.3V, SDA, and SCL) on your Teensy to four SparkFun Qwiic connectors. The Qwiic ecosystem allows for easy daisy chaining so, as long as your devices are on different addresses, you can connect as many Qwiic devices as you'd like.
- Page 2 SparkFun Qwiic Shield for Teensy - Extended DEV-17156 Product Showcase: SparkFun Qwiic Shield for Teensy Product Showcase: SparkFun Qwiic Shield for Teensy Required Materials To follow along with this tutorial, you will need a Teensy development board with either the "standard" or "extended"...
- Page 3 Teensy 4.1 Teensy 4.0 DEV-16771 DEV-15583 Teensy 4.1 (Headers) Teensy 4.0 (Headers) DEV-16996 DEV-16997 The Qwiic Shield includes a set of stackable headers to fit the Teensy footprint but you may also need some headers to solder to your Teensy. Or if you would prefer to use another header type for your shield assembly we've listed a few options below: Break Away Headers - Straight Female Headers...
- Page 4 PRT-13925 Now you probably would not want the Qwiic Shield for Teensy if you didn't have any Qwiic products to use with it, right? Well, if you don't have any Qwiic products, the following might not be a bad place to start: SparkFun GPS Breakout - NEO-M9N, U.FL...
- Page 5 PRT-14426 Lastly, if you want to use a non-Qwiic I C device, these adapters help to convert it to a Qwiic connector: Qwiic Cable - Breadboard Jumper (4-pin) SparkFun Qwiic Adapter PRT-14425 DEV-14495 Qwiic Cable - Female Jumper (4-pin)
-
Page 6: Required Tools
CAB-14988 Required Tools You will need a soldering iron, solder, and general soldering accessories to solder the header pins to the Qwiic shields: Solder Lead Free - 15-gram Tube Soldering Iron - 30W (US, 110V) TOL-09163 TOL-09507 Suggested Reading If you aren't familiar with the Qwiic system, we recommend reading here for an overview: Qwiic Connect System... -
Page 7: Hardware Overview
Getting Started with the Teensy Arduino Shields v2 Basic intro to the Teensy line of products, with An update to our classic Arduino Shields Tutorial! All soldering and programming suggestions. things Arduino shields. What they are and how to assemble them. Hardware Overview Qwiic Connectors The Qwiic Shields for Teensy each have four Qwiic connectors on them. -
Page 8: External Power Input
I C device does not have pull up resistors. Essentially all SparkFun I C breakouts come with pull up resistors on them so if you are using a Qwiic I C device or another SparkFun I C device, you can most likely leave it open. -
Page 9: Board Dimensions
These shields include an optional 3.3V power input. The 3.3V pin off of the Teensy is rated to supply 250mA. If your project requires more than that on the Qwiic 3.3V power rail, then you should consider supplying a separate power source and soldering it into the header pins labeled "ALT 3V3". -
Page 10: Hardware Assembly
Qwiic Shield for Teensy Extended Dimensions Hardware Assembly To get started using the Qwiic Shield for Teensy, solder the headers onto your Teensy board and your Qwiic Shield. You may choose to use the included stackable header kit or any combination of male/female breakaway headers. - Page 11 Teensy Extended Example Hookup If you are using the upper-most qwiic connector on the Qwiic Shield for Teensy, please check out the following tips. It helps to bend/curl your Qwiic cable a bit before inserting it into the right-angle connector on the sheild.
- Page 12 Pressing on the sides of the plastic is ideal. Resources and Going Further That's a wrap! Your Qwiic Shield for Teensy/Teensy Extended is now ready to connect to any of a host of Qwiic devices SparkFun offers. For more information, take a look at the resources below.
- Page 13 Hookup Guide for the BlackBoard Artemis A hardware overview and hookup guide for the Get started with the BlackBoard Artemis - all the SparkFun Pro nRF52840 Mini -- a breakout for Nordic's functionality of the SparkFun Artemis module wrapped impossibly cool Bluetooth/ARM Cortex M4 SoC.
- Page 14 SparkFun Qwiic Quad Solid State Relay Kit Hookup Guide Running low-power machine learning examples on the A Hookup Guide to get you started with the SparkFun SparkFun Edge can now be done using the familiar Qwiic Quad Solid State Relay Kit (say that five times Arduino IDE.
Need help?
Do you have a question about the Qwiic Shield for Teensy and is the answer not in the manual?
Questions and answers