Table of Contents
Advertisement
Available languages
Available languages
Quick Links
MANUALE UTENTE-INSTALLATORE PER MONOBLOCCO A FINESTRA
USER'S-INSTALLER'S MANUAL FOR MONOBLOC TYPE WINDOW
CLIMATIZADORES PARED SPLIT PARA MONOBLOQUE VENTANA
MANUEL USAGER-INSTALLATEUR POUR MONOBLOC À FENÊTRE
BENUTZER-INSTALLATIONSANLEITUNG FÜR FENSTER BLOCK
MODELLO / MODEL / MODELO / MODELE / MODELL
Questo manuale è stato creato per scopo informativo. La ditta declina ogni responsabilità per i risultati di una progettazione o di una installazione basata sulle spiegazioni e le specifiche tecniche
riportate in questo manuale. E' inoltre vietata la riproduzione anche parziale sotto qualsiasi forma dei testi e delle figure contenute in questo manuale.
This manual has been created for informative purpose. The company declines every responsibility for the results of projecting or installation based on the explanations and the technical specifications
given in this manual. Is besides forbidden the reproduction under any form of the texts and of the figures contained in this manual.
Este manual ha sido editado con fines informativos. La empresa se exime de cualquier responsabilidad derivada de un proyecto o una instalación basada en las explicaciones técnicas que figuran
en el manual. Por otra parte, está prohibida la reproducción, incluso parcial, bajo cualquier forma, de los textos y de las figuras contenidas en el manual.
Ce manuel a été créé pour le but informatif. L'entreprise décline toute responsabilité pour les résultats d'un projet ou d'une installation basée sur les explications et les détails techniques rapportés
dans ce manuel. Elle est en outre défendue la reproduction même partielle sous n'importe quel forme des textes et des figures contenues dans ce manuel.
Dieses Handbuch wurde zu Informationszwecken erstellt. Das Unternehmen haftet nicht für die Ergebnisse eines Entwurfs oder einer Installation, die auf den Erklärungen und den technischen
Angaben in diesem Handbuch gründen. Der Nachdruck der in diesem Handbuch enthaltenen Texte und Abbildungen in jeglicher Form ist untersagt.
2700 W
IT
EN
ES
FR
DE
Advertisement
Chapters
Table of Contents

Related Manuals for MAXA F26A06


Summary of Contents for MAXA F26A06
- Page 1 MANUALE UTENTE-INSTALLATORE PER MONOBLOCCO A FINESTRA USER’S-INSTALLER'S MANUAL FOR MONOBLOC TYPE WINDOW CLIMATIZADORES PARED SPLIT PARA MONOBLOQUE VENTANA MANUEL USAGER-INSTALLATEUR POUR MONOBLOC À FENÊTRE BENUTZER-INSTALLATIONSANLEITUNG FÜR FENSTER BLOCK MODELLO / MODEL / MODELO / MODELE / MODELL 2700 W Questo manuale è stato creato per scopo informativo. La ditta declina ogni responsabilità per i risultati di una progettazione o di una installazione basata sulle spiegazioni e le specifiche tecniche riportate in questo manuale.
- Page 2 I prodotti elettrici ed elettronici di eventuale scarto non dovranno essere disposti con i normali rifiuti domestici, ma smaltiti a norma di legge RAEE in base alle direttive Europee 2002/96/CE e successive modifiche 2003/108/CE, informandosi presso il Comune di residenza o presso il rivenditore nel caso in cui il prodotto venga sostituito con uno analogo. Possible wasted electrical or electronic devices/products should not be located together with normal domestic waste, but disposed according to the current WEEE law in compliance with the European Directive 2002/96/EC and following modifications 2003/108/EC.
- Page 3 INDICE - INDEX - ÍNDICE - INDEX - INHALTSVERZEICHNIS ITALIANO ............4 ENGLISH .
-
Page 4: Table Of Contents
ITALIANO INDICE 1. Nome delle parti ............6 2. - Page 5 Attenzione - Questo apparecchio può essere utilizzato da bambini di età non inferiore ad 8 anni e da persone con ridotte capacità fisiche, sensoriali o mentali o con esperienza e conoscenze insufficienti, purché attentamente sorvegliate o istruite su come utilizzare in modo sicuro l’apparecchio e sui pericoli che ciò comporta. Assicurarsi che i bambini non giochino con l'apparecchio.
-
Page 6: Nome Delle Parti
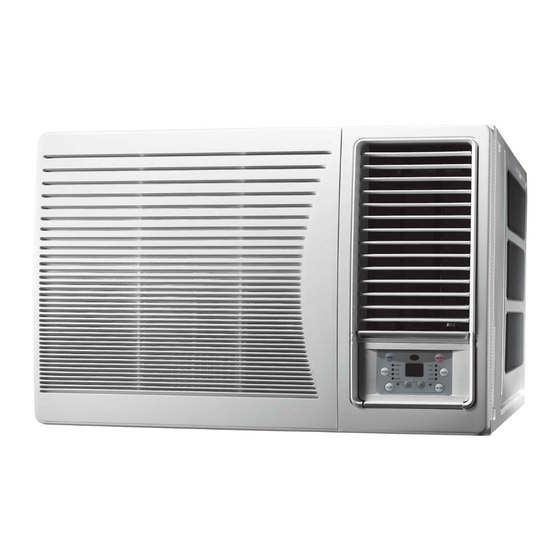
Nome delle parti - Precauzioni Condizionatore a Finestra 1. Nomi delle parti Manuale dell’utente - ITALIANO 2. Precauzioni 1. NOME DELLE PARTI Pannello frontale Entrata aria (per il lato interno) Pannello frontale Entrata aria (per il lato interno) ‚ Filtro dell'aria Cabinet ƒ... -
Page 7: Una Corretta Installazione Del Condizionatore
Una corretta installazione del condizionatore Condizionatore a Finestra 3. Precauzioni per un corretto uso del condizionatore Manuale dell’utente - ITALIANO 3. UNA CORRETTA INSTALLAZIONE DEL CONDIZIONATORE Al fine di garantire la sicurezza e di evitare problemi alla macchina per molto tempo, osservare i seguenti consigli: - Installare l'unità... -
Page 8: Nomi Dei Controlli
Controls - Operations 4. NOMI DEI CONTROLLI Tasto POWER: consente di spegnere e accendere il condizionatore. Tasto MODE: permette di selezionare la modalità di funzionamento, Raffreddamento (COOL), deumidificazione (DRY), ventilazione (FAN) (per i modelli solo freddo.) Tasto FANS PEED: permette di selezionare la velocità della ventilazione: AUTO, Bassa (LOW), Media (MED ), Alta ( HIGH). -
Page 9: Per La Manutenzione
Per la manutenzione Condizionatore a Finestra 6. Per la manutenzione Manuale dell’utente - ITALIANO 6. PER LA MANUTENZIONE Quando si revisiona il condizionatore d'aria, assicurarsi di aver premuto il tasto "POWER" per spegneralo. Quando si revisiona il condizionatore d'aria, assicurarsi di aver girato la manopola SELECTOR sulla posizione "0". Pulizia del filtro Se il filtro dell'aria si dovesse intasare con la polvere, l'entrata dell'aria è... -
Page 10: Guasti E Cause
Guasti e cause Condizionatore a Finestra 7. Guasti e cause Manuale dell’utente - ITALIANO 7. GUASTI E CAUSE In caso di malfunzionamenti, controllare l’unità come sotto riportato. Se l’unità devesse continuare a dare problemi dopo le operazioni di controllo sotto riportate, contattare il centro assistenza. Il lato esterno di entrata o di uscita La temperatura sul lato esterno è... - Page 11 ENGLISH INDEX 1. Parts name ............. . . 13 2.
- Page 12 Caution This appliance can be used by children aged from 8 years and above and persons with reduced physical, sensory or mental capabilities or lack of experience and knowledge if they have been given supervision or instruction concerning use of the appliance in a safe way and understand the hazards involved. Children shall not play the appliance. Cleaning and user maintenance shall not be made by children without supervision.
- Page 13 Window type Air Conditioner 1. Parts name Parts name - Precautions User’s manual - ENGLISH 2. Precautions 1. PARTS NAME Front panel Air inlet ( indoor side ) Front panel air inlet (indoor side) ‚ Air filter Cabinet ƒ Frame „...
- Page 14 Window type Air Conditioner 3. Air conditioners correct installation User’s manual - ENGLISH Air Conditioner correct installation 3. AIR CONDITIONER CORRECT INSTALLATION In order to assure safe and trouble-free operation for an extended period of time, observe the following instructions - Install the unit at a place having sufficient strengt to support the unit securely.
- Page 15 Controls - Operations 4. NAMES OF CONTROLS ON/OFF button: to turn the air conditioner on and off. MODE button: Select the operation mode, COOL, FAN, DRY (for cooling only model). FAN SPEED button: to set the fan speed in the sequence that goes from, HIGH, MID, LOW and AUTO sequence. ᴧ/v ᴧ...
- Page 16 Window type Air Conditioner 6. For the maintenance Maintenance User’s manual - ENGLISH 6. MAINTENANCE When servicing the unit, be sure to push the "POWER" button for to switch off the unit and disconnet the electric power. · Do not use gasoline, benzine , thinner or other ..Never attempt to clean the unit by puring water directly on it as this will cause deterioration of the electrical insulation.
- Page 17 Window type Air Conditioner 7. Breackdown’s and causes User’s manual - ENGLISH Troubles and causes 7. TROUBLES AND CAUSES Before requesting servicing, ceck the Outdoor side temperature is Outdoor side air outlet or inlet is Door and window are open. abnormally high due to application blocked.
- Page 18 ESPAÑOL ÍNDICE 1. Nombre de las partes ............20 2.
- Page 19 Attenzione - Este aparato puede ser utilizado por niños de edad no inferior a los 8 años y por personas con capacidades físicas, sensoriales o mentales reducidas, o con experiencia y conocimientos insuficientes, siempre que estén atentamente vigiladas o instruidas sobre la manera de utilizar de forma segura el aparato o sobre los peligros que ello comporta. Asegúrese de que los niños no jueguen con el aparato.
-
Page 20: Nombre De Las Partes
Nombre de las partes - Precauciones 1. NOMBRE DE LAS PARTES Panel frontal Gabinete ‚ Filtro del aire ƒ Marco „ Cubierta … Entrada del aire desde el exterior Entrada del aire desd † Salida del aire hacia el interior ‡... -
Page 21: Una Correcta Instalación Del Acondicionador
Una correcta instalación del acondicionador 3. UNA CORRECTA INSTALACIÓN DEL ACONDICIONADOR Con el objetivo de garantizar la seguridad y evitarle problemas a la máquina durante mucho tiempo, hay que observar los siguientes consejos: Interior Por lo menos C Exterior Interior Más de D Corte Exterior... -
Page 22: Nombres De Los Controles
Nombres de los controles - Operaciones 4. NOMBRE DE LOS CONTROLES Botón ON/OFF: enciende y apaga el acondicionador. Botón MODE: permite de seleccionar el modo de funcionamiento: COOL (REFRIGERACIÓN), FAN (VENTILACIÓN), DRY (DESHUMIDIFICACIÓN). Botón FAN: permite seleccionar la velocidad del ventilador: Auto, Baja (LOW), Media ( MED), Alta (HIGH). ᴧ/v ᴧ... -
Page 23: Para El Mantenimiento
Para el mantenimiento 6. PARA EL MANTENIMIENTO Cuando se revisa el acondicionador de aire, hay que asegurarse de haber pulsato el botón "POWER" para apagar la unidad. Limpieza del filtro En el caso que el filtro del aire se atascare con polvo, la entrada del aire se obstruye y el efecto de enfriamiento disminuye. -
Page 24: Problemas Y Sus Causas
Problemas y sus causas 7. PROBLEMAS Y SUS CAUSAS Detenga inmediatamente el acondicionador si se produce algún de las averías siguientes. Desconecte la alimentación elétrica y llame al centro de asistencia al cliente más próximo. No intente reparar el aparato usted mismo. Acuda siempre a un servicio técnico autorizado. Está... - Page 25 FRANÇAIS SOMMAIRE 1. Noms des composants ............27 2.
- Page 26 Attention - Cet appareil peut-être utilisé par les enfants de plus de 8 ans et par les personnes aux capacités physiques, sensorielles ou mentales réduites ou sans expérience ni connaissance à condition d'être surveillés ou instruits sur l'utilisation sûre de l'appareil ou sur les dangers inhérents. S'assurer que les enfants ne jouent pas avec l'appareil. - L’appareil doit être installé...
-
Page 27: Noms Des Composants
Nom des composants - Précautions 1. NOMS DES COMPOSANTS Entrée Panneau frontal ‚ Filtre de l'air ƒ Structure „ Carrosserie … Entrée de l'air de l'extérieur Sortie de l’air vers † Sortie de l'air vers l'intérieur Entrée de l’air d ‡... -
Page 28: Une Installation Correcte Du Conditionneur
Une installation correcte du conditionneur 3. UNE INSTALLATION CORRECTE DU CONDITIONNEUR Afin d'assurer la sécurité et d'éviter des problèmes à la machine pour une période prolongée, suivre les conseils suivants: - Installer le dispositif dans un lieu suffisamment stable pour supporter la machine en toute sécurité. - Prévoir une distance ou un espace suffisant autour de l’entrée ou de la sortie de l’air de façon que le flux d’air ne soit pas obstrué. -
Page 29: Noms Des Contrôles
Noms des contrôles - Opérations 4. NOMS DES CONTROLES (toujours attendre trois minutes avant chaque redémarrage) Touche ON/OFF: marche/arrêt permet de démarrer ou éteindre le climatiseur. Touche MODE: permet de sélectionner le mode de fonctionnement: Refroidissement (COOL), ventilation (FAN), déshu- midification (DRY). -
Page 30: Pour L'entretien
Pour l’entretien 6. POUR L’ENTRETIEN S’assurer d’avoir éteint l'appareil et débranché l'alimentation électrique avant de commencer les opérations d'entretien du climatiseur. Nettoyage du filtre Si le filtre de l’air est obstrué à cause des poussières, l’entrée de l’air est bloquée et le rafraîchissement diminue. Nettoyer le filtre de l’air toutes les deux semaines, en suivant l’explication reportée ci-dessous. -
Page 31: Malfunctionnements Et Solutions
Malfunctionnements et solutions 7. MALFUNCTIONNEMENTS ET SOLUTIONS En cas de malfonctionnement, mettez immédiatement l’appareil hors tension. Coupez l’alimentation électrique et con- tactez le service clientèle le plus proche. N'essayez pas de réparer le climatiseur vous-même. Consultez toujours un service de réparation agréé. Les orifices d’admission ou de décharge Température non appropriée du thermo- Des portes ou/et des fenêtres sont ouver-... - Page 32 DEUTSCH INHALTSVERZEICHNIS 1. Nombre de las partes ............20 1.
- Page 33 Vorsicht - Dieses Gerät darf von Kindern über 8 Jahre, sowie von Personen mit reduzierten körperlichen, sinnlichen oder geistigen Fähigkeiten oder ohne Erfahrung und Wissen benutzt werden, sofern sie unter Aufsicht sind, oder mit den entsprechenden Anleitungen zum sicheren Gebrauch des Geräts und der Gefahrenerkennung vertraut gemacht worden sind.
-
Page 34: Bezeichnung Der Teile
Bezeichnung der Teile - Vorsichtsmaßnahmen 1. BEZEICHNUNG DER TEILE Frontpaneel ‚ Luftfilter ƒ Struttura „ Gehäuse … Lufteingang vom Außen † Luftausgang zur Innenseite ‡ Schalttafel ˆ Leitungskabel ‰ Fernsteuerung HINWEIS: Alle Bilder in diesem Handbuch sind ein an- schauliches Beispiel zu erklären und sie können leicht ver- schiedene von der Klimaanlage, die Sie gekauft haben (je SLEEP... -
Page 35: Einwandfreie Montage Der Klimaanlage
Einwandfreie Montage der Klimaanlage 3. EINWANDFREIE MONTAGE DER KLIMAANLAGE Um die Sicherheit zu garantieren und um Probleme an der Maschine für eine längere Zeit zu vermeiden, bitte folgende Empfehlungen beachten: - Die Einheit an einem Platz befestigen, der ausreiched stabil ist, um die Einheit sicher festzuhalten. - Ausreichende Entfernung oder Raum für den Lufteingang und den Luftausgang herum vorsehen, um Verschließungen des Lufstroms zu vermeiden (wie auf den folgenden Bildern dargestellt). -
Page 36: Kontrollbezeichungen
Kontrollbezeichungen - Funktionen 4. KONTROLLBEZEICHNUNGEN (immer 3 Min. vor der Wiederinbetriebnahme abwarten) POWER Taste: drücken Sie diese Taste, um die Klimaanlage einzuschalten/auszuschalten. MODE Taste: um die folgenden Betriebsarten einzustellen: Kühlung (COOL), Trocknung (DRY), Lüftung (FAN). FAN Taste: um die Lüftersgeschwindigkeit einzustellen: Niedrige (low ), Mittlere (MED), Hohe (HIGH). ᴧ... -
Page 37: Instandhaltung
Instandhaltung 6. INSTANDHALTUNG Wenn das Klimagerät überprüft wird, sicherstellen, Sie haben die „ON/OFF-Taste“ drücken, um das Gerät auszuschalten. Reinigung des Filters Sollte sich der Luftfilter durch den Staub verstopfen, bleibt der Lufteingang verschlossen und die Wirkung der Abkühlung läßt nach. Der Luftfilter alle zwei Wochen gemäß der u.a. Darlegung saubermachen. Entfernung des Luftfilters - Auf beide Seiten unten des Öffnungsgitters auf „PUSH“... -
Page 38: Störungen Und Mögliche Ursachen
Störungen und mögliche Ursachen 7. STÖRUNGEN UND URSACHEN Im Falle von Betriebsstörungen, das Gerät, wie unten dargestellt, überprüfen. Sollten nach der Überprüfung nochmals Störungen vorkommen, bitten wir Sie darum, mit dem Kundendienst sich in Verbindung zu setzen. Die Lufteingang und Ausgang an der Die Temperatur der Außenseite Türe und Fenster sind offen. - Page 39 APPENDICE - APPENDIX - APÉNDICE - APPENDICE - ANHANG...
-
Page 40: Störungen
1. MALFUNZIONAMENTI - TROUBLESHOOTING - STÖRUNGEN - MALFUNCIONAMIENTOS - DYSFONCTIONNEMENTS Arrestare l’operazione e spegnere l’alimentazione e poi contattare il fornitore od il centro assisten- za abilitato se viene verificato un malfunzionamento di tipo qui sotto. If one of the following malfunctions occur, stop operation, shut off the power, and contact the manufacturer or its service agents for service. -
Page 41: Identifizierung
2. IDENTIFICAZIONE - IDENTIFICATION - IDENTIFICACION - IDENTIFICATION - IDENTIFIZIERUNG Identificazione CE Il climatizzatore è marcato CE secondo quanto dettato dalla Comunità Europea, con le Direttive 89/392/CEE, 73/23/ CEE, 89/336/CEE, e successive modifiche. Nota Importante Il climatizzatore è una macchina progettata e costruita esclusivamente per la climatizzazione degli ambienti. L’utilizzo dello stesso per scopi diversi da quelli previsti, e non conformi a quanto descritto in questo manuale, farà... -
Page 42: Technische Daten
3. DIMENSIONI / DIMENSIONS / DIMENSIONES / DIMENSIONS / ABMESSUNGEN MOD.: 2700 W Unit:mm ≥ 500mm ≥ 500mm ≥ 500mm ≤ 220 mm 4. SCHEMI ELETTRICI / WIRING DIAGRAMS / ESQUEMAS ELÉCTRICOS / CONNEXIONES ÉLECTRIQUES / ELEKTRISCHE SCHALTPLÄNE MOD.: 2700 W Please don't touch any terminal when the voltage of terminal P(DC+) and N(DC-) at... -
Page 43: Legend
5. LEGENDA / KEY / LEGENDE / LEYENDA / LEGENDE...
Need help?
Do you have a question about the F26A06 and is the answer not in the manual?
Questions and answers