Table of Contents
Advertisement
Quick Links
Advertisement
Table of Contents
Troubleshooting

Related Manuals for Siemens CLINITEK Advantus


Summary of Contents for Siemens CLINITEK Advantus
- Page 1 Clinitek Advantus Analyzer Operator’s Guide 06635252 (133932 Rev. A), 2007-06...
- Page 2 If the Clinitek Advantus analyzer is used in a manner differently than specified by Siemens Diagnostics, the protection provided by the equipment may be impaired. Observe all warning and hazard statements.
-
Page 3: Table Of Contents
Recalling Results .................. 27 Printing and Transmitting Results ............28 Additional Operating Instructions ............. 30 Using a Form Printer ................30 Removing a Jammed Test Strip ............30 Thermal Printing..................30 Managing the Printer Paper ..............30 Clinitek Advantus Operator’s Guide... - Page 4 Overview ....................71 Unpacking the Analyzer ................ 71 Installing the Analyzer ................74 Installing Connections ................80 Installing the Barcode Reader Bracket..........81 Installing a Roll of Printer Paper............81 Performing the Initial Analyzer Check ........... 82 Clinitek Advantus Operator’s Guide...
- Page 5 Pre-service Checklist................ 116 Appendix C: Orderable Supplies List of Supplies and Optional Equipment........119 Siemens Diagnostics Reagent Strips for Urinalysis ......119 CHEK-STIX Positive and Negative Control Strips for Urinalysis..119 Clinitek Handheld Barcode Reader............. 120 Installing a Barcode Reader Bracket........... 120 Clinitek Advantus Waste Bin Liners ............
- Page 6 Cable and Pin Specifications – Computer ........141 Pin Assignments for Interface Cable – Serial Port ......141 Hardware Handshaking............... 142 Cable and Pin Specifications – Printer ........... 142 Pin Assignments for Interface Cable – DB-25 Male Connector..............143 Notes....................143 Index Clinitek Advantus Operator’s Guide...
-
Page 7: Using This Guide
Using this Guide The Clinitek Advantus Operator’s Guide provides information for clinical laboratory professionals who use the Clinitek Advantus system: The following table describes how this guide is organized. If you want to . . . Then refer to . . . -
Page 8: Conventions
Conventions The Clinitek Advantus Operator’s Guide uses the following text and symbol conventions: Convention Description Biohazard statements alert you to potentially biohazardous conditions. BIOHAZARD Warning statements alert you to conditions that may cause personal injury. WARNING Caution statements alert you to conditions... -
Page 9: Overview And Intended Use
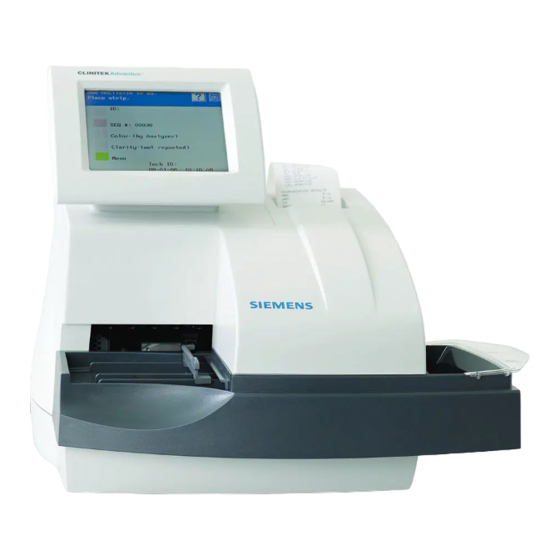
Overview and Intended Use The Clinitek Advantus Urinalysis analyzer is a semi-automated, benchtop analyzer. It is designed to read Siemens Medical Solutions Diagnostics ® Reagent Strips for Urinalysis, such as, MULTISTIX 10 SG and Siemens ® Diagnostics MULTISTIX PRO Reagent Strips. -
Page 10: Hardware Overview
The Clinitek Advantus system is intended for professional use in a laboratory environment only. Tests performed using the Clinitek Advantus system are intended for in vitro diagnostic use. As with all diagnostic tests, a definitive clinical diagnosis should not be based on the results of a single test, but should only be made by the physician after all clinical and laboratory findings have been evaluated. -
Page 11: Connections And Power
The line cord is connected into the line cord receptacle. Turn the analyzer on by pressing the power switch to the on position. You can connect a computer, printer, ethernet connection, keyboard, and handheld barcode reader to the analyzer using the interface connectors. Clinitek Advantus Operator’s Guide... -
Page 12: Memory
Memory card slot Cooling fan Power switch Line cord receptacle Ethernet interface connector Serial interface connector Printer interface connector Keyboard and barcode reader interface connector Figure 3 Connections, Power, and Memory Clinitek Advantus Operator’s Guide... -
Page 13: Software Overview
Software Overview The Clinitek Advantus provides an easy-to-navigate and intuitive user interface. When the analyzer is not in use, the screen saver or the Ready/Run screen displays. If the screen saver displays, touch the screen to access the Ready/ Run screen. You can access all tests through the Ready/Run screen. You can also navigate from this screen to any point in the software. - Page 14 The instrument will only recognize keyboard input that is equivalent to the keypads available on the instrument display. Refer to Appendix E, Symbols for a complete list of key symbols used on the Clinitek Advantus. Clinitek Advantus Operator’s Guide...
-
Page 15: Operating Sequence
The pins continue to move the strip along the platform until it drops into the waste bin. An internal thermal printer prints the test results, if this option is selected. You can also send the results to a computer and a form or 80-column printer. Clinitek Advantus Operator’s Guide... - Page 16 Clinitek Advantus Operator’s Guide...
-
Page 17: Operating The System
Operating the System Leave the Clinitek Advantus analyzer on at all times, except during maintenance and cleaning procedures. Overview You can test without a loadlist or specimen ID. Put a strip on the analyzer. The analyzer automatically assigns a Sequence Number and begins testing. -
Page 18: Check The Strip Loading Station
Tech ID. Enter Print Information 1. Select Menu 2. Select to print: Print • the ID list if a loadlist exists in memory • confirmation of the last calibration • a report of the setup parameters Clinitek Advantus Operator’s Guide... -
Page 19: Run Controls
Enter the color and clarity of each specimen before dipping the reagent strip. You can change the color and clarity until the strip moves. 3. Completely immerse all of the reagent pads on a Siemens Diagnostics Reagent Strip in fresh, well-mixed, uncentrifuged urine. 4. Immediately remove the reagent strip. - Page 20 When the final strip moves to the waste bin, the run ends, and end of run reports are processed. Refer to Printing and Transmitting Results‚ page 28 for information on printing and transmitting the results. Clinitek Advantus Operator’s Guide...
-
Page 21: Using The Specimen Id Without A Loadlist
You can also enter the ID from a computer keyboard, or scan it from a barcoded label using the handheld barcode reader. Do not select or scan Enter from the ID entry screen before entering NOTE: the color and clarity. Clinitek Advantus Operator’s Guide... -
Page 22: Entering A Loadlist From A Host Or Laboratory/Hospital System
Enter Entering a Loadlist from a Host or Laboratory/Hospital System You can connect the Clinitek Advantus analyzer to a host computer or laboratory system. Refer to Appendix G, Computer and Printer Interface, for more information. - Page 23 When the strip for the last loadlisted specimen is moved to the read area, you are not allowed to place any additional strips on the table. The push bar stays at the right side and the analyzer completes the run. Clinitek Advantus Operator’s Guide...
-
Page 24: Performing A Stat Test
4. Select a reagent strip. CAUTION Do not use a reagent strip other than the selected primary or alternative reagent strip. Only use Siemens Diagnostics brand reagent strips. Use of other strips may cause erroneous results. 5. Dip and place a reagent strip. -
Page 25: Managing Results
Use this procedure to edit the results of confirmatory testing. 1. During the end of run review, access the Confirmatory Report screens. 2. Select a record from the Confirmatory Report A screen. The flagged positive test results display. Clinitek Advantus Operator’s Guide... - Page 26 The patient ID results display with the earliest test displayed first. c. Use to select the correct test results. Move Up Move Down d. Select Select Result 4. Select the heading where you will add results. 5. Enter the microscopic test result for the heading. Clinitek Advantus Operator’s Guide...
-
Page 27: Recalling Results
Move Up 10 and Move Down 10 are used. If microscopic results are merged with the patient test results, displays on the patient record. Microscopics 7. Select to view the merged microscopic results. Microscopics Clinitek Advantus Operator’s Guide... -
Page 28: Printing And Transmitting Results
Previous Screen Resending Records from Memory Use this procedure to resend 1 or more records to a host computer or LIS: 1. Recall a group of results. Refer to Recalling Results‚ page 27. 2. Select Resend Clinitek Advantus Operator’s Guide... - Page 29 1. Recall a group of results. Refer to Recalling Results‚ page 27. 2. Select Delete 3. Confirm the deletion. 4. Select to return to the previous menu, or select Previous Screen Return to to return to the Ready/Run screen. Ready/Run Clinitek Advantus Operator’s Guide...
-
Page 30: Additional Operating Instructions
Change the roll when the pink edge displays. Refer to Changing the Paper‚ page 45. Emptying the Waste Bin Empty the waste bin as it starts to fill. This prevents problems with strips jamming as they leave the read station. Clinitek Advantus Operator’s Guide... -
Page 31: Calibration
Use the following procedure to print a report of the most recent successful calibration: 1. At the Ready/Run screen, select Menu 2. Select Print 3. Select Calibration confirmation The date and time of the latest successful calibration prints. Clinitek Advantus Operator’s Guide... - Page 32 Clinitek Advantus Operator’s Guide...
-
Page 33: Quality Control
• when training new operators The Clinitek Advantus analyzer can prompt for regular QC testing. You can set the interval between QC tests from 1 hour to 99 days. You can prevent the analyzer from being used for testing when a QC test is due. Select the QC interval and requirement through the Setup routine. -
Page 34: Testing Control Specimens
Enter 6. When you are ready to test the control, select Enter 7. Completely immerse all of the reagent pads on a Siemens Diagnostics Reagent Strip into the quality control solution. 8. Immediately remove the reagent strip. 9. While removing the strip, run the edge against the side of the container. - Page 35 CCS is selected as the output format, the control results are also transmitted to the host computer. 12. After all controls are run, select to exit the quality Return to Ready/Run control screen. Clinitek Advantus Operator’s Guide...
-
Page 36: Quality Control Errors
Ready/Run screen. Carefully repeat the control procedure described above. Deterioration of the Use a fresh bottle of Siemens Diagnostics Reagent reagent strip test Strips to repeat the quality control procedure. areas due to... -
Page 37: Maintenance
Maintenance General Cleaning Keep the exterior of the Clinitek Advantus analyzer free of dust at all times. Clean the exterior using a damp cloth and a mild detergent. CAUTION Do not use any type of solvent, oil, grease, or silicone spray on any part of the analyzer. - Page 38 Tilt the bar slightly upwards. b. Pull the bar straight out. Figure 8 Remove the Push Bar 4. Remove the waste bin liner. 5. Discard the used reagent strips into an appropriate container, according to your standard laboratory procedures. Clinitek Advantus Operator’s Guide...
- Page 39 6. Remove the fixed platform by pulling the entire assembly towards you. Figure 9 Remove the Fixed Platform 7. Remove the moving table by pulling the entire assembly towards you. Figure 10 Remove the Moving Table Clinitek Advantus Operator’s Guide...
- Page 40 Cleaning solution can damage the calibration bars. 10. If the holddown plate or push bar is extremely dirty, soak it in warm water and mild detergent to loosen the dried residue. 11. Rinse each piece thoroughly. Clinitek Advantus Operator’s Guide...
- Page 41 Align the tab at the back of the holddown plate with the slot at the back of the platform. d. Snap the holddown plate into place. e. Ensure that the white calibration bars are visible. Clinitek Advantus Operator’s Guide...
- Page 42 Do not use bleach to clean the display. Do not spray or pour the glass cleaner directly onto the screen. Do not use laboratory wipes, such as Kimwipes, because they may scratch the screen. 22. Turn analyzer power on. Clinitek Advantus Operator’s Guide...
-
Page 43: Performing A Decontamination
Use care when drying around the pins on the moving table. 6. Allow the calibration bars on the platform to air dry. 7. Reinstall the pieces. Refer to Performing the Daily Cleaning‚ page 37. *These products may not be available in all locations. Clinitek Advantus Operator’s Guide... -
Page 44: Lubricating The Push Bar Slide And Shaft
Appendix C, Orderable Supplies, for information on obtaining additional tubes. 8. Move the slide arm several times to spread the lubrication. 9. Reinstall the pieces. Refer to Performing the Daily Cleaning‚ page 37. 10. Reconnect the power cord. 11. Turn analyzer power on. Clinitek Advantus Operator’s Guide... -
Page 45: Changing The Paper
4. Remove the paper roll: a. Lift up the roll. b. Tear the paper between the roll and the printer. c. Remove the core and remaining paper on the roll. Clinitek Advantus Operator’s Guide... - Page 46 8. Hold the roll just above the printer, with the paper unrolling from underneath. 9. Push the paper gently under the roller at the back of the printer. The printer automatically pulls the paper into the printer and behind the paper guide on the top of the printer. Clinitek Advantus Operator’s Guide...
- Page 47 12. Set the paper into position behind the printer. 13. Place the front tabs of the cover into their slots. 14. Feed the end of the paper through the opening in the cover. 15. Snap the cover into place. Clinitek Advantus Operator’s Guide...
-
Page 48: Replacing The Printer
Remove the Cover on the Internal Printer 1. Ensure the analyzer is at the Ready/Run screen. 2. Press the tab on the back of the printer cover. 3. Lift the cover off. Figure 15 Remove the Printer Cover Clinitek Advantus Operator’s Guide... -
Page 49: Remove The Paper Roll
Push down on the back of the lever to unlock the roller. c. Pinch and lift the front of the lever to raise the paper guide. d. Carefully pull paper through the printer in its normal direction of travel. Printer release lever Figure 16 Printer Release Lever Clinitek Advantus Operator’s Guide... -
Page 50: Remove The Printer
Press the bottom of the shield on the right-hand side toward the touch screen. b. Lift to release the 2 clips located on either side at the bottom of the shield. Figure 17 Remove the Printer Shield Clinitek Advantus Operator’s Guide... - Page 51 Figure 18 Remove the Printer The printer is connected to the analyzer through a flat 29-pin interface cable for transfer of data. The cable slides into a connector that snaps down to secure the cable into position. Clinitek Advantus Operator’s Guide...
- Page 52 6. Unsnap the connector by lifting up on both sides of the top plate. The plate raises by about 2 mm (1/16 in). 7. Gently pull the interface cable from the connector. You may need to wiggle the cable slightly to loosen it. Figure 19 Remove the Interface Cable Clinitek Advantus Operator’s Guide...
-
Page 53: Install The New Printer
Print the analyzer setup parameters or perform several reagent strip tests. If you turned the internal printer off prior to replacement, turn it back NOTE: on. If Printer Error displays when attempting to print, check for a tight and proper connection of the interface cable. Clinitek Advantus Operator’s Guide... -
Page 54: Calibrating The Touch Screen
5. Touch the screen at the center of the 6. Repeat when the prompt changes to Touch the bottom right corner. When the touch screen is calibrated, the display automatically continues in the normal sequence of screens. Clinitek Advantus Operator’s Guide... -
Page 55: Troubleshooting
If the problem persists, record the error number being displayed and contact your local technical service provider for assistance. If you think Siemens Diagnostics Reagent Strips are causing the problem, consult the product insert that comes with the reagent strips for troubleshooting information. - Page 56 9. Reinstall the fixed platform. Refer to Performing the Daily Cleaning‚ page 37. 10. Reinstall the push bar. Refer to Performing the Daily Cleaning‚ page 37. 11. Turn analyzer power on. 12. Rerun the specimen(s) without results. Clinitek Advantus Operator’s Guide...
-
Page 57: Reinstalling The Fixed Platform
2. If it is not running, turn analyzer power off. 3. Check that the power cord is firmly connected to the analyzer and into a live AC electrical outlet. 4. Turn analyzer power on. Defective Contact your local technical support analyzer provider. electronics Clinitek Advantus Operator’s Guide... - Page 58 1. Ensure that the run is complete, problem and the analyzer is at the Ready/Run screen. 2. Turn analyzer power off. 3. Wait several seconds. 4. Turn analyzer power on. 5. If the problem continues, contact your local technical support provider. Clinitek Advantus Operator’s Guide...
- Page 59 Test results are Internal printer is Set the internal printer to On not being printed set to off through the Setup Routine. by the internal printer. No paper Install a new roll of paper. installed in printer Clinitek Advantus Operator’s Guide...
- Page 60 1, and no more than 200 IDs. than 1 ID or more than 200 IDs The list contains Ensure that the loadlist contains no an ID that has IDs with more than 13 characters. more than 13 characters Clinitek Advantus Operator’s Guide...
- Page 61 Error 01 Analyzer optical 1. Turn analyzer power off. error Error 02 2. Wait several seconds. Error 03 3. Turn analyzer power on. Error 04 Error 05 Clinitek Advantus Operator’s Guide...
- Page 62 Results Error Report, to determine the specimen(s) for which no results exist. 3. Retest those specimens. Ensure that the strip is dipped completely into the specimen and is placed onto the platform with the pads facing up. Clinitek Advantus Operator’s Guide...
- Page 63 Results Error Report, to determine the specimen(s) for which no results exist. 4. Retest those specimens. Error 21 Internal memory 1. Turn analyzer power off. error 2. Wait several seconds. 3. Turn analyzer power on. Clinitek Advantus Operator’s Guide...
- Page 64 3. Remove and reinstall, if needed. 4. Ensure the feet on the push bar are on the bottom, nearest the platform. 5. Turn analyzer power on. Analyzer Contact your local technical support mechanical error provider. Clinitek Advantus Operator’s Guide...
- Page 65 7. Check your printout of results, or the Results Error Report displayed at the end of the run, to determine the specimen(s) for which no results exist. 8. Retest those specimens. Clinitek Advantus Operator’s Guide...
- Page 66 1. Turn analyzer power off. error 2. Remove the fixed platform. 3. Inspect the calibration bars for damage or misalignment. 4. Clean the platform and calibration bars. 5. Reinstall the fixed platform. 6. Turn analyzer power on. Clinitek Advantus Operator’s Guide...
- Page 67 3. Ensure that the setup parameters for the computer interface are correct. 4. Transfer at least some of the records. 5. If unable to transfer records, contact your local technical support provider. Clinitek Advantus Operator’s Guide...
- Page 68 3. Reselect the options that need restored to change. Error 56-n Analyzer error 1. Turn analyzer power off. 2. Wait several seconds. 3. Turn analyzer power on. 4. If the error repeats, contact your local technical support provider. Clinitek Advantus Operator’s Guide...
-
Page 69: File Management
If it does not receive the acknowledgement, it continues to hold results in memory instead of overwriting them. The analyzer generates an error when the memory nears capacity. Refer to Section 6, Troubleshooting for error message details, and suggested corrective actions. Clinitek Advantus Operator’s Guide... - Page 70 Clinitek Advantus Operator’s Guide...
-
Page 71: System Configuration
Do not drop the analyzer or handle it roughly. This can disturb internal calibrated optics and electronics or cause other damage. Always handle the analyzer with care. The Clinitek Advantus analyzer is a precision instrument and must be handled accordingly. - Page 72 Fixed platform and holddown plate Push bar Moving table Figure 21 Instrument Parts 5. Retain the Clinitek Advantus shipping carton and packing for several weeks. If you need to ship the analyzer, the shipping carton affords the best protection against damage.
- Page 73 8. Locate the piece of foam packing that is under the read area cover. The foam has a red tag attached. 9. Remove the foam by gently pulling the red tag down and forward. Figure 22 Remove the Foam Clinitek Advantus Operator’s Guide...
-
Page 74: Installing The Analyzer
3. Write the installation date and serial number in the spaces provided in the Pre-service Checklist‚ page 116, and on the Warranty Information‚ page 113. 4. Contact your Siemens Diagnostics representative for your warranty information if this page is not included in your guide. Clinitek Advantus Operator’s Guide... - Page 75 2. Align the 2 grooves on the bottom of the table with the edges of the platform on which the table rests. 3. Gently push the table in until you hear the tab latch into the hold position. 4. Check that the table is secure. Figure 24 Install the Moving Table Clinitek Advantus Operator’s Guide...
- Page 76 3. Align the tab at the back of the holddown plate with the slot at the back of the platform. 4. Snap the holddown plate into place. 5. Ensure that the white calibration bars are visible. Figure 25 Install the Holddown Plate Clinitek Advantus Operator’s Guide...
- Page 77 During the initial installation, you may need to use firm pressure to push the platform the final 1.3 cm (0.5 in). The platform must be seated, and not even slightly crooked or the strips may jam as they are pushed along the platform. Figure 26 Install the Fixed Platform Clinitek Advantus Operator’s Guide...
- Page 78 2. With this end slightly upward, insert the peg on the other end of the bar into the hole in the pusher mechanism. 3. Lower the push bar into place. Figure 27 Install the Push Bar Clinitek Advantus Operator’s Guide...
- Page 79 Install the Waste Bin Liner 1. Take a waste bin liner from the pack delivered with the analyzer. 2. Place the liner into the waste bin. Figure 28 Install the Waste Bin Liner Clinitek Advantus Operator’s Guide...
-
Page 80: Installing Connections
Connect to a Printer You can use most 80-column, continuous feed printers or the Clinitek Form Printer with the Clinitek Advantus analyzer. Some printers include an interface cable that can connect to the printer port on the back of the analyzer. If not, you need to obtain the cable separately. Refer to Appendix G, Computer and Printer Interface, for the pin specifications for the male connector. -
Page 81: Installing The Barcode Reader Bracket
Connect to a Computer You can connect the Clinitek Advantus analyzer to a host computer or LIS (Laboratory Information System) via the serial port and a null modem cable, or via an ethernet cable. Refer to Appendix G, Computer and Printer Interface for cable requirements for interfacing to a computer. -
Page 82: Performing The Initial Analyzer Check
Performing the Initial Analyzer Check After the Clinitek Advantus analyzer is properly installed, perform the following initial analyzer check. If problems occur during this procedure or if an error message displays, refer to Section 6, Troubleshooting. 1. Turn analyzer power on. - Page 83 Figure 30 Placement of Reagent Strip After the strip is read, the internal printer prints the test results. The analyzer produces a result for each reagent pad that is within the limits given in the package insert for the control solution. Clinitek Advantus Operator’s Guide...
-
Page 84: Setup Information
9. If the analyzer does not perform as expected, or if the printed results do not agree with the expected values, refer to Section 6, Troubleshooting. With satisfactory completion of the initial analyzer check, the Clinitek Advantus analyzer is ready for routine testing. 10. Select Menu 11. - Page 85 3. If the time format is 12 Hour, select the cycle key to set the time to AM/PM AM or PM. The AM/PM cycle key is only active if the time format is 12 Hour. 4. Select Enter Clinitek Advantus Operator’s Guide...
- Page 86 MICROSCOPICS. You can customize the header or set it to contain all blanks if you do not want a header. 1. Select Custom header 2. Enter up to 24 letters and spaces. to erase any existing text. Move Left Clinitek Advantus Operator’s Guide...
- Page 87 Use this procedure to adjust the contrast of the analyzer display. 1. Select Display contrast 2. Use the keys to increase or decrease the contrast. 3. Select to confirm the setting and return to the first Setup Previous Screen menu. Clinitek Advantus Operator’s Guide...
-
Page 88: Setup Menu 2
Kanji (Japanese) Español Português Chinese Svenska The default selection for several other options may change, depending upon the language selected. For example, the date and time formats, strip and alternative strip names, and reporting of color. Clinitek Advantus Operator’s Guide... - Page 89 * English and Swedish only **Japanese only Plus System Use the cycle key to display and print results in the Plus system, Plus system which uses + symbols, rather than in clinical units, such as mg/dL. Options Plus system Clinitek Advantus Operator’s Guide...
- Page 90 Strip Many configurations of Siemens Diagnostics Reagent Strips are available for the Clinitek Advantus analyzer. However, not all configurations are available in every country. Use the cycle key to select the primary test strip. Strip Ensure the reagent strip selected agrees with the name of the Siemens Diagnostics Reagent Strip used as the primary reagent strip on the analyzer.
-
Page 91: Setup Menu 3
Alternative strip Choose different primary and alternative reagent strips to enable switching between tests. Ensure the reagent strip selected agrees with the name of the Siemens Diagnostics Reagent Strip used as the secondary reagent strip. Options None †... -
Page 92: Setup Menu 4
At the third Setup menu, select to access the fourth Setup menu. Next Screen Menu Option Default Tests to report and their order Mark positives Positive levels for tests Normal range for SG/pH Normal range for CRE Clinitek Advantus Operator’s Guide... - Page 93 2. Select a test for each of the remaining positions 3. When finished, select Previous Screen remove a test from the Select the tests to report and leave a blank reporting order, description in the final position. Clinitek Advantus Operator’s Guide...
- Page 94 Tests to report. If Protein is selected as a reported test, the first screen displays 2 different options for Protein. Option 1 is for traditional Siemens Diagnostics Reagent Strips. Option 2 is for all selectable MULTISTIX PRO strips. The reported results for protein vary slightly, depending upon which group of reagent strips is used.
-
Page 95: Setup Menu 5
Setup menu. Next Screen Menu Option Default Color Determined by analyzer Color choices Yellow, Orange, Red, Green, Blue, Brown, Other Clarity choices Clear, SL Cloudy, Cloudy, Turbid, Other Use default COL/CLA during run Clinitek Advantus Operator’s Guide... - Page 96 Entered by tech entered loadlist or just before testing each specimen, The analyzer can only determine color if the Siemens Diagnostics NOTE: Reagent Strip used contains the leukocyte test. Results reported by the analyzer may be different from the color seen visually. This is because of the inherent differences between the human eye and the optical system of the analyzer.
- Page 97 Use default COL/CLA during run clarity. To... Select... display no default value, set the first listed value for color and clarity as the default, The reported value can be changed prior to testing the specimen. NOTE: Clinitek Advantus Operator’s Guide...
-
Page 98: Setup Menu 6
Flags for confirmatory test A 2. Select the box next to the tests to include in the confirmatory report. A check mark displays in the box. Select the box again to remove the check mark. 3. Select Previous Screen Clinitek Advantus Operator’s Guide... - Page 99 Select... not set a QC interval, No regular QC test prompt when a QC test is due, Prompted regular QC test prevent testing of patient samples when Compulsory regular QC test a QC test is due, Clinitek Advantus Operator’s Guide...
-
Page 100: Setup Menu 7
Tech ID Microscopics Setup Enable entry of microscopics results. 1. Select Microscopics setup The display shows where to select 5 headings and their associated units. The sixth selection enables you to enter custom data and units. Clinitek Advantus Operator’s Guide... - Page 101 3. Select the sixth key on the screen to set custom data and units: a. Enter a custom heading. b. Use the cycle key to set units: Options Cycle key 6 /µL /HPF /LPF mS/cm NONE c. Select Enter 4. When finished, select Previous Screen Clinitek Advantus Operator’s Guide...
- Page 102 Tech ID To... Select... disable display of the Tech ID, display the Tech ID on QC results, On, control results only display the Tech ID on QC and patient On, both patient and control results results, Clinitek Advantus Operator’s Guide...
-
Page 103: Setup Menu 8
Use this procedure to set a personal password or reset an existing password. The analyzer has a default password of 84437, which is always active. 1. Select Set or reset password 2. Enter up to 6 digits. 3. Select Enter 4. When prompted, re-enter the password. Clinitek Advantus Operator’s Guide... - Page 104 You can also set the computer port through the first Setup menu. If the port selection changes in 1 menu, it automatically changes in the other menu. Refer to the specifications accompanying the computer for information on the required parameters for Baud, Data, and Parity. 3. Select Output format Clinitek Advantus Operator’s Guide...
- Page 105 If you are using a Clinitek 200+ or Clinitek 200 analyzer in your laboratory, you must: • set identical parameters for Clinitek Advantus analyzer and the Clinitek 200 analyzer or Clinitek 200+ analyzer. This helps ensure that the data is transferred in the same format by all analyzers.
- Page 106 Subnet mask set the subnet mask number. Options Subnet mask 255.255.255.000 255.255.000.000 255.000.000.000 7. Use the cycle key to activate a Gateway address. Gateway To... Select... not use a gateway address, make the gateway address active, Clinitek Advantus Operator’s Guide...
- Page 107 Leading char. to ignore characters at the beginning of the barcode. 4. Use the cycle key to ignore between 0 and 9 Trailing char. to ignore characters at the end of the barcode. 5. Select Previous Screen Clinitek Advantus Operator’s Guide...
-
Page 108: Setup Menu 9
Use this test to determine if the strip sensor is functioning properly. 1. Select Strip sensor 2. When prompted, place a test strip. If the strip sensor detects the presence of a strip placed on the table, the message displays. Strip detected 3. Select Previous Screen Clinitek Advantus Operator’s Guide... - Page 109 If these labels cannot be read, the problem is probably with your reader. If they read properly, the labels you are using may not be acceptable. Clinitek Advantus Operator’s Guide...
-
Page 110: Completing Setup
Completing Setup 1. When you have finished selecting the setup parameters, select Return to Ready/Run The setup parameters are stored in the Clinitek Advantus analyzer. Your changes are only saved when you select NOTE: Return to Ready/ 2. Print a copy of the setup report to verify your selections and retain in your files: a. -
Page 111: Appendix A: Safety Information
• Keep your hands away from your face. • Cover all superficial cuts and wounds before starting any work. • Dispose of contaminated materials according to your laboratory’s biohazard control procedures. Clinitek Advantus Operator’s Guide... -
Page 112: References
Laboratory Workers from Occupationally Acquired Infections; Approved Guideline - Third Edition. Wayne, PA: Clinical and Laboratory Standards Institute; 2005. CLSI Document M29-A3. [ISBN 1-56238-567-4]. 3. Federal Occupational Safety and Health Administration. Bloodborne Pathogens Standard. 29 CFR 1910. 1030. Clinitek Advantus Operator’s Guide... -
Page 113: Appendix B: Warranty And Support Information
Appendix B: Warranty and Support Information Legal Information To contact the legal representative for Siemens Diagnostics within the European community, contact the Siemens Diagnostics Authorized Representative. For service, contact your local technical support provider. Siemens Diagnostics Authorized Representative Siemens Medical Solutions Diagnostics Europe Limited Chapel Lane, Swords, Co. -
Page 114: Disclaimer Of Warranties
Siemens Diagnostics. 4. Siemens Diagnostics reserves the right to make changes in design of this instrument without obligation to incorporate such changes into previously manufactured instruments. -
Page 115: Contact Information
Contact Information Siemens Medical Solutions Diagnostics Pty Ltd ABN 65 007 436 651 885 Mountain Highway Bayswater Victoria 3153 Australia Siemens Medical Solutions Diagnostics 3-20-14 Higashi-Gotanda, Shinagawa Tokyo, 141-8641, Japan Clinitek Advantus Operator’s Guide... -
Page 116: Pre-Service Checklist
Is the internal or an external printer turned on using the procedure in Printer‚ page 86? Is there paper in the printer? Have you performed the printer test using the procedure in Perform Hardware Tests‚ page 108? Clinitek Advantus Operator’s Guide... - Page 117 Are reasonable results being displayed and printed for the QC and patient samples? If NO: Was the type of Siemens Diagnostics Reagent Strip used the same as the type of strip selected when testing? Ensure that the correct primary or secondary reagent strip was selected to match the reagent strip being used.
- Page 118 Clinitek Advantus Operator’s Guide...
-
Page 119: Appendix C: Orderable Supplies
Siemens Diagnostics Reagent Strips for Urinalysis You can use many different configurations of Siemens Diagnostics Reagent Strips on the Clinitek Advantus analyzer. Contact your local technical support provider for the configurations available in your country. CHEK-STIX Positive and Negative Control Strips for Urinalysis... -
Page 120: Clinitek Handheld Barcode Reader
Clinitek Handheld Barcode Reader You can connect the Clinitek Handheld Barcode Reader to the barcode reader port on the Clinitek Advantus analyzer. The reader can be used to enter the identification numbers from barcoded labels, rather than manually entering each number before the specimen is tested. Color and clarity can also be scanned from special barcodes that are included with the barcode reader. -
Page 121: List Of Replacement Parts
List of Replacement Parts This is a list of the replacement parts available for your Clinitek Advantus analyzer. Contact your local technical support representative to order. • AC power cord • Clinitek Advantus Operator’s Guide • Clinitek Advantus Operator’s Guide multilingual CD •... - Page 122 Clinitek Advantus Operator’s Guide...
-
Page 123: Appendix D: Specifications
Appendix D: Specifications System Specifications This section summarizes the design specifications for the Clinitek Advantus analyzer. Safety Certifications Refer to the DECLARATION OF CONFORMITY shipped with the Clinitek Advantus analyzer. Electromagnetic Compatibility (EMC) Refer to the DECLARATION OF CONFORMITY shipped with the Clinitek Advantus analyzer. -
Page 124: Environmental Specifications
Electrical Rating Power Requirements 50 to 60 Hz Maximum Power Input 72 VA Fuse Rating 2 A, 250 V, 2 AG, SB(T) Line Leakage Current <0.5 mA in normal condition <3.5 mA in single fault condition Clinitek Advantus Operator’s Guide... -
Page 125: Tables Of Results
TRACE (15 >=300 (300 ) TRACE (LOW mg/dL No Difference Creatinine † NORMAL DILUTE NORMAL Protein-to- Creatinine mg/g No Difference 150 ABNORMAL Ratio 300 ABNORMAL >500 ABNORMAL YELLOW GREEN ‡ ORANGE BLUE No Difference Color BROWN Clinitek Advantus Operator’s Guide... -
Page 126: English And Chinese, Units-International (Si)
No Difference Nitrite NEGATIVE POSITIVE No Difference NEGATIVE Ca 125 NEGATIVE Leukocytes Leu/µL Ca 15 Ca 500 TRACE Ca 70 NEGATIVE 1.0 NEGATIVE Protein TRACE (0.15 >=3.0 (3.0 ) TRACE (LOW 17.7 mmol/L 26.5 No Difference Creatinine Clinitek Advantus Operator’s Guide... -
Page 127: English Nordic, Units-Nordic Plus System
NEGATIVE 3+ NEGATIVE Ketone 4+ TRACE <=1.005 1.020 Specific 1.010 1.025 No Difference Gravity 1.015 >=1.030 NEGATIVE Occult Blood No Difference +/- INTACT No Difference >=9.0 Urobilinogen µmol/L >=131 No Difference Nitrite NEGATIVE POSITIVE No Difference Clinitek Advantus Operator’s Guide... - Page 128 Color may be preceded with LT or DK when determined by the analyzer. If determined visually, default descriptions can be changed by the user. Other can also be reported. Determined visually. Reported results are default descriptions that can be changed by the user. Clinitek Advantus Operator’s Guide...
-
Page 129: Appendix E: Symbols
System and Packaging This section describes the symbols that can display in the analyzer documentation, the exterior of the Clinitek Advantus analyzer, or on the analyzer packaging. The symbols on the analyzer provide you with the location of certain components and with warnings for proper operation. The symbols on the analyzer packaging provide you with other important information. - Page 130 This symbol indicates that the product is heavy, and should only be lifted by two or more persons. This symbol indicates a temperature hazard. In this instance, the hazard is from a printer component. Clinitek Advantus Operator’s Guide...
- Page 131 This symbol indicates that the product or container contains recycled material. This symbol is intended to facilitate recycling of corrugated materials. The number is licensed in Germany and printed on corrugated shippers. Clinitek Advantus Operator’s Guide...
-
Page 132: User Interface
Select this key to return to the Ready/Run screen. Ready/Run You must select this key when you exit the Setup Routine to save your changes. At any screen where you enter data, you must select Enter before selecting this key to save your data. Clinitek Advantus Operator’s Guide... - Page 133 The character at the current position is usually erased before the cursor is moved to the left. If this key displays in conjunction with the Move Right key, the existing characters are not erased as the cursor is moved. Clinitek Advantus Operator’s Guide...
- Page 134 Select this key to delete one or more records. Print Select this key to print one or more records. Resend Select this key to resend one or more records to a computer. Microscopics Select this key to display the merged microscopy results. Clinitek Advantus Operator’s Guide...
- Page 135 Name Description Run QC Select this key to display the Run Controls screen Sample and test a QC sample. Loopback Select this key to start the serial port loopback test. Clinitek Advantus Operator’s Guide...
- Page 136 Clinitek Advantus Operator’s Guide...
-
Page 137: Appendix F: Barcode Reader
Appendix F: Barcode Reader General Information You can use the optional Clinitek Advantus handheld barcode reader to scan barcoded labels that are adhered to the specimen tubes. You can also use it to scan the color and clarity barcodes from the special card that is included with the reader. -
Page 138: Testing The Barcode Reader
Barcode Test. If the reader is able to read the test label, the quality of your labels may be suspect. If the test label cannot be read, the reader itself is suspect. Clinitek Advantus Operator’s Guide... -
Page 139: Specifications
1 to 30 data characters. A maximum of 13 characters Number of Characters: can be displayed, stored and transmitted by the Clinitek Advantus analyzer. Excess characters must be removed as leading or trailing characters. 0.15 to 0.51 mm (0.006 to 0.02 in). It is better to be closer Narrow Bar Width: to the upper limit (0.51 mm/0.02 inch), as long as the entire barcode can be... -
Page 140: Maintenance
1. Wipe the reader window with a soft cloth or facial tissue dampened with water, or a mild detergent-water solution. 2. If a detergent solution is used, rinse with a soft cloth or facial tissue dampened with water only. 3. Clean the plastic case in the same manner. Clinitek Advantus Operator’s Guide... -
Page 141: Appendix G: Computer And Printer Interface
Appendix G: Computer and Printer Interface General Information You can connect the Clinitek Advantus analyzer to a host computer or Laboratory Information System (LIS). You can also connect an 80-column or form printer. This appendix contains the specifications needed for the interface cables required. -
Page 142: Hardware Handshaking
Clinitek Report Form. Clinitek Form Printer – Set the external printer option to On, Form Printer 2 This format does not add additional spaces to the front of the line. Clinitek Advantus Operator’s Guide... -
Page 143: Pin Assignments For Interface Cable
Printer PRINTER Printer Out Line Printer SIG GND Signal Ground Notes 1 STROBE-L Data Strobe -L indicates active low signal 2 SIG GND Signal Ground Pins 19 through 25 are also connected to the signal ground. Clinitek Advantus Operator’s Guide... - Page 144 Clinitek Advantus Operator’s Guide...
- Page 145 Computer keyboard 8-81 Tests 8-93 Connections 8-80 Time 8-85 Environmental requirements D-124 Time format 8-91 External printer 8-80 Time separator 8-91 Fixed platform 8-77 Confirmatory Test Holddown plate 8-76 Edit results 8-102 Initial analyzer check 8-82 Clinitek Advantus Operator’s Guide...
- Page 146 Set type 8-87 Date 8-85 Printer Paper Time 8-85 Pink edge 2-30 Siemens Diagnostics Printing Reagent Strips 1-9 Custom header 8-86 Specifications D-123 Set number of blank lines 8-86 Specimen ID Troubleshoot 6-58 6-59 Enable 8-102 Clinitek Advantus Operator’s Guide...
- Page 147 Enter 2-21 Stat Test 2-24 Warranty B-113 Strip Sensor Record information 8-74 Troubleshoot 6-58 6-59 Waste Bin Liner Stuck Reagent Strip Install 8-79 Remove 6-55 Symbols E-129 Technician Identification Change 2-18 Enable 8-102 Testing Cancel 2-24 Quality Control 4-34 Sequence 1-15 Time Set 8-85 Set format 8-91...
- Page 148 Clinitek Advantus Operator’s Guide...
Need help?
Do you have a question about the CLINITEK Advantus and is the answer not in the manual?
Questions and answers