Table of Contents
Advertisement
Quick Links
Advertisement
Table of Contents

Related Manuals for DAXOM Thermotank UKDAX-160GB25


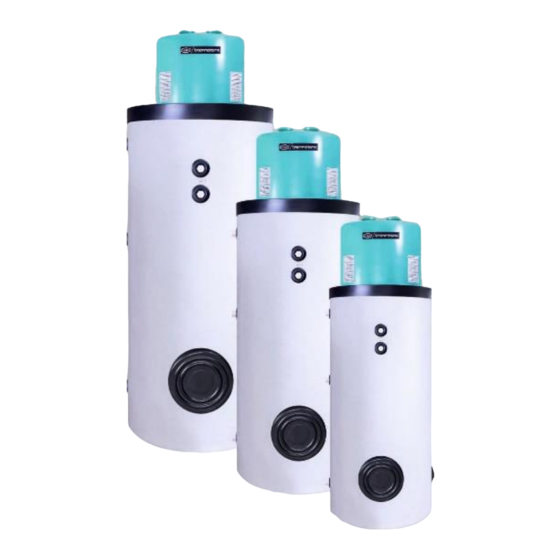
Summary of Contents for DAXOM Thermotank UKDAX-160GB25
-
Page 2: Safety Warnings
To DAXOM User: In order to perform product function properly and for your safety follow the instructions mentioned in the user manual of the device during the mounting and the usage of the device. In case of an unauthorized mounting and maintenance, the device will be void from warranty cover. - Page 3 2. GAS FIRED BOILER CONFIGURATION...
-
Page 4: Technical Informations
3. TECHNICAL INFORMATIONS PRODUCT MODEL Product Type Gas Category II2H3 B/P Gas Type NG(G20) & LPG(G30/G31) Gas Inlet Pressure NG 20 mbar, LPG 30 mbar Pipe Type C13,C33,C43,C53,C83,C93 Boiler Nominal Value (l)* 160 160 200 200 300 300 400 400 800 1000 1500 2000 Heat Power (kW) Boiler Heat Time (min) **... -
Page 5: Product Installation
4. PRODUCT INSTALLATION 4.1 Installation Conditions and Safety Warnings The waste gas pipe should not be installed in the general chimney or ventilation space of the building. The waste gas pipe should definitely go outside the building. Pipe exit should not be from passages and corridors, narrow eaves, ventilation and light spaces of buildings, balconies (open or closed), elevator shafts and protruding building parts that prevent waste gas outlet, openings that provide fresh air to other units, and places that may be exposed to direct wind resistance. - Page 6 Fresh air inlet and waste gas outlet connections and water inlet-outlet connections should be installed at the back of the selected location in accordance with the conditions stated above. The product should be placed on the floor and balanced, the floor should not be sloping or damage. All feet of the device must be on the ground, and a support fixed on the ground should be used for the feet that are not fully on the ground.
- Page 7 4.3.1. Fresh Air and Exhaust Gas Pipe Installation Length Fresh air and exhaust gas length must be calculated according to following table. TABLE-1 MAXIMUM EQUIVALENT PIPE LENGTH TABLE (L MAXIMUM EQUIVALENT PIPE LENGTH (m) MODEL PIPE TYPE 80/125 80+80 100/150 100+100 UKDAX-***GB25 UKDAX-***GB35...
- Page 8 4.4.Water and Gas Connections All connections of product must be removable. There must be absolutely valve, silt trap, check valve and suitable opening pressure safety valve at water main which is connected to cold water inlet of product. There must be absolutely valve at hot water outlet line of the product. ...
- Page 9 4.5. Condensing Connection All connections must be tight. Because of acidic function of condensing water, condensing water disposal must be...
- Page 10 connected to close drain. Siphon must be installed to condensing outlet together with product. Drainage connection mıust be with pipe durable to condensing water. (preferably PVC) 4.7. Boiler Filling After installment connections are completed, boiler is needed to fill. This process must be done by implementing following instructions.
-
Page 11: Product Usage
5. PRODUCT USAGE 5.1. Command Pannel... - Page 12 Week days Indicator Anti-legionary function indicator Heating operation situation indicator Eco mode situation indicator Timer program situation indicator Hour İndicator Error Codes Temperature Indicator Timer Economy operation mode ON/OFF Menu Down 5.2. Product Operation First operation of product must absolutely be done by Authorised Service. Our company is not responsible from damages and accidents in case of intervention of unauthorised person to product.
- Page 13 the following. Open gas valve Hold for “ON” If boiler inside temperature is higher than set temperature, boiler will be in standby. If boiler inside temperature is lower than set temperature, product starts to operate for heating the water. appears.
- Page 14 5.3. Operating Parameter Setting 5.3.1. Day and Hour Setting Bring the product OFF position. Keep press , week days start to blink. By pressing 1 second interval, days are set. Press button, hour digit blinks.
- Page 15 By pressing one second interval hour is set between 0 and 23 Press , min digit blinks. By pressing button one second interval min set between 0 and 60. By pressing button or if not pressing any button for a 15 sec, will exit from setting menu by saving settings.
- Page 16 5.3.2. Boiler Temperature Setting While boiler is ON position, temperature setting is done between 30 C and 65 C by pressing buttons. 5.3.3. Economy Mode Setting Product can be used at economic mode for saving energy while using. It is needed to press button for economy mode.
- Page 17 5.3.4. Timer Setting There is 10 different time programs as weekly. Different temperature can be set for each time program. Time program can be activated or disactivated by button. When time program is activated is seen. Although time program is set, if it is not activated in other words, if is not seen, boiler does not operate according to time program For time program setting...
- Page 18 Press button for setting starting time of program. Enter time program activated week day/days menu by pressing button. button. “Wednesday” is Choose time program day / days by pressing chosen following photo. By pressing button, enter hour selection menu that time program will start. button.
- Page 19 By pressing button, enter minute selection menu that time program will start. button. “15” is Choose time program starting minute by pressing chossen at following photo. By pressing button, enter hour selection menu that time program will be end. button.
- Page 20 button. “30” is Choose time program ending minute by pressing chossen at following photo. By pressing button enter temperature selection menu. Choose time button. “55” temperature that will use during time program by pressing is chosen at following photo. ...
- Page 21 If it is pressed to , it is turned back to start up screen by exit setting menu. 5.2. Turn Off Product TURN OFF gas valve, electrical fuse and water inlet / outlet valve respectively. 5.3. The Precautions to be Taken ...
-
Page 22: Maintenance Repair And Service
Check pipes and connections pipes regularly. If you suspect that there is gas leakage caused by pipe and connection pipes, consult to number 187 gas failure department of necessary gas company. If you suspect that there is gas leakage except pipe and pipe connections consult to your service agency. - Page 23 6.1 Cathodic Protection It is aimed to maximize the lifetime of product with cathodic protection. Cathodic protection is done with magnesium anode rods. Magnesium anode dissolves with the help of electrolysis in the tank, adheres to the needed points on the inner surface of the boiler and extend the life of the tank.
-
Page 24: Troubleshooting
7. TROUBLESHOOTING PROBLEM SOLUTION WAYS CAUSE ● No Energy Check the electricity fuse ● Gas valve is not ON Turn on gas valve or perform gas load ● Gas valve semi ON Turn On gas valve completely ● Air in the gas pipe Gas Turn on the gas valve completely ●... - Page 29 Namık Kemal Mah. Marmara Cad. No:74 Ümraniye - İstanbul Tel. : +90 216 369 85 36-37 : +90 216 385 95 45 E-Mail : info@daxom.com Merkez Servis Namık Kemal Mah. Marmara Cad. No:74 Ümraniye - İstanbul Tel. : +90 216 360 71 21-22 : +90 216 360 72 25 19.12.22...
Need help?
Do you have a question about the Thermotank UKDAX-160GB25 and is the answer not in the manual?
Questions and answers