Advertisement
Please read the following before using the instrument.
- Procedures for WLAN config between the LN-100 and a controller are included in the back side of this manual.
- The manual is an electronic manual provided in a CD in PDF format. It is recommended that the manual files are backed up by transferring to your PC etc.
Adobe Reader is necessary in order to view these documents. The latest version of Acrobat Reader can be found on the Adobe homepage. - All company and product names featured in this manual are trademarks or registered trademarks of each respective organization.
PRECAUTIONS FOR SAFE OPERATION
For the safe use of the product and prevention of injury to operators and other persons as well as prevention of property damage, items which should be observed are indicated herein by an exclamation point within a triangle used with WARNING and CAUTION statements in this manual.
The definitions of the indications are listed below. Be sure you understand them before reading the manual's main text.
Definition of Indication
 | Ignoring this display and making an operation error could possibly result in death or serious injury to the operator. |
 | Ignoring this display and making an operation error could possibly result in minor injury or property damage. |
 This symbol indicates items for which caution (hazard warnings exclusive) is urged. Specific details are printed in or near the symbol.
 This symbol indicates items which are prohibited. Specific details are printed in or near the symbol.
 This symbol indicates items which must always be performed. Specific details are printed in or near the symbol.
General
Do not use the unit in areas exposed to high amounts of dust or ash, in areas where there is inadequate ventilation, or near combustible materials. An explosion could occur.
 Do not perform disassembly or rebuilding. Fire, electric shock, burns or hazardous radiation exposure could result.
 When securing the instrument in the carrying case make sure that all catches, including the side catches, are closed. Failure to do so could result in the instrument falling out while being carried, causing injury.
Do not use the carrying case as a footstool. The case is slippery and unstable so a person could slip and fall off it.
Do not place the instrument in a case with a damaged case or belt. The case or instrument could be dropped and cause injury.
This instrument automatically operates when the power is turned ON or OFF. Do not touch the instrument during operation. Doing so may cause injury.
Power Supply
Do not use batteries other than those designated. An explosion could occur, or abnormal heat generated, leading to fire.
To prevent shorting of the battery in storage, apply insulating tape or equivalent to the terminals. Otherwise shorting could occur, resulting in fire or burns.
Do not place articles such as clothing on the battery charger while charging batteries. Sparks could be induced, leading to fire.
Do not use damaged power cords, plugs or loose outlets. Fire or electric shock could result.
Do not use power cords other than those designated. Fire could result.
Use only the specified battery charger to recharge batteries. Other chargers may be of different voltage rating or polarity, causing sparking which could lead to fire or burns.
Do not connect or disconnect power supply plugs with wet hands. Electric shock could result.
Do not short circuit. Heat or ignition could result.
Do not use voltage other than the specified power supply voltage. Fire or electrical shock could result.
Do not use the battery or charger for any other equipment or purpose. Fire or burns caused by ignition could result.
 Do not heat or throw batteries or chargers into fire. An explosion could occur, resulting in injury.
Do not use batteries or the battery charger if wet. Resultant shorting could lead to fire or burns.
 Do not touch liquid leaking from batteries. Harmful chemicals could cause burns or blisters.
Tripod
When mounting the instrument to the tripod, tighten the centering screw securely. Failure to tighten the screw properly could result in the instrument falling off the tripod, causing injury.
Tighten securely the leg fixing screws of the tripod on which the instrument is mounted. Failure to tighten the screws could result in the tripod collapsing, causing injury.
Do not carry the tripod with the tripod shoes pointed at other persons. A person could be injured if struck by the tripod shoes.
Keep hands and feet away from the tripod shoes when fixing the tripod in the ground. A hand or foot stab wound could result.
Tighten the leg fixing screws securely before carrying the tripod. Failure to tighten the screws could lead to the tripod legs extending, causing injury.
Wireless LAN
Do not use within the vicinity of hospitals. Malfunction of medical equipment could result.
Use the instrument at a distance of at least 22 cm from anyone with a cardiac pacemaker. Otherwise, the pacemaker may be adversely affected by the electromagnetic waves produced and cease to operate as normal.
Do not use onboard aircraft. The aircraft instrumentation may malfunction as a result.
Do not use within the vicinity of automatic doors, fire alarms and other devices with automatic controls as the electromagnetic waves produced may adversely affect operation resulting in an accident.
Laser Safety
Refer to "LASER SAFETY INFORMATION" in your manual (PDF).
STANDARD PACKAGE COMPONENTS
Upon opening, make sure that all the following are included.

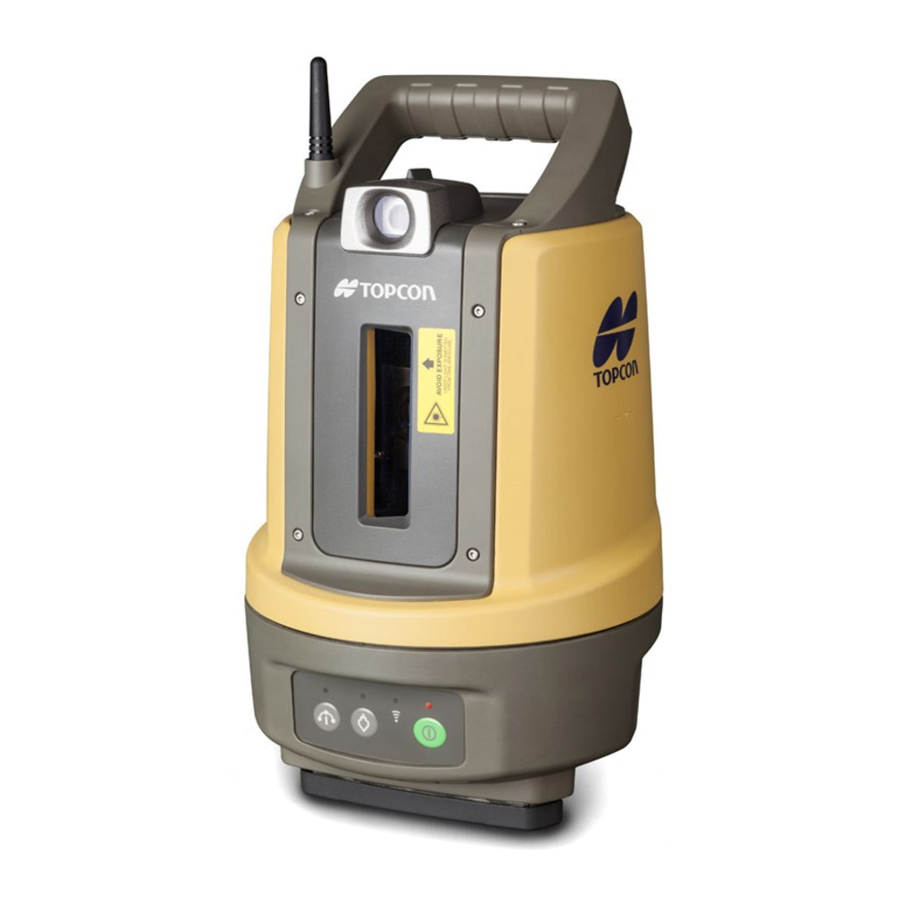
- Main unit - 1
- Battery (BDC70) - 2
- Battery charger (CDC68A) - 1
- Power cable(EDC113A/113B/113C) - 1
- Wiping cloth - 1
- CD (PDF Manual) - 1
- INSTRUCTION MANUAL: READ THIS FIRST (This sheet) - 1
- Laser caution sign-board - 1
- Carrying case - 1
- Carrying strap - 2
- Export restrictions card (Be sure to read) - 1

- A dedicated power cable for the country or the area where the instrument is purchased is attached.
This application is configuration software to connect the LN-100 and its controller (Android device) for operation by wireless communication. This manual explains how to install this application and how to connect with the LN-100. For other details including functions of the main unit and the measurement methods, refer to the respective instruction manual.
|
 " indicates the chapter (the section) of the related instruction manual as a reference.
Installation and Startup
Installing from Google Play
From the controller, access Google Play.
Search for "WLAN Config for LN-100" and install the application.
Tap the icon  on the controller to start up WLAN Config for LN100.
- For details on Google Play and how to install this application, see the Google support home page (https://support.google.com).
How to connect
- Avoid a W-LAN connection during auto leveling when setting up the instrument.
There are two methods to connect to the LN-100:
- Mode A
Data communication is directly performed between the LN-100 and the controller without going through a WLAN access point. - Mode B
Data communication is performed via a WLAN access point.
To configure the communication settings, Mode A needs to be set to the connection mode of the LN-100.
- To use Mode B, an access point for WLAN is required. Ensure that you have a SSID and password for the access point to connect.
- Configure the controller in advance so that it can connect to the WLAN access point.
- Set Mode A to the connection mode of the LN-100.
- The selector switch is inside the battery box.

- The selector switch is inside the battery box.
- Turn the power of the LN-100 ON.
![]() LN-100 Instruction Manual "Setting Up the Instrument
LN-100 Instruction Manual "Setting Up the Instrument ![]() Power ON/OFF"
Power ON/OFF" - Start up the application from the controller.
Tap![]() .
. - Select the LN-100 to connect to.
The controller searches within the communication range and displays available networks. Select the destination from among the available networks.

- The SSID configured on the LN100 is displayed.
- If the SSID to connect is not displayed, tap [Scan network].
Enter the password and press [OK].

![]()
- The default security settings for Mode A are as follows:
SSID: Model name_serial number (E.g., LN-100_AB1234)
Security: WPA2
Password: 00 serial number (E.g., 00AB1234)
The serial number is printed on the label which is placed at the position indicated in the figure below.

- Select the connection mode.
Select the connection mode for new setting.

- Configure WLAN.
Configure necessary settings and tap [Set].

- Network SSID (Displayed only when Mode B is selected)
- Security (None/WEP/WPA/WPA2)
- Password (Not required when security is set to "None")
- WLAN Channel (1 to 11) (Displayed only when Mode A is selected)
- Use static IP (Displayed only when Mode B is selected)
![]() For details of the setting items, refer to the instruction manual of your WLAN device.
For details of the setting items, refer to the instruction manual of your WLAN device.
![]()
- Long tapping (holding down) on the input field of Network SSID displays the list of available networks for you to select the destination.
- If connection to the WLAN access point is restricted by a MAC address (MAC address filtering), configure the LN-100's MAC address on the access point.
- Restart the LN-100.
Restart the LN-100 to activate the settings.
If you are going to use Mode B, set the connector switch to Mode B, and restart the LN-100.
If the LN-100 successfully connects to the access point, the WLAN LED (![]() ) on the LN-100 control panel is lit green.
) on the LN-100 control panel is lit green. - Connect to the LN-100.
Select the access point (LN-100 or SSID for the access point) from the controller application.
Once connected, you can control the LN-100 from the controller.
![]() For details on how to connect, see the instruction manual of the application you are using.
For details on how to connect, see the instruction manual of the application you are using.

 Power ON/OFF"


: LN-100 WLAN LED color ( )
)
| Status | Display |
| Standby | Mode A: Flashing green in one second intervals Mode B: Flashing green quickly |
| Connected | Solid green |
| Error | Solid red |
: Transmission settings
Mode A
| Item | Selection item |
| SSID | Fixed (Model name _ serial number) |
| Security | None/WEP/WPA/WPA2 (WPA2) |
| Security key | WEP64: ASCII text: 5 characters or Hexadecimal: 10 characters WEP128: ASCII text: 13 characters or Hexadecimal: 26 characters WPA/WPA2: ASCII text: 8 to 63 characters or Hexadecimal: 64 characters (00serial number) |
| Channel | 1 to 11 (11) |
| IP address | Fixed (192.168.0.1) |
| Subnet mask | Fixed (255.255.255.0) |
| DHCP function | Fixed (DHCP server enabled) |
| DHCP lease address | Fixed (192.168.0.10 to 192.168.0.25) |
Mode B
| Item | Selection item |
| SSID | Up to 32 bytes |
| Security | None/WEP/WPA/WPA2 (None) |
| Security key | WEP64: ASCII text: 5 characters or Hexadecimal: 10 characters WEP128: ASCII text: 13 characters or Hexadecimal: 26 characters WPA/WPA2: ASCII text: 8 to 63 characters or Hexadecimal: 64 characters (No setting) |
| IP address | xxx.xxx.xxx.xxx format (No setting) |
| Subnet mask | xxx.xxx.xxx.xxx format (No setting) |
| DHCP function | DHCP client / static IP (DHCP client) |
- The values in brackets represent the default settings.
- After you purchase the device, please change the default password.
- You can use ASCII text or hexadecimal characters for your password, and they are as follows:
ASCII text: Single-byte, alphanumeric characters
Hexadecimal characters: Single-byte, alphanumeric characters 0 - 9 and A - F
TOPCON CORPORATION
75-1 Hasunuma-cho, Itabashi-ku, Tokyo 174-8580, Japan http://www.topcon.co.jp
Please see the attached address list or the following website for contact addresses.
GLOBAL GATEWAY http://global.topcon.com/
©2013 TOPCON CORPORATION
ALL RIGHTS RESERVED

Documents / Resources
References
Download manual
Here you can download full pdf version of manual, it may contain additional safety instructions, warranty information, FCC rules, etc.
Advertisement


Need help?
Do you have a question about the LN-100 and is the answer not in the manual?
Questions and answers