Table of Contents
Advertisement
Quick Links
Advertisement
Chapters
Table of Contents
Troubleshooting

Related Manuals for Roche cobas b 123


Summary of Contents for Roche cobas b 123
- Page 1 123 POC system Instructions for Use, Version 13.0 Software version 4.17...
-
Page 2: Publication Information
Table 1 Revision history Edition notice This publication is intended for operators of the cobas b 123 POC system. Every effort has been made to ensure that all information contained in this publication is correct at the time of publishing. However, Roche may need to update the publication information as output of product surveillance activities, leading to a new version of this publication. -
Page 3: In This Chapter Chapter
Copyright © 2009-2020, F. Hoffmann-La Roche Ltd. All rights reserved. License information cobas b 123 POC system software is protected by contract, copyright law and international treaties. cobas b 123 POC system contains a user license between F. -
Page 4: Contact Addresses
123 POC system Issued by TÜV SÜD for Canada and the US. Laboratory Equipment is the product identifier as shown on the name plate. Contact addresses Manufacturer Roche Diagnostics GmbH Sandhofer Strasse 116 68305 Mannheim Germany Made in Switzerland www.roche.com... -
Page 5: Table Of Contents
123 POC system Table of contents Operation Publication information Contact addresses Edition 5 Installation and put out of operation Table of contents Installation Intended use Installing the instrument Intended user Put out of operation Use environment Symbols and abbreviations... -
Page 6: In This Chapter Chapter
123 POC system Appendix 9 Calibration verification control General information Installing AutoCVC Packs 13 Available accessories and consumables Performing an AutoCVC measurement Available accessories and consumables Managing CVC results in the QC database Configuring analytical measurement ranges 14 Copyright information... -
Page 7: Intended Use
123 POC system Intended use The cobas b 123 POC system is a fully automated POC system for in vitro measurement of pH, blood gases (BG), electrolytes (ISE), hematocrit (Hct), metabolites (Glu, Lac), total hemoglobin (tHb), hemoglobin derivatives (O HHb, COHb, MetHb), oxygen saturation (SO ) and neonatal bilirubin (Bili). - Page 8 123 POC system Symbols used on the instrument Symbol Description Catalog number Serial number Global Trade Item Number Manufacturer Date of manufacture Direct current Caution Biohazard Table 4 Symbols used on the instrument Symbols used on consumables Symbol...
- Page 9 123 POC system Symbol Description Do not use if package is damaged Consumable contents Control material Fragile handle with care Store upright Do not reuse Manufacturer Sterilized using irradiation Sterilized using ethylene oxide Sufficient for <n> tests Operator’s manual/operating instructions...
-
Page 10: In This Chapter Chapter
123 POC system Symbol Description Software symbol for the AutoQC Pack Software symbol for the Sensor Cartridge Biohazard Table 5 Symbols used on consumables Abbreviations Abbreviation Definition 1-point calibration 2-point calibration Analytical measurement range Assisted breathing rate rate... -
Page 11: In This Chapter Chapter
123 POC system Abbreviation Definition Deoxyhemoglobin i.e. that is to say International Electrotechnical Commission Ion-selective electrode International Organization for Standardization Information technology In vitro diagnostic Potassium Lactate Liquid crystal display Light-emitting diode Laboratory Information System Mean airway pressure... -
Page 12: What Is New In This Version
123 POC system Abbreviation Definition User interface module Universal Serial Bus Tidal volume Table 6 Abbreviations What is new in this version Updates for new hardware version Updated safety messages Added Hypodermic needle as consumable Editorial updates. Roche Diagnostics... - Page 13 Introduction and specifications Safety information ........................... 15 General description .......................... 27 Specifications ............................ 51 Theoretical foundations ........................93...
- Page 15 123 POC system 1 Safety information Table of contents Safety information The chapter provides information about the safe operation of the system. Chapter In this chapter Safety classifications......................17 Safety precautions.........................18 Operator qualification ....................18 Safe and proper use of the system................18 Installation and deinstallation ..................19...
-
Page 16: Safety Information
1 Safety information cobas b 123 POC system Table of contents Roche Diagnostics Instructions for Use · Version 13.0... -
Page 17: Safety Classifications
123 POC system 1 Safety information Safety classifications Safety classifications This section explains how precautionary information is presented in this manual. The safety precautions and important user notes are classified according to the ANSI Z535.6 Standard. Familiarize yourself with the following meanings and icons: Safety alert The safety alert symbol is used to alert you to potential physical injury hazards. -
Page 18: Safety Precautions
Insufficient knowledge and skills As an operator, ensure that you know the relevant safety precaution guidelines and standards and the information and procedures contained in these instructions. Do not carry out operation and maintenance unless a Roche representative has trained you or your trainer to do so. -
Page 19: Installation And Deinstallation
1 Safety information Safety precautions Installation and deinstallation Transport Risk of personal injury when lifting. The cobas b 123 POC system, without consumables in the bottle compartment and AutoQC materials in the AutoQC module, weighs approximately 20 kg. Perform the put out of operation procedure before moving the system. -
Page 20: Electrical Safety
The power cable has to conform to country-specific requirements. Contact your Roche Service representative for more information. Only use electrical accessories, such as power cables, provided by Roche. Do not alter any electrical equipment on the instrument, or any electrical accessories that accompany the system. -
Page 21: Mechanical Safety
123 POC system 1 Safety information Safety precautions Infectious waste Contact with waste (liquid and/or solid) may result in infection. All materials and mechanical components associated with the waste systems are potentially biohazardous. Wear appropriate personal protective equipment. Take extra care when working with lab gloves. -
Page 22: Reagents And Working Solutions
Wear appropriate personal protective equipment. Observe the instructions given in the package insert. Observe the information given in Material Safety Data Sheets (available for Roche Diagnostics reagents and cleaning solutions). If reagents, detergents, or other cleaning solutions come into contact with your skin, wash the affected area immediately with soap and water and apply a disinfectant. -
Page 23: Incorrect Results
123 POC system 1 Safety information Safety precautions Incorrect results Poor accuracy and precision Incorrect results may lead to errors in diagnosis, posing danger to the patient. For the proper use of the system, run QC tests and monitor the system during operation. -
Page 24: Software And Data Security
Update to latest software versions for the specified system configuration provided by Roche as soon as possible. Only data required for its purpose shall be entered on a Roche device. Avoid use of direct identifiers with sensitive data or free-text fields. -
Page 25: Instrument Damage
Do not write down your password anywhere, including in a contact form, in the address book, or in a file on the computer. Do not disclose your password to anyone. Roche never asks you for your password. If you ever disclose your password to anyone, change it immediately afterwards. -
Page 26: Safety Labels On The Instrument And Consumables
The safety labels on the system comply with the following standards: ANSI Z535, IEC 61010-2-101, IEC 61010-1, IEC 60417, ISO 7000, or ISO 15223-1. Only Roche Service representatives may replace damaged labels. For replacement labels, contact your Roche Service representative. - Page 27 Imaging scanner (optional) ..................39 User interface module ....................40 Consumable information ....................41 Sensor Cartridge......................41 Sensor phases......................42 BG sensors ........................43 ISE sensors ........................44 Glu/Lac sensors ......................45 Fluid Pack........................46 cobas b 123 AutoQC Pack (optional)................49 Roche Diagnostics Instructions for Use · Version 13.0...
- Page 28 2 General description cobas b 123 POC system Table of contents Roche Diagnostics Instructions for Use · Version 13.0...
-
Page 29: System Information
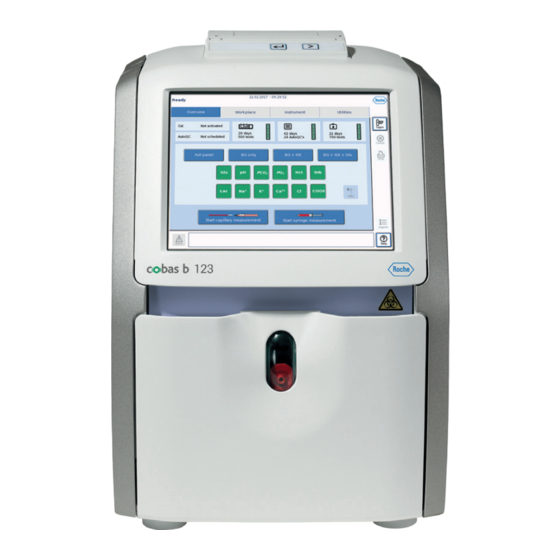
Figure 2-1 cobas b 123 POC system The cobas b 123 POC system is a fully automated POC system for in vitro measurement of pH, blood gases (BG), electrolytes (ISE), hematocrit (Hct), metabolites (Glu, Lac), total hemoglobin (tHb), hemoglobin derivatives (O HHb, COHb, MetHb), oxygen saturation (SO ) and neonatal bilirubin (Bili). -
Page 30: Accessory Information
2 General description cobas b 123 POC system System information Instrument variant Measured parameters Optional modules cobas b 123 <2> POC system – AutoQC module pH, BG (PO , PCO ), ISE (Na , Cl , Ca ), Hct, Glu, Lac cobas b 123 <3>... -
Page 31: System Components
123 POC system 2 General description System components System components Visual identification Printer (part of the user interface module) Screen (part of the user interface module) USB port Sample input module (part of the Fluid Pack) Measuring chamber module with Sensor Cartridge... -
Page 32: Printer
2 General description cobas b 123 POC system System components Printer Figure 2-3 Thermal printer The thermal printer is a part of the user interface module. Paper feed button on the printer Front door The measuring chamber module with the Sensor Cartridge, the Fluid Pack with the sample input module, and the AutoQC module with the AutoQC Pack (optional) are located behind the front door. -
Page 33: Rear Panel
123 POC system 2 General description System components Inappropriate handling of Sensor Cartridges may result in infection Sensor Cartridges may contain trace amounts of hazardous liquids. Inappropriate handling of Sensor Cartridges may lead to direct exposure of these liquids, which may lead to WARNING serious skin burns, eye damage, and other serious health risks. - Page 34 Use the power supply in the horizontal position only. Power cable The power cable has to conform to country-specific requirements. To place an order for a power cable, contact your Roche Service representative. The power cable has to meet these minimum specifications: Supply...
-
Page 35: Interfaces: Hardware Version 1
123 POC system 2 General description System components (1) IEC320-EN60320/C13: Plugs and Socket-Outlets for Household and Similar Purposes (2) Standard for the US, Canada, and Japan. Name plate Refer to Symbols used on the instrument (p. 8) to find the meaning of the symbols used on the name plate. - Page 36 2 General description cobas b 123 POC system System components Pin 1 Data carrier detected Pin 2 Receive data Pin 3 Transmit data Pin 4 Data terminal ready Pin 5 Signal ground Pin 6 Data set ready Pin 7 Request to send...
-
Page 37: Interfaces: Hardware Version 2
123 POC system 2 General description System components Interfaces: Hardware version 2 Hardware versions (p. 30) 3x USB Ports for barcode scanner and ticket printer D Button (on/off) SD card Status LEDs (2x) and fuses (2x) (Fuse 5A slow 250V) -
Page 38: Barcode Scanner
“Interleaved 2 of 5” (without check digits) is not allowed. The corresponding data can no longer be scanned. If you use one of the 2 barcodes with check digits, contact your Roche Service representative. Barcode printing quality To assure optimal barcode scanning performance, it is required that sample barcodes have a print quality of ISO/IEC 15416 grade 2.5 to 4.0 (corresponds to ANSI X3.182... -
Page 39: Imaging Scanner (Optional)
123 POC system 2 General description System components For more information, see the manufacturer’s Reference Guide. The Reference Guide is available from your Roche representative. Imaging scanner (optional) Using the non-directional imaging scanner, you can scan patient and product information into the system. -
Page 40: User Interface Module
2 General description cobas b 123 POC system System components User interface module Status area Consumable status area Logon button Menu tab Cancel button Next calibration message window D Next AutoQC measurement message window Print button Parameter selection field Info button... -
Page 41: Consumable Information
123 POC system 2 General description Consumable information Consumable information Sensor Cartridge Sensor Cartridge handle D BG sensor part ISE sensor part Smart memory chip Glu/Lac sensor part Figure 2-19 Sensor Cartridge Sensor Cartridge types cobas b 123 Sensor Cartridge... -
Page 42: Sensor Phases
2 General description cobas b 123 POC system Consumable information Sensor phases Phase Instrument performance START-UP phase No measuring operation RUN-IN phase Measuring operation with longer time-to-display or time-to- ready Stable phase Regular operation IN-USE time Sensor Cartridge in-use time... -
Page 43: Bg Sensors
123 POC system 2 General description Consumable information BG sensors BG sensors measure pH, PO , PCO and Hct parameters. Conductivity contact measuring contact measuring contact pH sensor (BG) reference contact Conductivity contact D CO reference contact Figure 2-20 BG sensor sensor Uses the Clark measurement principle. -
Page 44: Ise Sensors
2 General description cobas b 123 POC system Consumable information ISE sensors ISE sensors measure Na , Ca , and Cl electrolyte values. sensor sensor pH sensor (ISE) Conductivity contact sensor ISE reference sensor sensor Figure 2-21 ISE sensor , Ca , Cl sensors These sensors consist of electrolyte-sensitive membranes. -
Page 45: Glu/Lac Sensors
123 POC system 2 General description Consumable information Glu/Lac sensors Glu/Lac sensors measure glucose and lactate. BSA sensor Glucose reference sensor Lactate counter electrode Glucose sensor Lactate sensor Glucose counter electrode D Lactate reference sensor Conductivity contact Figure 2-22... -
Page 46: Fluid Pack
2 General description cobas b 123 POC system Consumable information Fluid Pack Tubing (peristaltic pump) D Docking parts (measuring chamber module) Cuvette (oximeter module) Sample input module Sample sensor contacts Figure 2-23 cobas b 123 Fluid Pack The Fluid Pack contains:... - Page 47 123 POC system 2 General description Consumable information All Fluid Packs have to be changed after 42 days. Fluid Pack types (p. 335) If you perform fewer tests than the test frequency for your Fluid Pack, you will not be able to perform as many tests as expected with your Fluid Pack.
- Page 48 2 General description cobas b 123 POC system Consumable information Sample sensor contacts on the Fluid Pack Sample sensor contacts inside the measuring chamber module Figure 2-25 Sample sensor contacts Do not touch the sample sensor contacts on the Fluid Pack.
-
Page 49: Cobas B 123 Autoqc Pack (Optional)
Figure 2-28 cobas b 123 AutoQC Pack TRI-LEVEL AutoQC modules are available for the cobas b 123 POC system to provide regular, automated quality control. The advantage of this system is that the QC fluid is withdrawn directly from the ampoule using the sample needle. - Page 50 These ampoules are filled with QC material from 3 different levels. AutoQC Pack types Currently, the following versions of the cobas b 123 AutoQC Pack are available: cobas b 123 AutoQC Pack TRI-LEVEL Level 1–3 for low, normal and high values QC material (p.
- Page 51 123 POC system 3 Specifications Table of contents Specifications In this chapter, the system’s performance, product and environmental data are provided. Chapter In this chapter Performance data........................55 Measurement parameters....................55 Precision (sample mode: normal)................55 pH ..........................56 ..........................56 ..........................57 ..........................57 ..........................58...
- Page 52 ..........................74 ..........................75 tHb (cobas b 123 POC system with COOX module).........75 Hb (cobas b 123 POC system with COOX module) ........75 HHb (cobas b 123 POC system with COOX module)........75 MetHb (cobas b 123 POC system with COOX module) ........75 COHb (cobas b 123 POC system with COOX module) ........76...
- Page 53 123 POC system 3 Specifications Table of contents Barcode scanner ........................90 Imaging scanner (optional)....................92 Roche Diagnostics Instructions for Use · Version 13.0...
- Page 54 3 Specifications cobas b 123 POC system Table of contents Roche Diagnostics Instructions for Use · Version 13.0...
-
Page 55: Performance Data
)” and “Intermediate precision (S )” were determined from 2 runs per day with 2 replicated per run for 20 days using the cobas b 123 POC system. The mean value is the measured value of the corresponding parameter for which S and S are representative or have been determined. - Page 56 Sample 2 7.441 0.0029 0.03 0.0032 0.04 Sample 3 7.568 0.0054 0.07 0.0050 0.06 Table 3-2 pH material Material: cobas b 123 AutoQC Pack TRI-LEVEL, n=80 Mean (CV%) (CV%) Level 1 7.149 0.0026 0.04 0.0059 0.08 Level 2 7.393 0.0016 0.02 0.0043...
-
Page 57: Pco 2
Sample 2 72.7 0.3728 0.51 2.3130 3.18 Sample 3 128.6 1.7942 1.39 3.3567 2.61 Table 3-8 material Material: cobas b 123 AutoQC Pack TRI-LEVEL, n=80 Mean (CV%) (CV%) Level 1 64.2 0.4441 0.69 1.0526 1.64 Level 2 41.9 0.2699 0.64 0.6055... - Page 58 3 Specifications cobas b 123 POC system Performance data Material: cobas b 123 AutoQC Pack TRI-LEVEL, n=80 Mean (CV%) (CV%) Level 1 117.4 0.3946 0.34 0.5152 0.44 Level 2 141.0 0.1519 0.11 0.4866 0.35 Level 3 153.7 0.4462 0.29 0.8063 0.52...
- Page 59 Sample 2 101.4 0.3478 0.34 0.4932 0.48 Sample 3 126.6 0.7057 0.55 0.7989 0.63 Table 3-21 material Material: cobas b 123 AutoQC Pack TRI-LEVEL, n=80 Mean (CV%) (CV%) Level 1 81.5 0.5086 0.62 1.3698 1.68 Level 2 99.5 0.2633 0.26 1.0743...
-
Page 60: Hct
Sample 2 1.18 0.01 0.79 0.02 1.79 Sample 3 1.40 0.02 1.25 0.02 1.25 Table 3-25 material Material: cobas b 123 AutoQC Pack TRI-LEVEL, n=80 Mean (CV%) (CV%) Level 1 1.709 0.0105 0.61 0.0132 0.77 Level 2 1.219 0.0029 0.24 0.0045... -
Page 61: Lac
Sample 2 38.5 0.1597 0.41 0.4427 1.14 Sample 3 62.3 0.2370 0.38 0.5559 0.89 Table 3-30 Hct material Material: cobas b 123 AutoQC Pack TRI-LEVEL, n=80 Mean (CV%) (CV%) Level 1 58.9 0.1416 0.24 0.4716 0.80 Level 2 40.9 0.0874 0.21 0.4306... -
Page 62: Glu
Sample 2 5.00 0.06 1.27 0.25 4.91 Sample 3 27.10 0.15 0.56 1.42 5.24 Table 3-37 Glu material Material: cobas b 123 AutoQC Pack TRI-LEVEL, n=80 Mean (CV%) (CV%) Level 1 0.0361 0.59 0.1015 1.67 Level 2 0.0221 0.85 0.0584 2.23 Level 3 25.0... - Page 63 Sample 2 12.9 0.0874 0.67 0.1298 1.00 Sample 3 20.7 0.0703 0.33 0.1402 0.67 Table 3-42 tHb material Material: cobas b 123 AutoQC Pack TRI-LEVEL, n=80 Mean (CV%) (CV%) Level 1 0.0469 0.66 0.1624 2.29 Level 2 11.5 0.0830 0.72 0.1281 1.12...
-
Page 64: Cohb
Sample 2 94.5 0.5108 0.54 0.6363 0.67 Sample 3 97.4 0.1342 0.13 0.2651 0.27 Table 3-48 Hb material Material: cobas b 123 AutoQC Pack TRI-LEVEL, n=80 Mean (CV%) (CV%) Level 1 48.3 0.1188 0.25 0.2616 0.54 Level 2 75.8 0.4170 0.55 0.4746... -
Page 65: Methb
Sample 2 0.1125 1.93 0.1106 1.90 Sample 3 30.7 0.3221 1.04 0.3181 1.03 Table 3-54 MetHb material Material: cobas b 123 AutoQC Pack TRI-LEVEL, n=80 Mean (CV%) (CV%) Level 1 11.7 0.0242 0.21 0.0537 0.46 Level 2 0.0849 1.49 0.0968 1.70... -
Page 66: Bili
3 Specifications cobas b 123 POC system Performance data Material: cobas b 123 AutoQC Pack TRI-LEVEL, n=80 Mean (CV%) (CV%) Level 1 17.6 0.0414 0.24 0.0909 0.52 Level 2 0.1451 1.78 0.1651 2.02 Level 3 0.1279 4.73 0.1329 4.92 Table 3-58... - Page 67 123 POC system 3 Specifications Performance data Prepared whole blood Expected values for prepared whole blood are based on reference methods. Prepared whole blood including. Expected bilirubin values for human whole blood, including bilirubin, are NIST bilirubin traceable, based on weighted samples or reference methods.
-
Page 68: Pco 2
3 Specifications cobas b 123 POC system Performance data Unit: [mmHg] Parameter group: BG only Material: tonometered human whole blood, n=20 Mean (CV%) (CV%) Sample 1 68.4 0.4721 0.69 1.0934 1.60 Sample 2 122.7 1.4066 1.15 2.4542 2.00 Sample 3 24.3... - Page 69 123 POC system 3 Specifications Performance data Parameter group: BG and COOX Material: prepared human whole blood, n=20 Mean (CV%) (CV%) Sample 1 0.0639 0.90 0.1016 1.43 Sample 2 16.2 0.1978 1.22 0.3517 2.17 Sample 3 19.9 0.3303 1.66...
-
Page 70: Cohb
3 Specifications cobas b 123 POC system Performance data Material: tonometered human whole blood, n=20 Mean (CV%) (CV%) Sample 1 79.8 0.9521 1.19 1.1771 1.48 Sample 2 94.3 0.5132 0.54 0.6293 0.67 Sample 3 97.8 0.0734 0.08 0.2777 0.28 Table 3-75... -
Page 71: Hhb
123 POC system 3 Specifications Performance data Material: prepared human whole blood, n=20 Mean (CV%) (CV%) Sample 1 0.1104 12.94 0.1329 15.59 Sample 2 0.0851 1.61 0.1105 2.09 Sample 3 36.4 0.9648 2.65 0.7701 2.12 Table 3-79 MetHb material... -
Page 72: Linearity (Normal Sample)
Prepared dialysis solution Expected values for prepared dialysis solution are based on reference methods. Material: tonometered whole blood Number of cobas b 123 <4> POC system instruments: 4 Parameter Unit Coefficient (Pearson) -
Page 73: Material: Prepared Whole Blood, Including Bilirubin
0.9999 1.0–78.9 MetHb 1.0000 0.6–79.2 0.9989 0.0–95.0 Table 3-86 Material: prepared whole blood Material: prepared whole blood, including bilirubin Number of cobas b 123 <4> POC system instruments: 4 Parameter Unit Coefficient (Pearson) Range Bili [mg/dL] 0.998 3.08–48.3 Table 3-87... -
Page 74: Material: Prepared Whole Blood
3 Specifications cobas b 123 POC system Performance data Material: prepared whole blood Number of cobas b 123 POC system instruments: 8 Parameter Unit Coefficient (Pearson) Range [---] 1.000 6.34–8.12 1.000 11.7–81.7 [g/dL] 1.000 3–29 1.000 29–100 1.000 28.4–98.0 COHb 1.000... -
Page 75: Pco
Pearson’s Corr. coeff. [r] cobas b 221 system -0.2 0.95 1.85 0.99 Table 3-94 (1) Median absolute bias tHb (cobas b 123 POC system with COOX module) Unit: [g/dL] Material: whole blood Comparison instrument No. of samples [n] Bias Slope [b] Intercept [a] Pearson’s Corr. -
Page 76: Cohb (Cobas B 123 Poc System With Coox Module)
3 Specifications cobas b 123 POC system Performance data COHb (cobas b 123 POC system with COOX module) Unit: [%] Material: whole blood Comparison instrument No. of samples [n] Bias Slope [b] Intercept [a] Pearson’s Corr. coeff. [r] cobas b 221 system 1.00... - Page 77 123 POC system 3 Specifications Performance data Comparison instrument No. of samples [n] Bias Slope [b] Intercept [a] Pearson’s Corr. coeff. [r] cobas b 221 system 1.43 0.97 6.65 0.98 Table 3-104 (1) Median absolute bias Unit: [mmol/L]...
-
Page 78: Glu
The trueness of measurement values in micro sample mode, BG-only (40 μL) and BG with COOX (55 μL), have been confirmed by comparing measurement values in normal sample mode (150 μL). Number of instruments: 8 cobas b 123 POC systems Material: whole blood Parameter Unit No. -
Page 79: Sample Throughput
123 POC system 3 Specifications Sample throughput Sample throughput Activated/installed modules Sample throughput [samples/hours] Syringe/Capillary BG - ISE - Hct - Glu - Lac BG - ISE - Hct - Glu - Lac - AutoQC BG - ISE - Hct - Glu - Lac - COOX... -
Page 80: Sample Measurement Time
3 Specifications cobas b 123 POC system Sample measurement time Sample measurement time Measurement times [seconds] Activated/installed modules Total time Until display BG - ISE - Hct - Glu - Lac BG - ISE - Hct - Glu - Lac - COOX... -
Page 81: Sample Volumes
123 POC system 3 Specifications Sample volumes Sample volumes Minimum sample volumes depend on Hct concentration. Maximum sample volumes depend on which modules are installed. It does not depend on whether the modules are activated or deactivated. Activated/installed modules Typical sample volume [μL]... -
Page 82: Sample Types
3 Specifications cobas b 123 POC system Sample types Sample types Sample types NOTICE Only use the following sample types: Whole blood Dialysis solutions Aqueous solutions Recommended QC material (1) With approximate physiological ion matrix and buffer capacity. Roche Diagnostics... -
Page 83: Calibrations
123 POC system 3 Specifications Calibrations Calibrations Calibrations Time intervals Duration [min] System calibration every 24 hours 1P calibrations every 60 minutes 2P calibrations every 12 hours (alternatively 4, 8 or 12 hours) Table 3-116 Calibrations Roche Diagnostics... -
Page 84: Environmental Parameters
3 Specifications cobas b 123 POC system Environmental parameters Environmental parameters Temperature/humidity/stability Instrument Operate the system only within the specified conditions. NOTICE Operating conditions Ambient temperature 15–32 °C Ambient air pressure 530–800 mmHg (-100 m to + 2500 m above sea... -
Page 85: Fluid Pack
15–85% (not condensed) Table 3-123 Stability during operation cobas b 123 Fluid Pack COOX 200 up to 200 tests or up to 42 days cobas b 123 Fluid Pack COOX 400 up to 400 tests or up to 42 days... -
Page 86: Product Data
Height: 47 cm Depth: 33 cm Weight cobas b 123 POC system (instrument): 20 kg (without Fluid Pack and AutoQC Pack) 24.5 kg (with Fluid Pack and AutoQC Pack) Acoustic noise level In normal operating conditions: <60 dB(A) Printing noise: <65 dB(A) -
Page 87: Holding Points
123 POC system 3 Specifications Product data Holding points Lift and carry the instrument using the 2 slots on each side of the instrument. Use both hands to lift and carry the instrument. Holding points Figure 3-1 Holding points Roche Diagnostics Instructions for Use ·... -
Page 88: Printer
3 Specifications cobas b 123 POC system Printer Printer Type: Thermal printer Resolution: 203 dpi (8 dots/mm) Full graphics: 832 dots/line Printing speed: Standard measurement report < 10 seconds Paper width: 113.5 ± 0.5 mm Paper length: about 45 m Roche Diagnostics Instructions for Use ·... -
Page 89: User Interface Module
123 POC system 3 Specifications User interface module User interface module Hardware version 1 Intel Atom N270 1.6 GHz Memory: 512 MB RAM Hard disk: ≥40 GB storage capacity CompactFlash card: ≥1 GB storage capacity USB storage device: ≥... -
Page 90: Barcode Scanner
Code 39 Code 93 Code 128 (1) Roche default settings applied. Further available barcode types can be programmed in accordance with the manufacturer’s PS2 scanner Reference Guide. The Reference Guide is available via your Roche representative on demand. Hardware versions (p. 30) - Page 91 Code 39 Code 93 Code 128 (1) Roche default settings applied. Further available barcode types can be programmed in accordance with the manufacturer’s PS2 scanner Reference Guide. The Reference Guide is available via your Roche representative on demand. Hardware versions (p. 30) Roche Diagnostics Instructions for Use ·...
-
Page 92: Imaging Scanner (Optional)
3 Specifications cobas b 123 POC system Imaging scanner (optional) Imaging scanner (optional) Hardware version 1 Manufacturer: Datalogic Type: Magellan® 1100i Imaging Scanner with optional holder Reading speed 1768 digital scan/s. Resolution: 0.127 mm 0 to 17.1 cm Reading width (1) Depending on the barcode length and the scanning angle. - Page 93 123 POC system 4 Theoretical foundations Table of contents Theoretical foundations This chapter contains background information on how calculated values are derived and how calibrations are performed on the system. In addition, unit conversion tables, standard values and reference ranges for measured parameters are provided.
- Page 94 4 Theoretical foundations cobas b 123 POC system Table of contents AG ........................... 105 .......................... 106 ........................... 106 ........................106 ......................... 106 ........................106 AaDO ........................107 a/AO ........................107 ........................... 107 Hct(c)........................108 MCHC ........................108 ......................... 108 ........................108 Osm.........................
-
Page 95: Assigning Unit Formats To Parameters
123 POC system 4 Theoretical foundations Assigning unit formats to parameters Assigning unit formats to parameters To assign a unit format to parameters You can only assign unit formats for parameters that have more than one unit format. -
Page 96: Selecting Between Ph And H + Unit Formats
4 Theoretical foundations cobas b 123 POC system Selecting between pH and H unit formats Selecting between pH and H unit formats To select between pH and H unit formats Switching between pH and H unit formats changes reference and critical ranges and QC rules and consequences, and deactivates correlation factors from the previous unit format. -
Page 97: Parameters And Calculations
123 POC system 4 Theoretical foundations Parameters and calculations Parameters and calculations Conversion table for units The system provides an array of useful parameters, which are calculated from the measurement values of each sample. Refer to the following table for an explanation of the symbols used in the equations. -
Page 98: Equations
4 Theoretical foundations cobas b 123 POC system Parameters and calculations Equations If calculated values exceed their critical ranges, verify the validity of your results with a medical specialist before making any clinical decisions. WARNING Default units are used for the calculation of the equations. -
Page 99: Be Ecf
123 POC system 4 Theoretical foundations Parameters and calculations The base deviation of blood determines the titratable base of the blood. Theoretically, this is measured by titrating blood with a strong acid or base to a pH = 7.4 with PCO = 40 mmHg at 37 °C. - Page 100 4 Theoretical foundations cobas b 123 POC system Parameters and calculations [3][4] Unit: [%] a/f, Equation 4-11 where 0.48 7.4) 0.0013 26.7 Equation 4-12 Adult = 26.7 F1 = 1.661 F2 = 0.074 F3 = 4.172 Fetal = 21.5 F1 = 1.3632 F2 = 0.0533...
-
Page 101: Cto
123 POC system 4 Theoretical foundations Parameters and calculations Oxygen content is the sum of oxygen bound to hemoglobin as O Hb and the amount of oxygen dissolved in the plasma. can only be calculated if measured SO available. -
Page 102: Chco 3 - St
4 Theoretical foundations cobas b 123 POC system Parameters and calculations (0.8262 0.01296 0.006942 lg(0.025 Equation 4-18 cHCO Standard bicarbonate of the blood, defined as the plasma bicarbonate concentration in blood, which has been equilibrated at 37 °C with a gas mixture having a PCO 40 mmHg. -
Page 103: A/Ao
123 POC system 4 Theoretical foundations Parameters and calculations a/AO Arterial alveolar oxygen partial pressure ratio. Unit: [%] a/AO Equation 4-22 = PO a/AO (p. 107) for patient temperatures other than 37 °C. avDO Arterial venous oxygen tension ratio. -
Page 104: Shunt (Qs/Qt)
4 Theoretical foundations cobas b 123 POC system Parameters and calculations Shunt (Qs/Qt) The shunt parameter is a measure of the direct mixing of venous blood into the oxygenated blood circulation. The shunt parameter gives the short circuit volume relating to the total volume (% - value). -
Page 105: Shunt Estimated (Qs/Qt Est )
123 POC system 4 Theoretical foundations Parameters and calculations Shunt estimated (Qs/Qt To calculate an estimated shunt value, a fixed value of 5.15 vol% (=2.3 mmol/L) is used for avDO To determine this, 1 independent measurement of arterial blood is required. -
Page 106: Ph T
4 Theoretical foundations cobas b 123 POC system Parameters and calculations Corrected pH value for patient temperatures other than 37 °C. 0147 0065 . )] ( Equation 4-29 Corrected hydrogen ion concentration for patient temperatures other than 37 °C. Unit: [nmol/L]... -
Page 107: Aado
123 POC system 4 Theoretical foundations Parameters and calculations Equation 4-34 0.0237 0.0001 t 37 t 37 47 10 Equation 4-35 = Baro total R = RQ AaDO Corrected alveolar oxygen partial pressure for patient temperatures other than 37 °C. -
Page 108: Hct(C)
4 Theoretical foundations cobas b 123 POC system Parameters and calculations Hct(c) Hct as a function of tHb. Unit: [ - ] Hct(c) Equation 4-39 Default value of Hb factor, F = 3.00 (F = 100/MCHC [g/dL]) Input range: 2.70–3.30. This corresponds to an MCHC of 30.3 g/dL to 37 g/dL (= reference range for adults). -
Page 109: Osm
123 POC system 4 Theoretical foundations Parameters and calculations Equation 4-42 The calculation takes place with SO or, if not available, with SO (c). [10] Osmolality. Unit: [mOsm/kg] Equation for blood, plasma, serum: 1.86 Urea Equation 4-43 Equation for aqueous solution, acetate, bicarbonate:... -
Page 110: Oer
4 Theoretical foundations cobas b 123 POC system Parameters and calculations Equation 4-46 Gap is only calculated if the input value, Osm(e) (measured osmolality with an osmometer) and the calculated value, Osm , are available. Oxygen extraction ratio. Unit: [%]... -
Page 111: Lac Clearance 1H
123 POC system 4 Theoretical foundations Parameters and calculations PF index = Equation 4-49 = PO clearance 1h [12], Lactate Clearance calculates, in percent, the hourly change of measured lactate. [13] . It requires 2 independent measurements. Both measurements must be carried out with the same patient ID. - Page 112 4 Theoretical foundations cobas b 123 POC system Parameters and calculations [6] National Committee on Clinical Laboratory Standards, Defintions of Quantities and Conventions Related to Blood pH and Gas Analysis, NCCLS Document C12-A; Approved Standard (1994), Vol. 14 No. 11.
-
Page 113: Calibration Principle
123 POC system 4 Theoretical foundations Calibration principle Calibration principle Calibration (p. 221) The Fluid Pack contains 3 stable aqueous solutions to calibrate the system’s parameters. sensor Calibrated using ambient air, corresponding to the oxygen concentration in the standby solution, and a zero point solution (CAL 2 solution). -
Page 114: Oximeter Module (Optional)
123 POC system Oximeter module (optional) Oximeter module (optional) This module is included in the cobas b 123 <3> POC system and cobas b 123 <4> POC system variants. The oximeter module is an optical sensor module for determining total hemoglobin... -
Page 115: Reference And Critical Values
123 POC system 4 Theoretical foundations Reference and critical values Reference and critical values The results of laboratory tests have little practical utility until clinical studies have ascribed various states of health and disease to intervals of values Reference intervals are useful because they attempt to describe the typical results found in a defined population of apparently healthy people. - Page 116 4 Theoretical foundations cobas b 123 POC system Reference and critical values Parameter Normal range Sample matrix Unit Displayed/printed Source default range 1.15–1.33 Serum, plasma mmol/L 1.150–1.330 Tietz Textbook of Clinical heparin Chemistry and Molecular Diagnostics, 5th edition 2012, p.
-
Page 117: Critical Ranges
123 POC system 4 Theoretical foundations Reference and critical values Critical ranges Normal values depend, among other factors, on the patient, age, gender, lifestyle habits (e.g. smoking), underlying disease (e.g. asthma), and therapy (e.g. state after an infusion). This especially applies to critical ranges, as these are based on the normal values. -
Page 118: Assigning Reference And Critical Ranges
4 Theoretical foundations cobas b 123 POC system Assigning reference and critical ranges Assigning reference and critical ranges Default reference and critical ranges are defined on the instrument during installation. However, individual laboratories should generate their own set of reference and critical ranges. - Page 119 123 POC system 4 Theoretical foundations Assigning reference and critical ranges To edit a reference or critical range for a parameter 1 Utilities > Configuration > Measurement > Parameter > Ranges Figure 4-5 Reference/critical ranges setup screen 2 To select a parameter, press the buttons at the top of the Set reference/critical ranges panel.
- Page 120 4 Theoretical foundations cobas b 123 POC system Assigning reference and critical ranges To delete reference and critical ranges for a parameter 1 Utilities > Configuration > Measurement > Parameter > Ranges Figure 4-7 Reference/critical ranges setup screen 2 To select a parameter, press the...
-
Page 121: Monitoring Reference And Critical Ranges On Measurement Reports
123 POC system 4 Theoretical foundations Monitoring reference and critical ranges on measurement reports Monitoring reference and critical ranges on measurement reports To activate reference and critical ranges monitoring on measurement reports 1 Utilities > Configuration > Measurement > Parameter > Ranges... -
Page 122: Assigning A Correlation Factor To A Parameter
Assigning a correlation factor to a parameter may shift measurement results that would be outside of the measuring range to be inside the measuring range. Roche does not guarantee measurement results for which correlation factors have been assigned to parameters. - Page 123 123 POC system 4 Theoretical foundations Assigning a correlation factor to a parameter 2 To add a correlation factor to a parameter, press the New button. A dialog box appears on the screen. Figure 4-10 Adding correlation factors screen...
- Page 124 4 Theoretical foundations cobas b 123 POC system Assigning a correlation factor to a parameter A dialog box appears on the screen. Figure 4-12 Editing correlation factors screen 3 To edit this correlation factor, press the button in the bottom panel of the screen.
- Page 125 Operation Installation and put out of operation .................... 127 Measurement..........................137 Quality control ..........................179 Calibration ............................. 221 Calibration verification control ..................... 233 Software functions.......................... 245...
- Page 127 123 POC system 5 Installation and put out of operation Table of contents Installation and put out of operation This chapter describes how to install the instrument, and put the instrument out of operation. Chapter In this chapter Installation..........................
- Page 128 5 Installation and put out of operation cobas b 123 POC system Table of contents Roche Diagnostics Instructions for Use · Version 13.0...
-
Page 129: Installation
Check the instrument and its accessories for completeness and potential damage. Verify that the shipment is complete by comparing components with the shipping order. If anything is missing, inform your Roche representative immediately. Roche Diagnostics Instructions for Use · Version 13.0... - Page 130 5 Installation and put out of operation cobas b 123 POC system Installation If the delivery has suffered damage despite careful packing, inform the transportation company immediately. Retain the packing material and products as evidence for the damage claim. Inserting damaged consumables may damage the system...
-
Page 131: Installing The Instrument
123 POC system 5 Installation and put out of operation Installing the instrument Installing the instrument Installing the instrument You must perform a QC measurement on 3 levels after installing the instrument. WARNING To install the instrument 1 Connect the barcode scanner and, if necessary, the network connection to their corresponding interfaces on the back of the instrument. - Page 132 5 Installation and put out of operation cobas b 123 POC system Installing the instrument 2 Connect the power supply to the instrument, and then connect it to the power supply network. Power supply interface Figure 5-3 Power supply interface location: Hardware version 1...
- Page 133 123 POC system 5 Installation and put out of operation Installing the instrument After the instrument has finished loading, the installation wizard appears on the screen. Figure 5-6 Installation wizard 4 Follow the instructions on the screen. To change the Sensor Cartridge (p. 303) To change the Fluid Pack (p.
-
Page 134: Put Out Of Operation
5 Installation and put out of operation cobas b 123 POC system Put out of operation Put out of operation For less than 24 hours If the instrument is not needed for less than 24 hours, switch it off by pressing the following buttons: Utilities >... -
Page 135: Putting The Instrument Out Of Operation
123 POC system 5 Installation and put out of operation Put out of operation Putting the instrument out of operation To put the instrument out of operation Infection due to contact with the Fluid Pack and the Sensor Cartridge The Fluid Pack and the Sensor Cartridge may contain materials of human origin. -
Page 136: Preparing The Instrument For Transportation
5 Installation and put out of operation cobas b 123 POC system Put out of operation Preparing the instrument for transportation To prepare the instrument for transportation 1 Remove the printer paper from the printer. 2 Remove the USB storage device. - Page 137 123 POC system 6 Measurement Table of contents Measurement This chapter describes how to collect and handle samples, perform measurements and configure measurement settings. Chapter In this chapter Preanalytics ........................139 Sample collection ......................139 Whole blood ......................139 Anticoagulants ......................
- Page 138 6 Measurement cobas b 123 POC system Table of contents Entering measurement input values ................170 Measurement results and reports..................173 Measuring database......................175 Acid base maps ........................176 Patient trend diagrams...................... 177 Roche Diagnostics Instructions for Use · Version 13.0...
-
Page 139: Preanalytics
This may lead to errors and discrepancies in the measurement values. Do not squeeze the puncture site before collecting your sample. Use the correct sample container for your measurement. Roche recommends using the Roche MICROSAMPLER PROTECT for blood collection. -
Page 140: Anticoagulants
NOTICE Heparin salts are the only permitted anticoagulants for analyses with the cobas b 123 POC system. Other anticoagulants, such as EDTA, citrate, oxalates, fluorides and ammonia-containing anticoagulants have a significant effect on the blood pH value and other parameters and cannot be used. -
Page 141: Sample Collection, Specifically For Bilirubin Measurements
Samples from the fresh dialysis solution may only be taken with an untreated syringe free from coagulant inhibitors. WARNING Sample collection containers Sample collection containers Use only Roche sample collection containers. WARNING Roche recommends that you use its sample collection containers. Roche Diagnostics Instructions for Use · Version 13.0... -
Page 142: Syringes
To prevent damage to your instrument, Roche recommends using Roche MICROSAMPLER PROTECT for blood collection. If you use glass capillary tubes from other manufacturers, ensure that they have heat-polished ends. -
Page 143: Sample Handling
Clot Catcher PRO The Clot Catcher PRO, which is placed on top of a syringe, prevents blood clots and tissue particles from entering the cobas b 123 POC system. The Clot Catcher PRO is only suitable for measurements in capillary mode. -
Page 144: Dialysis Solution
6 Measurement cobas b 123 POC system Preanalytics Dialysis solution Failure to follow sample handling protocols for dialysis solutions may lead to incorrect patient results Failure to follow sample handling protocols for dialysis solutions may lead to incorrect WARNING patient results, which may endanger patient lives. -
Page 145: Interferences
123 POC system 6 Measurement Interferences Interferences A study was carried out to evaluate the influence of chemical substances and pharmaceuticals that could interfere with measurement parameters. The study was designed in accordance with the following CLSI guideline: Clinical and Laboratory Standards Institute. - Page 146 6 Measurement cobas b 123 POC system Interferences Substance Concentration Tested analyte 0.021 mmol/L BG, ISE, Glu, Lac Gentamicin 0.117 mmol/L BG, pH, ISE, Glu, Lac Gentisic acid 3.0 mmol/L ISE, Glu, Lac Glutathione, reduced Glycolic acid 13.05 mmol/L , Na...
-
Page 147: Substances Without Effect On Thb, So , Hb Derivatives And Bilirubin
123 POC system 6 Measurement Interferences Substance Concentration Tested analyte 45 mmol/L BG, pH, ISE, Glu, Lac Sodium chloride 0.105 mmol/L BG, pH, ISE, Glu, Lac Sodium fluoride Sodium glutamate 0.86 mmol/L ISE, Glu, Lac 3000 IU/L BG, ISE, Glu, Lac... -
Page 148: Substances With Effect On Bg, Ph, Ise, Glu, Lac And Hct
6 Measurement cobas b 123 POC system Interferences Substance Concentration Tested analyte pH low tHb, HHb, O Hb, COHb, MetHb, SO pH low Bili Propofol, 2% 0.11 mg/mL tHb, HHb, O Hb, COHb, MetHb, SO , Bili 10 mg/mL tHb, HHb, O... -
Page 149: Substances With Effect On Thb, So , Bilirubin And Hb Derivatives
(3) When determining interference for hematocrit, sample matrix modification (morphology of the erythrocytes, hemolysis, and osmosis effect) has to be considered when adding substances. Therefore, sample modification was determined with an absolute reference measurement using centrifugation (hemofuge), and the values determined with the cobas b 123 POC system were corrected. Substances with effect on tHb, SO... - Page 150 6 Measurement cobas b 123 POC system Interferences Substance Parameter Substance Parameter Effect of the substance ± Trueness concentration concentration (MV) Methylene blue 40.00 mg/L 13.7 g/dL -1.1 g/dL 0.5 g/dL -3.3% 0.5% 4.50% MetHb 4.1 mg/dL -2.94 mg/dL 1.2 mg/dL Bili 13.4 mg/dL...
- Page 151 123 POC system 6 Measurement Interferences Substance Parameter Substance Parameter Effect of the substance ± Trueness concentration concentration (MV) 0.25 mg/mL 0.5% 1.3% 1.5% 99.5% -4.3% 2.0% 4.8 mg/dL -0.54 mg/dL 1.2 mg/dL Bili 14.2 mg/dL -0.36 mg/dL 1.2 mg/dL...
-
Page 152: Limitations Of Clinical Analysis
A detailed discussion of these phenomena can be found at different places in the technical literature. Concerning the cobas b 123 POC system, an attempt has been made to identify and evaluate these possible influences. Since it is not possible to check all medication or substances, you should be immediately informed with abnormal deviations of the measurement results—as with every clinical analysis—and evaluate the complete picture of the... - Page 153 123 POC system 6 Measurement Limitations of clinical analysis MCHC (g/dL) MCHC (mmol/L) 31.0–35.0 4.805–5.425 24.0–36.0 3.720–5.580 to 6 to 13 26.0–34.0 4.030–5.270 to 23 25.0–34.0 3.875–5.270 to 37 Table 6-5 MCHC reference ranges for neonates To measure neonatal bilirubin 1 In the Configuration tab, press the following buttons: Measurement >...
-
Page 154: Configuring Measurement Input Values
6 Measurement cobas b 123 POC system Configuring measurement input values Configuring measurement input values You can assign input values that can be edited in the Input values tab during a measurement. This feature allows you to change measurement-specific information, such as patient ID. - Page 155 123 POC system 6 Measurement Configuring measurement input values 4 To add an input value, choose it from the list on the left panel of the screen and press the button. 5 To remove an input value, choose it from the list on the right panel of the screen and press the button.
-
Page 156: Configuring The Measurement Results Screen
6 Measurement cobas b 123 POC system Configuring the measurement results screen Configuring the measurement results screen You can assign which measured and calculated values are displayed on the Results tab during a measurement. This feature allows you to quickly display and record specific values for all measurements. -
Page 157: Configuring The Parameter Selection Field
123 POC system 6 Measurement Configuring the parameter selection field Configuring the parameter selection field The parameter selection field in the Overview tab makes it easier to view which parameters are available before performing a measurement. You can permanently disable parameters for measurements and calibrations, so these parameters do not appear in the parameter selection field. -
Page 158: Creating User-Defined Parameter Groups
6 Measurement cobas b 123 POC system Configuring the parameter selection field Figure 6-6 Overview tab Creating user-defined parameter groups Creating user-defined parameter groups makes it easier for you to activate the measurement parameters you use most on the Overview tab. You can create up to 3 user-defined parameter groups with this feature. - Page 159 123 POC system 6 Measurement Configuring the parameter selection field 4 To add parameters to or remove parameters from the user-defined group, press each parameter’s button. Parameters, which are shown in dark green, are part of the group.
-
Page 160: Performing A Measurement
If QC results do not match their expected results, perform the QC measurements again. If QC results still do not match their expected results, refer to the QC troubleshooting section (QC troubleshooting (p. 218)). If the error persists, contact your Roche Service representative. - Page 161 123 POC system 6 Measurement Performing a measurement Proficiency test materials, also known as EQA materials, have to be measured in the Proficiency test menu. Performing a proficiency test measurement (p. 194) You can measure samples from syringes (without cannulae), capillaries and the Roche MICROSAMPLER PROTECT.
- Page 162 6 Measurement cobas b 123 POC system Performing a measurement 3 To start the measurement, press the Start syringe measurement. Improper docking of the syringe or injecting a sample into the fill port during a syringe measurement may result in infection...
- Page 163 123 POC system 6 Measurement Performing a measurement 5 To aspirate your sample, press the Yes button. Figure 6-11 Aspirating your sample from the syringe 6 When you receive the prompt on the screen to remove the syringe, remove the syringe from the fill port and press Yes.
- Page 164 6 Measurement cobas b 123 POC system Performing a measurement 7 In the Input values tab, press the button to enter your input values. To avoid incorrect results, enter the correct sample type for each syringe measurement. WARNING Figure 6-13 Input values tab during a syringe measurement 8 To view your results, enter the Results tab.
- Page 165 Performing capillary measurements with inappropriate capillary tubes may damage the analyzer. Roche recommends using its glass capillary tubes or Roche MICROSAMPLER PROTECT for blood collection. If you use glass capillary tubes from other manufacturers, ensure that they have heat-polished ends. Available accessories and consumables (p. 335) 1 Collect your sample for the measurement.
- Page 166 6 Measurement cobas b 123 POC system Performing a measurement 4 Firmly attach the capillary or the Roche MICROSAMPLER PROTECT to the fill port. Then, remove your hand from the sample collection container. Figure 6-16 Attaching the capillary to the fill port...
- Page 167 Aspirating your sample from the capillary or the Roche MICROSAMPLER PROTECT 6 When you receive the prompt on the screen to remove the capillary, remove the capillary or the Roche MICROSAMPLER PROTECT from the fill port and press Yes. The instrument performs the capillary measurement.
- Page 168 6 Measurement cobas b 123 POC system Performing a measurement 7 In the Input values tab, press the button to enter your input values. To avoid incorrect results, enter the correct sample type for each capillary measurement. WARNING Figure 6-20 Input values tab during a capillary measurement 8 To view your results, enter the Results tab.
-
Page 169: Measurement Modes
123 POC system 6 Measurement Measurement modes Measurement modes Micro mode When you perform a capillary measurement, the instrument automatically switches to micro mode if it aspirates a blood sample with a volume less than 123 μL. The Input values tab indicates if the instrument has performed a measurement in micro mode. -
Page 170: Entering Measurement Input Values
6 Measurement cobas b 123 POC system Entering measurement input values Entering measurement input values You can enter various patient, operator, and sample-specific input values during a measurement in the Input values tab. This can be done manually, or using a barcode scanner. - Page 171 123 POC system 6 Measurement Entering measurement input values Measurement results are not accepted and do not appear in the measuring database if you do not input a value for mandatory input for a measurement if you do not confirm a standard value or enter a new standard value for a...
- Page 172 6 Measurement cobas b 123 POC system Entering measurement input values To enter measurement input values using a barcode scanner Incorrect results due to errors in scanning barcodes Errors in scanning barcodes may lead to patient-specific information being incorrectly entered into the system. This leads to incorrect results, which may lead to incorrect patient WARNING diagnoses and endanger patient lives.
-
Page 173: Measurement Results And Reports
123 POC system 6 Measurement Measurement results and reports Measurement results and reports Results tab When one measured value is available, the Results tab automatically appears. You can continue to enter input values by returning to the Input values tab. - Page 174 6 Measurement cobas b 123 POC system Measurement results and reports This measurement result was determined by a parameter with a QC warning. Status messages on the measurement report (p. 323) You can increase the time-to-display setting to get a more accurate control of measured values.
-
Page 175: Measuring Database
123 POC system 6 Measurement Measuring database Measuring database You can find all measurements performed by your instrument in the measuring database. To enter the measuring database, press the following buttons: Workplace > Measuring database Figure 6-27 Measuring database To sort database entries by start time, patient ID or last name, press their respective column headers. -
Page 176: Acid Base Maps
6 Measurement cobas b 123 POC system Acid base maps Acid base maps Acid base maps allow you to identify acid-base physiology disorders, such as metabolic and respiratory acidosis and alkalosis, from pH and PCO measurements. Figure 6-28 Acid base map... -
Page 177: Patient Trend Diagrams
123 POC system 6 Measurement Patient trend diagrams Patient trend diagrams You can monitor all measured parameters for up to 10 days for a patient using patient trend diagrams. You can only view up to 2 parameters on the same diagram. - Page 178 6 Measurement cobas b 123 POC system Patient trend diagrams Roche Diagnostics Instructions for Use · Version 13.0...
- Page 179 123 POC system 7 Quality control Table of contents Quality control In this chapter, a detailed description of quality control procedures is provided. This includes how to perform QC measurements and proficiency tests, how to troubleshoot QC warnings and locks, and how to assess QC results.
- Page 180 7 Quality control cobas b 123 POC system Table of contents Roche Diagnostics Instructions for Use · Version 13.0...
-
Page 181: General Qc Concept
If QC results do not match their expected results, perform the QC measurements again. If QC results still do not match their expected results, refer to the QC troubleshooting section (QC troubleshooting (p. 218)). If the error persists, contact your Roche Service representative. - Page 182 The following control materials are recommended: cobas b 123 AutoQC Pack TRI-LEVEL: This control material is only available for instruments with an AutoQC module. COMBITROL PLUS B: This control material is to be used for manual QC measurements.
-
Page 183: Important Information For Evaluating Qc Results
123 POC system 7 Quality control Important information for evaluating QC results Important information for evaluating QC results QC measurement results are evaluated based on their ranges: Measured value is within the target value range ± 2... -
Page 184: Performing Qc Measurements
7 Quality control cobas b 123 POC system Performing QC measurements Performing QC measurements You can perform the following types of QC measurements: AutoQC measurement User-activated AutoQC measurement Manual QC measurement Manual QC measurement NOTICE When performing a manual QC measurement, enter or check the QC ranges from the package insert. - Page 185 123 POC system 7 Quality control Performing QC measurements 2 In the AutoQC panel, press the button of one of the 3 QC levels that you want to perform the QC measurement for. The instrument performs the user-activated AutoQC measurement.
- Page 186 7 Quality control cobas b 123 POC system Performing QC measurements COMBITROL PLUS B control material has to be acclimated to room temperature at least 24 hours before its use. 1 Workplace > QC measurement The following window appears on the screen:...
- Page 187 123 POC system 7 Quality control Performing QC measurements 5 Gently tap the head of the ampoule with your fingernail to remove any liquid from the top. Figure 7-8 Tapping the head of the ampoule 6 Break open the ampoule using gauze.
- Page 188 7 Quality control cobas b 123 POC system Performing QC measurements Failure to follow QC protocols may lead to incorrect patient results Failure to follow QC protocols may lead to incorrect patient results, which may endanger patient lives. WARNING Follow quality control practices according to local regulations.
- Page 189 123 POC system 7 Quality control Performing QC measurements 9 When you receive the prompt on the screen to remove the capillary, remove the ampoule adapter from the fill port and press Yes. Figure 7-12 Removing the ampoule adapter from the fill port The instrument performs the manual QC measurement.
- Page 190 7 Quality control cobas b 123 POC system Performing QC measurements 11 To accept or reject the results of the QC measurement, press the Accept or Reject button. Figure 7-14 QC values tab after a manual QC measurement Roche Diagnostics...
-
Page 191: Qc Results And Reports
123 POC system 7 Quality control QC results and reports QC results and reports QC values tab Figure 7-15 QC values tab after a manual QC measurement This is the legend for the text shown in the QC values tab. This text also appears on measurement reports. -
Page 192: Qc Database
7 Quality control cobas b 123 POC system QC database QC database You can find all QC measurements performed by your instrument in the QC database. To enter the QC database, press the following buttons: Workplace > QC database Figure 7-16... -
Page 193: Levey-Jennings Graphs
123 POC system 7 Quality control Levey-Jennings graphs Levey-Jennings graphs Levey-Jennings graphs show the progress of QC measurement results, in order to help you find errors in how the system measures. These graphs are created for each parameter using QC measurement results performed on the same QC material and level. -
Page 194: Performing A Proficiency Test Measurement
The cobas b 123 POC system can measure proficiency test or EQA materials. NOTICE However, results are not obtained if they are outside of the measuring range or outside of the system specifications. - Page 195 123 POC system 7 Quality control Performing a proficiency test measurement To perform a proficiency test measurement 1 Workplace > QC measurement > Proficiency test The following window appears on the screen: Figure 7-18 Proficiency material setup screen 2 To enter the material name, level and lot number of the proficiency test material, scan the barcode on the ampoule’s label.
- Page 196 7 Quality control cobas b 123 POC system Performing a proficiency test measurement 6 Follow the instructions of the proficiency material manufacturer for handling and preparation. Failure to follow proficiency test protocols may lead to incorrect proficiency test results Failure to follow proficiency test protocols may lead to incorrect proficiency test results.
- Page 197 123 POC system 7 Quality control Performing a proficiency test measurement 9 When you receive the prompt on the screen to remove the capillary, remove the ampoule adapter from the fill port and press Yes. Figure 7-22 Removing the ampoule adapter from the fill port The instrument performs the proficiency test.
- Page 198 7 Quality control cobas b 123 POC system Performing a proficiency test measurement 11 To accept or reject the results of the proficiency test, press the Accept or Reject button. Figure 7-24 Proficiency test values tab after a proficiency test Target ranges do not apply for proficiency tests.
-
Page 199: Configuring The Qc Scheduler
123 POC system 7 Quality control Configuring the QC scheduler Configuring the QC scheduler You can configure the QC scheduler to load manufacturer QC schemes, or create your own QC times. To load the manufacturer QC scheme 1 Utilities > Configuration > Quality control > Times / intervals 2 Press the Load manufacturer QC scheme button. - Page 200 7 Quality control cobas b 123 POC system Configuring the QC scheduler 3 In the QC scheduler panel, press the New button. The following window appears on the screen: Figure 7-26 AutoQC time configuration screen 4 To set a start time, press the button in the Start time field.
- Page 201 123 POC system 7 Quality control Configuring the QC scheduler 3 To copy the times in QC scheduler for the selected day of the week, press the Copy button. A dialog box appears on the screen. Figure 7-28...
- Page 202 7 Quality control cobas b 123 POC system Configuring the QC scheduler 3 To edit a time in the QC scheduler, select it from the drop-down list on the QC scheduler panel. Then, press the Edit button. The following window appears on the screen:...
-
Page 203: Defining And Configuring Qc Materials
These limits cannot be extended because this would not ensure that system specifications are fulfilled. Range limit correction due to new Correction of range limits due to new Roche specifications for known QC materials is manufacturer specifications performed using a modification barcode sheet provided by Roche after-sales service. - Page 204 7 Quality control cobas b 123 POC system Defining and configuring QC materials 2 In the Setup QC material panel, press the New button. The following window appears on the screen: Figure 7-33 QC setup wizard window 3 To enter the QC material’s information, scan the material and range codes from its package insert using a barcode scanner.
- Page 205 123 POC system 7 Quality control Defining and configuring QC materials 2 To edit the ranges for a QC material, select it from the drop-down list on the Setup QC material panel. Then, press the Ranges button. The following window appears on the screen:...
- Page 206 7 Quality control cobas b 123 POC system Defining and configuring QC materials To delete a defined QC material 1 Utilities > Configuration > Quality control > Material definition > Setup Figure 7-37 QC scheduler screen 2 To delete the QC material, select it from the drop-down list on the Setup QC material panel.
-
Page 207: Configuring Qc Rules And Consequences
If QC results do not match their expected results, perform the QC measurements again. If QC results still do not match their expected results, refer to the QC troubleshooting section (QC troubleshooting (p. 218)). If the error persists, contact your Roche Service representative. - Page 208 7 Quality control cobas b 123 POC system Configuring QC rules and consequences 3 To define a QC rule for this parameter, press the buttons in the Rules panel. The following QC rules are available: None No rule RiliBÄK RiliBÄK ranges Set 1 Rule 1 &...
-
Page 209: Configuring Qc Settings
123 POC system 7 Quality control Configuring QC settings Configuring QC settings You can configure QC settings, such as automatic AutoQC measurements and automatic QC measurement printouts, in the Utilities > Configuration > Quality control menu. To configure automatic AutoQC measurements after specific instrument actions 1 Utilities >... - Page 210 7 Quality control cobas b 123 POC system Configuring QC settings To activate/deactivate automatic QC measurement printouts Activating the automatic QC measurement printouts feature does not enable the printing of AutoQC measurement results. 1 Utilities > Configuration > Quality control > Result view > Auto report...
-
Page 211: Evaluating Qc Measurement Results
123 POC system 7 Quality control Evaluating QC measurement results Evaluating QC measurement results If a parameter is not calibrated, no QC evaluation can take place. If this occurs, calibrate the parameter and repeat the QC measurement. The following methods for evaluating QC measurement results are available: Verifying the ±... -
Page 212: Multirules
7 Quality control cobas b 123 POC system Multirules Multirules Overview number of individual measurements per level (L=Level) QC measurement value of one level and one parameter mean value taken from the insert sheet or calculated based on at least 20 and no more than 100 individual measurements ... - Page 213 123 POC system 7 Quality control Multirules Set 2 Rule 1, Rule 2 and Rule 4. OUT OF CONTROL 4 +3σ +3σ +3σ +2σ +2σ +2σ –2σ –2σ –2σ –3σ –3σ –3σ (Rule 1 = NOK) AND ((Rule...
- Page 214 7 Quality control cobas b 123 POC system Multirules Set 4 Rule 1, Rule 2, Rule 4, Rule 5 and Rule 6. OUT OF CONTROL 6 +3σ +3σ +1σ +1σ –1σ –1σ –3σ –3σ (Rule 1 = OK) AND ((Rule 2 = OK) OR (Rule...
-
Page 215: Removing Qc Consequences
123 POC system 7 Quality control Removing QC consequences Removing QC consequences You can view all QC locks or warnings on the instrument by pressing the Info button on the Overview tab. Figure 7-46 Parameter information screen The “Parameter information” screen lists all parameters that have a QC lock or warning. - Page 216 7 Quality control cobas b 123 POC system Removing QC consequences To remove a QC consequence from a parameter manually If you have to manually remove a QC consequence, repeat the QC measurement with the same level using a new QC ampoule for either manual or automatic QC from the same or a different lot.
- Page 217 123 POC system 7 Quality control Removing QC consequences 2 To remove QC locks or warnings from all parameters, press the Remove all QC locks/warnings button. 3 Perform a QC measurement with your new QC material. Roche Diagnostics...
-
Page 218: Qc Troubleshooting
1 Make sure that all of the parameters are calibrated. 2 Repeat the QC measurement with same QC material and level. 3 If the error still persists, contact your Roche Service representative. To troubleshoot group B QC problems 1 Perform a system calibration: Instrument > System calibration 2 If you performed a QC measurement after a Fluid Pack replacement, check that the Fluid Pack was stored according to specifications before installation. -
Page 219: Troubleshooting Autoqc Module Blockages
123 POC system 7 Quality control Troubleshooting AutoQC module blockages Troubleshooting AutoQC module blockages Fragments of ampoules from the AutoQC Pack may escape and get stuck inside the AutoQC module. This leads to blockages in the AutoQC module. - Page 220 Head and basket of an ampoule lost under the AutoQC module lift Figure 7-51 Ampoule basket lost under the AutoQC module lift 4 Install a new AutoQC Pack. 5 If this error persists, contact your Roche Service representative. Roche Diagnostics Instructions for Use · Version 13.0...
- Page 221 123 POC system 8 Calibration Table of contents Calibration In this chapter, all automatic and user-activated calibrations are described. Chapter In this chapter General information ......................223 Calibration schemes....................223 Automatic calibrations...................... 225 System calibration ....................... 225 2P calibration....................... 225 1P calibration.......................
- Page 222 8 Calibration cobas b 123 POC system Table of contents Roche Diagnostics Instructions for Use · Version 13.0...
-
Page 223: General Information
Calibrations on the cobas b 123 POC system are performed with 3 stable aqueous solutions found inside the Fluid Pack. Calibrations are performed automatically at specific times. In addition, you can perform manual calibrations at any time. - Page 224 8 Calibration cobas b 123 POC system General information Calibration scheme Figure 8-1 Consumable status window of the Sensor Cartridge Roche Diagnostics Instructions for Use · Version 13.0...
-
Page 225: Automatic Calibrations
123 POC system 8 Calibration Automatic calibrations Automatic calibrations You cannot perform measurements, QC measurements or replacement routines during most automated calibrations. You can stop a 2P calibration or system calibration by pressing the button. 1P calibrations cannot be stopped by pressing the button. -
Page 226: Recalibration
8 Calibration cobas b 123 POC system Automatic calibrations Recalibration Recalibrations are carried out after each measurement. The measurement parameters are calibrated using a standby solution. Oximeter calibration Oximeter calibration consists of a wavelength calibration of the polychromator, and a calibration of the integration time and layer thickness calibration of the cuvette. -
Page 227: Wash Cycle
123 POC system 8 Calibration Automatic calibrations Wash cycle Wash cycle is the filling of the measuring chamber with new standby solution. This occurs every hour on the instrument during the RUN-IN phase. In the calibration database, this is recorded as a Wash cycle entry. -
Page 228: User-Activated Calibrations
8 Calibration cobas b 123 POC system User-activated calibrations User-activated calibrations User-activated calibrations are available in the Instrument tab. Figure 8-2 Instrument tab You can perform the following calibrations manually: Calibration for “Ready” 1-point calibration 2-point calibration System calibration Oximeter calibration Automatic calibrations (p. -
Page 229: Calibration Database
123 POC system 8 Calibration Calibration database Calibration database You can find all calibrations performed by your instrument in the calibration database. To enter the calibration database, press the following buttons: Workplace > Calibration database Figure 8-3 Calibration database The first column in the database shows the overall status of all of the measurement parameters after the calibration. -
Page 230: Configuring Calibration Settings
8 Calibration cobas b 123 POC system Configuring calibration settings Configuring calibration settings You can configure when your instrument performs 2P and system calibrations in the Calibration scheduler. In addition, you can activate or deactivate automatic printing of calibration reports. - Page 231 123 POC system 8 Calibration Configuring calibration settings To define the daily frequency of 2P calibrations To enable the automatic printing of calibration reports, the internal printer has to be activated. To activate/deactivate the internal printer (p. 267) 1 Utilities >...
- Page 232 8 Calibration cobas b 123 POC system Configuring calibration settings 2 To activate this feature, press the buttons to display On in the Activate automatic report panel. Then, press the Close button. 3 To deactivate this feature, press the buttons to display Off in the Activate automatic report panel.
- Page 233 123 POC system 9 Calibration verification control Table of contents Calibration verification control Calibration verification allows you to test the accuracy of your instrument using controls of known concentrations. This chapter describes the calibration verification workflow on this system.
- Page 234 9 Calibration verification control cobas b 123 POC system Table of contents Roche Diagnostics Instructions for Use · Version 13.0...
-
Page 235: General Information
123 POC system 9 Calibration verification control General information General information Calibration verification is used to test your instrument’s accuracy. Materials of known concentration are used to assure that the instrument is accurately measuring values throughout its measuring ranges. -
Page 236: Installing Autocvc Packs
Inserting damaged AutoCVC Packs may damage the instrument NOTICE If damaged AutoCVC Packs are inserted into the cobas b 123 POC system, the AutoQC module may become damaged. Before inserting AutoCVC Packs into the instrument for the first time, check for possible damage during transportation. - Page 237 123 POC system 9 Calibration verification control Installing AutoCVC Packs To install an AutoCVC Pack 1 Workplace > Change AutoQC Pack 2 Follow the instructions on the screen. When you have installed the AutoCVC material, AutoCVC text replaces AutoQC Pack information on the Overview tab.
-
Page 238: Performing An Autocvc Measurement
9 Calibration verification control cobas b 123 POC system Performing an AutoCVC measurement Performing an AutoCVC measurement To perform an AutoCVC measurement 1 Workplace > Calibration verification The following dialog box appears on the screen: Figure 9-2 Configuring AutoCVC measurement screen 2 To start the measurement, press one of the level buttons (Level 1–Level 6). - Page 239 123 POC system 9 Calibration verification control Performing an AutoCVC measurement 4 To accept or reject the AutoCVC measurement’s results, press the Accept or Reject button in the CVC values tab. Accepted AutoCVC measurement results are stored in the QC database.
-
Page 240: Managing Cvc Results In The Qc Database
9 Calibration verification control cobas b 123 POC system Managing CVC results in the QC database Managing CVC results in the QC database You can find all CVC measurements performed by your instrument in the QC database. To enter the QC database, press the following buttons: Workplace > QC database. -
Page 241: Configuring Analytical Measurement Ranges
123 POC system 9 Calibration verification control Configuring analytical measurement ranges Configuring analytical measurement ranges AMRs are ranges of values that an instrument can report directly without needing to dilute or increase the sample concentration. You may need to create or edit your instrument’s AMR values based on CVC measurement results or local regulations. - Page 242 9 Calibration verification control cobas b 123 POC system Configuring analytical measurement ranges 4 To enter the lower or upper limit, press the button. Then, enter your lower or upper limit using the numeric keyboard box that appears on the screen. To apply them, press the OK button.
- Page 243 123 POC system 9 Calibration verification control Configuring analytical measurement ranges New ranges have to be within the measuring ranges. 4 To save your changes, press the OK button. Roche Diagnostics Instructions for Use · Version 13.0...
- Page 244 9 Calibration verification control cobas b 123 POC system Configuring analytical measurement ranges Roche Diagnostics Instructions for Use · Version 13.0...
- Page 245 123 POC system 10 Software functions Table of contents Software functions This chapter describes the system’s software tabs, icons and databases. In addition, instructions on how to configure system settings, such as network connections and user access, are provided.
- Page 246 10 Software functions cobas b 123 POC system Table of contents Roche Diagnostics Instructions for Use · Version 13.0...
-
Page 247: General Software Information
123 POC system 10 Software functions General software information General software information Software tabs The software on the system has 4 different tabs. You can configure specific settings or get general information while measurements or calibrations are being performed, or while other procedures are executing database actions. - Page 248 10 Software functions cobas b 123 POC system General software information Last entry To the left To the right Edit sort Menu closed – Menu open – Menu entry Selection disabled – Selection enabled Start a procedure (without input values)
- Page 249 123 POC system 10 Software functions General software information Functional oxygen saturation Bili Bilirubin (neonatal) Glucose Lactate Calculation values: Hydrogen ion concentration – Bicarbonate concentration in plasma cHCO ctCO Total CO concentration in the plasma ctCO Total CO...
- Page 250 10 Software functions cobas b 123 POC system General software information Alveolar oxygen partial pressure at patient's temperature Respiratory index at patient's temperature Alveolar arterial pressure at patient's temperature AaDO Alveolar-arterial oxygen partial pressure at patient's temperature a/AO pH at patient's temperature...
-
Page 251: Overview Tab
123 POC system 10 Software functions Overview tab Overview tab All information (results, error messages, alarms, warnings, etc.) is displayed on this tab. Measurements are also started in this menu. Status area Consumable status window Menu tab Logon button... -
Page 252: Description Of The Screen Areas
10 Software functions cobas b 123 POC system Description of the screen areas Description of the screen areas Status area The status of the instrument, and the date and time are displayed in this area. If a user is logged on to the instrument, their user name is also displayed. - Page 253 123 POC system 10 Software functions Description of the screen areas Quality control (p. 179) Parameter selection field You can select parameters or a parameter group for a specific measurement. Also, the status of the individual parameters is indicated.
- Page 254 10 Software functions cobas b 123 POC system Description of the screen areas Starting a measurement You can measure samples from syringes, without a needle or cannulae, capillaries and the Roche MICROSAMPLER PROTECT. Press the following buttons to start a measurement:...
-
Page 255: Workplace Tab
123 POC system 10 Software functions Workplace tab Workplace tab You can perform consumable changes, manual QC and CVC measurements, and view databases in this tab. Measuring database Change Sensor Cartridge Calibration database Change AutoQC Pack QC database... -
Page 256: Instrument Tab
10 Software functions cobas b 123 POC system Instrument tab Instrument tab All instrument data (i.e. status display) are displayed, and manual calibrations and various maintenance tasks can be started from this tab. Calibration for "Ready Instrument status 1 point calibration... -
Page 257: Utilities Tab
123 POC system 10 Software functions Utilities tab Utilities tab You can perform installation and put out of operation procedures, troubleshooting routines, and software updates in this tab. Also, you can configure various settings. Installation Sensor Cartridge wetting routine... -
Page 258: Instrument Databases
10 Software functions cobas b 123 POC system Instrument databases Instrument databases The instrument stores all measurement, calibration and quality control results, and instrument activities from the last 90 days in its databases. Measuring database (p. 175) QC database (p. 192) Calibration database (p. - Page 259 123 POC system 10 Software functions Instrument databases 2 To add a database entry for export, use the drop-down list to choose it. Then, press the button. The following window appears on the screen: Figure 10-10 Export to USB storage device screen 3 Follow the instructions on the screen.
-
Page 260: Logging On And Off
10 Software functions cobas b 123 POC system Logging on and off Logging on and off To log on to the system 1 In the Overview tab, press the button The following window appears on the screen: Figure 10-12 Logon screen 2 To enter your operator ID and password, press the button. -
Page 261: Connecting Usb Storage Devices
Connecting USB storage devices To connect a USB storage device 1 Press down on the gray cover on the left-hand side of the instrument. cobas b 123 POC system (p. 31) The USB interface appears. Gray cover USB storage device... -
Page 262: Configuring System Settings
10 Software functions cobas b 123 POC system Configuring system settings Configuring system settings You can configure your system settings, such as instrument time, language and data import and export preferences, in the Utilities > Configuration > System menu. To configure the instrument’s time (p. 263) To configure the instrument’s region and time zone (p. - Page 263 123 POC system 10 Software functions Configuring system settings To configure the instrument’s time 1 Utilities > Configuration > System > Date / time Figure 10-15 Configuring the date and time screen 2 To set the instrument’s time, press the button in the Set time field.
- Page 264 10 Software functions cobas b 123 POC system Configuring system settings 2 To set your region and time zone, press the button in the Time zone field. A dialog box appears on the screen. Figure 10-17 Selecting region and time zone dialog box 3 In the dialog box, choose your desired region and time zone from their corresponding drop-down lists.
- Page 265 123 POC system 10 Software functions Configuring system settings To configure instrument’s volume settings 1 Utilities > Configuration > System > Instrument > Volume Figure 10-19 Configuring instrument volume screen 2 To set the general instrument volume, press the buttons at the top of the Set volume panel.
- Page 266 10 Software functions cobas b 123 POC system Configuring system settings 2 To enter a new instrument name, press the button in the Instrument name field. 3 To enter new hospital information, press the button in the Hospital information field.
- Page 267 123 POC system 10 Software functions Configuring system settings 4 To apply your new timeout value, press the OK button. To activate/deactivate the internal printer 1 Utilities > Configuration > System > Instrument > Printer Figure 10-23 Activate/deactivate internal printer panel screen...
- Page 268 10 Software functions cobas b 123 POC system Configuring system settings 4 To apply your changes, press the Close button. Roche Diagnostics Instructions for Use · Version 13.0...
-
Page 269: Configuring Network Connection Settings
123 POC system 10 Software functions Configuring network connection settings Configuring network connection settings You can configure various network connection settings, such as how your system sends patient results to information systems, or how your system connects to other networks in the Utilities >... - Page 270 10 Software functions cobas b 123 POC system Configuring network connection settings To automatically connect your system to a network using a DHCP server 1 Utilities > Configuration > System > Connectivity > Network Figure 10-26 Configuring network connection screen...
- Page 271 123 POC system 10 Software functions Configuring network connection settings To manually connect your system to a network using an IP address 1 Utilities > Configuration > System > Connectivity > Network Figure 10-28 Configuring network connection screen...
- Page 272 10 Software functions cobas b 123 POC system Configuring network connection settings 2 In the IP address panel, press the buttons on the upper part of the panel to display DHCP. The DNS panel becomes active. Figure 10-30 Configuring network connection screen...
- Page 273 123 POC system 10 Software functions Configuring network connection settings 2 To activate the ASTM protocol on your instrument, press the buttons to display Activated in the upper panel of the screen. The bottom panel of the screen becomes active.
- Page 274 10 Software functions cobas b 123 POC system Configuring network connection settings To configure POCT1-A protocol settings 1 Utilities > Configuration > System > Connectivity > POCT1-A Figure 10-33 POCT1-A configuration screen 2 To activate the POCT1-A protocol on your instrument, press buttons to display Activated in the upper panel of the screen.
- Page 275 123 POC system 10 Software functions Configuring network connection settings 6 To enter a port number for the POCT1-A protocol, press the button on the Port field. Enter your port number using the numeric keyboard box that appears on the screen.
- Page 276 10 Software functions cobas b 123 POC system Configuring network connection settings To select a protocol for performing queries ASTM or POCT1-A protocols have to be activated on the instrument to perform queries with their respective protocols. 1 Utilities > Configuration > System > Connectivity > Queries...
- Page 277 123 POC system 10 Software functions Configuring network connection settings 2 To enable remote operator management, make sure that the Remote operator management button is checked and highlighted. If the Remote operator management button is not checked and highlighted, press it.
-
Page 278: Configuring Operator Settings
123 POC system operator profile settings This function is enabled for this operator profile. This function is disabled for this operator profile. Table 10-2 cobas b 123 POC system operator profile settings key Roche Diagnostics Instructions for Use · Version 13.0... - Page 279 123 POC system 10 Software functions Configuring operator settings To create an operator 1 Utilities > Configuration > Operators Figure 10-39 Operator settings screen 2 To create an operator, press the New button. A dialog box appears on the screen.
- Page 280 10 Software functions cobas b 123 POC system Configuring operator settings To edit an operator’s settings 1 Utilities > Configuration > Operators Figure 10-41 Operator settings screen 2 To edit the operator’s settings, press the Edit button. A dialog box appears on the screen.
- Page 281 123 POC system 10 Software functions Configuring operator settings To delete an operator 1 Utilities > Configuration > Operators Figure 10-43 Operator settings screen 2 Select the operator that you want to delete. Then, press the Delete button.
-
Page 282: Changing Security Levels
Changing security levels Changing security levels Security levels on the cobas b 123 POC system provide a defined set of instrument functions that users can perform on their instruments. Each increased security level disables more functions that the user can perform on the instrument. - Page 283 Security level 4 Cancel button Set up QC materials Table 10-3 cobas b 123 POC system security level settings This function is available. This function is not available. You have to be an authorized user to perform this function. Table 10-4 cobas b 123 POC system security levels key To change the instrument’s security level...
-
Page 284: Performing Software And Language Updates
Software and language updates add new and remove outdated features, deliver bug fixes and update drivers to the software running the cobas b 123 POC system. Roche recommends that you perform these updates as soon as you receive them from your Roche representative. -
Page 285: Exporting And Importing Configuration Settings
123 POC system 10 Software functions Exporting and importing configuration settings Exporting and importing configuration settings This feature allows you to efficiently import and export configuration settings between different systems. To export configuration settings 1 Insert a USB storage device into the USB interface. -
Page 286: Audit Trail
10 Software functions cobas b 123 POC system Audit trail Audit trail You can find all changes in instrument settings and input values in the audit trail. To enter the audit trail, press the following buttons: Instrument > Audit trail. - Page 287 123 POC system 10 Software functions Audit trail 2 To add an audit trail entry for export, use the drop-down list to choose it. Then, press the button. The following window appears on the screen: Figure 10-49 Export to USB storage device screen 3 Follow the instructions on the screen.
-
Page 288: Available Printout Reports
10 Software functions cobas b 123 POC system Available printout reports Available printout reports Measurement report The measurement report displays input values and results for all measurements. It can be configured to suit your needs. Figure 10-51 Measurement report printout Acid base report The acid base report is a graphical representation of a patient’s acid-base... - Page 289 123 POC system 10 Software functions Available printout reports Figure 10-52 Acid base report printout Patient trending report The patient trending report shows trends for specific parameters in a patient over time. Roche Diagnostics Instructions for Use · Version 13.0...
- Page 290 10 Software functions cobas b 123 POC system Available printout reports Figure 10-53 Patient trending report printout Proficiency test report The proficiency test report displays input values and results for proficiency tests. These reports may be sent to the organizers of your interlaboratory comparison scheme to assess your laboratory’s results.
- Page 291 123 POC system 10 Software functions Available printout reports Figure 10-54 Proficiency test report printout QC report The QC report displays input values and results for all QC measurements. Roche Diagnostics Instructions for Use · Version 13.0...
- Page 292 10 Software functions cobas b 123 POC system Available printout reports Figure 10-55 QC report printout Levey-Jennings report The Levey-Jennings report display QC statistics to help you identify errors in how the system performs measurements. Roche Diagnostics Instructions for Use · Version 13.0...
- Page 293 123 POC system 10 Software functions Available printout reports Figure 10-56 Levey-Jennings report printout Sensor status report The sensor status report displays status information for all of the measuring parameters on the instrument. This information is used to help identify specific errors on the instrument that you cannot troubleshoot.
- Page 294 10 Software functions cobas b 123 POC system Available printout reports Figure 10-57 Sensor status report printout Roche Diagnostics Instructions for Use · Version 13.0...
- Page 295 Consumable change Consumable change ........................297...
- Page 297 123 POC system 11 Consumable change Table of contents Consumable change This chapter describes the process of changing the consumables that enable the proper operation of the instrument. Chapter In this chapter Disinfection procedures ....................299 Disinfecting the instrument..................... 301 Changing consumables.....................
- Page 298 11 Consumable change cobas b 123 POC system Table of contents Roche Diagnostics Instructions for Use · Version 13.0...
-
Page 299: Disinfection Procedures
Disinfection minimizes the risk of infection when replacing items that were in contact with blood. Regularly perform these procedures. Roche recommends adding a disinfection procedure to your standard laboratory practices. Use only liquid surface disinfectants containing alcohol (approximately 70%), e.g. - Page 300 11 Consumable change cobas b 123 POC system Disinfection procedures Immediate use after disinfection may lead to fire or explosion Traces of disinfectant on the instrument after a disinfection may provoke a fire or explosion. WARNING After disinfecting the instrument, allow the disinfectant to evaporate from the instrument for 15 minutes.
-
Page 301: Disinfecting The Instrument
123 POC system 11 Consumable change Disinfecting the instrument Disinfecting the instrument Regularly disinfect the following parts of the instrument: Touch screen Surfaces of the instrument (including all covers) Consumable area To disinfect the instrument’s screen Spraying water or disinfectant onto the screen may damage the instrument NOTICE Disinfecting the instrument’s screen by directly spraying water, disinfectants, or other... - Page 302 11 Consumable change cobas b 123 POC system Disinfecting the instrument To disinfect the instrument’s consumable area Disinfecting the Sensor Cartridge or the measuring chamber module may lead to incorrect patient results Disinfecting the Sensor Cartridge or the measuring chamber module may deteriorate the WARNING performance of the Sensor Cartridge’s sensors, which may lead to incorrect patient results.
-
Page 303: Changing Consumables
Treat used Sensor Cartridges as hazardous waste and dispose them according to local regulations. For more information, contact your Roche Service representative. When handling and disposing Sensor Cartridges, prevent direct contact by wearing appropriate personal protective equipment, such as:... - Page 304 Treat used Fluid Packs as hazardous waste and dispose them according to local regulations. For more information, contact your Roche Service representative. When handling and disposing Fluid Packs, prevent direct contact by wearing appropriate personal protective equipment, such as:...
- Page 305 Inserting damaged AutoQC Packs may damage the instrument NOTICE If damaged AutoQC Packs are inserted into the cobas b 123 POC system, the AutoQC module may become damaged. Before inserting AutoQC Packs into the instrument for the first time, check for possible damage during transportation.
- Page 306 11 Consumable change cobas b 123 POC system Changing consumables A new AutoQC Pack has to be adjusted to room temperature at least 24 hours before use. 1 Workplace > Change Auto QC Pack 2 Follow the instructions on the screen.
-
Page 307: Additional Information For Consumable Changes
123 POC system 11 Consumable change Additional information for consumable changes Additional information for consumable changes Additional consumable changes At the end of a consumable change, you can perform additional changes for the other consumables by pressing its respective button. - Page 308 11 Consumable change cobas b 123 POC system Additional information for consumable changes Figure 11-2 Consumable status window To display the status of each consumable, press its respective tab in the window. Unlocking the front door When you perform a Fluid Pack, a Sensor Cartridge or an AutoQC Pack change, you are asked to open the front door.
- Page 309 Troubleshooting Troubleshooting..........................311...
- Page 311 123 POC system 12 Troubleshooting Table of contents Troubleshooting In this chapter, error messages that appear in the software, their causes and troubleshooting actions are described. Chapter In this chapter General information ......................313 Alarm area and buttons ....................314 System stops ........................
- Page 312 12 Troubleshooting cobas b 123 POC system Table of contents Roche Diagnostics Instructions for Use · Version 13.0...
-
Page 313: General Information
Treat these components as infectious waste. Dispose consumables according to the local regulations. For more information, contact your Roche Service representative. Wear appropriate personal protective equipment, such as laboratory clothing, protective gloves, safety glasses, face masks, and safety visors, during disposal to prevent direct contact. -
Page 314: Alarm Area And Buttons
12 Troubleshooting cobas b 123 POC system Alarm area and buttons Alarm area and buttons Alarm button If there is an error, the Alarm button is activated and the alarm name is displayed. The Alarm button changes color depending on the error type. - Page 315 123 POC system 12 Troubleshooting Alarm area and buttons Date/Time Date and time of the error Message Error description: e.g., Fluid Pack Error Error ID Roche Diagnostics Instructions for Use · Version 13.0...
-
Page 316: System Stops
Fluid Pack, or Sensor Cartridge with no remaining tests. Figure 12-2 System stop window To remedy a system stop, follow the instructions on the screen. If you have to resolve a system stop and it is not listed, contact your Roche Service representative. WARNING Category... - Page 317 Remove and reinstall the Sensor Cartridge: Workplace > Change Sensor Cartridge If this error persists, remove and reinstall the Fluid Pack: Workplace > Change Fluid Pack If this error still persists, contact your Roche Service representative. Fluid Pack error Fluid Pack defective System stop due to Press the Change Fluid Pack button.
- Page 318 Workplace > Change Fluid Pack Inspect the docking parts of the Fluid Pack for dirt. Remove any dirt with a moist cloth. Reinstall the Fluid Pack. If this error still persists, contact your Roche Service representative. Fluid Pack error Fluid Pack defective Fluidics tightness Press the Change Fluid Pack button.
- Page 319 Inspect the Fluid Pack chip for dirt. Remove any dirt with a dry cloth. Reinstall the Fluid Pack. If this error still persists, contact your Roche Service representative. 1000 Instrument error Internal software Database server not Press the Restart system button.
-
Page 320: Defects
You can perform measurements, but you may not be able to perform specific functions if it involves the affected module. To remedy a defect, follow the instructions on the screen. If you have to resolve a defect and it is not listed, contact your Roche Service representative. Category... -
Page 321: Warnings
To remedy a warning, follow the instructions on the screen. If you have to resolve a warning and it is not listed, contact your Roche Service representative. Category... -
Page 322: Information Alarms
Information alarms refer to actions that you have to perform. You can perform all functions with the instrument while information alarms are active. To remedy an information alarm, follow the instructions on the screen. If you have to resolve an information alarm and it is not listed, contact your Roche Service representative. Category... -
Page 323: Status Messages On The Measurement Report
123 POC system 12 Troubleshooting Status messages on the measurement report Status messages on the measurement report Status messages appear on measurement reports to provide you additional information about your measurement result, or to explain why a measurement result could not be determined. -
Page 324: Calibration And Qc Troubleshooting For Parameters
Press Utilities > Sensor Cartridge internal wetting routine to call up the wetting routine: Call up another Calibration for ready. 3 If this error persists, contact your Roche Service representative. Calibrating oximeter parameters that are not calibrated If one or more oximeter parameters are not calibrated, perform the following procedure. -
Page 325: Removing Qc Locks Or Warnings From Sensor Parameters
> System calibration. Then, perform a manual QC measurement by pressing the following buttons: Workplace > QC measurement. 6 If this error still persists, contact your Roche Service representative. Removing QC locks or warnings from oximeter parameters If one or more oximeter parameters have a QC lock or warning, perform the following procedure. -
Page 326: Performing Sensor Cartridge Wetting Routines
12 Troubleshooting cobas b 123 POC system Performing Sensor Cartridge wetting routines Performing Sensor Cartridge wetting routines To activate the internal contents of the Sensor Cartridge, the system performs an automatic internal wetting routine each time you insert a new Sensor Cartridge. -
Page 327: Checking The Fluid Pack Valve Positions
123 POC system 12 Troubleshooting Checking the Fluid Pack valve positions Checking the Fluid Pack valve positions The Fluid Pack valve positions can change when removing and reinstalling Fluid Packs into the system. Before you reinstall a Fluid Pack into the system, make sure that all of the valves are in the correct position. -
Page 328: Barcode Scanner Troubleshooting
Interfaces: Hardware version 1 (p. 35) 2 Verify that there is an LED light visible inside the barcode scanner. 3 If your issues still persist, contact your Roche Service representative. Roche Diagnostics Instructions for Use · Version 13.0... -
Page 329: Creating Troubleshooting Reports And Log Files
12 Troubleshooting Creating troubleshooting reports and log files Creating troubleshooting reports and log files Troubleshooting reports and log files allow your Roche Service representative to assess and solve errors that appear on your system. To create a troubleshooting report 1 Utilities > Export / import > Export Troubleshooting-Report... -
Page 330: Depot Repair
Put out of operation (p. 134) Depot repair allows you to exchange your defective system for a replacement cobas b 123 POC system while it is being repaired. This service is only available in selected countries. Contact your Roche Service representative for more information. - Page 331 Appendix Available accessories and consumables ..................333 Copyright information........................339 Glossary ............................343...
- Page 333 123 POC system 13 Available accessories and consumables Table of contents Available accessories and consumables In this chapter, all available accessories and consumables, and their order numbers are listed. Chapter In this chapter Available accessories and consumables ................335 Sensor Cartridge types ....................
- Page 334 13 Available accessories and consumables cobas b 123 POC system Table of contents Roche Diagnostics Instructions for Use · Version 13.0...
- Page 335 Parameter is measured Parameter is measured via the oximeter module. Only possible for cobas b 123 <3> POC system and cobas b 123 <4> POC system together with one of the cobas b 123 Fluid Pack COOX types Table 13-2...
- Page 336 COMBITROL PLUS B Level 3 03321215001 Table 13-5 QC material types Only for cobas b 123 <2> POC system and cobas b 123 <4> POC system For all cobas b 123 POC system instruments Table 13-6 QC material table key...
- Page 337 123 POC system 13 Available accessories and consumables Available accessories and consumables Parameter COOX Roche MICROSAMPLER PROT ECT, sterile 05772583001 (50 pcs.) Hypodermic needle 09251561001 (100 pcs.) BS2 Blood Sampler 03113493035 (MC0028) Capillary Tubes, ~ 200 μL 03113477180 (MC0024) Capillary Tubes, ~ 115 μL...
- Page 338 13 Available accessories and consumables cobas b 123 POC system Available accessories and consumables Roche Diagnostics Instructions for Use · Version 13.0...
- Page 339 123 POC system 14 Copyright information Table of contents Copyright information Chapter In this chapter Software license information ................... 341 Roche Diagnostics Instructions for Use · Version 13.0...
- Page 340 14 Copyright information cobas b 123 POC system Table of contents Roche Diagnostics Instructions for Use · Version 13.0...
- Page 341 Software license information Software license information cobas b 123 POC system software The cobas b 123 POC system software is protected by contract law, copyright laws, and international treaties. The cobas b 123 POC system software is licensed for use between F.
- Page 342 14 Copyright information cobas b 123 POC system Software license information Roche Diagnostics Instructions for Use · Version 13.0...
- Page 343 AutoQC module for cobas b 123 <2> POC system and sensor parameters using CAL1 solution. cobas b 123 <4> POC system variants. It allows for the automatic controlling of BG, ISE, Glu, Lac, and 2P 2-point calibration: an automatic calibration of all COOX/Bilirubin parameters.
- Page 344 (CCD). phase until the end of the stable phase Printer A low-noise thermal printer, which is part of ISE sensors Part of the cobas b 123 Sensor Cartridge. the user interface module. They measure Na...
- Page 345 Troubleshooting report User-generated report of errors that the user cannot successfully troubleshoot on the system. It is intended to help Roche Service representatives assess and solve these errors. Utilities tab Location on the user interface where you...
- Page 346 123 POC system Workplace tab - Workplace tab Roche Diagnostics Instructions for Use · Version 13.0...
- Page 347 Index Index ............................... 349...
- Page 349 123 POC system Index Index Numerics – Specifications, 90 – Troubleshooting, 328 1P calibration, 225 Barcode scanner assignments, 36 2P calibration, 225 Calibration, 221 Abbreviations, 10 – 1P calibration, 225 Accessories – 2P calibration, 225 – Instrument, 30 –...
- Page 350 Index cobas b 123 POC system – Adding and removing parameters from data Creating user-defined parameter groups, 158 transmission, 277 – Automatic network connection using DHCP server, – Configuring ASTM protocol settings, 272 Database – Configuring POCT1-A protocol settings, 274 –...
- Page 351 123 POC system Index Glossary, 343 Mandatory inputs, 170 Manual QC measurements, 185 Measurement, 137 – Acid base map, 176 – Capillary measurements, 165 Holding points, 87 – Configuring measurement input values, 154 – Configuring the measurement results screen, 156 –...
- Page 352 Index cobas b 123 POC system Perfomance data – Measurement parameters, 55 Performance data, 55 QC database, 192 – Comparison of micro samples to normal samples, 78 QC results and reports, 191 – Correlation to other methods, 74 – QC values tab, 191 –...
- Page 353 123 POC system Index – Mechanical safety, 21 – Logging on and off, 260 – Operating conditions, 19 – Software update, 284 – Operator qualification, 18 Software licenses, 341 – Reagents and working solutions, 22 Software tab – Safe and proper use of the system, 18 –...
- Page 354 Index cobas b 123 POC system – Sample types, 30 System stops, 316 Troubleshooting, 311 – Alarm area and buttons, 314 – Barcode scanner, 328 – Calibration troubleshooting for parameters, 324 – Checking Fluid Pack valve positions, 327 – Creating log files, 329 –...
Need help?
Do you have a question about the cobas b 123 and is the answer not in the manual?
Questions and answers