FIOR & GENTZ NEURO HiTRONIC Maintenance Manual
Hide thumbs
Also See for NEURO HiTRONIC:
- Instructions for use for patients (33 pages) ,
- Manual (46 pages) ,
- Instructions for use manual (48 pages)
Advertisement
Quick Links
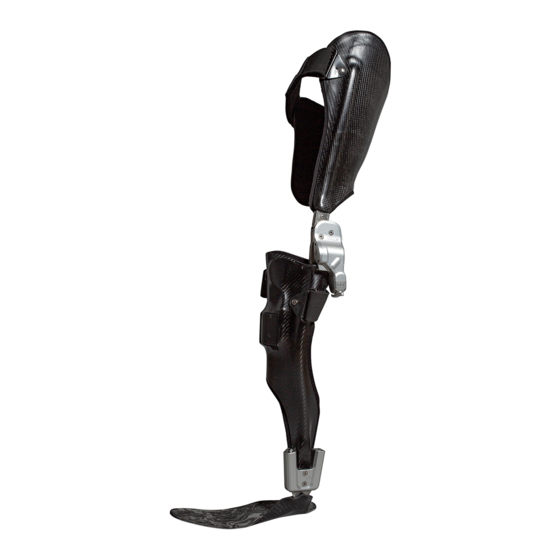
Maintenance NEURO HiTRONIC
This online tutorial shows the maintenance of our hydraulic system knee joint:
NEURO HiTRONIC
The system components must be checked for wear and functionality every six months. Here, we give
you a detailed overview of the work steps to be taken at every maintenance. You will find further
information on the system knee joint in the
instructions for
use.
Furthermore, you can find the online tutorial
Joint Assembly NEURO HiTRONIC
under the "Producing the
Orthosis" area. If you want to reorder system components, you can find those in the
maintenance plan
as well as a guide for the documentation of the maintenance.
28.12.2022
1/45
NEURO HiTRONC
Advertisement

Related Manuals for FIOR & GENTZ NEURO HiTRONIC


Summary of Contents for FIOR & GENTZ NEURO HiTRONIC
- Page 1 Furthermore, you can find the online tutorial Joint Assembly NEURO HiTRONIC under the “Producing the Orthosis” area. If you want to reorder system components, you can find those in the maintenance plan as well as a guide for the documentation of the maintenance.
- Page 2 Maintenance NEURO HiTRONIC 28.12.2022 2/45 NEURO HiTRONC...
- Page 3 Fase 1/22 You can find information on system components that have to be checked particularly carefully during maintenance in the instructions for use under “Maintenance”. 28.12.2022 3/45 NEURO HiTRONC...
- Page 4 Fase 2/22 Check if the system joint moves without lateral play. If there is play, tighten the screws again and/or replace worn sliding washers. 28.12.2022 4/45 NEURO HiTRONC...
- Page 5 Fase 3/22 Check if there is play around the axis. If there is play, replace the bearing nut and the sliding bushing or put them in. 28.12.2022 5/45 NEURO HiTRONC...
- Page 6 Fase 4/22 Check if the system joint moves freely. Hold the orthosis horizontally in front of you. The tip of the foot points away from you. Pull the thigh shell towards you to bring the orthosis into flexion. Then, release the thigh shell.
- Page 7 Fase 5/22 Disassemble the system joint completely. Remove the cover plate. Remove the screws of the functional unit. 28.12.2022 7/45 NEURO HiTRONC...
- Page 8 Fase 6/22 Demount the cable cover and loosen the plug connection. 28.12.2022 8/45 NEURO HiTRONC...
- Page 9 Fase 7/22 Demount the functional unit. Turn a screw in the middle bore in order to raise the functional unit, until it can carefully be taken off. 28.12.2022 9/45 NEURO HiTRONC...
- Page 10 Fase 8/22 Clean all parts and thoroughly test them for wear. 28.12.2022 10/45 NEURO HiTRONC...
- Page 11 Fase 9/22 Check the stop dampers for wear. They should still be round and slightly exceed the stop. Also check the stop itself for wear. Replace worn parts. 28.12.2022 11/45 NEURO HiTRONC...
- Page 12 Fase 10/22 Check the roll unit for damages and wear. Exchange it, if necessary. 28.12.2022 12/45 NEURO HiTRONC...
- Page 13 Fase 11/22 Remove the air filter and check it for soiling. Clean the air filter or replace it, if necessary. 28.12.2022 13/45 NEURO HiTRONC...
- Page 14 Fase 12/22 Remove the guide piece and check it for soiling and wear. Clean the guide piece or replace it, if necessary. 28.12.2022 14/45 NEURO HiTRONC...
- Page 15 Fase 13/22 Check the cover plate for wear. Replace worn screws, sliding washers and bearing nuts. Clean all parts. Check the flexion stop disc and sliding bushing for wear and replace them, if necessary. 28.12.2022 15/45 NEURO HiTRONC...
- Page 16 Fase 14/22 Check the system anchors for play in the laminate. Clamp the joint's lower or upper part into a vice with plain jaws. Try to move the laminate against the system joint. In case of a loosening, there often also arise noises alongside motions.
- Page 17 Fase 15/22 Check all cables, plugs and connections. If necessary, connect the cables anew and replace brittle or damaged cables and plugs. 28.12.2022 17/45 NEURO HiTRONC...
- Page 18 Fase 16/22 Connect the Expert app to the controller. Check the battery health and if the software is up-to-date. Replace the controller in case of a bad battery health and update the software, if applicable. 28.12.2022 18/45 NEURO HiTRONC...
- Page 19 Fase 17/22 The User app updates automatically if it has not been turned off manually. If need be, ascertain if the app is up-to-date. 28.12.2022 19/45 NEURO HiTRONC...
- Page 20 Fase 18/22 If the software of the remote control needs an update, this is shown under the menu item “Update remote control's software”. Update the software, if necessary. 28.12.2022 20/45 NEURO HiTRONC...
- Page 21 Fase 19/22 Note the online tutorial for the Joint Assembly NEURO HiTRONIC, when you reassemble the system joint. Check for play in ml and ap direction. Adjust the plunger guide ring, if necessary. 28.12.2022 21/45 NEURO HiTRONC...
- Page 22 Fase 20/22 Check the functional unit. Set the Free mode using the remote control/app and try to flex the system joint. This should be possible. 28.12.2022 22/45 NEURO HiTRONC...
- Page 23 Fase 21/22 Set the Lock mode using the remote control/app and try to flex the system joint again. This should not be possible. 28.12.2022 23/45 NEURO HiTRONC...
- Page 24 Fase 22/22 Set the rotary switch to the rightmost symbol (the opened lock). The orthosis is now permanently unlocked. Make sure that you can see the plunger during this test. Bend the system joint to 90° and quickly bring it into full extension. While doing so, the plunger must not lose contact to the flexion stop disc.
- Page 25 28.12.2022 25/45 NEURO HiTRONC...
- Page 26 28.12.2022 26/45 NEURO HiTRONC...
- Page 27 28.12.2022 27/45 NEURO HiTRONC...
- Page 28 28.12.2022 28/45 NEURO HiTRONC...
- Page 29 28.12.2022 29/45 NEURO HiTRONC...
- Page 30 28.12.2022 30/45 NEURO HiTRONC...
- Page 31 28.12.2022 31/45 NEURO HiTRONC...
- Page 32 28.12.2022 32/45 NEURO HiTRONC...
- Page 33 28.12.2022 33/45 NEURO HiTRONC...
- Page 34 28.12.2022 34/45 NEURO HiTRONC...
- Page 35 28.12.2022 35/45 NEURO HiTRONC...
- Page 36 28.12.2022 36/45 NEURO HiTRONC...
- Page 37 28.12.2022 37/45 NEURO HiTRONC...
- Page 38 28.12.2022 38/45 NEURO HiTRONC...
- Page 39 28.12.2022 39/45 NEURO HiTRONC...
- Page 40 28.12.2022 40/45 NEURO HiTRONC...
- Page 41 28.12.2022 41/45 NEURO HiTRONC...
- Page 42 28.12.2022 42/45 NEURO HiTRONC...
- Page 43 28.12.2022 43/45 NEURO HiTRONC...
- Page 44 28.12.2022 44/45 NEURO HiTRONC...
- Page 45 Last Update: 28 December 2022 28.12.2022 45/45 NEURO HiTRONC...
Need help?
Do you have a question about the NEURO HiTRONIC and is the answer not in the manual?
Questions and answers