Vimar BY-ALARM PLUS Quick Start Manual
Hide thumbs
Also See for BY-ALARM PLUS:
- Installer manual (60 pages) ,
- User manual (45 pages) ,
- Manual (11 pages)
Table of Contents
Advertisement
Quick Links
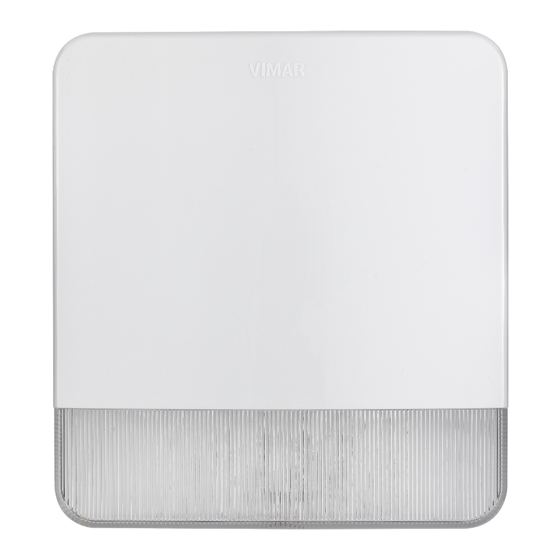
BY-ALARM PLUS
03827
By-alarm self-powered outdoor siren, can be connected to any burglar alarm
system control unit, 2 piezoelectric speakers, LED alarm signalling, 13.8 Vdc
power supply, surface mounting. Buffer battery not included. Spirit level for
easy installation, system status LED, anti-tamper protection, anti-removal and
anti-foam, 4 programmable sounds, 2 programmable timers.
The siren is self-powered and managed by a microprocessor that can continuously monitor all
device parameters. It has a volt-free changeover relay specifically for signalling tampering when
integrated with other systems, and a fault output for remote monitoring of fault conditions. The
activation method can be set freely (e.g. 2-wire, 3-wire, etc.) as can the signalling method. The
siren is pre-configured with default factory settings, which can be changed using the internal
push buttons.
CONNECTIONS
2-wire connection
This is the classic connection method in which the alarm signal is active when there is no power
supply positive (see the figure CONNECTIONS - 2-wire connection).
3- or 4-wire connection
DL7
This connection method offers greater flexibility to activate/deactivate the siren and a second
siren (the figure CONNECTIONS - 3- or 4-wire connection). In this case, the parameters are
programmed using the By-alarm Plus Manager software.
Activation: this can be done by either disconnecting the power supply + or using the START
input (which is driven by the control unit).
Deactivation: this can be done by either reconnecting the power supply + or using the STOP
input (which is driven by the control unit).
Both the START and STOP terminals can be programmed as described in the PROGRAMMING
paragraph.
Any alarm can be stopped with the "STOP" input. The STOP input stops alarm signalling as long
as it is kept active; for example, if the input is deactivated, the siren will sound again if the cause
of activation is still present.
The figure also shows how to simultaneously activate both the external siren and an optional
internal siren using the volt-free changeover contacts COM-NC-NO of the control unit relay;
switching the relay disconnects the + from the external siren and simultaneously connects it to
the internal siren.
Other connections
If you want to take the tamper signal to the control unit, connect terminals "7" and "8" on the
siren directly to a terminal on the control unit. The contact connected to terminals "7" and "8"
opens in the event of tampering.
SIREN BATTERY (NOT INCLUDED)
This powers the siren in the event of tampering and/or no mains voltage on the line connecting
to the rest of the system. It must always be present since, in the event of an alarm, it supplies
the energy necessary to develop the required sound power and to supply the flashing light. The
12 V power supply keeps it charged.
N.B. Always observe the polarity during installation (red = positive, black = negative).
If the battery is flat and its voltage is lower than 10.5 V, the siren stops sounding, while the light
indicators remains on.
INSTALLATION
1. Choose a suitable location to install the device. Position the siren on a flat surface, in a
place that is hard to access but clearly visible so that it acts as a deterrent against attempted
break-ins.
2. Cut off the power supply to the electrical system.
3. Remove the cover.
4. Route the cables through the cable outlet holes.
5. If you want to activate the anti-removal protection, insert the screw into the corresponding
hole; take care to position the microswitch lower than the screw.
6. Insert the buffer battery into its housing and wire it with the correct polarity.
7. Wire the siren.
8. Check whether the default settings are what you want, and make any necessary changes
(refer to the PROGRAMMING chapter). Power up the siren; red LED DL7 will remain on
during this step.
9. Close the cover, taking care to centre the holes, and tighten the screws provided. The
anti-tamper microswitch will close and LED DL7 (red) will flash every 2 s for 20 s; when the
flashing stops, the siren is ready and operational.
49401879A0 01 2212
PROGRAMMING
The siren is programmed using the push buttons and LEDs on the electronic board.
ES01
R4
R5
The programming menus can be recognised by a combination of LED flashes (from 3 to 6), and
push buttons P1 and P2 are used to navigate within the menus.
Programming is only done after initial power-up, so make sure that:
• the siren is not powered, i.e. the battery and power supply are disconnected;
• the anti-tamper switch is open;
• the control unit is in a state that allows tampering with the siren without triggering an alarm (e.g.
control unit in the programming state).
1. Open the cover.
2. Power up the siren; the red LED will remain on.
3. Press push button P1 and hold it down for 3 s; the LEDs will flash to indicate that programming
is active. Release the push button; the combination of LEDs on indicates the current menu (as
specified in the table below).
4. To scroll through the menus to the one you want, press push button P1 until you see the
corresponding LED combination.
5. To enter the current configuration in the selected menu, press push button P2 and release
it. You will then be in the menu, and each press of push button P2 will change the selected
configuration, which is shown by the flashing LEDs.
6. To exit from the current menu and return to the menu selection, press push button P1 and
release it.
7. To exit from programming mode and save the settings, press push button P1 and hold it down
for 3 s until the LEDs flash. To exit from programming mode without saving the changes made,
press push button P2 and hold it down for 3 s until the programming LEDs flash, or wait for
the 30 s timeout without pressing any push buttons.
8. Close the cover and complete the installation.
Below is a list of all programming menus and the corresponding combination of LEDs 3, 4, 5
and 6. The "Options" column contains the programmable settings for each menu (the options
enabled by default are identified with a grey background).
Menu
LED
3 4 5 6 3 4 5 6 3 4 5 6 3 4 5 6
combination
No.
Item
3 4 5 6
1
START input
STOP
2
input
Sound signal-
3
ling
Maximum
4
sound duration
Activate
5
START input
No
6
power supply
Tamper/removal
signal,
7
anti-foam,
thermal attack
Courtesy
light on
8
LED line tran-
sition
9
Reset to default
= LED on continuously
= LED flashing
ES02
R6
R7
R8
R9
E
Options
Negative
Positive
Negative
rising edge
rising edge
falling edge
Negative
Positive
Negative
rising edge
rising edge
falling edge
Sound 1
Sound 2
Sound 3
3 minutes
6 minutes
9 minutes
Flashing
LED DL7
LED DL8
light
FAULT
TAMPER
Flashing
output
output
light
FAULT
TAMPER
Flashing
output
output
light
Activate
combina-
Activate
tion of
Activate only
LED DL8
LED DL8
Flashing
only
and
light for 10 s
Flashing
light for 10 s
Default
= LED off
Viale Vicenza 14
36063 Marostica VI - Italy
www.vimar.com
Positive
falling edge
Positive
falling edge
Sound 4
12 minutes
Siren
Siren
Siren
/
Advertisement
Table of Contents

Related Manuals for Vimar BY-ALARM PLUS


Summary of Contents for Vimar BY-ALARM PLUS
- Page 1 (the figure CONNECTIONS - 3- or 4-wire connection). In this case, the parameters are 1. Open the cover. programmed using the By-alarm Plus Manager software. 2. Power up the siren; the red LED will remain on. Activation: this can be done by either disconnecting the power supply + or using the START 3.
- Page 2 • Anti-tamper device or recycling materials used in manufacture. • Anti-removal device • Plastic enclosure • Battery monitoring and charging based on the ambient temperature Viale Vicenza 14 36063 Marostica VI - Italy www.vimar.com 49401879A0 01 2212...
- Page 3 03827 TAMPER LED FAULT START STOP 3- or 4-wire connection CONTROL UNIT 03800-03801-03802 INTERNAL SIREN 30526-20496-19496-14496 + – T INT SET TAMPER LED FAULT START STOP SIREN 03827 Viale Vicenza 14 36063 Marostica VI - Italy www.vimar.com 49401879A0 01 2212...
- Page 4 INSTALLATION 1 2 V WARNING: Dispose of batteries in the specific separate collection bins. Viale Vicenza 14 36063 Marostica VI - Italy www.vimar.com 49401879A0 01 2212...
Need help?
Do you have a question about the BY-ALARM PLUS and is the answer not in the manual?
Questions and answers