Table of Contents
Advertisement
Available languages
Available languages
* Suitable for ages 3-8 years.
* Maximum load: 50kg.
!
WARNING: This product must be
assembled by an adult. When unassembled, there
are small and sharp parts, which could be choked on
if swallowed. Keep out the reach of small children.
Warning: Do not use in traffic.
IMPORTANT, RETAIN FOR FUTURE REFERENCE: READ CAREFULLY
ASSEMBLY INSTRUCTION
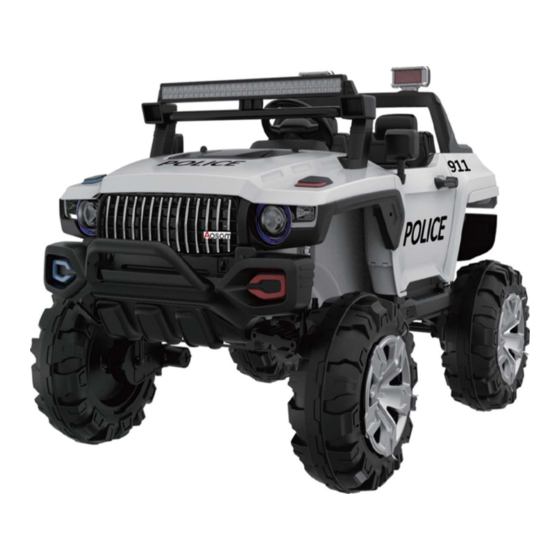
Ride-on Two Seat Truck
1
INfab056V03_US_CA
Assembly video please scan the QR code.
Vidéo d'assemblage, veuillez scanner le code QR.
EN
370-082
Advertisement
Table of Contents

Subscribe to Our Youtube Channel
Related Manuals for Aosom 370-082


Summary of Contents for Aosom 370-082
- Page 1 INfab056V03_US_CA 370-082 Ride-on Two Seat Truck * Suitable for ages 3-8 years. Assembly video please scan the QR code. Vidéo d'assemblage, veuillez scanner le code QR. * Maximum load: 50kg. WARNING: This product must be assembled by an adult. When unassembled, there are small and sharp parts, which could be choked on if swallowed.
- Page 2 Car body Windshield Steering wheel Front axle assembly Spotlight bracket Rear axle Rear collision rod Front bumper rod Rearview mirror Wheel cover Spotlight Seat fixtures Rear wheel Front wheel Seat baffle Tailstock lid Chair Seat back 4(spare) 1(spare) Charger Shim Opening pin 4(spare) Screw...
- Page 3 Product Specifications: Name Parameters 12V 7AH Battery Drive Motor 12V 550 (10000RPM) Generator Steering Motor 12V 390 (6600RPM) 37-95 Months Applicable Age Range Maximum load 50KG 135x86x85CM Physical Dimension 3-5 km/h Speed Using 1-2 hours after Charging 8-10hours Hours of Use Input: 100V-240V, Output: 12V1000M Charging Remote Control Battery...
- Page 4 Function indication ①USB interface ⑥Dashboard ②TF interface ⑦Forward Stop Back ③Mp3 interface ⑧Power switch ④The voltage display ⑨light switch ⑤Multi-Media Remote control Function and instructions 2.4G Remote Control Instructions 1) The remote control takes two AAA batteries 2) Turn off the Power switch on the vehicle 3) Hold Down '▲...
-
Page 5: Front Axle Assembly
Battery Operating Specifications: ● Never mix new and old batteries, or different kinds of batteries. ● Never mistake positive and negative electrode of battery, or short circuit will happen. ● Non-rechargeable batteries are not to be recharged. ● Install batteries in a right polarity. ●... - Page 6 3. Installation of front and rear wheels ● Identify the front and rear wheels, rear wheels will have a fitting shape corresponding to the shape of the motor hub Successively insert washer, front wheel, and washer into the front axle, fix with cotter pin and install wheel cover. ●...
- Page 7 5. Installation of steering wheel ● Connect the wing of the steering wheel by inserting the steering wheel into the direction control rod, and affix with the screws through the holes with nuts. ⑤ 6. Installation of seat assemblies ● Insert the seat baffle (Part O), tail box cover and seat cushion into the corresponding slots, separate the seat back, insert the backrest bar, secure with screws.
- Page 8 7.External components after installation ● First, insert two seat fasteners into the car body, and then insert the spotlight bracket into the slot on the car body, and install the spotlight onto the top of the lamp bracket: Clip the rear bumper into the rear of the car. WARNING The toy is to be assembled by an adult.
-
Page 9: Charging Notice
Children can use the product only in the company of adults, and the adult cannot leave during the process. Never let Children stand or play onto the pedal or in the car. Only adults can complete storage battery charging, and must charge the product before its first use. -
Page 10: Trouble Clearing
Charging steps are as follows: Step 1: The charging hole is under the steering wheel. Step 2: Put the charger plug into the plug hole. Step 3: Connect the charger to the power socket. Warning: Car must be charged by adults only. Car is useless during charging. Trouble Clearing Type Analysis... -
Page 11: Maintenance And Service
Maintenance and Service Before use children’s parents should check whether charge' s wiring, plug, shell and other parts are damaged, and fix those damaged parts. After using the product for a time, parents should lubricate iron castings with lube, or those castings will get rusted; they should keep the product out of fire and lay it flat in dark places;... -
Page 12: Instructions De Montage
370-082 Voiture électrique deux places * Recommandé pour les enfants de 3 à 8 ans. * Charge maximale : 50kg. AVERTISSEMENT : Ce produit doit être assemblé par un adulte. À l'état non assemblé, il présente des pièces de petite taille et tranchantes, qui risquent de provoquer un étouffement en... - Page 13 LES PIÈCES Pare-vent Volant Carrosserie Ensemble Essieu avant Support de projecteur Essieu arrière Barre Pare-choc arrière Barre Pare-choc avant Rétroviseur Enjoliveur Projecteur Roue arrière Roue arrière Roue avant Déflecteur de siège Couvercle du coffre arrière Siège Dossier 4(spare) 1(spare) Chargeur Cale Goupille d'ouverture...
- Page 14 Projecteur Siège Volant Support Projecteur Couvercle du coffre arrière Fixations des sièges Barre Pare-choc arrière Pare-vent Rétroviseur Roue arrière Cale Goupille d'arrêt Enjoliveur Pare-choc Enjoliveur avant Cale Goupille d'arrêt Cale Roue avant Spécifications du Produit: Paramètres Désignation 12V 7AH Batterie Générateur Moteur d'Entraînement 12V 550 (10000RPM) Moteur de Direction 12V 390 (6600RPM)
- Page 15 Fonction Indication des Fonctions Interface USB Tableau de bord Interface TF Avancer Arrêt Reculer Interface MP3 Interrupteur Indicateur de tension d'alimentation Multi-Media Interrupteur d'éclairage Fonction et Instructions de la Télécommande Instructions de la Télécommande 2,4G 1) La télécommande prend nécessite deux piles AAA.
- Page 16 Spécifications relatives au Fonctionnement de la Batterie: ● Ne jamais mélange des piles neuves avec des anciennes, ou des piles de différents types. ● Ne jamais confond re les polarités po sitive et négative de la batterie, sinon un court-circuit se produira. ●...
- Page 17 3. Installation des roues avant et arrière ● Différencier les roues avant des roues arrières es roues arrière auront une forme ajustée correspondant à la forme du moyeu du moteur Insére successivement rondelle, la roue avant et rondelle dans l'essieu avant, fixe avec une goupille fendue et installe l'enjoliveur de roue.
- Page 18 5. Installation du volant ● Connecter l'aile du volant en insérant le volant dans la tige de commande de direction, et le fixer avec les vis et des écrous à travers les trous. ⑤ 6. Installation des ensembles de siège ●...
- Page 19 Dossier du siège Couvercle du coffre arrière Siège Déflecteur de siège 7.Composants externes après l'installation ●Tout d'abord, insérez deux attaches de siège dans la carrosserie de la voiture, puis insérez le support du projecteur dans la fente de la carrosserie de la voiture et installez le projecteur sur le dessus du support de la lampe.
- Page 20 Les enfants doivent être attachés avec leur ceinture de sécurité lorsqu'ils utilisent la voiture et celle-ci doit rester hors de portée des flammes. Les enfants ne peuvent utiliser le produit qu'en compagnie d'adultes, et ces derniers ne peuvent pas s'absenter pendant l'utilisation. Ne jamais laisser les enfants se tenir debout ou jouer sur la pédale ou dans la voiture.
-
Page 21: Dépannage
Les étapes de chargement sont les suivantes : Étape 1 : Le port de charge se trouve sous le volant. Étape 2 : Insérer la fiche du chargeur dans l'orifice de chargement. Étape 3 : Brancher le chargeur à la prise de courant. Avertissement : La voiture ne doit être chargée que par des adultes. -
Page 22: Entretien Et Service
Entretien et Service Avant d'utiliser le produit, les parents doivent vérifier si le câblage, la prise, la coque et les autres pièces de la charge ne sont pas endommagés, et réparer les pièces endommagées. Après avoir utilisé le produit pendant un certain temps, les parents doivent lubrifier les pièces en fonte avec de la graisse, sinon ces pièces vont rouiller ;...
Need help?
Do you have a question about the 370-082 and is the answer not in the manual?
Questions and answers