
Subscribe to Our Youtube Channel
Related Manuals for Aosom 370-149V80


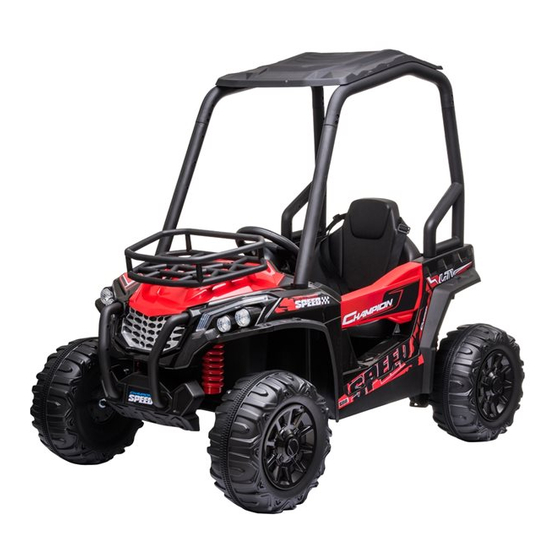
Summary of Contents for Aosom 370-149V80
- Page 1 INfda005_US_CA 370-149V80 READ AND SAVE THIS INSTRUCTION FOR FUTURE USE ASSEMBLY INSTRUCTION...
-
Page 2: User Notice
User Notice │ 1 SPECIFICATIONS: Battery: 12V10AH *1 Motor: 2*555(120W) Suitable ages: 37-96 months Maximum weight: 30KG Speed : 3-6KM/h Power way: Charging type Charg: 8-12 hours ; Use: 2 hours Use of time: Input AC 110 V~240, output DC12V 1000 Charger: WARNING... - Page 3 STORAGE BATTERY INFORMATION AND MAINTENANCE ●Please charge 8 to 12 hours before first time use. ●Please use the suitable adapter to charge storage battery, otherwise the ride-on will be damaged. ●Please charge the car once the speed is slower than normal, otherwise it will decrease storage battery life.
- Page 4 PREVENT FIRE AND ELECTRIC SHOCK: - Use the only rechargeable battery and charger supplied with your vehicle. -NEVER substitute the battery or the charger with another brand. Using another battery or charger may cause a fire or explosion. -Do not use the battery or charger for any other product. Overheating, fire or explosion could occur.
- Page 5 ●Recharge the battery after each use. Only an adult can handle the battery. Recharge the battery at least once a month when the vehicle Raider is not being used. ●Do not wash the vehicle with a hose. Do not wash the vehicle with soap and water.
- Page 6 Parts Diagram │ 2 HINT: Some parts shown are assembled on both sides of vehicle Roof...
-
Page 7: Parts List
Parts List │ 3 Q’ty (pcs) PART PART NAME REMARKS Vehicle body Rear wheel Front wheel Ø12 washer Lock nut Split pin Hubcap Steering column Steering wheel M5x35 machine screw Ø5 nut Front bumper Left and right Ø4x12 flat head screw Bakset base Bakset fence Shift lever assembly... - Page 8 Attach the Front Bumpers & Tailight Cover │ 4 Assembly tools required (not included): Long nose pliers Screwdriver 1. Insert the tabs on the front bumper into the holes on the front of the vehicle, push until you hear it “click” into place. 2.
- Page 9 Basic type - Attach the Steering Column │ 5 HINT: The follow steps only for the basic type. Front Bottom View Turn the vehicle body downside up. 1. Slide a Ø12 washer onto the steering column from the straight end. 2.
- Page 10 Type /RC - Attach the Steering Column │ 6 HINT: The follow steps only for the type R/C. Front Bottom View Turn the vehicle body downside up. 1. Insert the straight end of the steering column through the hole on the steering gear box, the hole on the vehicle body, and out through hole on the dash.
- Page 11 Reset the Front axle │ 7 Front Bottom View Split pin M6X20 machine Ø12 washer screw Steering column Front axle linkage Ø6 washer Front axle Front axle Ø6 lock nut plate plate Cut off the plastic tie on the front axle with scissors. 1,2.
-
Page 12: Attach The Rear Wheels
Attach the Rear Wheels │ 8 Hole on the gear box Rear Bottom View Cut off the plastic ties on the gear boxes. Remove all the parts from the rear axle. 1. Insert the rear axle through the hole in the vehicl body, when inserting it half way, lift the another gear box so that the rear axle can go through it and protrude out. -
Page 13: Attach The Front Wheels
Attach the Front Wheels │ 9 Front Bottom View Remove all the parts from the front axle. 1. Slide a Ø12 washer onto the front axle. 2. Slide a front wheel onto the front alxe. 3. Slide a Ø12 washer onto the front axle. 4. -
Page 14: Attach The Steering Wheel
Attach the Steering Wheel │ 10 HINT: If the steering wheel of your vehicle equipped with the sound function, please follow the steps 1-4 to add the batteries (Not Included), and refer to the battery information on page 2. 1. With a screwdriver remove the screw on the battery cover located in the center of the steering wheel. - Page 15 Attach the Shift Level Assembly & Protecting Board │ 11 1. Lift up the shift lever assembly and remove the four Ø4x12 round head screws with a screwdriver. 2. Push the Shift Lever Assembly forward and locate it over the 4 screws mounting brackets as shown.
- Page 16 Connect the Power Supply & Attach the Rear Bed Board │ 12 1. Plug the battery connector into the vechiel connector, push firmly. 2. Fit the tabs on the rear bed board into the slots located in the rear vehicle body, and press down until it “clicks”...
- Page 17 Attach the Seat & Attach the Basket │ 13 1. Fit the seat back to the seat. 2. Insert two Ø4x12 flat head screws from the the bottom side of the seat, through the seat and into the seat back, and tighten. 3.
- Page 18 Attach the Roof(1) │ 14 HINT: The follow steps only for the type with roof. “R” marked “L” marked “R” marked “L” marked HINT: The roof, roof beams, roof front supports and roof rear supports are marked “L” and “R”, aslo they are designed to assemble together in only one way.
- Page 19 Attach the Roof(2) │ 15 HINT: The follow steps only for the type with roof. 1. Fit the roof assembly to the vehicle body. 2. Insert a Ø4x12 flat head screw through the roof front support and into the bonnet, and tighten with a screwdriver.
- Page 20 Use Your Ride-on │ 16 1. Power button: Turns the vehicle on and off. 2. Low speed forward/reverse shifter: Changes the direction that vehicle moves from forward to reverse. ● To move the vehicle forward, shift the lever to top position. ●...
- Page 21 Using the High Speed │ 17 IMPORTANT ● The High Speed Protective cover must be removed by an adult. ● Before remove the HIGH SPEED protective cover: Make sure your child knows how to steer, how to start and stop the product and knows the rules for safe driving.
- Page 22 Charging │ 18 WARNING! • ONLY an adult is allowed charge and recharge the battery! • This product with Charging Protection: when charging, all functions will be cut off. • The POWER SWITCH must be turned in OFF position when charging. •...
-
Page 23: Troubleshooting Guide
Troubleshooting Guide │ 19 Possible Cause Solution Problem Vehicle does not run Battery low on power Recharge battery. Thermal fuse has tripped Reset fuse, see <Fuse> Check that the battery connectors are firmly plugged Battery connector or wires into each other. If wires are loose around the motor are loose contact your distributor please.
Need help?
Do you have a question about the 370-149V80 and is the answer not in the manual?
Questions and answers
I live in Australia 370-149v80 Can I still buy a remote controller Can I still buy replacement battery - where is battery located in the car Can I still buy a charger