Table of Contents
Advertisement
Available languages
Available languages
Quick Links
37-60
months
WARNING: The toy is to be assembled by an
adult.
In unassembled state contain potentially hazardous
sharp points, sharp edges and small part, so please
keep out of baby's reach.
Warning: Not to be used in traffic.
IMPORTANT, RETAIN FOR FUTURE REFERENCE: READ CAREFULLY
ASSEMBLY INSTRUCTION
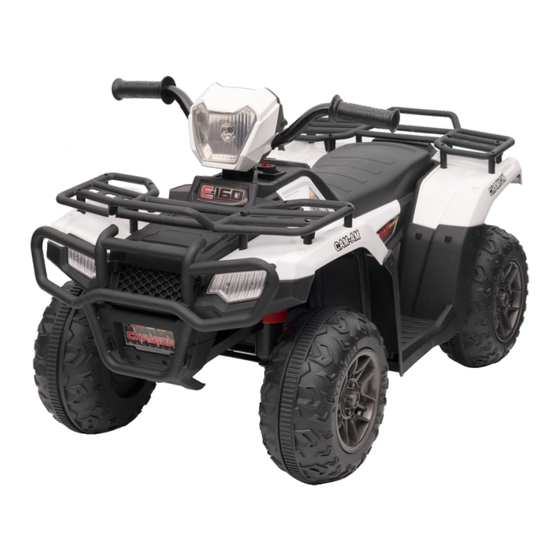
Electric Ride-on Car
IN221000614V02_US_CA
●Music
●Volume adjustment
●Forward and backward
●High and low speed
1
370-260V80
EN
Advertisement
Table of Contents

Subscribe to Our Youtube Channel
Summary of Contents for Aosom 370-260V80
- Page 1 IN221000614V02_US_CA 370-260V80 37-60 months Electric Ride-on Car WARNING: The toy is to be assembled by an ●Music adult. ●Volume adjustment In unassembled state contain potentially hazardous sharp points, sharp edges and small part, so please ●Forward and backward keep out of baby’s reach.
- Page 2 Car body Wheel Wheel cover Rear basket Handlebar Buffer beam Washer M8 nut M8 spanner Screw Charger Guide book...
- Page 3 Product Specifications: Battery: 12V 4.5AH Drive Motor: 12V390#*2(15000RPM) Suitable age: 37-60months Maximum weight: 25kg Speed: 2-4km/h Hours of Use: Using 50 minutes after Charging 8-12 hours Charger: Input: AC100V-240V,50/60HZ,0.2A Output: DC 12V,0.5A ③ ① ② ⑧ ④ ⑤ ⑥ ⑦ Button function High and low speed Music switch/Volume +...
-
Page 4: Handlebar Assembly
1. Wheel and wheel cover assembly Add 1pcs washer, 1pcs wheel and 1pcs washer step by step to the front axle, then use spanner to tighten the nut. At last, insert 1pcs wheel cover into the wheel. Add 1pcs wheel and1pcs washer step and step to the rear axle, then use spanner to tighten the nut. - Page 5 3. Buffer beam assembly Insert the buffer beam into the hole on the front bumper. 4. Rear basket assembly Insert the rear basket into the reserved holes on the car, then use 8pcs screws to tighten. 5. Connect the battery line Open the seat, connect two red connectors like picture, then use screwdriver to lock the seat.
- Page 6 WARNINGS - This product must be assembled by an adult. - When unassembled, this product contains small and sharp parts – keep out the reach of small children. - Do not use in traffic. - This product is not to be used by children under three years of age. - The seatbelt must be worn when using this product.
-
Page 7: Charging Steps
Charging steps: Step 1: The charging hole is under the handlebar to the right. Step 2: Insert the plug into the hole. Step 3: Connect the charger to the power socket. Warning: Car must be charged by adults only. Car is useless during charging. Troubleshooting Problem Cause... -
Page 8: Maintenance
fixed by a professional or under the guidance of a professional. If you have any questions, please contact our customer care center. Our contact details are below: 001-877-644-9366 customerservice@aosom.com Imported by Aosom LLC 27150 SW Kinsman Rd Wilsonville, OR 97070 USA MADE IN CHINA... -
Page 9: Instructions D'assemblage
IN221000614V02_US_CA 370-260V80 37-60 mois Voiture -jouet Électrique AVERTISSEMENT : Le jouet doit être ● Musique assemblé par un adulte. À l'état non assemblé, il ● Réglage du volume contient des pointes et des bords tranchants ● Avant et arrière potentiellement dangereux, ainsi que de petites ●... - Page 10 Roue Enjoliveur Carrosserie de roue Panier arrière Guidon Poutre tampon Clé Rondelle Écrou Chargeur Manuel...
- Page 11 Spécifications du produit : Batterie : 12V 4.5AH Moteur d'entraînement : 12V390#*2(15000RPM) Âge approprié : 37-60mois Poids maximum : 25kg Vitesse : 2 à 4 km/h Heures d'utilisation : Utilisation 50 minutes après la charge 8 à 12 heures Entrée: AC100V-240V,50/60HZ,0.2A Chargeur : Sortie: DC 12V,0.5A Fonction...
- Page 12 1. Fixation des Roues et de l'enjoliveur de roue Mettez 1 rondelle, 1 roue et 1 rondelle à l'axe avant, puis serrez l'écrou à l'aide d'une clé. Enfin, insérez 1 enjoliveur de roue dans la roue. Mettez 1 roue et 1 rondelle étape par étape à...
- Page 13 3. Fixation de la poutre tampon Insérez la poutre tampon dans le trou du pare-chocs avant. 4. Fixation du panier arrière Insérez le panier arrière dans les trous réservés sur la voiture, puis serrez -le avec 8 vis. 5. Connexion du fil de batterie Ouvrez le siège, connectez deux connecteurs rouges comme une image, puis verrouillez le siège à...
- Page 14 AVERTISSEMENT - Ce produit doit être assemblé par un adulte. - Lorsque ce produit n'est pas monté, il contient des pièces petites et tranchantes – gardez-les hors de portée des jeunes enfants. - Ne pas utiliser dans la circulation. - Ce produit ne doit pas être utilisé par les enfants de moins de trois ans. - La ceinture de sécurité...
-
Page 15: Dépannage
Étapes de charge : Étape 1 : Le trou de charge se trouve sous le guidon à droite. Étape 2: Insérez la fiche dans le port. Étape 3: Connectez le chargeur à la prise de courant. Avertissement : La voiture doit être chargée par des adultes uniquement. La voiture est inutilisable pendant la charge. -
Page 16: Entretien
Si vous avez la moindre question, veuillez contacter notre centre d'assistance à la clientèle. Nos coordonnées sont les suivantes: 416-792-6088 customerservice@aosom.ca Imported by Aosom Canada Inc. 7270 Woodbine Avenue, Unit 307, Markham, Ontario Canada L3R 4B9 MADE IN CHINA Importé par Aosom Canada Inc.


Need help?
Do you have a question about the 370-260V80 and is the answer not in the manual?
Questions and answers