Advertisement
Quick Links
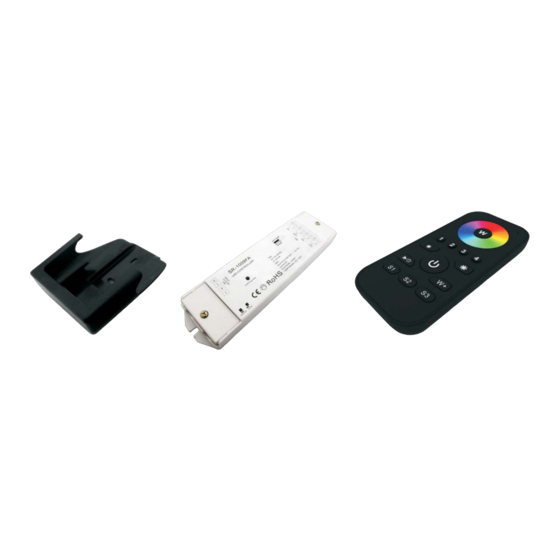
Сенсорный пульт Mini SR-2819 (RGBW 4 зоны)
PRoduct intRoduction
SR-2819S RGBW remote controller has 4 different zones. It can get Red/ Green/ Blue/ White color
directly. The remote controller can save up to 3 colors or 3 modes into corresponding buttons
(S1,S2,S3) for each zone. You can choose any color through color wheel. you can set the system
as RGB 3-channeloutput, or RGBW 4-channel output.
PaRaMeteR
•
Remote
Part no.
operation Voltage
SR-2819S
•
Receiver
Part no.
SR-1007FA
SR-1009EA
SR-1009FA3
SR-1009FA7
PRoduct Size
operation Frequency
3.6VDC
868MHz
iuput Voltage
12-36VDC
12-36VDC
12-36VDC
12-36VDC
dimension ø/h (mm)
55x120x17
current
output
4x5A
4x(60-180)W
4x8A
4x(96-288)W
4x350mA
4x(4.2-12.6)W
4x350mA
4x(8.4-25.2)W
Remarks
load 3pcs 7
AAA (1.5V)
batteries
Remarks
Constant voltage
Constant voltage
Constant current
Constant current
Advertisement

Related Manuals for Arlight Mini SR-2819


Summary of Contents for Arlight Mini SR-2819
- Page 1 Сенсорный пульт Mini SR-2819 (RGBW 4 зоны) PRoduct intRoduction SR-2819S RGBW remote controller has 4 different zones. It can get Red/ Green/ Blue/ White color directly. The remote controller can save up to 3 colors or 3 modes into corresponding buttons (S1,S2,S3) for each zone.
- Page 2 WiRinG diaGRaM • Receiver connection diagram for Single unit • Receiver connection diagram for Multiple units BRieF intRoduction oF ButtonS...
- Page 3 oPeRation 1. Learning (matching) a. Do wiring according to connection diagram b. Wake up the remote control by touching ON/OFF button. c. Press learning button on receiver. d. Touch any zone button on remote control. e. Then touch color wheel. f.
- Page 4 SaFety & WaRninGS 1. The product shall be installed and serviced by a qualified person. 2. IP20.Please avoid the sun and rain. When installed outdoors, please ensure it is mounted in a water proof enclosure. 3. Always be sure to mount this unit in an area with proper ventilation to avoid overheating. 4.
Need help?
Do you have a question about the Mini SR-2819 and is the answer not in the manual?
Questions and answers