Gree U-MATCH Series Service Manual
Hide thumbs
Also See for U-MATCH Series:
- Service manual (149 pages) ,
- Owner's manual (72 pages) ,
- Manual (35 pages)
Table of Contents
Advertisement
Quick Links
Advertisement
Table of Contents

Related Manuals for Gree U-MATCH Series


Summary of Contents for Gree U-MATCH Series
- Page 1 U-MATCH SERIES SERVICE MANUAL T1/R410A/60Hz (GC201603 - І...
-
Page 2: Table Of Contents
CONTENTS PRODUCT INTRODUCTION ....................2 1 MODELS LIST .......................... 2 2 NOMENCLATURE ........................2 3 FUNCTION ..........................3 4 PRODUCT DATA ........................3 4.1 Product Data at Rated Condition ......................3 4.2 Electrical Data ............................4 INSTALLATION ........................6 1 DIMENSION DATA ........................6 2 UNIT INSTALLATION ....................... - Page 3 U-MATCH SERIES SERVICE MANUAL PRODUCT...
-
Page 4: Product Introduction
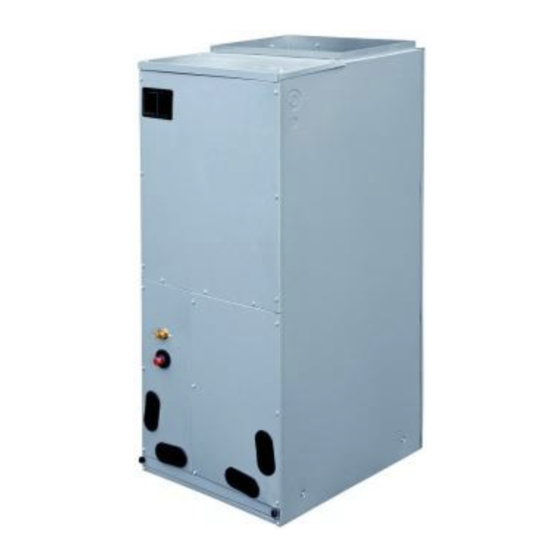
U-MATCH SERIES SERVICE MANUAL PRODUCT INTRODUCTION 1 MODELS LIST Model Nominal Capacity Power Supply Appearance Model name Product Code Refrigerant Btu/h Ph,V, Hz HNF24/A-D EM116N0750 R410A 22000 1, 220/230, 60 HNF36/A-D EM116N0770 R410A 34000 1, 220/230, 60 HNF48/A-D EM116N0790 R410A... -
Page 5: Function
U-MATCH SERIES SERVICE MANUAL 3 FUNCTION Function Description Remote control function The maximum control distance of remote controller is 10 m. Easy installation It can be installed either horizontally or vertically. Wide range of static pressure Static pressure ranges from 0-0.64 inwg. -
Page 6: Electrical Data
U-MATCH SERIES SERVICE MANUAL 4.2 Electrical Data Power Supply Fan Motor Air Switch Model Ph V Hz Qty. Ampere HNF24/A-D 0.62 HNF36/A-D 1.25 1, 220/230, 60 HNF48/A-D HNF60/A-D Notes: RLA: Rated load amperes LRA: Locked rotor amperes FLA: Full load current ①... - Page 7 U-MATCH SERIES SERVICE MANUAL INSTALLATION...
-
Page 8: Installation
U-MATCH SERIES SERVICE MANUAL INSTALLATION 1 DIMENSION DATA Table 1 Dimension of indoor unit Unit: Inch DIMENSION MODEL HNF24/A-D 18-1/8"(460) 21-1/4"(540) 43-1/2"(1105) 11-5/8"(295) 16-3/4"(426) HNF36/A-D 18-1/8"(460) 21-1/4"(540) 43-1/2"(1105) 11-5/8"(295) 16-3/4"(426) 21-1/4"(540) 21-1/4"(540) HNF48/A-D 48-1/4"(1224) 11-5/8"(295) 1/2"(508) 21-1/4"(540) 21-1/4"(540) HNF60/A-D 48-1/4"(1224) 11-5/8"(295) -
Page 9: Piping Work
U-MATCH SERIES SERVICE MANUAL The space around the unit is adequate for ventilation. When installing this air handler, please minimize the length of refrigerant tubing as much as possible. Do not install the air handler in a location either above or below the condenser that violates the instructions provided with the condenser. - Page 10 U-MATCH SERIES SERVICE MANUAL (3) Take the tailpiece from the plastic accessory bag and slide the 13/16 nut into place. (4) Confirm position of the white teflon seal and manually tighten the 13/16 nut. (5) Torque the 13/16 nut to 20-30 ft-lbs.
-
Page 11: Matters Of Attention
U-MATCH SERIES SERVICE MANUAL 3.3 Matters of Attention When connecting the indoor unit with the connecting pipe, do not pull the big and small joints of the indoor unit by force, so as to prevent the capillary of the indoor unit and other pipes from breaking and leaking. -
Page 12: Electric Wiring
U-MATCH SERIES SERVICE MANUAL 4 ELECTRIC WIRING 4.1 POWER CORD & AIR SWITCH Power Supply Minimum Sectional Area of Power Model Capacity of Air Switch (A) (Ph, V, Hz) Cord (AWG) HNF24/A-D HNF36/A-D 1, 220/230,60 HNF48/A-D HNF60/A-D 4.2 WIRING DIAGRAM... -
Page 13: Thermostat Wring
U-MATCH SERIES SERVICE MANUAL Model: HNF48/A-D,HNF60/A-D 4.3 Thermostat Wring... - Page 14 U-MATCH SERIES SERVICE MANUAL MAINTENANCE...
-
Page 15: Maintenance
U-MATCH SERIES SERVICE MANUAL MAINTENANCE 1 FLOW CHART OF TROUBLESHOOTING 1.1 Air flow volume from air outlet of unit is abnormal... -
Page 16: The Unit Can Not Start Up For Cooling
U-MATCH SERIES SERVICE MANUAL 1.2 The unit can not start up for cooling... -
Page 17: Poor Cooling Effect
U-MATCH SERIES SERVICE MANUAL 1.3 Poor cooling effect... -
Page 18: Noise Or Abnormal Vibration Of Unit
U-MATCH SERIES SERVICE MANUAL 1.4 Noise or abnormal vibration of unit... -
Page 19: Disassembly And Assembly Procedure Of Main Parts
U-MATCH SERIES SERVICE MANUAL 2 DISASSEMBLY AND ASSEMBLY PROCEDURE OF MAIN PARTS 2.1 Disassembly and Assembly of the Electric Box Procedures Diagrams Operating Instructions ● Loosen screws around the upper panel with a screwdriver. 1. Remove the upper panel ● Remove the upper panel away from the unit. -
Page 20: Disassembly And Assembly Of The Fan Motor
U-MATCH SERIES SERVICE MANUAL ● Place the electric element at the proper position. ● Tighten the screws around the 4. Mount the new electric electric element with a screwdriver. element. ● Wire the electric element to the wiring terminal. ● Place the electric box at the proper position. -
Page 21: Disassembly And Assembly Of The Evaporator And Drain Pan
U-MATCH SERIES SERVICE MANUAL ● Loosen screws fixing the motor and fan blades. ● Loosen screw bolts fixing the 3. Remove the motor. bracket. ● Remove the motor rightward from the fan. ● Place the motor at the proper position. - Page 22 U-MATCH SERIES SERVICE MANUAL ● Remove the screws from enhanced 3. Remove the enhanced frame. ● Disassemble the enhanced frame frame if applicable. from the unit. ● Loosen screws at both side of the 4. Remove the mounting mounting plate with a screwdriver.
-
Page 23: Disassembly And Assembly Of The Filter
U-MATCH SERIES SERVICE MANUAL ● Remove the evaporator away from 7. Remove the evaporator. the primary drain pan. ● Reassemble the unit as before. 2.4 Disassembly and Assembly of the Filter Procedures Diagrams Operating Instructions ● Loosen screws fixing the mounting plate with a screwdriver. -
Page 24: Explosive Views And Parts List
U-MATCH SERIES SERVICE MANUAL 3 EXPLOSIVE VIEWS AND PARTS LIST Model: HNF24/A-D, HNF36/A-D: Exploded Views... - Page 25 U-MATCH SERIES SERVICE MANUAL Spare Parts List HNF24/A-D HNF36/A-D Description Part Code EM116N0750 Part Code EM116N0770 Product Code Product Code Lower Cover Plate Sub-Assy '01262200008 '01262200008 Lower Cover Plate Sub-Assy '01262200009 '01262200009 Top Cover Board Sub-Assy '01262200007 '01262200007 Insulating Board...
- Page 26 U-MATCH SERIES SERVICE MANUAL HNF48/A-D, HNF60/A-D:...
- Page 27 U-MATCH SERIES SERVICE MANUAL Spare Parts List HNF48/A-D HNF60/A-D Description Part Code EM116N0790 Part Code EM116N0810 Product Code Product Code Insulating Board '75142201 '75142201 Lower Cover Plate Sub-Assy '01262200015 '01262200015 Lower Cover Plate Sub-Assy '01262200017 '01262200017 Top Cover Board Sub-Assy...
- Page 28 JF00302856...
Need help?
Do you have a question about the U-MATCH Series and is the answer not in the manual?
Questions and answers