Gree U-Match Series Owner's Manual
Cassette type unit, indoor/outdoor unit
Hide thumbs
Also See for U-Match Series:
- Service manual (149 pages) ,
- Owner's manual (72 pages) ,
- Manual (35 pages)
Table of Contents
Advertisement
Advertisement
Table of Contents

Related Manuals for Gree U-Match Series


Summary of Contents for Gree U-Match Series
- Page 1 Owner's Manual Original Instructions Air Conditioners U-Match Series Cassette Type Unit Models: Indoor Unit Outdoor Unit GUD50T/A1-K GU50W/A1-K GU71T/A1-K GU71W/A1-K GU85T/A1-K GU85W/A1-K GU100T/A1-K GU100W/A1-M GU125T/A1-K GU125W/A1-M GU140T/A1-K GU140W/A1-M GU160T/A1-K GU160W/A1-M...
- Page 2 To Users Thank you for selecting Gree’s product. Please read this instruction manual carefully before installing and using the product, so as to master and correctly use the product. In order to guide you to correctly install and use our product and...
- Page 3 (10) The final right to interpret for this instruction manual belongs to Gree Electric Appliances Inc. of Zhuhai. Exception Clauses...
-
Page 4: Table Of Contents
Contents 1 Safety Notices (Please be sure to abide) ......1 2 Product Introduction ............6 2.1 Overall Layout ................6 2.2 Product Operating Range ............7 2.3 Standard Accessories .............7 3 Installation ................8 3.1 Installation Preparation ............8 3.2 Unit Installation ..............16 3.3 Electrical Installation ............ -
Page 5: Safety Notices (Please Be Sure To Abide)
U-Match Series Cassette Type Unit 1 Safety Notices (Please be sure to abide) SPECIAL WARNING: (1) Do not pierce or burn. (2) Do not use means to accelerate the defrosting process or to clean, other than those recommended by the manufacturer. - Page 6 U-Match Series Cassette Type Unit PROHIBITED! (1) The air conditioner should be grounded to avoid electric shock. Do not connect the ground wire to gas pipe, water pipe, lightning arrester or telephone wire. (2) The appliance shall be stored in a well-ventilated area where the room size corresponds to the room area as specified for operation.
- Page 7 U-Match Series Cassette Type Unit WARNING! Please install the air conditioner in a secure place that can withstand the weight of air conditioner. Insecure installation may cause the air conditioner falling down and lead to injury. (10) Be sure to adopt independent power circuit. If the power cord is damaged, it must be repaired by the manufacturer, service agent or other professional agents.
- Page 8 U-Match Series Cassette Type Unit NOTE! Do not put a finger or other objects into the air inlet or air return grill. Please adopt safety protection measures before touching the refrigerant pipe; otherwise your hands may be hurt. Please arrange the drain pipe according to the instruction manual.
- Page 9 U-Match Series Cassette Type Unit OBSERVED! If wired control is to be used, it should be connected first before powering up the unit, otherwise the wired control may not be able to use. When installing the indoor unit, keep it away from television, wireless waves, and fluorescent.
-
Page 10: Product Introduction
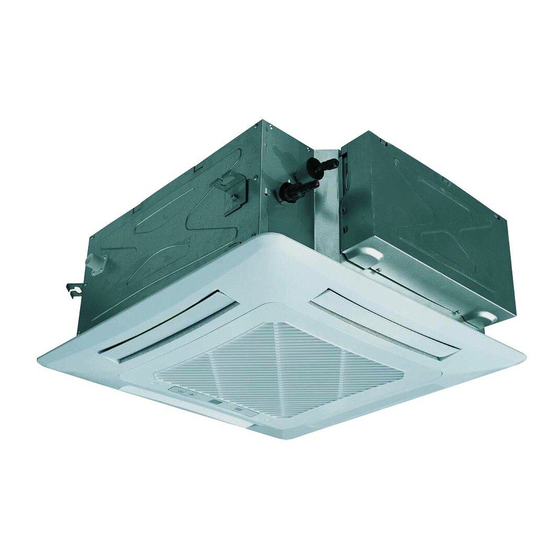
U-Match Series Cassette Type Unit 2 Product Introduction 2.1 Overall Layout NOTE: The connection pipe, drain pipe, power cord, for this unit should be prepared by the user. -
Page 11: Product Operating Range
U-Match Series Cassette Type Unit 2.2 Product Operating Range — Cooling Heating Outdoor temperature DB(°C) -15~48 -15~24 Indoor temperature DB/WB(°C) 32/23 27/- (Maximum) 2.3 Standard Accessories Indoor Unit Accessories Name Appearance Q'ty Usage To connect with the Drain Hose hard PVC drain pipe... -
Page 12: Installation
U-Match Series Cassette Type Unit Outdoor Unit Accessories Name Appearance Q'ty Usage To plug the unused drain Drain Plug 1or3 hole. Drainage To connect with the hard Connecter PVC drain pipe 3 Installation 3.1 Installation Preparation 3.1.1 Selection of Installation Location... - Page 13 U-Match Series Cassette Type Unit (6) If hoisting screw bolts are to be used, check whether the installation location is safe enough. If not safe, reinforce the location before installation. (7) Indoor unit, power cord, connecting wires and communication cords should be at least 1m from television and radio.
- Page 14 U-Match Series Cassette Type Unit 3.1.2 Unit Dimension WARNING! Install the indoor unit in a location which can withstand a load of at least five ① . times the weight of the main unit and which will not amplify sound or vibration.
- Page 15 U-Match Series Cassette Type Unit Dimensions Model GU71T/A1-K GU85T/A1-K GU100T/A1-K GU125T/A1-K GU140T/A1-K GU160T/A1-K NOTES! Drilling of ceiling opening and installation of air conditioner must be performed ① . by professionals! Please refer to the installation cardboard for the dimension of drilling hole of ②...
- Page 16 U-Match Series Cassette Type Unit (2) Outdoor units GU50W/A1-K,GU71W/A1-K;GU85W/A1-K,GU100W/A1-M: GU125W/A1-M,GU140W/A1-M,GU160W/A1-M: Unit: mm Dimensions Model GU50W/A1-K GU71W/A1-K GU85W/A1-K GU100W/A1-M...
- Page 17 U-Match Series Cassette Type Unit Dimensions Model GU125W/A1-M 1010 GU140W/A1-M 1010 GU160W/A1-M 1010 3.1.3 Diagram of Unit Installation Space and Location (1) Diagram of installation space and location for outdoor unit (Notice: for best performance of the outdoor unit, make sure its installation space conforms to the following installation dimensions).
- Page 18 U-Match Series Cassette Type Unit 2) When two or more outdoor units are to be installed side by side. Unit: mm (mm) A,B,C — ≥300 ≥300 ≥1000 — — A,B,C,E — ≥300 ≥300 ≥1000 — ≥1000 — — — —...
- Page 19 U-Match Series Cassette Type Unit 3) When outdoor units are installed in rows. Unit: mm (mm) ≤1/2H b≥250 1/2H<H ≤H b≥300 >H Prohibited 4) When outdoor units are installed one above another Unit: mm (2) Diagram of installation location and space for indoor unit (Notice: for the best performance of indoor unit, make sure its installation space conforms to the following installation dimensions).
-
Page 20: Unit Installation
U-Match Series Cassette Type Unit Model H(mm) GUD50T/A1-K GU71T/A1-K GU85T/A1-K GU100T/A1-K GU125T/A1-K GU140T/A1-K GU160T/A1-K 3.2 Unit Installation 3.2.1 Indoor Unit Installation In order to make the front panel cover 20mm of the ceiling, the distance between the ceiling and the unit should be 35mm or less. If the distance between the ceiling and the unit is above 35mm, add some ceiling material to shorten the distance. - Page 21 U-Match Series Cassette Type Unit 3.2.1.1 Hoisting the Main Body Unit NOTE! Please tightly screw up the nuts and bolts to prevent the air conditioner from falling. (1) Installing the Suspension Bolts. 1) Using the installation template, drill holes for bolts (four holes).
- Page 22 U-Match Series Cassette Type Unit 1) Install the hoisting stand on the hoisting screw by using nuts and gaskets at both the upper and lower sides of the hoisting stand. To prevent the gasket from breaking off, a gasket anchor board can be helpful.
- Page 23 U-Match Series Cassette Type Unit to the drainage hole on the chassis of the outdoor unit. Then connect a drain hose to the drainage connector (If drainage connector is used, the outdoor unit should be at least 10cm from the installation ground). See the figures below.
- Page 24 U-Match Series Cassette Type Unit return bend should be added every 6 meters. The requirement on the adding of oil return bend is as below: (1) Outdoor unit is beneath the indoor unit. There’s no need to add non-return bend at the lowest or highest position of the vertical pipe, as shown below: (2) Outdoor unit is above the indoor unit.
- Page 25 U-Match Series Cassette Type Unit Dimensions for the making of oil return bend are as follows: A(inch) B(mm) C(mm) Ф1/2 ≥26 ≤150 Ф5/8 ≥33 ≤150 3.2.3.2 Pipe Flaring (1) Cut the connection pipe with a pipe cutter. (2) The mouth of connection pipe should face downward. Remove burrs with the cut surface so that the chips do not enter the pipe.
- Page 26 U-Match Series Cassette Type Unit (3) If the pipe is repeatedly bent or extended, it will become hard and difficult to be bent or extended. So do not bend or extend the pipe for more than 3 times. (4) When bending the pipe, do not bend it excessively, otherwise it will get broken.
- Page 27 U-Match Series Cassette Type Unit Pipe Diameter(inch) Tightening Torque(N·m) Ф1/4 15-30 Ф3/8 35-40 Ф1/2 45-50 Ф5/8 60-65 Ф3/4 70-75 Ф7/8 80-85 Screw on the flare nut of the flaring connecting pipe on the outdoor unit valve. The method of screwing the flare nut is the same with that for indoor unit.
- Page 28 U-Match Series Cassette Type Unit 3.2.3.5 Thermal Insulation of Pipe Joint (Only for Indoor Unit) Stick coupler heat insulation (large and small) to the place where connecting pipes. 3.2.4 Connection Pipe Vacuum Pumping NOTE! Make sure the outlet of vacuum pump is away from fire source and is well- ventilated.
- Page 29 U-Match Series Cassette Type Unit Model Time(min) GUD50T/A1-K GU71T/A1-K GU85T/A1-K GU100T/A1-K GU125T/A1-K GU140T/A1-K GU160T/A1-K And verify if the pressure gauge at the low pressure side of the manifold valve assembly reads -0.1MPa (-750mmHg), if not, it indicates there is leak somewhere.
- Page 30 U-Match Series Cassette Type Unit 3.2.5 Refrigerant Adding See the following table for the amount of additional refrigerant. Standard Unnecessary Charge Additional Refrigerant Item Pipe Length Pipe Length Amount for Extra Pipe GU50W/A1-K 5.0m ≤7.0m 22 g/m GU71W/A1-K 5.0m ≤7.0m...
- Page 31 U-Match Series Cassette Type Unit (5) In order to make sure the drain hose is straight, the hangers should keep a distance of 1~1.5m from one another. (6) Use the drain hose that is delivered together with the unit. (7) Insert the drain hose into the drain faucet.
- Page 32 U-Match Series Cassette Type Unit 3.2.6.2 Outdoor Side Drainage Pipe (1) If the outdoor unit is underneath the indoor unit, arrange the pipeline according to the following diagram. 1) Drain hose should be placed on the ground and its end should not be immersed into water.
- Page 33 U-Match Series Cassette Type Unit 3.2.6.3 Notice on Drain Lift Pipe (1) The drain lift pipe should be 1000mm or less away from ground, as shown below. (2) If multiple drain pipes are to be converged, please install according to the following process.
- Page 34 U-Match Series Cassette Type Unit NOTE: Specifications of the converging drain pipes should be applicable to the operating capacity of the units. (3) Drain branch should be connected to the vertical or horizontal part of the main drain pipe. (4) Horizontal pipe should not be connected to the vertical pipe that is on the same level.
- Page 35 U-Match Series Cassette Type Unit (2) See the following diagram for the method of water filling. 3.2.7 Installing the Front Panel As shown below, take off the 4 corner covers from the front panel and loose the hexagon screw bolts on the 4 fasteners to the maximum. The position marked with “PIPING SIDE”...
- Page 36 U-Match Series Cassette Type Unit NOTES: (1) Improper screw looseness will lead to the following problem. (2) After the screws are tightened, if there is still a gap between the ceiling and the decorative front panel, adjust the height of the unit again (as shown below).
-
Page 37: Electrical Installation
U-Match Series Cassette Type Unit WARNING! After installing the panel, the insulated protective cover with the thickness of 1mm shall be used to wrap the wiring terminal, Tighten the insulated glue cover on both sides with bonding tie to fix it. - Page 38 Do not change the power cables arbitrarily. Do not change the length and terminals of the power cables. If you want to change the power cables, please contact Gree’s local service center. Wiring terminals should be connected firmly to the terminal board. Loose ⑩...
- Page 39 U-Match Series Cassette Type Unit 3.3.2 Electrical Parameters Fuse Circuit breaker Min. sectional area Power supply capacity capacity of power cord Model V/Ph/Hz Indoor unit 220-240V ~50Hz 3.15 Circuit breaker Min. sectional area of Power supply capacity power cord Model...
- Page 40 U-Match Series Cassette Type Unit between indoor and outdoor units. The maximum length is 100m. Please select a proper length according to local conditions. Communication cords must not be twisted together. To be in compliance IOS5151, it is necessary to use 8 meters long wire.
- Page 41 U-Match Series Cassette Type Unit 2) Use a screwdriver to unscrew the terminal screw on the terminal board. 3) Use nippers to bend the solid wire into a ring that fits the terminal screw. 4) Form a proper ring and then put it on the terminal board. Use a screwdriver to tighten up the terminal screw.
- Page 42 U-Match Series Cassette Type Unit WARNING! Before working, please check whether the indoor and outdoor units are powered ① . Match the terminal numbers and wire colors with the colors indicated in the ② . indoor unit. Wrong wire connection may burn the electrical components.
- Page 43 U-Match Series Cassette Type Unit GUD50T/A1-K +GU50W/A1-K ① . Power cord 3×1.5mm ② . Power cord 3×1.0mm ③ . Communication cords 2×0.75mm ④ . Communication cords 2×0.75mm GU71T/A1-K +GU71W/A1-K GU85T/A1-K +GU85W/A1-K ① . Power cord 3×2.5mm Power cord 3×1.0mm ② .
- Page 44 U-Match Series Cassette Type Unit WARNING! High and low voltage wires should be secured separately. Secure the former ③ . ones with big clamps and the latter ones with small clamps. Use screws to tighten up the connection wires and power cords of indoor and ④...
- Page 45 U-Match Series Cassette Type Unit 2) Outdoor side Remove the big handle/front panel of the outdoor unit and insert one end of the communication cord and the power cord to the terminal board. GU50W/A1-K, GU71W/A1-K,GU85W/A1-K: GU100W/A1-M, GU125W/A1-M, GU140W/A1-M, GU160W/A1-M:...
-
Page 46: Check After Installation
U-Match Series Cassette Type Unit GU125W/A1-M, GU140W/A1-M, GU160W/A1-M: 3.4 Check after Installation Check Items after Installation Possible events due to improper Check items installation. The unit may fall down, vibrate or Is the main body installed securely? produce noise. Cooling... -
Page 47: Installation Of Controller
U-Match Series Cassette Type Unit (2) Control circuit is correct and all the wires are firmly connected. (3) Cut-off valves of the gas pipe and liquid pipe are open. (4) The inside of the unit should be clean. Take irrelevant objects out if there is any. - Page 48 Check the above items and adopt the corresponding corrective measures. If the air conditioner continues to function poorly, please stop the air conditioner immediately and contact Gree’s authorized local service center. Ask our professional service staff to check and repair the unit.
-
Page 49: Error Code
Do not repair the air conditioner by yourself. Improper maintenance will cause ② . electric shock or fire hazard. Please contact Gree’s authorized service center and send for professional service staff to repair. If the display panel or wired control displays an error code, please refer to the error code meaning stated in the following table. - Page 50 U-Match Series Cassette Type Unit NOTE: When the unit is connected with the wired controller, the error code will be simultaneously shown on it. Instructions to the Error Indicating Lamps on the Panel of the Cassette Type Unit. Power and ON/OFF Indicating Lamp: It goes red when the unit is powered on while it goes white when the unit is started.
-
Page 51: Unit Maintenance
U-Match Series Cassette Type Unit 5.3 Unit Maintenance 5.3.1 Clean Air Filter If the air conditioner is used at a dusty place, clean the air filter regularly. (Once every half a year) How to clean the air filter 1) Open the air intake grill. - Page 52 U-Match Series Cassette Type Unit How to clean the air filter 4) Cleaning the filer screen Use vacuum cleaner to remove dust or rinse the filter. If the filter is very dirty (greasy), use warm water (below 45°C) with neutral detergent to clean it.
-
Page 53: After-Sales Services
(3) Leave the fan running for 2-3 hours to dry the inside of the unit. 5.3.6 Components Replacement Components are available in Gree agency or Gree distributors nearby. 5.4 After-Sales Services Any quality or other issues encountered in the purchased air conditioner,...
Need help?
Do you have a question about the U-Match Series and is the answer not in the manual?
Questions and answers