
Related Manuals for VWR avantor PV4


Summary of Contents for VWR avantor PV4
- Page 1 Instruction manual ® PV4 Spectrophotometer NA Cat. No 76520-714 Version 01 Issue 02/2022...
- Page 3 Legal address of Manufacturer United States VWR International LLC 100 Matsonford Rd Radnor, PA 19087 +1 800-932-5000 www.vwr.com Country of Origin China...
-
Page 4: Table Of Contents
Table of Contents Spectrophotometer .............................. 1 Safety Information ............................1 Package Contents ............................2 Unpacking ..............................2 Installation ..............................2 Intended use ..............................2 Symbols and conventions ......................... 3 Product Specifications ..........................3 Overview ............................... 4 Description ..............................5 Getting Started ............................6 Important Guidelines .......................... -
Page 5: Spectrophotometer
Avoiding Electrical Shock Please follow the guidelines below and read this manual in its entirety to ensure safe operation of the unit. VWR recommends against the use of PV4 Spectrophotometer. To avoid electrical shock ▪ Do not open the device. -
Page 6: Package Contents
Dust Cover Fuse Unpacking Open the package, according to carefully check the packing list for all items. If items are missing or damaged, please contact your local VWR/Avantor service provider or authorized contractual partner. Installation Placement Place the instrument on a stable surface carefully. -
Page 7: Intended Use
0 to 200%T, -0.3 to 3.0A, 0 to 9999C Wavelength Accuracy ±0.5nm Photometric Accuracy ±0.4%T or ±0.004A @ 1A Stability 0.002A/h @ 500nm Memory 236KB Language English, French, German, Spanish, Portuguese, Chinese Display TFT Color LCD (5”, Touch Screen) vwr.com I Instruction manual VWR ® PV4 Spectrophotometer... -
Page 8: Overview
47CFR Part 15 (2011) ANSI C63.4 (2009) Overview The PV4 Spectrophotometer is used in Chemistry, Pharmaceuticals, Biochemical, Metallurgy, Light Industry, Textile, Material, Environments, Medical, Education and some other fields for Quality Control laboratories. vwr.com I Instruction manual VWR ® PV4 Spectrophotometer... -
Page 9: Description
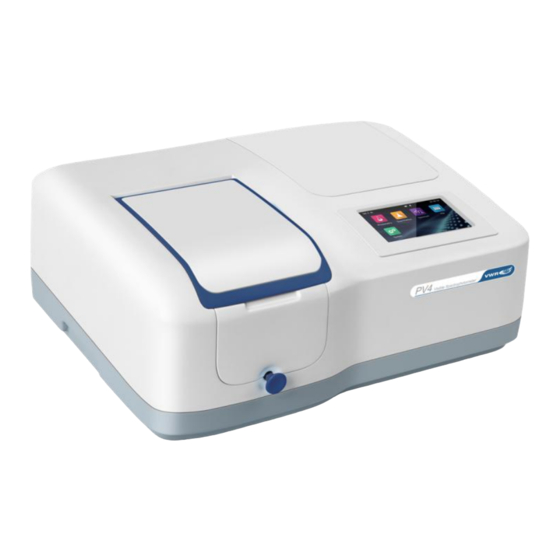
Description Front View Right View Rear View vwr.com I Instruction manual VWR ® PV4 Spectrophotometer... -
Page 10: Getting Started
(e.g. wear protective clothing and gloves, use of disinfectant) regarding the handling of sample material. ▪ Dispose of measuring solutions, cleaning and disinfectant materials in accordance with the relevant local laboratory regulations. vwr.com I Instruction manual VWR ® PV4 Spectrophotometer... -
Page 11: General Operating Instructions
The screen can be started with a touch. To make a selection, use your fingertips or stylus to press the screen. Do not press the screen with sharp objects (such as ball point). Select Application At he Main Interface, press the icon to select application. vwr.com I Instruction manual VWR ® PV4 Spectrophotometer... - Page 12 System System calibration and setup. Performance verification Verify the performance of the instrument. Basic Operation Home Back to main interface. Return Back to the previous interface. Page Up/Down Go to previous/next page. vwr.com I Instruction manual VWR ® PV4 Spectrophotometer...
- Page 13 List interface, press the area Name, key in the sample name (Up to 8 characters). Print the Measurement Report: List interface, press the icon Delete sample(s): List interface, press the Check Box, and press the icon Open Results vwr.com I Instruction manual VWR ® PV4 Spectrophotometer...
- Page 14 Open: List interface, press the icon Press the icon to select the Internal/USB memory which the file saved. Press file lists to select, press the button Open. Save Results vwr.com I Instruction manual VWR ® PV4 Spectrophotometer...
- Page 15 Copy the selected file(s) from internal /USB memory to USB/internal memory. Export csv Export file(s) To *.csv format Export txt Export file(s) To *.txt format Delete Delete the selected file(s). Rename, Import, Export and Delete Files vwr.com I Instruction manual VWR ® PV4 Spectrophotometer...
-
Page 16: Calibration And System Settings
Select Tab Calibration in the System interface. Remove something in the measurement channel, close the sample chamber cover, select the item Dark current, Wavelength or System baseline, press the icon to do calibration. vwr.com I Instruction manual VWR ® PV4 Spectrophotometer... - Page 17 Tungsten lamp reset Reset the Tungsten lamp usage. Select Tab Light source in the System interface. The light source information is displayed on the screen. Reset the lamp usage: Press the icon to reset the Tungsten lamp usage time. vwr.com I Instruction manual VWR ® PV4 Spectrophotometer...
- Page 18 Format the USB mass storage. Select Tab Memory in the System interface. The use of the internal and USB memory (If inserted) are shown. Press the icon to format internal memory/USB memory. vwr.com I Instruction manual VWR ® PV4 Spectrophotometer...
- Page 19 Select Tab Language in the System interface. Select a language, press the icon to change. General Options Select Tab General Options in the System interface. Beep: Press the icon to turn on/off the beep. vwr.com I Instruction manual VWR ® PV4 Spectrophotometer...
- Page 20 (AC-5: 5 cells automatic sample holder, AC-8:8 cells automatic sample holder). Restore Defaults Restore Restore the parameters to factory settings. Select Tab Restore defaults in the System interface. Select an item, press the icon restore. vwr.com I Instruction manual VWR ® PV4 Spectrophotometer...
-
Page 21: Performance Verification
Display options to verify the performance of the instrument. Important information Before verifying the performance, the instrument needs to be preheated for 30 minutes, and then re-measure dark current. vwr.com I Instruction manual VWR ® PV4 Spectrophotometer... - Page 22 The difference between the maximum and minimum values of the three measurements is single point photometric repeatability; Repeat step measurement single-point vwr.com I Instruction manual VWR ® PV4 Spectrophotometer...
- Page 23 500, press the button Zero; Put the Block in the measurement channel, press the button Measure, the result is the dark noise of this wavelength. vwr.com I Instruction manual VWR ® PV4 Spectrophotometer...
-
Page 24: Operation
The cuvettes must be clear with no remains of the samples on the surface of it. Photometry Photometry mode is used to measure the absorbance or transmissivity of the sample. Main interface, press the icon to start a Photometry application. vwr.com I Instruction manual VWR ® PV4 Spectrophotometer... - Page 25 Measure transmittance value of the sample(s). Measure energy value of the sample(s). Press the icon to set wavelength, key in the measurement wavelength. Put the reference in the measurement channel, press the icon to do zero. vwr.com I Instruction manual VWR ® PV4 Spectrophotometer...
- Page 26 Press the icon to browse the result(s). Quantitation Quantitation mode is used to measure the concentration of the sample(s). Main interface, press the icon to start a Quantitation application. vwr.com I Instruction manual VWR ® PV4 Spectrophotometer...
- Page 27 μg/dL, mg/mL, μg/mL, ng/mL, μg/μL, ng/μL, mol/L, mmol/L, IU, Custom (User input, up to 8 characters). Coe K: Input equation coefficient. Calibration Std M: Measure standard sample(s) Std I: Input standard sample(s) Standard quantity Standard sample number (Up to 10) vwr.com I Instruction manual VWR ® PV4 Spectrophotometer...
- Page 28 2.3.2 Measure standard sample to establish standard curve Put the reference in the measurement channel, press the button Zero to do zero. (2) Put the 1# standard sample in the measurement channel, press the button Read to measure. vwr.com I Instruction manual VWR ® PV4 Spectrophotometer...
- Page 29 Finished establish method. Press the button Save to save the method, press the button Measure to accept the new method and go to the measurement interface, Press the button Finish to exit. vwr.com I Instruction manual VWR ® PV4 Spectrophotometer...
- Page 30 Quantitation interface, press the button Measure sample. Method Select measurement method. Zero Do 0Abs/100%T. Read Measure the sample and record the result. List View the result(s) list. Press the icon to select method. vwr.com I Instruction manual VWR ® PV4 Spectrophotometer...
- Page 31 Put the reference in the measurement channel, press the icon to do zero. Put the sample in the measurement channel, press the icon to measure a sample and record the result. Press the icon to browse the result(s). vwr.com I Instruction manual VWR ® PV4 Spectrophotometer...
- Page 32 Spectrum application. Method Set the measurement parameters. Zero Scan baseline. Read Scan the sample and draw curve. Stop Stop scanning. List View the result(s) list. Press the icon to setup the measurement parameters. vwr.com I Instruction manual VWR ® PV4 Spectrophotometer...
- Page 33 Put the reference in the measurement channel, press the icon to scan baseline. Put the sample in the measurement channel, press the icon to scan a sample and record the result. vwr.com I Instruction manual VWR ® PV4 Spectrophotometer...
- Page 34 Press the icon to browse the curve and result(s). vwr.com I Instruction manual VWR ® PV4 Spectrophotometer...
-
Page 35: Troubleshooting
Close the lid, restart self-check during self-check Something is blocking the Light System Calibrate Failed Remove it, calibrate again path Cuvettes were contaminated Clean cuvettes Measurements inaccurate Samples were contaminated Improve samples vwr.com I Instruction manual VWR ® PV4 Spectrophotometer... -
Page 36: Repair And Maintenance
Be sure to switch off the power and unplug the socket before replacement! Tools needed A 3×75 Flat Blade screwdriver. Switch Off the power supply Switch off the power supply and unplug from the socket. 3. Take out the Fuse Seat vwr.com I Instruction manual VWR ® PV4 Spectrophotometer... - Page 37 Pick out the fuse (3.15A/250V) and replace it. 5. Reset the fuse seat Replace the fuse seat in the power socket. Push the fuse case by using the screwdriver and turning it clockwise, the fuse seat will be locked. vwr.com I Instruction manual VWR ® PV4 Spectrophotometer...
- Page 38 It can be removed with the first exchange of lamp. Put on gloves then pull out the defected Tungsten lamp. Insert the new Tungsten lamp as deep as possible on the lamp seat. vwr.com I Instruction manual VWR ® PV4 Spectrophotometer...
- Page 39 Then fix the screws. 6. Finish Restore the cover of the light chamber and fix the screws. Restore the cover of the lamp room and fix the screws. vwr.com I Instruction manual VWR ® PV4 Spectrophotometer...
-
Page 40: User Replaceable Accessories And Spare Parts
FLOW CELL, 5 MM, QUARTZ, BEAM HEIGHT:15MM 10037-532 FLOW CELL, 10 MM, QUARTZ, BEAM HEIGHT:15MM 10037-534 FLOW CELL, 20 MM, QUARTZ, BEAM HEIGHT:15MM 10037-536 FLOW CELL, 30 MM, QUARTZ, BEAM HEIGHT:15MM 10037-538 vwr.com I Instruction manual VWR ® PV4 Spectrophotometer... -
Page 41: Warranty
(2) years from date of delivery. If a defect is present, VWR will, at its option and cost, repair, replace, or refund the purchase price of this product to the customer, provided it is returned during the warranty period. -
Page 42: Compliance With Local Laws And Regulations
The customer is responsible for applying for and obtaining the necessary regulatory approvals or other authorisations necessary to run or use the Product in its local environment. VWR will not be held liable for any related omission or for not obtaining the required approval or authorisation, unless any refusal is due to a defect of the product. -
Page 43: Software
Software Functions We’ll introduce the main functions of VWR Software Multi Wave Pro in this chapter. Quantitative Analysis Provide 2 methods to establish a Standard Curve; Up to 20 standard samples to establish a new curve or input the coefficients to make a ... -
Page 44: Installation
Installation We will show you how to install VWR Software Multi Wave Pro on your PC in this chapter. Install and Uninstall VWR Software Multi Wave Pro PC System Requirements Pentium or above PC; USB Ports. 512MB Memory (1GB or Above is strongly recommended);... - Page 45 Choose install path, then click Next to copy files to Hard disc; Unplug the USB cable if connected before, click Next; After finished copy all files of VWR Software Multi Wave Pro, it will start install the USB Drive. Click Next;...
- Page 46 Click Finish to finish install USB Drive; Plug the USB cable, click Next; 10. Click Finish to finish all the setup. vwr.com I Instruction manual VWR ® PV4 Spectrophotometer...
- Page 47 Uninstall VWR Software Multi Wave Pro Start→All Files→VWR Software→Uninstall VWR Software Multi Wave Pro 1.0, click Next to uninstall. After all the files were removed, click Finish to end. Run VWR Software Multi Wave Pro Double click the icon on desktop.
- Page 48 After VWR Software Multi Wave Pro being started, then click Main Menu→Options, a dialog box of Options will display in the screen, click Search to automatically search the instrument’s communication port, after get the communication port, click OK to save setting. If you choose the option of Connect to Spectrophotometer When Start, the instrument will connect to the PC automatically when you run VWR Software Multi Wave Pro next time.
- Page 49 PC if you click the icon again. Introduction We will introduce the VWR Software Multi Wave Pro in this chapter. Main InterfaceOPERA This is the main interface after start.
- Page 50 You can finish all the operation through Keyboard or Mouse. Most of the functions can be finished through the Shortcut Bar. Most of the functions can be done by using the drop-down menu from the Right-hand arrow. vwr.com I Instruction manual VWR ® PV4 Spectrophotometer...
-
Page 51: General Operating Instructions
Tool Bar. Set Test Parameters Click the button of to set the parameters. Modify a Sample Choose the data frame you want to modify or set the curve as current curve; vwr.com I Instruction manual VWR ® PV4 Spectrophotometer... - Page 52 Mouse’s cursor turns into the form of “+”. Click the icon again to cancel the current status. Modify Scale Click the icon on Tools Bar to display coordinate as you like. vwr.com I Instruction manual VWR ® PV4 Spectrophotometer...
- Page 53 Right Frame. You can set the Peak height by clicking icon. Mathematics Function Click the icons in the Tools Bar, a new dialog box will display on the screen respectively. You can add, subtract, multiply or divide two spectrums. vwr.com I Instruction manual VWR ® PV4 Spectrophotometer...
- Page 54 Operation We will introduce you how to use VWR Software Multi Wave Pro. Quantitative Analysis VWR Software Multi Wave Pro use Standard Curve to test the sample’s concentration at a fixed wavelength point. Click the icon in the Tools Bar shortcut to create a new Quantitative Analysis.
- Page 55 Two methods are under your choice to create a new curve. Method 1: Coefficient Click Coefficient option; (2) Click Fit Method to choose Fit Curve method; (3) Input the curve equation’s coefficients in corresponding frames; (4) Click OK to finish setting. vwr.com I Instruction manual VWR ® PV4 Spectrophotometer...
- Page 56 Pull the unknown into the light path (if it is Automatic 8-cell Holder in the instruments, click to set the location of the relative cell first), Then click the icon, click in the shortcut toolbar to test, the test result will display in the data sheet. vwr.com I Instruction manual VWR ® PV4 Spectrophotometer...
- Page 57 We will introduce how to measure a sample’s change over a selected period of time. Click the icon to begin a new test of Kinetics; Click the button of to set the parameters; Choose Photometric Display Mode, input the Wavelength, Display Time, Total Time, vwr.com I Instruction manual VWR ® PV4 Spectrophotometer...
- Page 58 We’ll introduce how to create the spectrum while using Spectrum Scan function. Click the icon on the Tools Bar to start a new Spectrum scan; Click the icon in the Tool Bar to set the parameters of Wavelength Scan; vwr.com I Instruction manual VWR ® PV4 Spectrophotometer...
- Page 59 Multi-wavelength Analysis We’ll introduce how to measure a sample in different wavelengths (≤20). Click the icon on the Tools Bar, a new form appears on the screen; vwr.com I Instruction manual VWR ® PV4 Spectrophotometer...
- Page 60 5. Pull the reference into the light path, click the icon in the Tools Bar to do blank; 6. Pull the sample into the light path, click to start test. And the test result will be listed in the data sheet. vwr.com I Instruction manual VWR ® PV4 Spectrophotometer...
- Page 61 5. Pull the reference into the light path, click in the Tools Bar to do blank; 6. Pull the sample in the light path, click the icon to measure. The result will display in the data sheet. vwr.com I Instruction manual VWR ® PV4 Spectrophotometer...
- Page 62 We will introduce how to scan the variability of energy in the range of wavelength. Click Main Menu→File→New→Energy Scan to build Energy Scanning; Click the icon on the Tools Bar to set parameter; Click OK to finish and exit setting; vwr.com I Instruction manual VWR ® PV4 Spectrophotometer...
- Page 63 Other Functions We will introduce the additional functions about VWR Software Multi Wave Pro in this chapter. Turn On/Off W Lamp Click Main Menu→Device→Turn On/Off W Lamp to open or close W Lamp.
-
Page 64: Appendix
)/ (A (Optional) 260nm 280nm 320nm =62.9, f =36.0, f =1552, f =757.3 Method 2: C = (A Protein Ratio=(A )/ (A (Optional) 260nm 230nm 320nm =49.1, f =3.48, f =183, f =75.8 vwr.com I Instruction manual VWR ® PV4 Spectrophotometer... - Page 66 2360 Argentia Road Mississauga, Ontario L5N 5Z7 Tel.: +1 800 932 5000 Email: canadainfo@avantorsciences.com Mexico VWR International S. de R.L. de C.V Carretera Tlalnepantla-Cuautitlán Km 14.5 Colonia Lechería, Tultitlan, Edo. México, CP 54940 Tel.: +800 759 8974 Email: mdl_mx_csr@AvantorSciences.com Puerto Rico VWR Advanced Instruments LLC Bo.
Need help?
Do you have a question about the avantor PV4 and is the answer not in the manual?
Questions and answers