
Related Manuals for VWR V-1200


Summary of Contents for VWR V-1200
- Page 1 V-1200 Spectrophotometer INSTRUCTION MANUAL European Catalogue Number(s): 634-6000 Version: 1.0.0 Issued: 07, April 2010 VWR Collection Manual ver 1, rel 15.05.2007...
- Page 3 Legal Address of Manufacturer Europe VWR International Europe bvba Researchpark Haasrode 2020 Geldenaaksebaan 464 B 3001 Leuven Tel.:+ 32 16 385 011 http://www.be.vwr.com Made in China...
-
Page 5: Table Of Contents
Table of Contents Safety Information Package Contents Unpacking Installation Intended Use Symbols and Conventions Specifications Overview Description of Buttons and Switches Operational Keys Getting Started Important Guidelines General Operating Instructions Operation Photometry Quantitative Mode System Utility Troubleshooting Repair and Maintenance Daily Maintain Spare Parts Replacement Accessories and Spares Parts... -
Page 7: Safety Information
Please follow the guidelines below, and read this manual in its entirety to ensure safe operation of the unit. VWR recommends against the use of V-1200 Spectrophotometer. Do not open the device. Disconnect the device from the mains supply before carrying out maintenance work or changing the fuses. -
Page 8: Unpacking
Manual Unpacking Open the package, according to carefully check the packaging packing list items, if found inside the packaging are missing or damaged items please your local VWR office and authorized contractual partners. Installation Placement Place the instrument on the stable table carefully. -
Page 9: Symbols And Conventions
Symbols and Conventions The following chart is an illustrated glossary of the symbols that are used in this manual. CAUTION This symbol indicates a potential risk and alerts you to proceed with caution CAUTION This symbol indicates the presence of high voltage and warns the user to proceed with caution CAUTION This symbol indicates risks associated with hot surfaces Specifications... -
Page 10: Overview
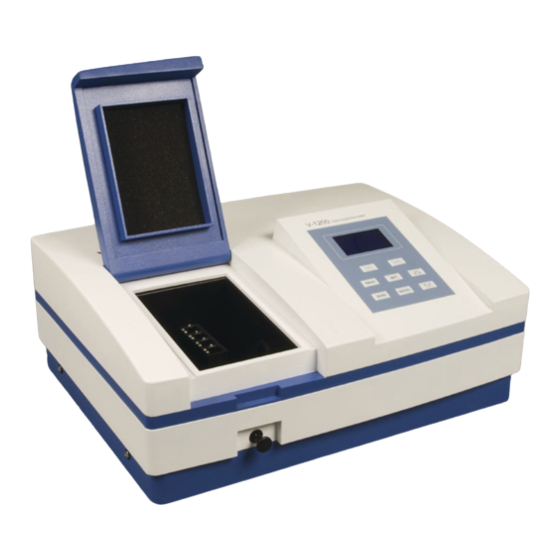
Overview V-1200 Spectrophotometer has the characters of wide range of wavelength, high sensitivity, powerful function, easy to use, simple structure and pretty figure. Besides these, the large LCD, High Precise A/D and easy to store RAM makes the instrument much more superior than other originals. -
Page 11: Operational Keys
Operational Keys... -
Page 12: Getting Started
Functions FUNCTION: Functions on-screen prompts PRINT: Print measuring result ZERO: Blank SET: Set Parameters GOTO ʎ : Set Wavelength UP, DOWN: Scroll menu/data and set Y scale Getting Started The following chart describes the basic operation of the instrument. Turn On and Self-check Switch on the power. -
Page 13: General Operating Instructions
serious damage to health. During sample preparation, measuring procedures and maintenance and cleaning work, observe all local laboratory safety precautions (e.g. wear protective clothing and gloves, use of disinfectant) regarding the handling of sample material. Dispose of measuring solutions and cleaning and disinfectant materials in accordance with the relevant local laboratory regulations. -
Page 14: Operation
Put the Reference in the light path, press to do blank. Measure Samples Put the samples in the light path, press (left) to measure. Print the test results Test Interface, press key select “Print, clear data”, press key (left) to print. Store the Standard Curve After got the Standard Curve by Marked, press input the file name and... -
Page 15: Photometry
After self-test, the instrument goes into pre-warm state. For accurate test, at least 30 minutes of warm up is required. Check the cuvettes The cuvettes must be clear and there’s no remains of the samples on the surface of it. Photometry 1. -
Page 16: Quantitative Mode
5. Print Test Results Press the key select “Print, clear data”, press key (left) to print. Photometry Date& Time: mm-dd-yyyy, hh:mm:ss Model: V-1200 Serial No.: VECXXXXXXX Firmware Version: 2.5.0 VWR International bvba. No. WL.(nm) 500.0 0.000 100.0 500.0 0.000 100.0 500.0 0.000 100.0... - Page 17 2. Build standard curve or use the saved standard curve There are two methods to build standard curve, you can choose one method according to your situation: Input Coefficient: Choose Coefficient. Press to choose “build standard curve”, press to choose ”coefficient”. ---- ---- Set wavelength.
- Page 18 press (left)to confirm to finish setting of this method, the curve will be displayed in the screen. WL.: 500.0 nm WL.: 500.0 nm ---- Coefficient B: Coefficient K: +00000 00000 ---- Cancel Cancel Create Standard Curve: Choose Create Curve. Press to choose ”Create Curve ”, press to choose “Standard Curve”, press...
- Page 19 Blank. Pull the blank sample in light path, press (left) to do blank. Input the number of standards. Press to input the quantity of standard sample(Not more than 9 standard curve), press (left) to confirm. ---- ---- Input the concentration of standards. When you have finished the last step, the system will ask you to input the standards’...
- Page 20 Press to choose ”Load Curve”, press choose the cursor, press (left)to confirm. ---- ---- Press (left) to enter the test mode after building or loading standard curve. ---- 3. Blank. Put reference into light path, press to do blank. 4. Using standard curve to test sample. Put samples into light path, Press (left) to test result will be displayed in the data list.
-
Page 21: System Utility
(left) to print. Quantitation Date& Time: mm-dd-yyyy, hh:mm:ss Model: V-1200 Serial No.: VECXXXXXXX Firmware Version: 2.5.0 VWR International bvba. C=1.000* A+1.000 r=1.0000 No. WL.(nm) Conc. 500.0 0.120 1.120 500.0 0.127 1.127 500.0 0.121 1.121 End. System Utility Users can set the system utilities according their own situation. - Page 22 ---- ---- Edit Clock Press to choose “Time & Date”, press (left) to enter into, press to input value, to set next item, press (left) to confirm and return. ---- Refresh Dark Current Press to choose “Refresh Dark Current”, press (left)to confirm(Be sure that the sample room is closed during the whole refreshing course), return after finish this.
- Page 23 Check the sample room first, and then close it. Press to choose “Reset WL”, press (left) to calibrate, be sure that the sample room is closed during the whole refreshing course, come back after finish this. ---- Select Language Press to choose Language (English, French, German or Spanish), press (left) to enter into, press...
-
Page 24: Troubleshooting
---- Load Default Parameter Main Interface, press , all parameters will be restored to factory setting and the Instrument will restart. Troubleshooting Review the information in the table below to troubleshoot operating problems. Problem Cause Solution Power cord connection is not Improve connectivity reliable Power on, no response... -
Page 25: Repair And Maintenance
OK, but nothing display on the screen or display is not clear Cuvettes were contaminated Clean cuvettes Samples were contaminated Improve samples Measurements Worse matching Improve the matching of the inaccurate cuvettes cuvettes Dark current error Resample dark current Repair and Maintenance Daily Maintain Check the compartment After measurement, the cuvettes with sample solutions should be taken out of the... - Page 26 Danger! Be sure to switch off the power and unplug the socket before replacement! 1. Tools preparation Prepare a 3×75 Flat Blade screwdriver. 2. Switch Off the power supply Switch off the power supply, and unplug the socket. 3. Take out the Fuse Seat Take out the fuse seat by the screwdriver.
- Page 27 Replace the fuse seat in the power socket. 6. Switch on the power Plug the socket and switch on the power. Replace lamps Hot! ! ! ! Wait 20 minutes before open the lamp chamber after power off to avoid scald! 1.
- Page 28 5. Replace W lamp Pull out the defected W lamp and draw on the cotton glove. Insert the new W lamp as deep as possible on the lamp seat. Be sure to keep the filament in the same direction as the old one face. Switch on Power, check the light spot is in the middle of the entrance slit.
- Page 29 1. Prepare the tools Prepare a 6×150mm Cross Blade Screwdriver. 2. Switch off the power supply Switch off the power supply and unplug the socket 3. Open the Bottom cover plate Unscrew all the screws indicated then remove the bottom plate. 4.
-
Page 30: Accessories And Spares Parts
Visit the VWR’s website at www.vwr.com for: • Complete technical service contact information • Access to VWR’s Online Catalogue, and information about accessories and related products • Additional product information and special offers Contact us For information or technical assistance contact your local VWR... -
Page 31: Warranty
(2) years from date of purchase. If a defect is present, VWR will, at its option, repair, replace, or refund the purchase price of this product at no charge to you, provided it is returned during the warranty period. This warranty does not apply if the product has been damaged by accident, abuse, misuse, or misapplication, or from ordinary wear and tear. - Page 32 disposal and recycling of the equipment. For more information about where you can drop off your waste of equipment, please contact your local dealer from whom you originally purchased this equipment. By doing so, you will help to conserve natural and environmental resources and you will ensure that your equipment is recycled in a manner that protects human health.
- Page 34 Local VWR offices in Europe and Asia Pacific Austria Hungary Portugal VWR International GmbH Spektrum-3D Ltd. VWR International - Material de Graumanngasse 7 A VWR International Company Laboratório, Lda 1150 Wien Simon László u. 4. Edifício Neopark Tel.: 01 97 002 0 4034 Debrecen Av.
Need help?
Do you have a question about the V-1200 and is the answer not in the manual?
Questions and answers