Table of Contents
Advertisement
Available languages
Available languages
Quick Links
SAFETY INFORMATION
DANGER: Risk of eye damage. Do not stare directly at the LED chips
■
of this LED strip.
WARNING: The remote contains a CR2032 DC 3V button battery. If
■
swallowed, it could cause severe injury or death within 2 hours. Seek
medical attention immediately.
CAUTION: Do not power LED tape while coiled on reel.
■
IMPORTANT: Always observe polarity for 12-volt connections,
■
+ to +, – to –.
IMPORTANT: Do not install Class 2 low voltage wiring in the same runs
■
as AC main power. If AC and low voltage wires cross, keep them at
90-degree angles. Use only insulated staples, plastic ties, or wire
support clips to secure cords and wires.
NOTICE: LED flexible tape lighting rating: 24VDC 1.5A.
■
Only use the 24-volt LED lighting power supply which has been
■
provided with this kit.
Do not bend, crush or pull the cable. Protect from sharp edges,
■
oil and heat.
For indoor/dry location use only.
■
Electrical waste should not be disposed of with household waste.
■
Please recycle where facilities exist.
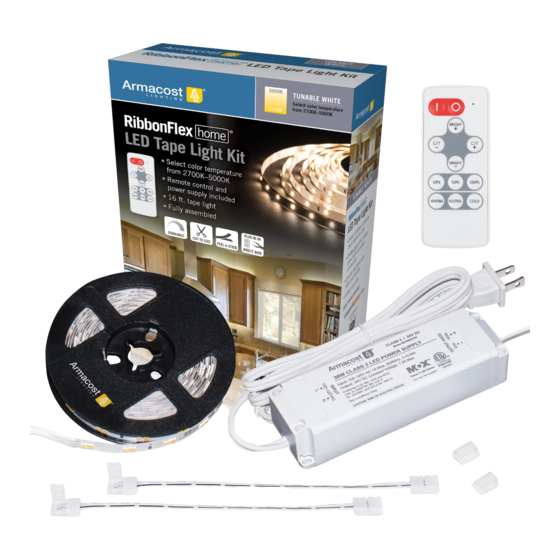
PACKAGE CONTENTS
Plug-in power supply
RF receiver and 16 feet
LED tape light (pre-assembled)
Wire connectors (optional use)
INSTALLATION
See armacostlighting.com/knowledge-center for more installation tips.
Cutting the tape to length
Cut the LED tape with scissors in the center of copper pads (position
■
A) as shown. The tape can also be cut at silver solder joints (position
B), but this cut point should be used for soldered connections only.
Cut tape
at center of
copper pads
IMPORTANT: Make sure to
■
observe polarity when making
connections, positive to positive
and negative to negative. Check
to see that the wire colors and
the polarity markings printed
on the tape line up.
NOTE: Be sure all 24-volt connections are secure and protected from electrical
shorting. Options include electrical tape, small wire nuts, crimp connectors, etc.
1
RF dimmer
remote
Wire support clips
Okay to cut at silver
solder joints, but
do not use connector
Tunable White LED Tape Light Kit
How to use included connectors
The wire connectors are used to join two sections of LED tape. They
■
can also be spliced and extended for gaps of any size. 18-20 AWG
wire is recommended for custom lengths (not included).
Add wire to fit needs
Open the lid of the connector opposite the wire.
■
Peel about 1/4 inch of the paper from the LED strip adhesive backing
■
at the connection point.
Use a gentle side-to-side motion to slide the strip into the connector,
■
making sure the tape slides under the internal connector contact points.
Perform a power test to be sure the connection is secure. If the LEDs
■
flicker or do not light, repeat the steps in this guide.
Insert tape into
channel under
contact tabs
Soldering the LED tape (optional)
Soldering is another method for joining wires to the tape light and
■
joining sections of tape light directly together.
Wire Lead Connection
Preparing the assembly location
Power the LED tape lighting and temporarily hold or tape into
■
position with painter's tape or masking tape – do not remove the
adhesive paper backing.
Adjust the lighting to various angles and positions to get the desired
■
level of illumination and lighting appearance. If the LEDs create
undesirable light spots on walls, or reflections, reposition the tape light
strip farther away from surfaces or try a different mounting angle.
Once you have determined your final mounting position, remove
■
any dirt and dust present where the tape will be applied. Mounting
surfaces should be clean, completely dry, and as dust-free as
possible. For best results, install when temperatures are above 60ºF
(15ºC). When installing on painted surfaces, paint should be fully
cured based on manufacturer's cure time.
Installing the LED strip
Working from one end to the other, remove the paper backing protecting
■
the adhesive and firmly press the LED tape down with your fingers or a
clean cloth, taking care not to press on the individual LEDs.
Support and secure the power cables leading to the tape light with
■
the included wire support clips.
NOTE: Although the LED tape can
■
be installed in curved and irregular
spaces, avoid sharp bends or bending
on the solder joints as you could
damage the LED tape light. If an LED
is inadvertently damaged and fails to
light, the remaining LEDs will continue to operate.
Item 421501
Be sure tape
Press down
slides into
lid until it
channel groove
snaps closed
Splice Connection
Advertisement
Table of Contents

Subscribe to Our Youtube Channel
Related Manuals for Armacost Lighting RibbonFlex Home 421501


Summary of Contents for Armacost Lighting RibbonFlex Home 421501
- Page 1 Item 421501 Tunable White LED Tape Light Kit How to use included connectors SAFETY INFORMATION DANGER: Risk of eye damage. Do not stare directly at the LED chips ■ The wire connectors are used to join two sections of LED tape. They ■...
- Page 2 This warranty only applies when all components, including LED multiple kits can be paired together for control by a single remote. power supplies, have been provided by or approved for use by Armacost Lighting. PAIRING The warranty does not cover labor or any other costs or expense to remove or install any defective, repaired or replaced products.
- Page 3 Article 421501 Kit de ruban lumineux à DEL blanc accordable Comment utiliser les câbles raccords MISES EN GARDE DANGER : Ne pas regarder directement les DEL : risque de dommage Les raccords permettent de connecter deux segments de ruban DEL. ■...
- Page 4 électriques des DEL, ont été fournies Lors de vastes installations, plusieurs kits peuvent être reliés pour être ou approuvées par Armacost Lighting. La garantie ne couvre pas la main-d’œuvre ou tout contrôlés par une unique télécommande.
Need help?
Do you have a question about the RibbonFlex Home 421501 and is the answer not in the manual?
Questions and answers