Advertisement
Quick Links
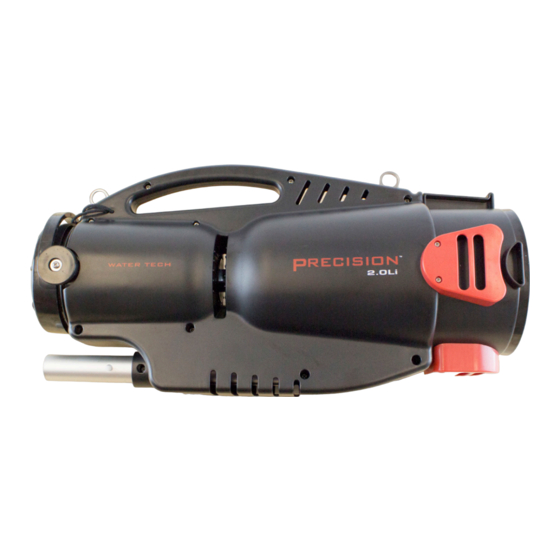
Your new kit will come with the
following items:
Motor Box (P40X003)
Lithium Charger (LC099-3S-US-EU)
(2) Li-Ion Batteries
STEP 1: Place the unit in flat workbench. Identify
the side with the ten (10) screws.
Need Help? Contact Customer Care at (732) 967-9888
Replacing the W
You will need the following tools:
Phillips screwdriver or drill
(Set at low torque level)
STEP 2: Unscrew the two (2) screws holding the
draining port's cap from the side with the ten (10)
screws. Set cap aside.
Installation Guide
t
Precision
TM
ater
ech
2.0Li Motor Box
TM
Pliers
1
Advertisement

Related Manuals for Water Tech Precision 2.0


Summary of Contents for Water Tech Precision 2.0
- Page 1 Installation Guide Need Help? Contact Customer Care at (732) 967-9888 Replacing the W Precision 2.0Li Motor Box ater Your new kit will come with the You will need the following tools: following items: Pliers Motor Box (P40X003) Phillips screwdriver or drill Lithium Charger (LC099-3S-US-EU) (Set at low torque level) (2) Li-Ion Batteries...
- Page 2 Installation Guide Need Help? Contact Customer Care at (732) 967-9888 Replacing the W Precision 2.0Li Motor Box ater STEP 3: Place the unit flat on a workbench with motor box away from you and pole side to the left. Detach motor box cap from motor box. Remove the ten (10) screws from the side of the shell and separate shell from unit.
- Page 3 Installation Guide Need Help? Contact Customer Care at (732) 967-9888 Replacing the W Precision 2.0Li Motor Box ater STEP 5: Turn the unit over and remove the four (4) screws holding the motor box assembly in place. Separate shell from motor box. STEP 6: Inspect the side of the shell that has the motor box cap attached to it.
- Page 4 Installation Guide Need Help? Contact Customer Care at (732) 967-9888 Replacing the W Precision 2.0Li Motor Box ater STEP 7: Slide metal clip off new lanyard. Remove new motor box cap and attached lanyard from new motor box. String new lanyard through holes (as shown). Slide clip over both ends of lanyard.
- Page 5 Installation Guide Need Help? Contact Customer Care at (732) 967-9888 Replacing the W Precision 2.0Li Motor Box ater STEP 9: Place the shell half with the pole attachment on workbench with funnel opening facing towards you. Place new motor box in shell with ON/OFF button.
- Page 6 Installation Guide Need Help? Contact Customer Care at (732) 967-9888 Replacing the W Precision 2.0Li Motor Box ater STEP 10: Flip unit over and insert four (4) previously set aside screws into screw openings and tighten with drill or screwdriver. STEP 11: Place shell half with ten (10) screw openings on top of motor box and funnel.
- Page 7 Installation Guide Need Help? Contact Customer Care at (732) 967-9888 Replacing the W Precision 2.0Li Motor Box ater STEP 12: Screw the two (2) screws holding the draining port’s cap from the side with the ten (10) screws. Rev.: 132017...
Need help?
Do you have a question about the Precision 2.0 and is the answer not in the manual?
Questions and answers