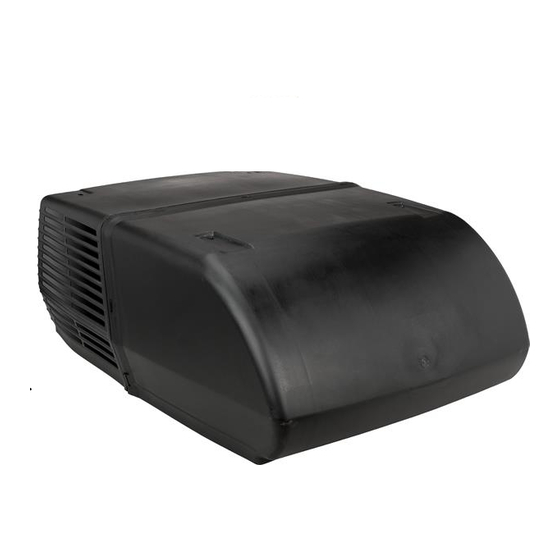
Airxcel ROUGHNECK 48000 Series Installation, Operation And Maintenance Instructions
Hide thumbs
Also See for ROUGHNECK 48000 Series:
- Installation, operation and maintenance instructions (24 pages) ,
- Installation instructions manual (18 pages) ,
- Operation and maintenance instructions (12 pages)
Table of Contents
Advertisement
Available languages
Available languages
INSTALLATION, OPERATION AND
MAINTENANCE INSTRUCTIONS FOR 48000
ROUGHNECK SERIES AIR CONDITIONERS
TABLE OF CONTENTS
I.
II.
III.
IV.
V.
VI.
VII.
Installing Ceiling Assembly
VIII.
These instructions are a general guide for installing the 48000 ROUGHNECK Series Coleman-Mach roof top air
conditioners. For specific air conditioner details, it will be necessary to refer to ALL printed documents supplied with
this conditioner.
These instructions are for the use of qualified individuals specially trained and experienced in installation of this type
equipment and related system components.
Installation and service personnel are required by some states to be licensed. PERSONS NOT QUALIFIED SHALL
NOT INSTALL NOR SERVICE THIS EQUIPMENT.
NOTE: The words "Shall" or "Must" indicate a requirement which is essential to satisfactory and safe product
performance. The words "Should" or "May" indicate a recommendation or advice which is not essential and not
required but which may be useful or helpful.
WARNING! - SHOCK HAZARD To prevent the possibility of severe personal injury or equipment damage due
to electrical shock, always be sure the electrical power source to the appliance is disconnected.
CAREFULLY FOLLOW ALL INSTRUCTIONS AND WARNINGS IN THIS BOOKLET TO
AVOID DAMAGE TO THE EQUIPMENT, PERSONAL INJURY OR FIRE.
WARNING! Improper installation may damage equipment, can create a hazard and will void the warranty.
The use of components not tested in combination with these units will void the warranty, may make the equipment
in violation of state codes, may create a hazard and may ruin the equipment.
P/N: 1980-022
RV Products Division
2
2
2
2
4
5
5
(9400 Series)
5
IMPORTANT NOTICE
IX.
i.
ii.
iii.
iv.
v.
Wall Thermostat Identification and Operation
vi.
X.
9
9
9
10
10
11
11
24
02-25-2016
Advertisement
Chapters
Table of Contents

Related Manuals for Airxcel ROUGHNECK 48000 Series


Summary of Contents for Airxcel ROUGHNECK 48000 Series
-
Page 1: Table Of Contents
RV Products Division INSTALLATION, OPERATION AND MAINTENANCE INSTRUCTIONS FOR 48000 ROUGHNECK SERIES AIR CONDITIONERS TABLE OF CONTENTS Operation and Maintenance General Information General Information Air Conditioning Sizing Control Panel III. Selecting an Installation Location iii. Operation Installing the Roof Top Unit Maintenance Electrical Wiring Wall Thermostat Identification and Operation... -
Page 2: General Information
III. SELECTING AN INSTALLATION LOCATION exterior roof surface. Your Airxcel, Inc. air conditioner has been designed for 2. It may be necessary to seal some of the old roof use primarily in recreational vehicles. - Page 3 Place the roof top air conditioner over the prepared mounting hole. The pointed end (nose) of the shroud Airxcel’s 48000 ROUGHNECK series requires that the must face towards the front of the vehicle. Pull the spacing from the vehicle roof top to the interior ceiling electrical conduit down from the roof air conditioner be no less than 1”.
-
Page 4: Electrical Wiring
DANGER! ROUTING 115 VAC WIRING WHEN USING NON-METALLIC SHEATH CABLES (ROMEX, Following Airxcel’s high voltage wiring specifications and all ETC.), STRIP SHEATH BACK TO EXPOSE 4-6 INCHES OF local and national electrical codes, route the roof top unit 115 THE SUPPLY LEADS. -
Page 5: Installing Optional Heater Accessory
O. Turn ON the power supply to the roof top air conditioner. VIII. SYSTEM CHECKOUT Airxcel, Inc. manufactures a wide range of roof top air conditioners which incorporate different product operation features. To properly evaluate the performance of a newly installed air conditioner, it is necessary... - Page 6 FIGURE 7 FIGURE 8...
- Page 7 MOUNTING FRAME ROOFTOP UNIT DUCT COLLAR ROOF STRUCTURE CEILING ASSEMBLY CHUTE FABRIC DUCT MATERIAL FILTERS CEILING ASSEMBLY SHROUD CONTROL KNOBS GRILLES FIGURE 9...
-
Page 8: Operation And Maintenance
Apply today by filling out the application located on the back cover of this Installation and Operation Manual and mailing it in along with your check or money order to Airxcel, Inc., P.O. Box 4020, Wichita, KS 67204. A contract will be sent to you within a few weeks. -
Page 9: Control Panel
ii. CONTROL PANEL IV. For Heating (“Elect-A-Heat” Ceiling Assembly Model Only) Refer to Figure 1, page 9). If your RV air conditioner is operated from the control panel located in the ceiling assembly, then there are The optional Elect-A-Heat heating assembly is intended to take the chill out of the indoor air when the air is a few three controls on the ceiling assembly that help you degrees too cool for comfort. -
Page 10: Warranty Service
4. If the vehicle is equipped with a flush mount ceiling frequently asked questions and service center locations. assembly, remove the four return air grille screws. Airxcel, Inc. support help may be accessed by e-mail at RVPSupport@Airxcel.com. All written correspondence Remove filter from the grille and either clean or should be directed to: exchange with new filters. - Page 11 LOUVER CONTROLS THERMOSTAT SELECTOR SWITCH HIGH HIGH FIGURE 1 FILTERS GRILLES FIGURE 2...
- Page 12 RV Products Division CLIMATISEURS SÉRIE 48000 ROUGHNECK INSTRUCTIONS POUR INSTALLATION ET LE FONCTIONNEMENT ET D’ENTREITIEN TABLE DES MATIERES Opération et maintenance Informations générales Informations générales Sélection d’un climatiseur approprié Panneau de Controle III. Sélection de l’emplacement d’installation iii. Functionnement Installation de l’unité de toit Entretien Câblage électrique Identification et functionnement du thermostat mural...
-
Page 13: Sélection D'un Climatiseur Approprié
à votre représentant deux devrait être installée à moins de 2,7 mètres (9 pi) Airxcel ou à Airxcel devraient contenir le nom et le du siège du conducteur. numéro de série du modèle du climatiseur. Le nom et le... - Page 14 Fixez La série 48000 ROUGHNECK d’Airxcel exige un écart le climatiseur au toit à l’aide des étapes véhicule. minimum de 2,54 cm (1 po) entre le toit du véhicule et son Reportez-vouz à...
-
Page 15: Câblage Électrique
RACCORDEMENT (ENVIRON 19 MM [3/4 PO] DE FIL NU). INSÉREZ LES FILS D’ALIMENTATION DANS LE SERRE- En respectant les spécifications d’Airxcel, Inc. pour le câblage CÂBLE DU CONNECTEUR ÉLECTRIQUE. LA GAINE DOIT haute tension et l’ensemble des codes de l’électricité locaux PÉNÉTRER AU-DELÀ... -
Page 16: Installation De L'accessoire De Chauffage Facultatif
VII. INSTALLATION DE L’ENSEMBLE DE DANGER - RISQUE DE CHOC ÉLECTRIQUE! PLAFOND (SÉRIE 9400) Confirmez que vous avez correctement apparié la AFIN DE PRÉVENIR LA POSSIBILITÉ DE BLESSURE PAR pompe à chaleur de toit et l’ensemble de plafond. L’unité CHOC ÉLECTRIQUE, LE FIL BLANC DOIT ÊTRE RACCORDÉ les instructions pas à... -
Page 17: Vérification Fonctionnelle Du Système
VIII. VÉRIFICATION FONCTIONNELLE DU SYSTÈME Airxcel, Inc. fabrique une gamme étendue de climatiseurs de toit qui incorporent différentes caractéristiques de fonctionnement de produit. Afin de correctement évaluer la performance d’une pompe à chaleur nouvellement installée, vous devez examiner les caractéristiques de fonctionnement propres à... - Page 18 MOUNTING FRAME ROOFTOP UNIT DUCT COLLAR ROOF STRUCTURE CEILING ASSEMBLY CHUTE FABRIC DUCT MATERIAL FILTERS CEILING ASSEMBLY SHROUD CONTROL KNOBS GRILLES FIGURE 9...
- Page 19 à Airxcel, Inc., PO Box 4020, Wichita, KS 67204. Un contrat sera envoyé à vous dans quelques semaines. Vous devez conserver vos documents avec preuve d’achat.
-
Page 20: Panneau De Controle
ii. PANNEAU DE CONTRÔLE Le compresseur du climatiseur est incapable de démarrer Si votre climatiseur de VR fonctionne à partir d’un contre une haute pression, donc, lorsque le climatiseur panneau de contrôle au plafond, il y a alors trois est arrête, il est important de la laisser arrêter pendant commandes au plafond pour aider à... -
Page 21: Garantie
Vous pouvez également visiter notre REMARQUE: Si des filtres de remplacement sont site Web á l’adresse www.Airxcel.com pour consulter les nécessaires, on peut se les procurer de la plupart réponses aux questions les plus fréquemment posées ainsi des centres de service autorisés Airxcel, Inc. - Page 22 LOUVER CONTROLS THERMOSTAT SELECTOR SWITCH HIGH HIGH FIGURE 1 FILTERS GRILLES FIGURE 2...
- Page 23 THIS PAGE INTENTIONALLY LEFT BLANK - CETTE PAGE EST INTENTIONNELLEMENT BLANK-...
-
Page 24: Optional Extended Warranty
Apply today by filling out the application below and mailing it with your check or money order to Airxcel, Inc., P.O. Box 4020, Wichita, KS 67204. A contract will be sent to you within a few weeks. You should retain with your paperwork for proof of purchase.
Need help?
Do you have a question about the ROUGHNECK 48000 Series and is the answer not in the manual?
Questions and answers