Table of Contents
Advertisement
Available languages
Available languages
Quick Links
Monitored Rack PDUs
PROTECT YOUR INVESTMENT!
Register your product for quicker service
You could also win an
ISOBAR6ULTRA surge protector-
www.tripplite.com/warranty
1111 W. 35th Street, Chicago, IL 60609 USA • www.tripplite.com/support
15-04-184-93341C.indb 1
Owner's Manual
High Voltage
Model: PDUMNH20HV
(Series Number: AGPD7989)
1.
2.
3.
3.1
3.2
3.3
3.4
3.5
4.
5.
and ultimate peace of mind.
a $50 value!
Copyright © 2015 Tripp Lite. All rights reserved.
1
2
3
5
5
7
9
9
10
10
11
12
23
4/16/2015 8:49:09 AM
Advertisement
Chapters
Table of Contents

Related Manuals for Tripp Lite PDUMNH20HV


Summary of Contents for Tripp Lite PDUMNH20HV
-
Page 1: Table Of Contents
You could also win an ISOBAR6ULTRA surge protector— a $50 value! www.tripplite.com/warranty 1111 W. 35th Street, Chicago, IL 60609 USA • www.tripplite.com/support Copyright © 2015 Tripp Lite. All rights reserved. 15-04-184-93341C.indb 1 4/16/2015 8:49:09 AM... -
Page 2: Important Safety Instructions
1. Important Safety Instructions SAVE THESE INSTRUCTIONS This manual contains instructions and warnings that should be followed during the installation, operation, and storage of this product. Failure to heed these instructions may affect your warranty. • The PDU provides the convenience of multiple outlets, but DOES NOT provide surge or line noise protection for connected equipment. -
Page 3: Features
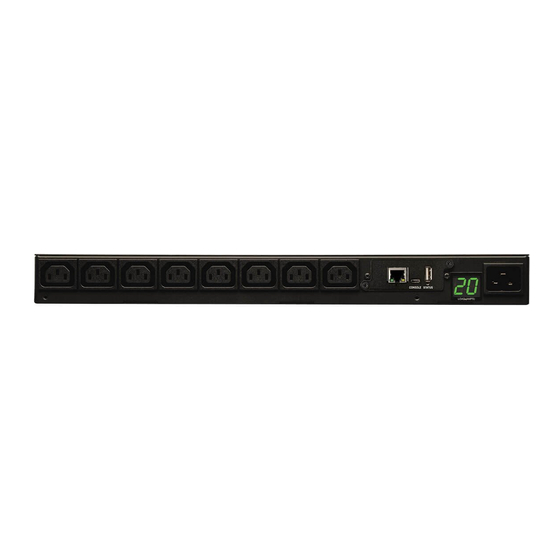
2. Features AC Input Power Cord: The detachable cord has an IEC- 320-C19 connector and an IEC-320-C20 connector IEC-320-C20 Power Inlet: The IEC power inlet connects to the included power cord or a compatible user-supplied power cord. AC Input Adapter: The adapter converts the AC input power cord to a NEMA L6-20P plug. - Page 4 2. Features SNMP Card Ports: PS/2 Port: Use this port to connect a Tripp Lite ENVIROSENSE environmental sensor to provide remote temperature/humidity monitoring and a dry contact interface to control and monitor alarm, security and telecom devices. Visit www.tripplite.com for ordering information.
-
Page 5: Installation
3. Installation 3.1 Mounting the PDU The PDU supports five primary mounting configurations: 1U Rack, 0U Rack, Wall, Under-Counter and Reduced-Depth. Note: Regardless of configuration, the user must determine the fitness of hardware and procedures before mounting. The PDU and included hardware are designed for common rack and rack enclosure types and may not be appropriate for all applications. - Page 6 3. Installation 3.1-3 Wall Mounting: Use three screws to attach each of the two shorter mounting brackets to the PDU as shown. Mount the PDU to the wall by inserting two or more 3.1-3 user-supplied screws through the mounting brackets and into secure mounting points.
-
Page 7: Connecting The Pdu
3. Installation 3.1-5 Reduced-Depth Mounting: Use three screws to attach each of the two shorter mounting brackets to the PDU as shown. Mount the PDU to a stable surface with the outlets 3.1-5 facing upward by inserting two or more user-supplied screws through the mounting brackets and into secure mounting points. - Page 8 3. Installation 3.2-2 NEMA Adapter Connection: The PDU includes a plug adapter that adds a NEMA L6-20P plug to the input power cord. Use this adapter only if you will be connecting the PDU to a NEMA L6-20R outlet. Insert the IEC C19 connector the adapter into the IEC C20 connector of the input power...
-
Page 9: Networking The Pdu
3. Installation 3.2-5 Optional Cord Retention Procedure: Use the included C14 plastic sleeves to secure plugs to receptacles. Attach the sleeve to the plug, making sure that the pull tabs remain outside the plug 3.2-5 and that the fit is secure. To unplug equipment properly, use the pull tabs to remove the plug and sleeve from the receptacle. -
Page 10: Remote Monitoring And Control
3. Installation 3.5 Remote Monitoring and Control The PDU provides remote monitoring outlet control and more via Web browser, telnet and SNMP-based Network Management Systems. For more information about configuration and operation of the PDU via the PowerAlert Web browser interface, refer to the SNMPWEBCARD Installation Guide. -
Page 11: Warranty And Product Registration
Seller will repair or replace the product, in its sole discretion. Service under this Warranty can only be obtained by your delivering or shipping the product (with all shipping or delivery charges prepaid) to: Tripp Lite, 1111 W. -
Page 12: Español
Conectando Su PDU a la Red Probando la Conexión de Red Monitoreo y Control Remoto Soporte técnico Garantía English Français 1111 W. 35th Street, Chicago, IL 60609 USA • www.tripplite.com/support Copyright © 2015 Tripp Lite. Todos los derechos reservados. 15-04-184-93341C.indb 12 4/16/2015 8:49:14 AM... -
Page 13: Instrucciones De Seguridad Importantes
1. Instrucciones de seguridad importantes GUARDE ESTAS INSTRUCCIONES Este manual contiene instrucciones y advertencias que deben seguirse durante la instalación, operación y almacenamiento de este producto. De no seguirlas, se afectar la garantía del producto. • El PDU proporciona la conveniencia de múltiples tomacorrientes, pero NO proporciona protección contra sobretensión o ruido en la línea para los equipos conectados. - Page 14 2. Característica Cable de Alimentación de Entrada CA: El cable desprendible tiene un enchufe IEC-320-C19 y una clavija IEC-320-C20 Entrada de Alimentación IEC-320-C20: La entrada de alimentación IEC se conecta al cable de alimentación incluido o a un cable de alimentación suministrado por el usuario. Adaptador de Entrada CA: El adaptador convierte el cable de alimentación de entrada CA en una clavija NEMA L6- 20P .
-
Page 15: Características
Puertos de Tarjeta SNMP: Puerto PS/2: Use este puerto para conectar el sensor ambiental ENVIROSENSE de Tripp Lite para monitorear la temperatura y humedad en forma remota y una interfaz de contacto seco para controlar y monitorear los dispositivos de alarma, seguridad y telecomunicaciones. -
Page 16: Instalación
3. Instalación 3.1 Montaje del PDU El PDU soporta cinco configuraciones primarias de montaje: Bastidor 1U, Bastidor 0U (Vertical), En la pared, Bajo el Escritorio y Fondo Reducido. Nota: Independientemente de la configuración, el usuario debe determinar la idoneidad de los materiales y accesorios así... - Page 17 3. Instalación 3.1-3 Montaje en la pared: Use tres tornillos para fijar cada uno de los dos soportes de montaje más cortos al PDU como se muestra. Monte el PDU a la pared 3.1-3 insertando dos o más tornillos, suministrados por el usuario a través de los soportes de montaje y en puntos de montajes seguros.
-
Page 18: Conexión Del Pdu
3. Instalación 3.1-5 Montaje de Fondo Reducido: Use tres tornillos para fijar cada uno de los dos soportes de montaje más cortos al PDU como se muestra. Monte el PDU a una 3.1-5 superficie estable con las tomas de corriente orientadas hacia arriba insertando o más tornillos, suministrados por el usuario a través de los soportes de montaje... - Page 19 3. Instalación 3.2-2 Conexión de Adaptador NEMA: Este producto incluye un adaptador de clavija que agrega una clavija NEMA L6-20P al cable de alimentación. Use este adaptador únicamente si conectará el PDU a un tomacorriente NEMA L6-20R. Inserte el conector IEC C19 adaptador en el conector IEC C20 del cable de alimentación.
-
Page 20: Conectando Su Pdu A La Red
3. Instalación 3.2-4 Conecte los equipos al PDU: no exceda la capacidad de carga del PDU. La corriente eléctrica total utilizada por el PDU aparecerá en el medidor digital en amperes. 3.2-4 Para información adicional, consulte el Medidor Digital de Carga (Amperímetro) en la sección Características. -
Page 21: Probando La Conexión De Red
3. Instalación 3.4 Probando la Conexión de Red Acceda al PDU con el Navegador de Red: Después que una dirección IP ha sido asignada al PDU, trate de acceder con navegador de Web que soporte frames [marcos], forms [formas] y Java™. Abra un Navegador de Web en una computadora conectada al LAN (Local Area Network / Red de Area Local) e introduzca la dirección... -
Page 22: Soporte Técnico
Sólo puede obtenerse servicio bajo esta garantía, entregando o despachando el producto (con todos los cargos de despacho o entrega pagados por adelantado) a: Tripp Lite, 1111 W. 35th Street, Chicago, IL 60609 USA. El vendedor pagará los cargos de despacho del retorno. Visite www.tripplite.com/support antes de enviar algún equipo para reparación. -
Page 23: Français
Mise en réseau de l’unité de distribution 31 Test de la connexion réseau Surveillance et contrôle à distance Assistance technique Garantie English Español 1111 W. 35th Street, Chicago, IL 60609 USA • www.tripplite.com/support Copyright © 2015 Tripp Lite. Tous droits réservés. 15-04-184-93341C.indb 23 4/16/2015 8:49:18 AM... -
Page 24: Importantes Consignes De Sécurité
1. Importantes consignes de sécurité CONSERVER CES DIRECTIVES Ce manuel contient des instructions et des mises en garde que vous devez respecter durant l’installation, l’utilisation et l’entreposage de ce produit. Le non-respect de ces instructions et mises en garde affecter la garantie du produit. •... -
Page 25: Caractéristiques
2. Caractéristiques Cordon d’alimentation en courant alternatif : Le cordon détachable a un connecteur IEC-320-C19 et un connecteur IEC-320-C20 Entrée d’alimentation IEC-320-C20 : L’entrée d’alimentation IEC se branche au cordon d’alimentation inclus ou à un cordon d’alimentation compatible fourni par l’utilisateur. - Page 26 Ports pour la carte SNMP : Port PS/2 : Utiliser ce port pour connecter un capteur environnemental ENVIROSENSE de Tripp Lite de façon à fournir une surveillance à distance de la température et de l’humidité et une interface à contact sec pour commander et surveiller les dispositifs d’alarme, de sécurité...
-
Page 27: Installation
3. Installation 3.1 Montage de l’unité de distribution d’alimentation (PDU) L’unité peut être montée selon cinq configurations principales : bâti en 1U, bâti en 0U (vertical), au mur, sous comptoir et à profondeur réduite. Remarque : Sans tenir compte de la configuration, l’utilisateur doit déterminer la compatibilité de la quincaillerie et les procédures avant d’effectuer l’installation. - Page 28 3. Installation 3.1-3 Montage mural : Utilisez trois vis pour fixer chacun des deux supports de fixation courts à l’unité, comme illustré. Montez l’unité de distribution au mur en 3.1-3 insérant deux vis (ou plus, fournies par vous) dans les supports de fixation et dans des points de montage solides.
-
Page 29: Connexion De L'unité De Distribution
3. Installation 3.1-5 Montage à profondeur réduite : Utilisez trois vis pour fixer chacun des deux supports de fixation courts à l’unité, comme illustré. Montez l’unité de distribution à une 3.1-5 surface stable avec les prises vers le haut en insérant deux vis (ou plus, fournies par vous) dans les supports de fixation et dans des points de montage solides. - Page 30 3. Installation 3.2-2 Connexion de l’adaptateur NEMA : Ce produit inclut un adaptateur de fiche qui ajoute une fiche NEMA L6-20P au cordon d’alimentation d’entrée. Utiliser cet adaptateur uniquement si vous connectez la PDU à une prise NEMA L6-20R. Insérer le connecteur IEC C19 l’adaptateur dans le connecteur IEC C20...
-
Page 31: Mise En Réseau De L'unité De Distribution
3. Installation 3.2-5 Procédures de rétention du cordon en option : Utiliser les manchons en plastique C14 inclus pour retenir les fiches aux prises. Fixer le manchon à la fiche en vous assurant que les languettes de 3.2-5 préhension demeurent à l’extérieur de la fiche et que l’ajustement est sécuritaire. -
Page 32: Surveillance Et Contrôle À Distance
à sa discrétion. Vous pouvez obtenir un service selon cette garantie seulement en livrant ou en expédiant le produit (avec les frais d’expédition et de livraison prépayés) à : Tripp Lite, 1111 W. 35th Street, Chicago, IL 60609 USA. Le vendeur paierai les frais d’expédition de retour.