Advertisement
Quick Links
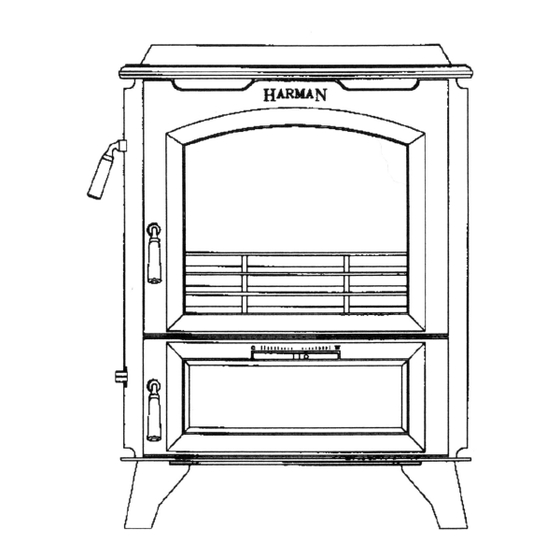
CW-30 "Harman E" Repair Guide
Disassembling Instructions and Parts Identification
There are quite a few of the CW-30 stoves still in use out there.
This guide will help you to identify parts and pieces while also providing instruction for replacing
gaskets and/or other various components.
What better way to learn about a stove than to take it apart and put it back together?
Advertisement

Related Manuals for Harman CW-30


Summary of Contents for Harman CW-30
- Page 1 CW-30 “Harman E” Repair Guide Disassembling Instructions and Parts Identification There are quite a few of the CW-30 stoves still in use out there. This guide will help you to identify parts and pieces while also providing instruction for replacing gaskets and/or other various components.
- Page 2 CW-30 “Harman E” Repair Guide To begin dismantling the stove, remove the Harman Logo plate from the center of the top. This will expose a nut which secures the cast iron top to the stove. Using a ½” socket or wrench, loosen and remove the nut. Then lift the top off of the stove.
- Page 3 CW-30 “Harman E” Repair Guide The under side of the cast iron top is gasketed, mostly to prevent rattles of metal to metal contact. This is ⅜” low density rope gasket (3-44-00888) attached with gasket cement. Now you’ll see the inner top, which is held down with (6) ½” nuts and washers. Remove the...
- Page 4 CW-30 “Harman E” Repair Guide Looking into the top of the firebox, you’ll see the waffle as shown below. Find a bolt or screw to fit the hole size (3/8” thread) and thread it into a hole near the center of the waffle.
- Page 5 CW-30 “Harman E” Repair Guide With the inner top removed, you’ll now see the damper (Damper Weldment # 1-10-00465) and the combustion package. (Ceramic Fiber Combustion Package # 3-40-00472) Pull forward and lift the combustion package out of the top of the stove. Use extra care...
- Page 6 CW-30 “Harman E” Repair Guide This view shows the underside of the combustion package. Note the holes and the indents for the damper frame bolts. Air Flow Holes, be sure they are not blocked. Indents for damper frame bolts. With the Package removed, you’ll see the top of the Pyrolite Ignitor Tunnel. You can also...
- Page 7 CW-30 “Harman E” Repair Guide Front Of Stove Damper Frame Mounting Bolts Damper Plate Damper Frame Filler Plate Using a ½” wrench and socket, remove the (4) bolts which hold the damper frame up in the top of the firebox. Be sure to secure the frame from below, as it will drop upon removal of the last bolt.
- Page 8 CW-30 “Harman E” Repair Guide This is the damper frame assembly (# 1-10-00641) and filler plate (# 1-10-00734) as it is removed from the firebox. To remove the damper, loosen the two bolts and clips at the ends of the damper plate. The damper lift arm can be removed by first removing the external brass elbow.
- Page 9 CW-30 “Harman E” Repair Guide Damper Frame Assembly Item # 1-10-00641 and Damper Filler Plate Item # 1-10-00734 3/8” Rope # 3-44-00888 1/4” rope # 3-44-108636 Note how the filler plate lays in the damper frame channel, with the end tabs inside.
- Page 10 CW-30 “Harman E” Repair Guide Remove the Arch Brick (cast iron or refractory) by lifting up slightly then pull the bottom toward the front of the stove. Arch Brick Item # 3-40-00615 Ramp Brick Item # 3-40- 00470 Next would be the side bricks. Note the insulation panel on the back side of the side bricks.
- Page 11 CW-30 “Harman E” Repair Guide Once the side bricks are removed, the support bricks can be lifted up and out. To remove the ramp brick, you need to lift it up then pull the bottom toward you, once it clears the retainer.
- Page 12 CW-30 “Harman E” Repair Guide The last refractory item remaining is the Pyrolite Ignitor Tunnel, Item # 3-40-00616. This is the route which the exhaust takes, when woodburning, to the secondary combustion pack- age. It is a snug fit in the back of the firebox, if you lift from the top, it will be easily re-...
- Page 13 CW-30 “Harman E” Repair Guide Once all of the refractory items are removed, remove the grates by lifting up on the right side until they are disengaged from the grate link and shaker mechanism. Then, lift out. (Grate # 3-00-00453, Grate Link #2-00-00457)
- Page 14 CW-30 “Harman E” Repair Guide Notch To access the air-slide, remove the six(6) bolts holding the cover in place. Notice the notch in the air slide slot. (must be on top) The air slide and channel can be lubricated with a dry...
- Page 15 CW-30 “Harman E” Repair Guide When re-installing the damper frame, start one of the rear bolts into the frame as shown above. Hold the bolt from below and have a nut ready to start on it above. While positioning the damper frame, guide the bolt up through the hole and start a nut onto it.
- Page 16 CW-30 “Harman E” Repair Guide After positioning the tunnel in the back of the stove, install the ramp brick by first nosing the ramp portion into the tunnel. Guide it upward until the bottom of the ramp brick is back behind the channel.
- Page 17 CW-30 “Harman E” Repair Guide Waffle Protector Guide the combustion package into the top of the stove. Be sure the tunnel fits between the legs of the package and the package fits all the way down. In the firebox top, install the waffle into the opening on the bottom of the package.
-
Page 18: Helpful Tips
Tighten each of the six nuts securely. Re-install the cast iron top by guiding the center bolt upward through the hole in the top. Secure with a single nut and lay in the Harman logo plate to finish the job.
Need help?
Do you have a question about the CW-30 and is the answer not in the manual?
Questions and answers