Table of Contents
Advertisement
Assembly INSTRUCTIONS
ITEM#: A101017510
SKU#: 810580328
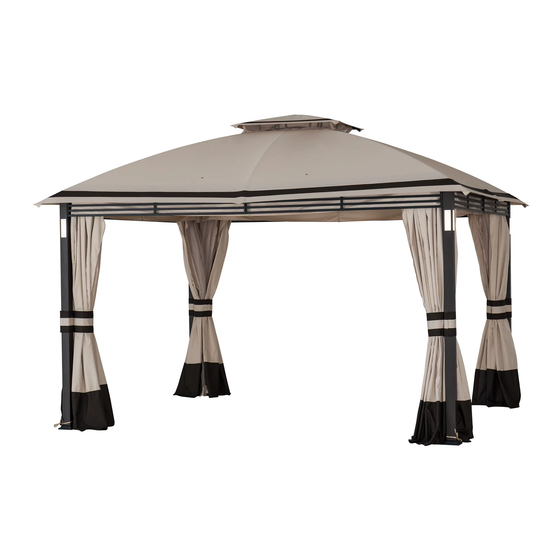
CRESTFIELD 11X13FT SOFT
TOP GAZEBO
Need help? We are here for you!
1(866)578-6569
24/7 • Toll Free
Production number: 2023100875
Advertisement
Table of Contents

Related Manuals for Broyhill A101017510


Summary of Contents for Broyhill A101017510
- Page 1 ASSEMBLY INSTRUCTIONS ITEM#: A101017510 SKU#: 810580328 CRESTFIELD 11X13FT SOFT TOP GAZEBO Need help? We are here for you! 1(866)578-6569 24/7 • Toll Free Production number: 2023100875...
- Page 2 GENERAL BEST PRACTICES FOR ASSEMBLY: • Please read and understand this entire manual before attempting to assemble or install the product. • Before beginning assembly of product, make sure all parts are present. Compare parts with package contents list and hardware contents list.
- Page 3 (2) this device must accept any interference received, including interference that many cause undesired operation. Do not dispose of batteries in fire, batteries may explode or leak. • Responsible Party - U.S. Contact Information Company: Broyhill, LCC Address: P.O. Box 236, Summit Station Telephone or internet contact 1(866)578-6569 information:...
- Page 4 EXPLODED DRAWING 3/27...
- Page 5 PARTS LIST Label Part Number Description Part Image Post 1 P00020078301 P00020078401 Post 2 P00610026001 Base Cover Post Cover P00010025001 Long Left Cross P00040144901 Beam Long Right Cross P00040145001 Beam Short Left Cross P00040145101 Beam Short Right Cross P00040145201 Beam Middle P00050172601 Connector...
- Page 6 P00570090101 Adjustable Tube P00760021201 Remote Control P00110071301 Small Canopy P00110071401 Big Canopy P00120028201 Mosquito Netting P00130014901 Curtain P00020080601 Post 3 5/27...
- Page 7 HARDWARE LIST Label Part Number Description Part Image H100010068 Bolt M6*15 H100010046 Bolt M6*40 H050030001 Flat washer M6 H040010004 Nut M6 H990050001 Ring H070010003 Stake Φ8*180 H090010017 Wrench M6 6/27...
- Page 8 HELPFUL HINTS • Tools needed and not included: • How many people needed for the installation work • Estimate assemble time : 150~180 Minutes How many people needed for the installation 7/27...
- Page 9 STEP 1 Assembled View: Put the Base Cover (C) on the Post1/2/3 (A/ B/AC), clip the Post Cover (D) into the Post 1/2/3(A/B/AC), using the Bolt (H1) to connect and lock the Post Cover (D) and the Post 1/2/3(A/B/AC), tighten by Wrench (HW). 8/27...
- Page 10 STEP 2 Assembled View: Use Bolt (H1), Flat washer (H3) and Nut (H4) to connect and lock the Short Left Cross Beam (G) and the Short Right Cross Beam (J), tighten by Wrench (HW). 9/27...
- Page 11 STEP 3 Assembled View: Use Bolt (H1), Flat washer (H3) and Nut (H4) to connect and lock the Long Left Cross Beam (E) and the Long Right Cross Beam (F), tighten by Wrench (HW). 10/27...
- Page 12 STEP 4 Assembled View: Use Bolt (H1) to connect and lock the Long Right Cross Beam (F) and the Post 2/3 (B/ AC), and connect and lock the Long Left Cross Beam (E) and Post 1 (A), tighten by Wrench (HW). 11/27...
- Page 13 STEP 5 d1=d2 Rt∠90 Assembly Tip on Step 5: Please measure to make sure the length of d1 is equal to d2 before moving to next step to ensure a square frame and best results. Keep the beam at right angles to the post, the post at right angles to the ground, and keep the beam horizontal.
- Page 14 STEP 6 Assembled View: Use Bolt (H1) to connect and lock the Middle Connector (K), the Long Left Cross Beam (E) and the Long Right Cross Beam (F). Use Bolt (H1) to connect and lock the Middle Connector (K), the Short Left Cross Beam (G) and the Short Right Cross Beam (J), tighten by Wrench (HW).
- Page 15 STEP 7 Assembled View: Use Bolt (H1) to connect and lock the Long Mosquito Netting Rod (L), the Long Left Cross Beam (E) and the Long Right Cross Beam (F). Use Bolt (H1) to connect and lock the Short Mosquito Netting Rod (M), the Short Left Cross Beam (G) and the Short Right Cross Beam (J), tighten by Wrench (HW).
- Page 16 STEP 8 Assembled View: Insert the Rafter Lower Tube (N) into the Rafter (P) and snap the snap clip on the Rafter Lower Tube (N) into the hole of the Rafter (P). 15/27...
- Page 17 STEP 9 Assembled View: Insert the Rafter (P) into the Big Roof Connector (Q) and snap the elastic buckle on the Rafter (P) into the hole of the Big Roof Connector (Q), use Bolt (H2), Flat washer ( H3) and Nut (H4) to connect and lock the Rafter Lower Tube (N) and the Post 1/2 (A/B), tighten by Wrench (HW).
- Page 18 STEP 10 Assembled View: Insert the Long Middle Beam Lower Tube (S) into the Long Middle Beam (T) and snap the snaps on the Long Middle Beam Lower Tube (S) into the holes of the Long Middle Beam (T). 17/27...
- Page 19 STEP 11 Assembled View: Insert the Long Middle Beam (T) into the Big Roof Connector (Q) and snap the elastic buckle on the Long Middle Beam (T) into the hole position of the Big Roof Connector (Q). Use Bolt (H2), Flat washer (H3) and Nut (H4) to connect and lock the Long Middle Beam Lower Tube (S) and the...
- Page 20 STEP 12 Assembled View: Insert the Short Middle Beam (U) into the Big Roof Connector (Q) and snap the clip of the Short Middle Beam (U) to the Big Roof Connector (Q). Use bolts (H2), Flat washer (H3) and Nut (H4) to connect and lock the Short Middle Beam (U) and the Middle Connector (K), tighten by Wrench (HW).
- Page 21 STEP 13 Assembled View: As shown in the picture, spread the Big Canopy (Y) on the big top, but do not spread it first. 20/27...
- Page 22 STEP 14 Assembled View: Assemble the Adjustable Tube (V) to the Rafter (P), and snap the elastic buckle of the Rafter (P) into the hole of the Adjustable Tube (V). 21/27...
- Page 23 STEP 15 Assembled View: As shown in the picture, assemble the hook to the Big Roof Connector (Q), spread the Small Canopy (X) on the small top, and put the four corners of the Small Canopy (X) on the Adjustable Tube (V) . 22/27...
- Page 24 STEP 16 Assembled View: As shown in the picture, spread out the Big Canopy (Y), put it on the Rafter Lower Tube (N), and put it on the Long Middle Beam Lower Tube (S), on the Short Middle Beam (U). 23/27...
- Page 25 STEP 17 Please do the matching of zippers for different panels as showing the picture. Assembled View: Hang the Ring (HR) on the Curtain (AB), on the Long Mosquito Netting Rod (L) and on the Short Mosquito Netting Rod (M). 24/27...
- Page 26 STEP 18 Please do the matching of zippers for different panels as showing the picture Assembled View: Hang the Ring (HR) on the Mosquito Netting (AA), Long Mosquito Netting Rod (L) and the Short Mosquito Netting Rod (M). Tie the straps on the Mosquito Netting (AA) to the Post 1/2/3 (A/B/AC).
- Page 27 STEP 19 Assembled View: Use Stake (HS) through the Post Cover (D) to fasten the assembled tent to the level ground. 26/27...
- Page 28 STEP 20 Caution: 12 AA Batteries needed to be put in the posts (not included) Caution:2 AAA Battteries needed to be put in the remote control (not included) Assembled View: As shown in the picture, assemble the battery into Remote Control and Post (A)&(B), assemble the battery into the Remote Control (W) and hang it on...
Need help?
Do you have a question about the A101017510 and is the answer not in the manual?
Questions and answers
My remote to turn on the post lights up but the lights on the posts don’t light up.
The post lights may not be lighting up with the Broyhill remote A101017510 for the following reasons:
1. Batteries Not Installed: Each post requires 3 AA batteries, and the remote requires 2 AAA batteries. If these batteries are not installed, the lights will not work.
2. Weak or Dead Batteries: If the batteries are weak or depleted, the lights will not function. Replace with new batteries.
3. Battery Type Issues: Mixing old and new batteries or different types (alkaline, carbon-zinc, rechargeable) can cause malfunction. Use the same type and new batteries.
4. Improper Installation: Ensure the batteries are correctly inserted into the posts and the remote, matching the correct polarity.
5. Remote Not Synced or Positioned Properly: The remote must be assembled and hung on Post B as instructed. Ensure it is properly installed and aimed.
6. Battery Leakage or Damage: Check for any battery leakage or corrosion that might prevent proper contact.
7. Power Disconnected: If not using the unit for a while, batteries may have been removed for storage and not reinstalled.
Check all these factors to troubleshoot the issue.
This answer is automatically generated